- Docker Tutorial
- Docker - Home
- Docker - Overview
- Docker - Installing on Linux
- Docker - Installation
- Docker - Hub
- Docker - Images
- Docker - Containers
- Docker - Registries
- Docker - Compose
- Docker - Working With Containers
- Docker - Architecture
- Docker - Layers
- Docker - Container & Hosts
- Docker - Configuration
- Docker - Containers & Shells
- Docker - Dockerfile
- Docker - Building Files
- Docker - Public Repositories
- Docker - Managing Ports
- Docker - Web Server
- Docker - Commands
- Docker - Container Linking
- Docker - Data Storage
- Docker - Networking
- Docker - Security
- Docker - Toolbox
- Docker - Cloud
- Docker - Logging
- Docker - Continuous Integration
- Docker - Kubernetes Architecture
- Docker - Working of Kubernetes
- Docker Setting Services
- Docker - Setting Node.js
- Docker - Setting MongoDB
- Docker - Setting NGINX
- Docker - Setting ASP.Net
- Docker Setting - Python
- Docker Setting - Java
- Docker Setting - Redis
- Docker Setting - Alpine
- Docker Setting - BusyBox
- Docker Useful Resources
- Docker - Quick Guide
- Docker - Useful Resources
- Docker - Discussion
Docker - Public Repositories
Public repositories can be used to host Docker images which can be used by everyone else. An example is the images which are available in Docker Hub. Most of the images such as Centos, Ubuntu, and Jenkins are all publicly available for all. We can also make our images available by publishing it to the public repository on Docker Hub.
For our example, we will use the myimage repository built in the "Building Docker Files" chapter and upload that image to Docker Hub. Let’s first review the images on our Docker host to see what we can push to the Docker registry.
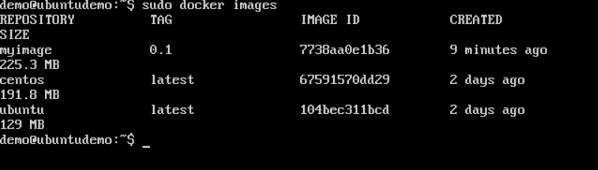
Here, we have our myimage:0.1 image which was created as a part of the “Building Docker Files” chapter. Let’s use this to upload to the Docker public repository.
The following steps explain how you can upload an image to public repository.
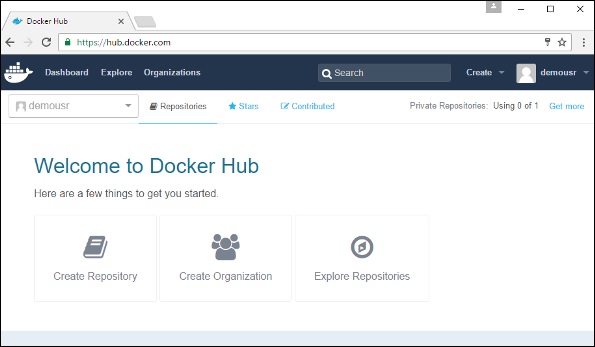
Step 1 − Log into Docker Hub and create your repository. This is the repository where your image will be stored. Go to https://hub.docker.com/ and log in with your credentials.
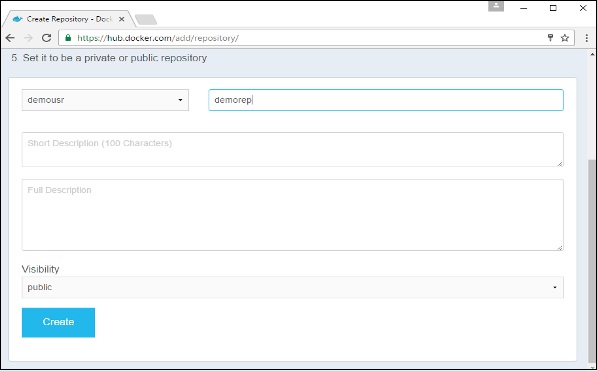
Step 2 − Click the button "Create Repository" on the above screen and create a repository with the name demorep. Make sure that the visibility of the repository is public.
Once the repository is created, make a note of the pull command which is attached to the repository.
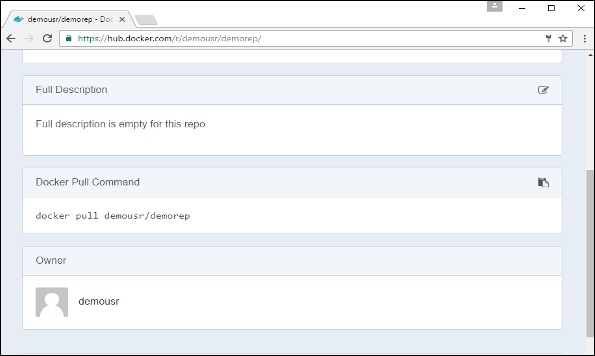
The pull command which will be used in our repository is as follows −
docker pull demousr/demorep
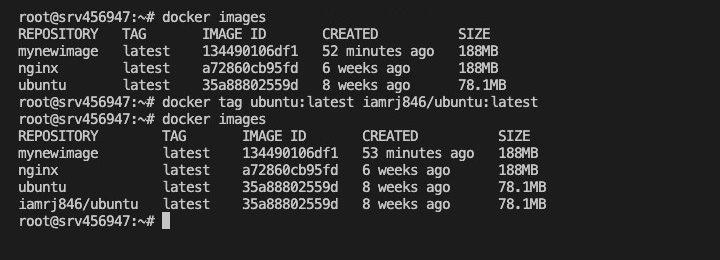
Step 3 − Now go back to the Docker Host. Here we need to tag our myimage to the new repository created in Docker Hub. We can do this via the Docker tag command.
We will learn more about this tag command later in this chapter.
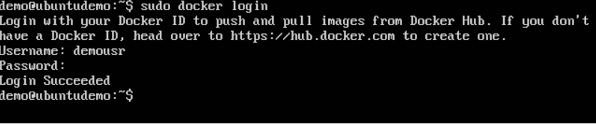
Step 4 − Issue the Docker login command to login into the Docker Hub repository from the command prompt. The Docker login command will prompt you for the username and password to the Docker Hub repository.
Step 5 − Once the image has been tagged, it’s now time to push the image to the Docker Hub repository. We can do this via the Docker push command. We will learn more about this command later in this chapter.
docker tag
This method allows one to tag an image to the relevant repository.
Syntax
docker tag imageID Repositoryname
Options
imageID − This is the ImageID which needs to be tagged to the repository.
Repositoryname − This is the repository name to which the ImageID needs to be tagged to.
Return Value
None
Example
sudo docker tag ab0c1d3744dd demousr/demorep:1.0
Output
A sample output of the above example is given below.
docker push
This method allows one to push images to the Docker Hub.
Syntax
docker push Repositoryname
Options
Repositoryname − This is the repository name which needs to be pushed to the Docker Hub.
Return Value
The long ID of the repository pushed to Docker Hub.
Example
sudo docker push demousr/demorep:1.0
Output

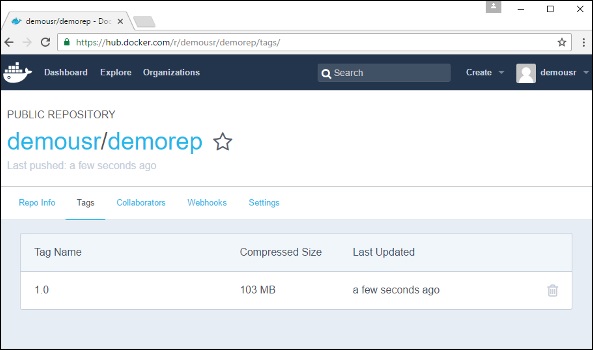
If you go back to the Docker Hub page and go to your repository, you will see the tag name in the repository.
Now let’s try to pull the repository we uploaded onto our Docker host. Let’s first delete the images, myimage:0.1 and demousr/demorep:1.0, from the local Docker host. Let’s use the Docker pull command to pull the repository from the Docker Hub.
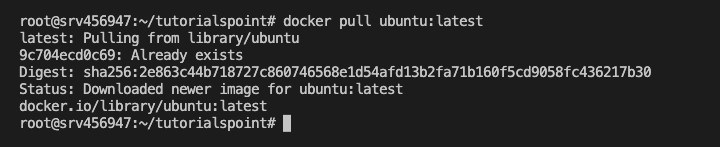
From the above screenshot, you can see that the Docker pull command has taken our new repository from the Docker Hub and placed it on our machine.