- Xamarin - Home
- Xamarin - Installation
- Xamarin - First Application
- Xamarin - Application Manifest
- Xamarin - Android Resources
- Xamarin - Android Activity Lifecycle
- Xamarin - Permissions
- Xamarin - Building the App GUI
- Xamarin - Menus
- Xamarin - Layouts
- Xamarin - Android Widgets
- Xamarin - Android Dialogs
- Xamarin - Gallery
- Xamarin - Andriod Views
- Xamarin - Multiscreen App
- Xamarin - Deploying Your App
Xamarin - Layouts
Linear Layout
In linear layout, the contents are arranged in either horizontal or vertical manner.
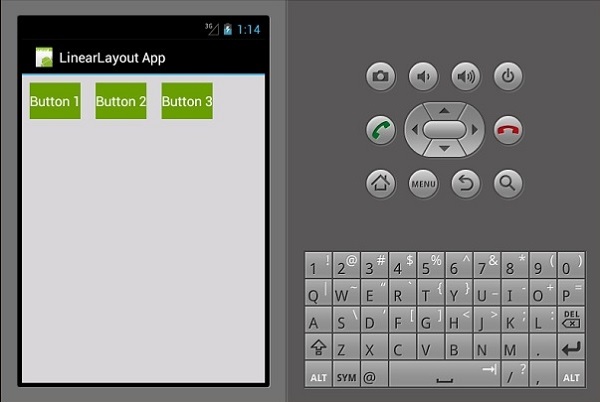
Linear Layout Horizontal
The contents of this layout are arranged horizontally. For this demo, we are going to create 3 buttons and arrange them horizontally in a linear layout.
<?xml version = "1.0" encoding = "utf-8"?>
<LinearLayout xmlns:android = "http://schemas.android.com/apk/res/android"
   android:orientation = "horizontal"
   android:layout_width = "fill_parent"
   android:layout_height = "fill_parent"
   android:background = "#d3d3d3"
   android:minWidth="25px"
   android:minHeight="25px">
   <Button
      android:id="@+id/MyButton1"
      android:layout_width="wrap_content"
      android:layout_margin="10dp"
      android:layout_height="wrap_content"
      android:text="Button 1"
      android:background="@android:color/holo_green_dark" />
   <Button
      android:id="@+id/MyButton2"
      android:layout_width="wrap_content"
      android:layout_margin="10dp"
      android:layout_height="wrap_content"
      android:text="Button 2"
      android:background="@android:color/holo_green_dark" />
   <Button
      android:id="@+id/MyButton3"
      android:layout_width="wrap_content"
      android:layout_margin="10dp"
      android:layout_height="wrap_content"
      android:text="Button 3"
      android:background="@android:color/holo_green_dark" />
</LinearLayout>
The resulting output is as shown below −
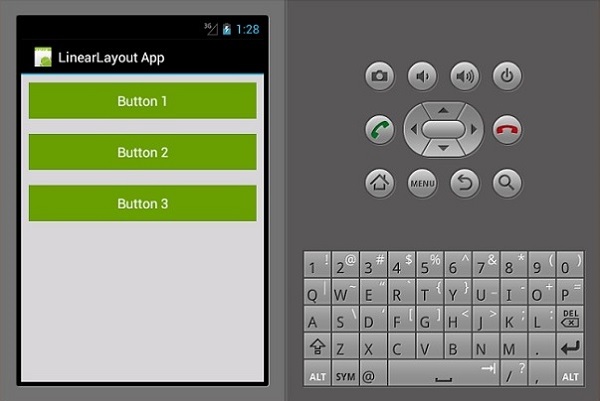
Linear Layout Vertical
This type of layout places the child view in a vertical manner.
<?xml version = "1.0" encoding = "utf-8"?>
<LinearLayout xmlns:android = "http://schemas.android.com/apk/res/android"
   android:orientation = "vertical"
   android:layout_width = "fill_parent"
   android:layout_height = "fill_parent"
   android:background = "#d3d3d3"
   android:minWidth = "25px"
   android:minHeight = "25px">
   <Button
      android:id = "@+id/MyButton1"
      android:layout_width = "fill_parent"
      android:layout_margin = "10dp"
      android:layout_height = "wrap_content"
      android:text = "Button 1"
      android:background = "@android:color/holo_green_dark" />
   <Button
      android:id = "@+id/MyButton2"
      android:layout_width = "fill_parent"
      android:layout_margin = "10dp"
      android:layout_height = "wrap_content"
      android:text = "Button 2"
      android:background = "@android:color/holo_green_dark" />
   <Button
      android:id = "@+id/MyButton3"
      android:layout_width = "fill_parent"
      android:layout_margin = "10dp"
      android:layout_height = "wrap_content"
      android:text="Button 3"
      android:background = "@android:color/holo_green_dark" />
</LinearLayout>
Its resulting output is as follows −
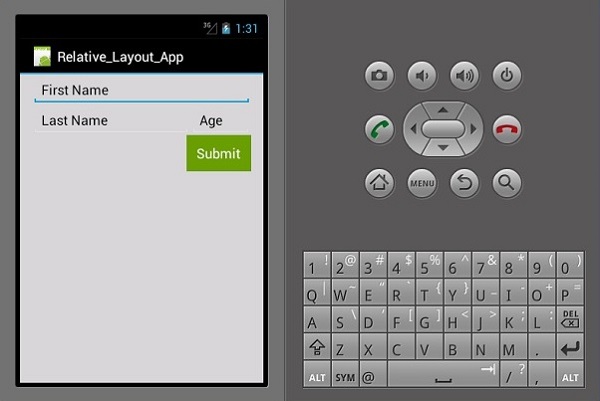
Relative Layout
In this view, the position of the child view is relative to its parent or to its sibling view. In the following example, we are going to create 3 EditText views and a button and then, align them relatively.
Create a new project and call it relative layout app. Open main.axml and add the following code.
<?xml version = "1.0" encoding = "utf-8"?>
<RelativeLayout xmlns:android = "http://schemas.android.com/apk/res/android"
   android:layout_width = "match_parent"
   android:layout_height = "match_parent"
   android:paddingLeft = "16dp"
   android:background = "#d3d3d3"
   android:paddingRight = "16dp">
   <EditText
      android:id = "@+id/name"
      android:layout_width = "match_parent"
      android:layout_height = "wrap_content"
      android:hint = "First Name"
      android:textColorHint = "@android:color/background_dark"
      android:textColor = "@android:color/background_dark" />
   <EditText
      android:id = "@+id/lastName"
      android:layout_width = "0dp"
      android:layout_height = "wrap_content"
      android:hint = "Last Name"
      android:layout_below = "@id/name"
      android:textColorHint = "@android:color/background_dark"
      android:textColor = "@android:color/background_dark"
      android:layout_alignParentLeft = "true"
      android:layout_toLeftOf = "@+id/age" />
   <EditText
      android:id = "@id/age"
      android:layout_width = "80dp"
      android:layout_height = "wrap_content"
      android:layout_below = "@id/name"
      android:hint = "Age"
      android:textColorHint = "@android:color/background_dark"
      android:textColor = "@android:color/background_dark"
      android:layout_alignParentRight = "true" />
   <Button
      android:layout_width = "85dp"
      android:layout_height = "wrap_content"
      android:layout_below = "@id/age"
      android:layout_alignParentRight = "true"
      android:text = "Submit"
      android:background = "@android:color/holo_green_dark" />
</RelativeLayout>
The important parameters that we have used in this code are −
android:layout_below − It aligns the child view element below its parent.
android:layout_alignParentLeft − It aligns the parent element to the left.
android:layout_toLeftOf − This property aligns an element to the left of another element.
android:layout_alignParentRight − It aligns the parent to the right.
When you build and run the App now, it would produce the following output screen −
Frame Layout
The frame layout is used to display only one item. Its difficult to arrange multiple items in this layout without having them overlap each other.
Start a new project and call it frameLayoutApp. Create a new Frame Layout as shown below.
<?xml version = "1.0" encoding = "utf-8"?>
<FrameLayout xmlns:android = "http://schemas.android.com/apk/res/android"
   android:layout_width = "fill_parent"
   android:layout_height = "fill_parent">
  <ImageView
      android:id = "@+id/ImageView1"
      android:scaleType = "matrix"
      android:layout_height = "fill_parent"
      android:layout_width = "fill_parent"
      android:src = "@drawable/img1" />
   <TextView
      android:layout_width = "fill_parent"
      android:layout_height = "wrap_content"
      android:textSize = "50dp"
      android:textColor = "#000"
      android:text = "This is a Lake" />
   <TextView
      android:gravity = "right"
      android:layout_width = "fill_parent"
      android:layout_height = "wrap_content"
      android:textSize = "50dp"
      android:text = "A very Deep Lake"
      android:layout_gravity = "bottom"
      android:textColor = "#fff" />
</FrameLayout>
The above code creates an imageView which fills the entire screen. Two textviews then float above the imageView.
Now, build and run your application. It will display the following output −
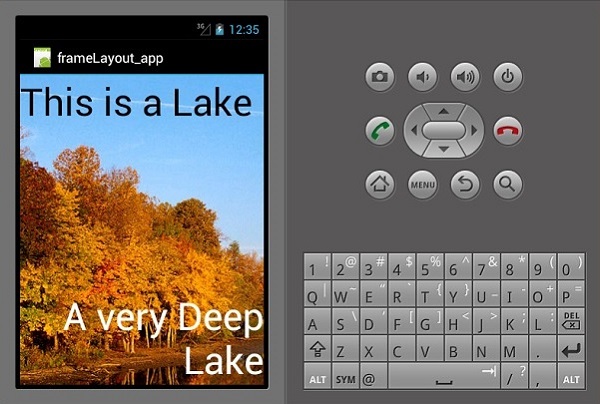
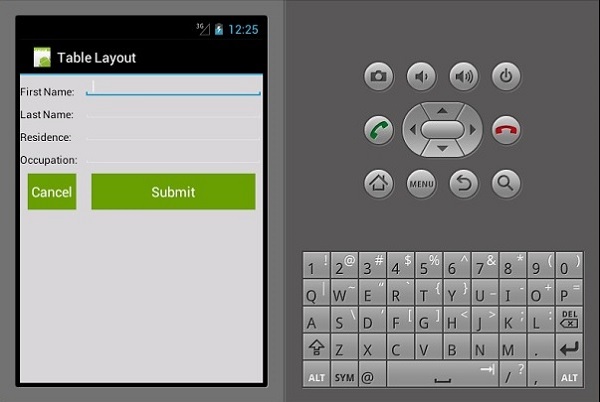
Table Layout
In this layout, the view is arranged into rows and columns. Lets see how it works.
<?xml version = "1.0" encoding = "utf-8"?>
<TableLayout xmlns:android = "http://schemas.android.com/apk/res/android"
   android:layout_width = "fill_parent"
   android:background = "#d3d3d3"
   android:layout_height = "fill_parent"
   android:stretchColumns = "1">

   <TableRow>
      <TextView
         android:text = "First Name:"
         android:layout_width = "wrap_content"
         android:layout_height = "wrap_content"
         android:textColor = "@android:color/black" />
      <EditText
         android:width = "100px"
         android:layout_width = "fill_parent"
         android:layout_height = "30dp"
         android:textColor = "@android:color/black" />
   </TableRow>

   <TableRow>
      <TextView
         android:text = "Last Name:"
         android:layout_width = "wrap_content"
         android:layout_height = "wrap_content"
         android:textColor = "@android:color/black" />
      <EditText
         android:width = "50px"
         android:layout_width = "fill_parent"
         android:layout_height = "30dp"
         android:textColor = "@android:color/black" />
   </TableRow>

   <TableRow>
      <TextView
         android:text = "Residence:"
         android:layout_width = "wrap_content"
         android:layout_height = "wrap_content"
         android:textColor = "@android:color/black" />
      <EditText
         android:width = "100px"
         android:layout_width = "fill_parent"
         android:layout_height = "30dp"
         android:textColor = "@android:color/black" />
   </TableRow>

   <TableRow>
      <TextView
         android:text = "Occupation:"
         android:layout_width = "wrap_content"
         android:layout_height = "wrap_content"
         android:textColor = "@android:color/black" />
      <EditText
         android:width = "100px"
         android:layout_width = "fill_parent"
         android:layout_height = "30dp"
         android:textColor = "@android:color/black" />
   </TableRow>

   <TableRow>
      <Button
         android:text = "Cancel"
         android:layout_width = "wrap_content"
         android:layout_margin = "10dp"
         android:layout_height = "wrap_content"
         android:background = "@android:color/holo_green_dark" />
      <Button
         android:text = "Submit"
         android:width = "100px"
         android:layout_margin = "10dp"
         android:layout_width = "wrap_content"
         android:layout_height = "wrap_content"
         android:background = "@android:color/holo_green_dark" />
   </TableRow>
</TableLayout>
The above code creates a simple data entry form arranged using tables and rows.