- SoapUI Basics
- SoapUI - Introduction
- SoapUI - Capabilities
- SoapUI - NG Pro
- SoapUI - Installation & Configuration
- SoapUI - WSDL
- SoapUI - Project
- SoapUI - TestSuite
- SoapUI - TestCase
- SoapUI - TestStep
- SoapUI - Request & Response
- SoapUI - Properties
- SoapUI - Property Transfer
- SoapUI - Logs Pane
- SoapUI - Assertions
- SoapUI - Troubleshooting
- SoapUI - Performance Testing
- SoapUI - Load Testing
- SoapUI - RESTful Web Services
- SoapUI - JDBC Connection
- SoapUI - JDBC Property
- SoapUI - JDBC Assertion
- SoapUI Useful Resources
- SoapUI - Quick Guide
- SoapUI - Useful Resources
- SoapUI - Discussion
SoapUI - TestStep
TestSteps are the "building blocks" of functional tests in SoapUI. These are added to a TestCase and used to control the flow of execution and validate the functionality of the web service(s) to be tested.
Insertion of TestStep
Step 1 − Right-click on TestSteps. Add Step and select an appropriate TestStep from the list. For example, if the user has to test a REST WebService, the user would select the REST Test Request.
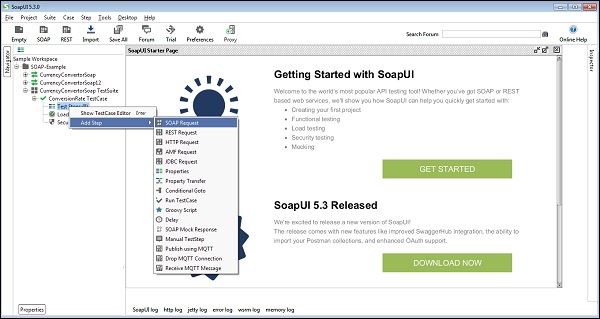
Step 2 − Add a TestStep to validate the imported SOAP request by selecting TestSteps → Add Step → SOAP Request.
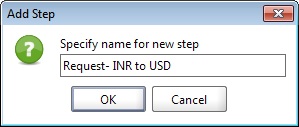
Step 3 − Enter the name of the TestStep and click OK in the wizard.
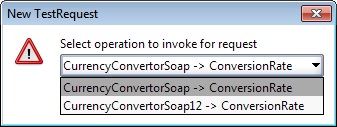
Upon clicking 'OK', a dialog box pops up to select the operation to invoke. All the operations are listed, and the users can select the operation that they would like to invoke.
There are two operations that will be listed. Both the Operations are the same except the SOAP version used. CurrencyConvertorSoap uses SOAP version 1.1 whereas, CurrencyConvertorSoap12 uses SOAP version 1.2.
Step 4 − Select first one CurrencyConvertorSoap and click OK.
While adding a TestCase, different standard assertions can be added. Assertions are also called as checkpoints/validation points of SOAP request/response.
Step 5 − Let us create a TestCase with a default option which means creating a TestStep WITHOUT any of the following validation points −
- Verifies if the response message is SOAP, upon executing the test.
- Verifies if the response schema is valid.
- Verifies if the SOAP response contains FAULT.
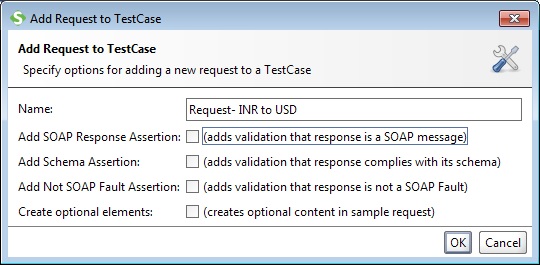
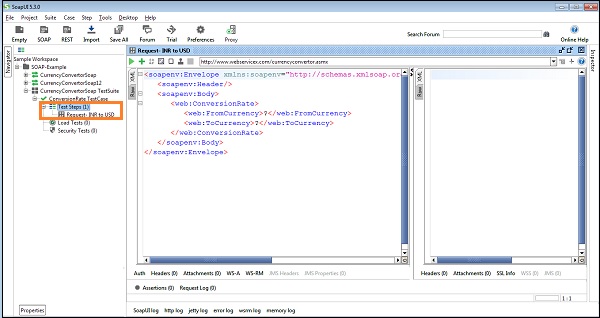
Step 6 − Upon clicking OK, the following request XML screenshot pops up.
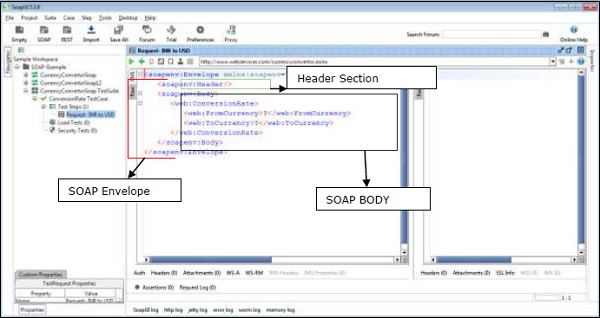
The test step count is now incremented to one as a functional TestStep added. Similarly, upon adding load and security TestSteps, the corresponding number automatically increases based on the number of steps added.