- SoapUI Basics
- SoapUI - Introduction
- SoapUI - Capabilities
- SoapUI - NG Pro
- SoapUI - Installation & Configuration
- SoapUI - WSDL
- SoapUI - Project
- SoapUI - TestSuite
- SoapUI - TestCase
- SoapUI - TestStep
- SoapUI - Request & Response
- SoapUI - Properties
- SoapUI - Property Transfer
- SoapUI - Logs Pane
- SoapUI - Assertions
- SoapUI - Troubleshooting
- SoapUI - Performance Testing
- SoapUI - Load Testing
- SoapUI - RESTful Web Services
- SoapUI - JDBC Connection
- SoapUI - JDBC Property
- SoapUI - JDBC Assertion
- SoapUI Useful Resources
- SoapUI - Quick Guide
- SoapUI - Useful Resources
- SoapUI - Discussion
SoapUI - Load Testing
Load testing is a specific form of performance testing that is conducted to assess the behavior of the system under a specific load. In SoapUI, we generally use the term "load testing" for all types of non-functional testing, however SoapUI supports all types of performance assessments of web services such as load, stress, and endurance.
Points to Note
Load testing is quite unique in SoapUI; a functional test case that allows creating and modifying performance tests quickly.
The main differentiator is that performance tests in SoapUI generally is created from the existing functional tests. This allows to quickly create advanced performance tests.
Web Service performance can be validated under different load scenarios. Maintain functional validations to see that they don't break under load, run several load tests simultaneously to see how they affect each other and much more.
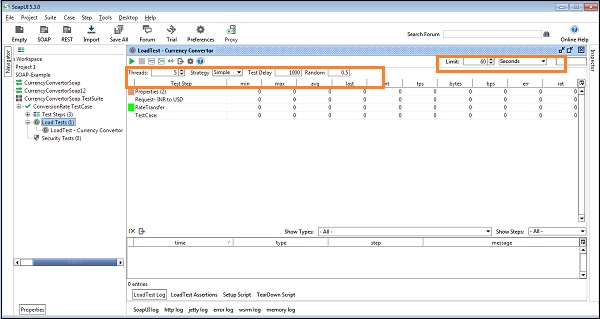
Creation of Load Test
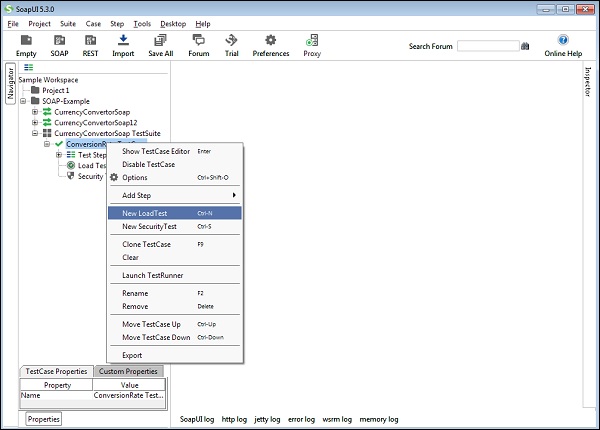
Step 1 − Right-click Functional Test Case and select New Load Test.
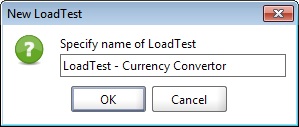
Step 2 − Enter the name of Load Test and click OK in the dialog wizard.
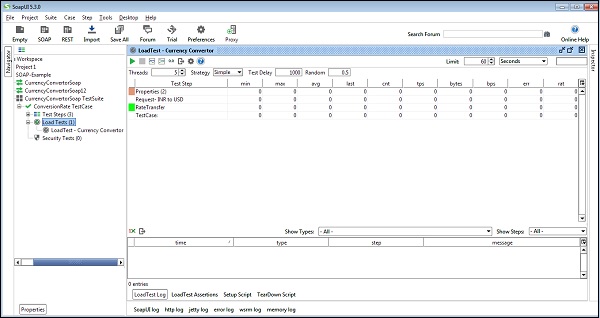
Load Test will open and the Load Test is created as shown in the following screenshot.
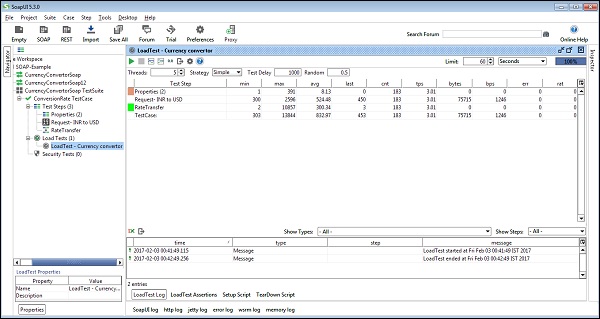
Execution of Load Test
When a new Load Test is created, it is preconfigured to run for 60 seconds (top right) with 5 threads using the Simple load strategy.
Modify these values as per requirement and Run. Note − The user should be aware of Load Testing configuration and concepts.
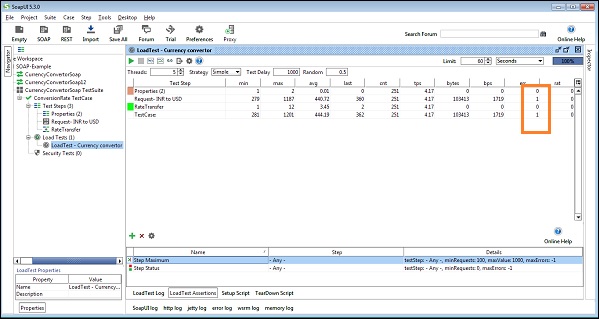
The user will see the statistics table in the middle, beginning with collecting data and after 60 seconds should have a finished LoadTest.
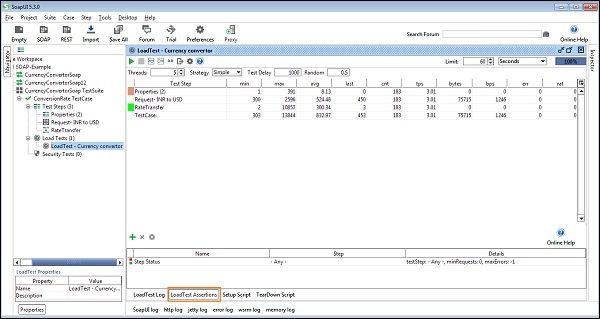
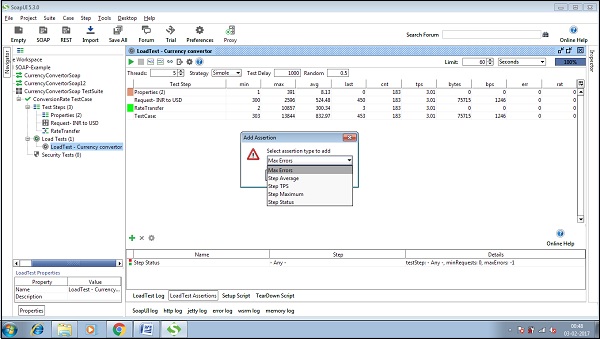
Adding an Assertion
Step 1 − In the LoadTest editor, select the LoadTest Assertion tab at the bottom of the editor.
Step 2 − Click the Add Assertion button in the LoadTest Assertion menu bar to add an assertion.
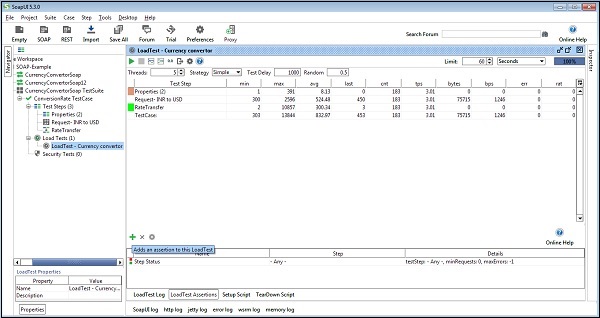
Step 3 − The Add Assertion dialog will open. Select Step Maximum. Select Maximum sets a Max Time in milliseconds that the responses are allowed to take, if the time exceeds what we've set, the test will fail. Click OK.
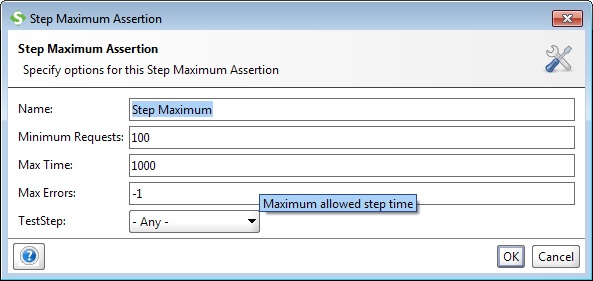
Step 4 − The TestStep Max Assertion window will open. As seen in the following screenshot, we allow a max response of one second, 1000 milliseconds. Let's not modify anything. Click Ok.
The Step Maximum assertion will now be successfully added.
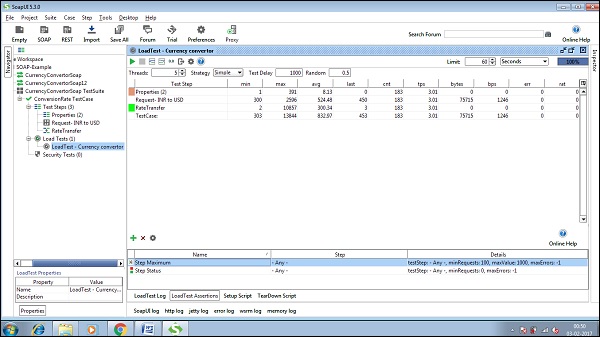
Step 5 − Now run the test again. If the responses take too long, you should see the numbers in the err column add up quickly.