- SAP SuccessFactors - Home
- SAP SuccessFactors - Introduction
- SAP SF - Integration Add-On
- SAP SuccessFactors - HCM Suite
- SAP SuccessFactors - Architecture
- SAP SuccessFactors - Landscape
- SAP SuccessFactors - Landscape HCI
- Performance & Availability Mgmt
- SAP SF - Customize Welcome Portlet
- SAP SuccessFactors - Navigation
- Compensation and Variable Pay
- SAP SuccessFactors - Foundation
- SAP SF - Intelligent Services
- SAP SuccessFactors - Onboarding
- SAP SF - Performance and Goals
- Succession and Development
- SAP SF - Employee Central
- SAP SF - Employee Central Activities
- SAP SuccessFactors - Recruiting
SAP SuccessFactors - Recruiting
In a company, talent acquisition is one of the most important process of HR to a business and hiring right people in the organization has a considerable impact on business performance. SAP SuccessFactors-Recruiting helps you source, engage, and hire the worlds best talent.
SAP SuccessFactors recruiting helps organization to source, engage and hire top talent and manage right people in an organization. You can attract and engage top talent, select and hire the best candidates as per company requirement, and measure the business results. You can emphasize primarily on hiring process and selecting the best candidates.
The benefits of SAP SF Recruiting are as follows −
It ensures that you get the right candidate with right skills at correct time.
You can evaluate the candidate speed-up the hiring process and keep it fast and fair.
You can fasten new hire onboarding and allows you to access resources in employee social network.
You can increase return on the recruiting spend and demonstrate how your recruiting strategy is driving business results.
Recruiting Rating Scales
A rating scale in SuccessFactors recruiting is used in Requisition Template and is used to rate competencies on the interview assessment. The benefits of using rating scales is that you can put more than one correct answer.
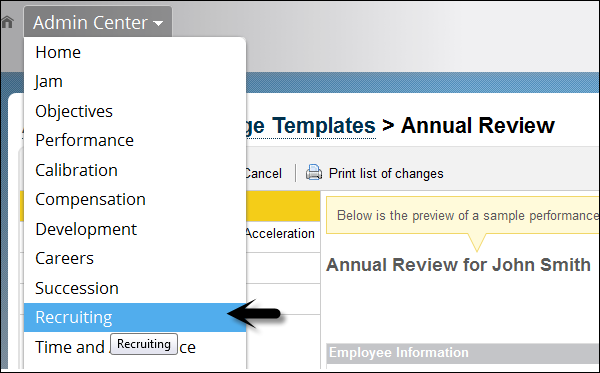
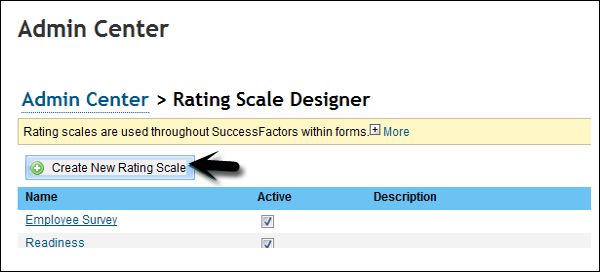
To create or edit an existing rating scale, go to Admin center > Company Settings > Rating Scale.
Step 1 − Click the Create New Rating Scale button.
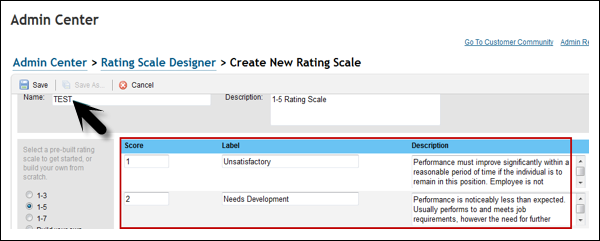
Step 2 − To define or modify a rating scale, open the rating scale. If you are creating a new scale, the creation process takes you to the edit functionality.
Select a rating scale by clicking one of the prebuilt rating scale options, or build your own. When creating a new rating scale, the system defaults to the 1-5 scale. Click Save.
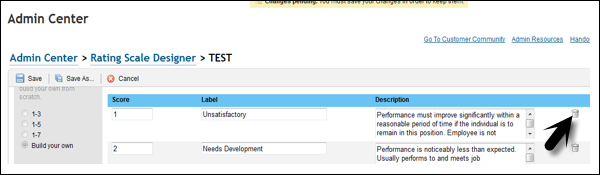
Step 3 − To delete a rating score, click the Delete button.
Step 4 − To modify the scale, enter the score, label, and description, and then click Add New Score.

Step 5 − Enter the details as given below. Click Save.

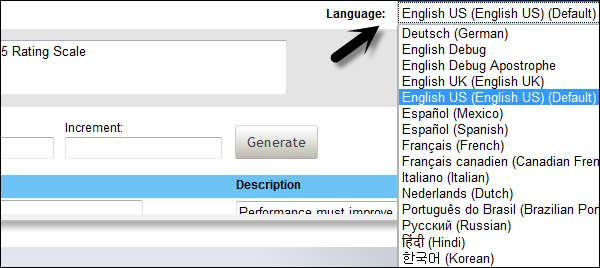
Step 6 − You can also add Rating scale in different languages by selecting a language from the drop down list.
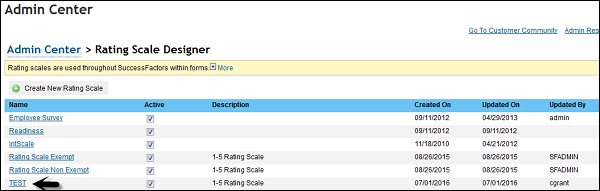
Step 7 − To view the Rating Scale, click the Rating Scale icon next to admin center. You can see that a Rating Scale has been created. To edit an existing scale, click Rating scale and a new window will open.
You can also check created on, updated on and Updated by details and description.
Recruiting email Templates
You can use recruiting email templates to create automatic status triggered responses and emails from a recruiter. Recruiting e-mail templates support the use of CC and BCC functionality. This allows a set of users, operators, or e-mail addresses to be specified on an e-mail template.
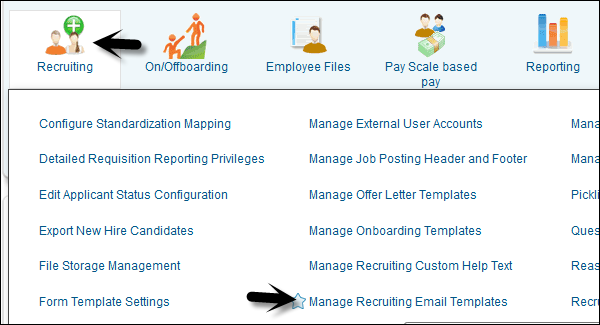
Step 1 − Go to Admin Tools > Recruiting > Manage Recruiting Email Templates.
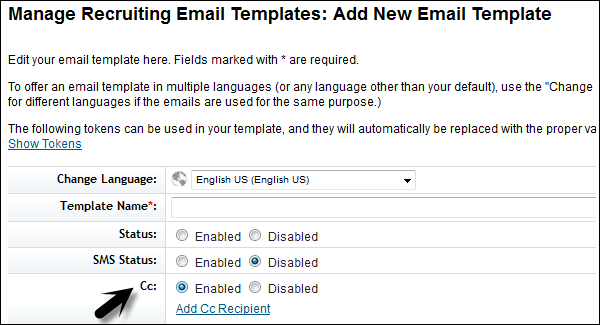
Step 2 − Click Create New Template and enter the template name.
Step 3 − Set the template to Enabled. Create a Subject for the e-mail. Write the e-mail body, using tokens where appropriate.
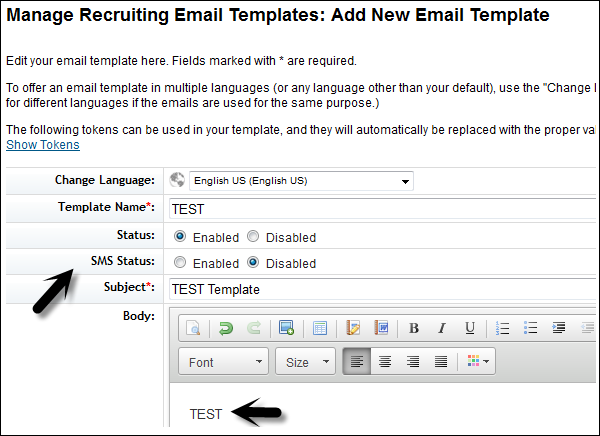
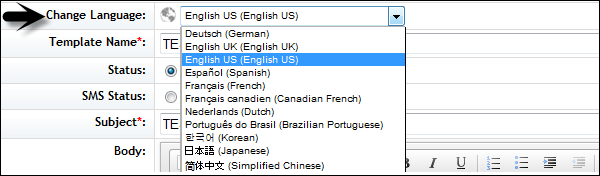
Step 4 − To offer an email template in multiple languages, you can use the option Change Language from the drop-down menu and complete all the fields for the translation.
Step 5 − To save changes, scroll down and click Save Changes.

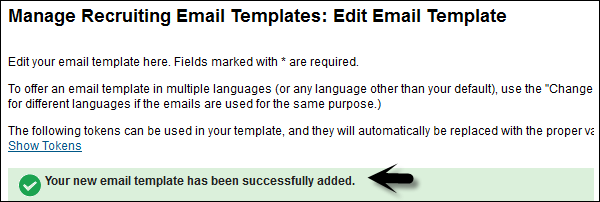
You will see the following page −
To see the template, go to Admin Center > Manage Recruiting Email Templates.
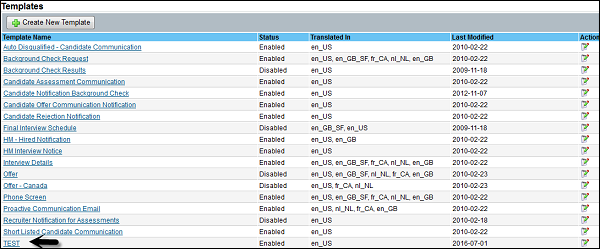
You can see Status, Translated language, last modified and action field. To edit a template, click Edit field under action.
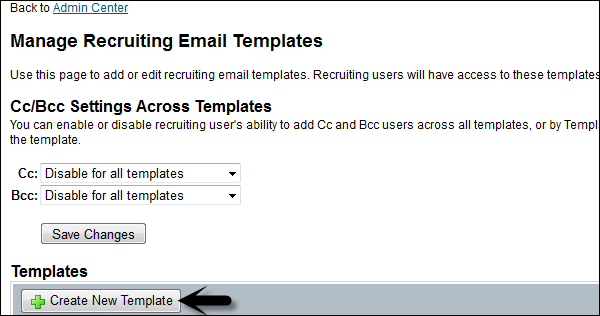
Cc/Bcc Settings
You can enable or disable to add Cc and Bcc users across all templates. When you enable Cc and Bcc option, you can add roles or specific users to the default Cc or Bcc line by editing the template.
You have the following three options as shown in the image given below −
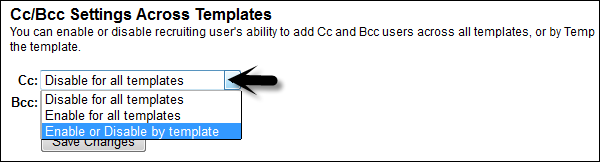
When you select enable or disable by template, click Save changes to apply.
When you create a new template, it will enable CC option in new template. You can add recipient email ID.
To see Template summary, go to Email Template summary.

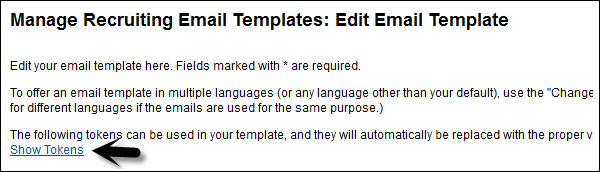
Show Token
You can use tokens in the body of an e-mail template. View the available tokens by clicking Show Tokens. To use token, copy and paste the token you need in the appropriate place in the e-mail body.
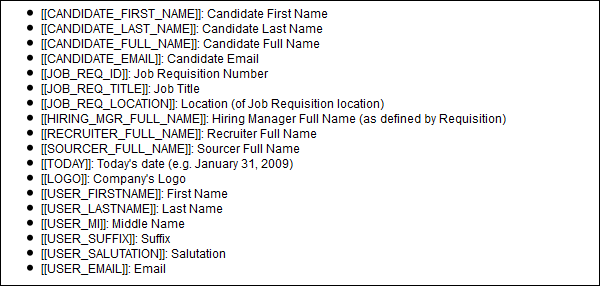
Example − To thank a candidate for applying, you may use Open an email template > Show Token.
You will see a list of tokens −
Output
Dear [[CANDIDATE_FIRST_NAME]], we have received your application for [[JOB_REQ_ID]], [[JOB_REQ_TITLE]] and are excited to review your qualifications against this position!
Recruiting Management Settings
You can set various recruitment settings, which are internal facing and external facing information about the company.
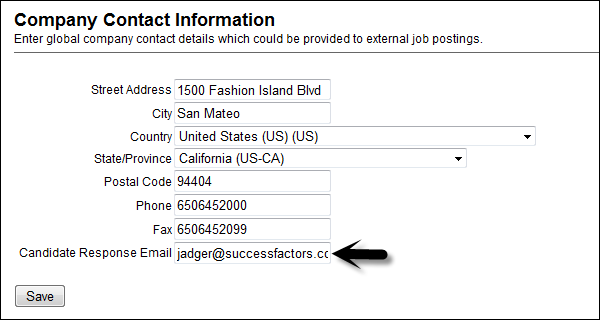
Step 1 − Go to Admin Center > Recruiting > Manage Recruiting Settings
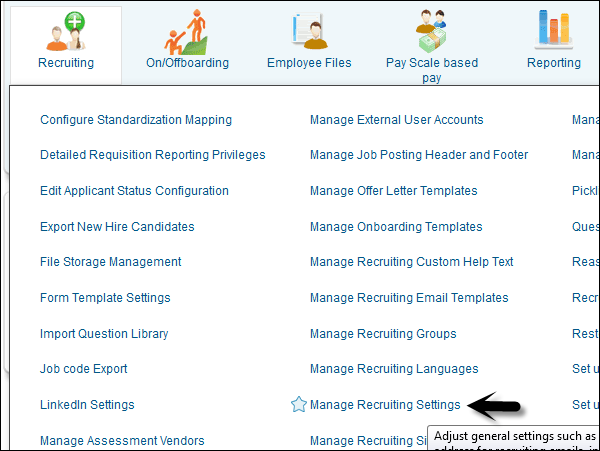
Step 2 − You can set up Company Contact Information, return email address notification, applicant profile settings, interview center, offer approval, etc.
Step 3 − The Return Email Address Information section enables you to override the default company-email address. You can lock it down so only this email address will be displayed in the correspondence back to candidates. You can make it editable so recruiters can change it to their own email address.
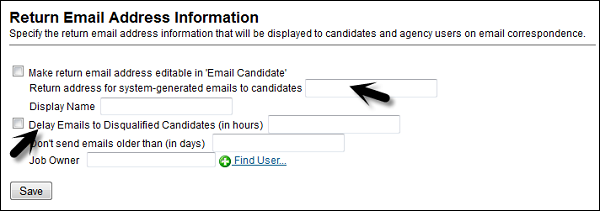
Step 4 − Recruiting Admin status can trigger an email to be sent to each candidate announcing this disqualification. To enable this option, select Delay Emails and enter a number (for hours). This prevents the candidates from learning exactly when they were disqualified.
The recommended setting is to delay over 20 hours and to stagger this to an odd number of hours - 21, 27, or 39 instead of using even number as it does not appear an automated message to candidates.
Step 5 − The Candidate Profile Settings section enables candidates to enter multiple lines of data such as previous work experience or educational history on their candidate profile. A candidates most recent work history is highlighted in the candidate profile.

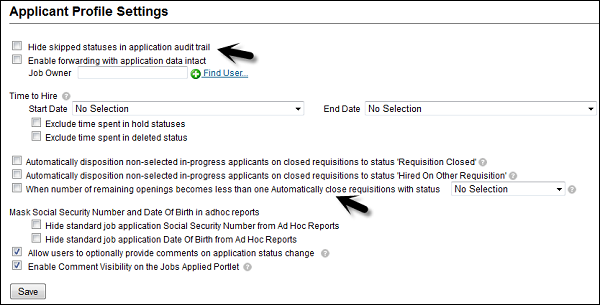
Step 6 − With applicant Profile Settings, you can skip status in an application audit trail. SuccessFactors audit tracks every move that a candidate makes through the hiring process. If you want to leave a step, you can skip the process and it will appear as blank.
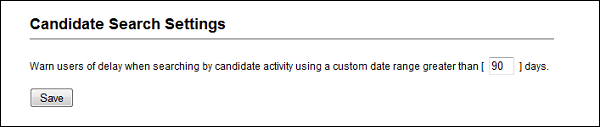
Step 7 − You can use Candidate Search Settings section as a system performance configuration. You can set a threshold based on your systems size and performance (30, 60, or 90 days) for candidate search. If a recruiter admin, tries to enter 120 days of data it will return only 90 days of data.
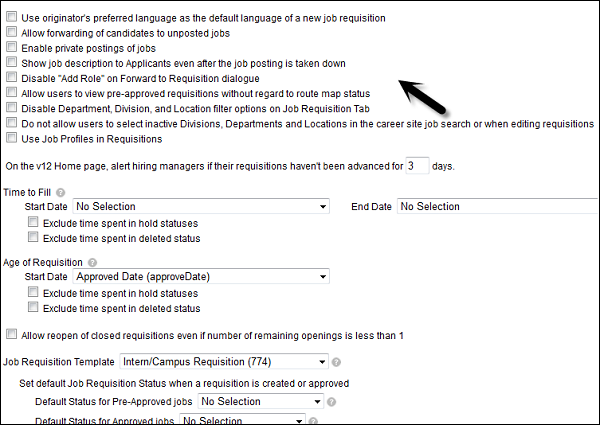
Step 8 − In the job-requisition section, various configurations and administration settings related to recruitment management process −
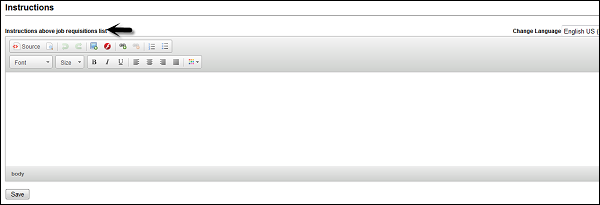
Step 9 − You have an instructions section at the end, which contains a text editor using which an admin can place a text on the top of job requirement.
Apart from these, various other settings are available under Recruitment management that an administrator can configure to manage recruitment management effectively.
