- SAP SuccessFactors - Home
- SAP SuccessFactors - Introduction
- SAP SF - Integration Add-On
- SAP SuccessFactors - HCM Suite
- SAP SuccessFactors - Architecture
- SAP SuccessFactors - Landscape
- SAP SuccessFactors - Landscape HCI
- Performance & Availability Mgmt
- SAP SF - Customize Welcome Portlet
- SAP SuccessFactors - Navigation
- Compensation and Variable Pay
- SAP SuccessFactors - Foundation
- SAP SF - Intelligent Services
- SAP SuccessFactors - Onboarding
- SAP SF - Performance and Goals
- Succession and Development
- SAP SF - Employee Central
- SAP SF - Employee Central Activities
- SAP SuccessFactors - Recruiting
SAP SF - Customize Welcome Portlet
How to Customize a Portlet in SuccessFactors?
A portlet is a configurable object on the SuccessFactors screen. Portlets provide resources, charting, or features for users to assist them with performance processes. To customize a portlet, follow the steps given below −
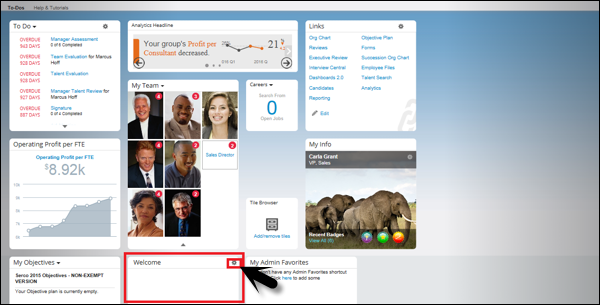
Step 1 − Go to SuccessFactors environment → Login and you can come to Welcome screen.
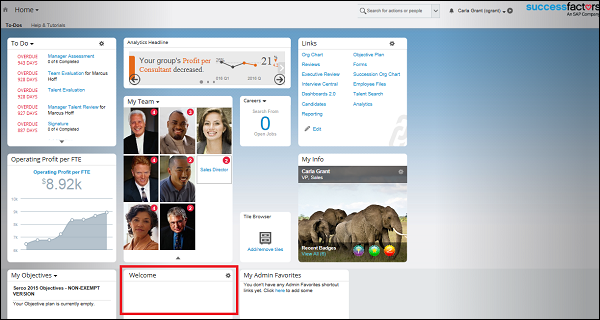
Step 2 − Click Toggle on the upper right hand side of the Welcome tile as shown below −
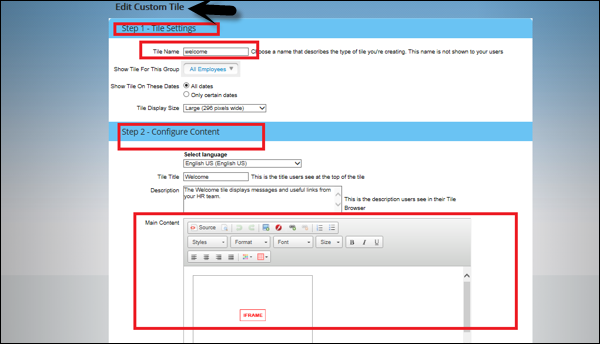
A new page Edit Custom Tile opens. There are two options −
- Tile Settings
- Configure Contents
Step 3 − Under Tile Setting, enter the tile name. Enter the name that describes the type of tile you are creating and this is not displayed to your users.
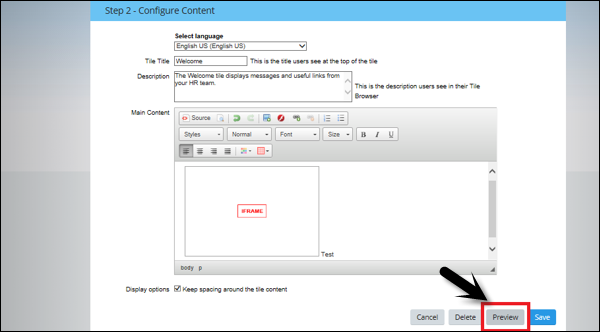
Step 4 − Under configure contents −
Enter Tile title − This is the title, a user will see at the top.
Description − This is the description, a user will see in their tile browser.
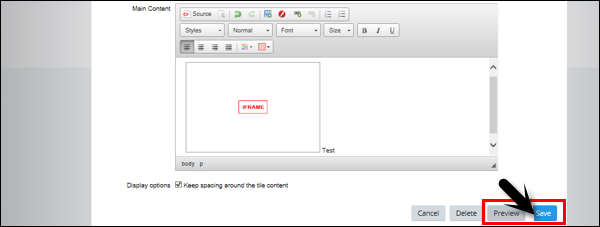
At the bottom, you have a preview option to see how the tile will look.
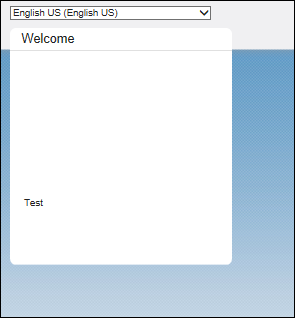
Step 5 − Once you click on Preview, Tile title will be displayed along with the description as shown in the following image. You can decide if you want to save this or make further changes.
Step 6 − To save the tile, click the save button at the bottom.