- SAP Ariba - Home
- SAP Ariba - Introduction
- SAP Ariba - Key Benefits
- SAP Ariba - Account Configuration
- User & Role Management
- Supplier Membership Fees
- SAP Ariba - Configuring SAP ERP
- Configuring Ariba Procurement Solution
- Buyers & Supplier Terms
- SAP Ariba - Integrating Master Data
- Integrating Transaction data
- SAP Ariba - SAP ERP Transports
- SAP Ariba - Downloading workbooks
- SAP Ariba - Installation
- SAP Ariba - Configuration
- SAP Ariba - Security Details
- SAP Ariba - Logging & Auditing
- Comparison With Other Tools
- SAP Ariba - Solution Areas
- SAP Ariba - Configurable Workflows
- SAP Ariba - Reporting Options
- Integration with S/4 HANA
- Best Practices For Integration
SAP Ariba - Installation
In this chapter, we will learn how to install SAP Ariba. Consider the following to install SAP Ariba −
- SAP Ariba Notes Installation
- SAP Ariba Adapter Installation
- Ariba Functional Configuration
- SAP Ariba Web Services Configuration
- Customizing Adapter as per business requirement
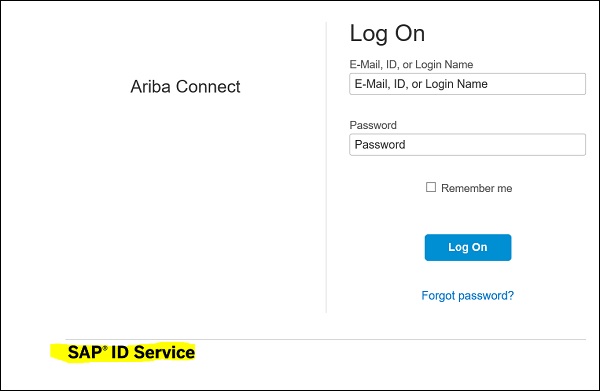
To install SAP Ariba Adapter, you need to go to support.ariba.com and login using your SID and password.
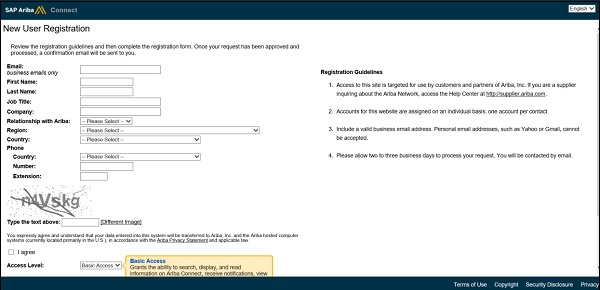
To download software, you need to have a DSC (Designated Support Contact) ID. New users can register on the Ariba portal. Open https://support.ariba.com → New User Registration
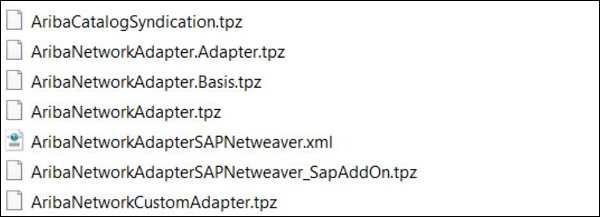
Once you login to Ariba Portal, search for Ariba Network Adapter for SAP NetWeaver. As mentioned, Ariba Network Adapter is available only for DSCs.

The next step is to Import required AN adapter files (.tpz) into SAP Enterprise Service Repository.
You need to import the required Ariba Network product and component definitions (.zip) into System Landscape directory SLD.

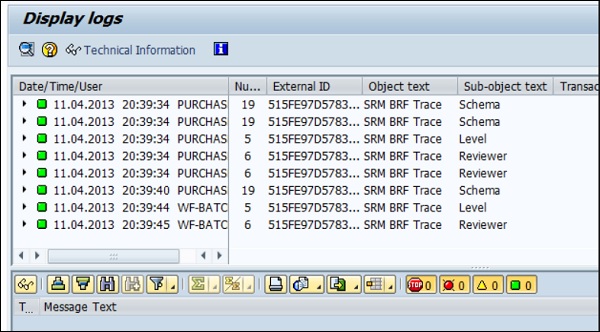
Below are Ariba troubleshooting codes that can be used to fix any of the issues −
Using SLG1 − Application Log: Display Logs Transaction Code
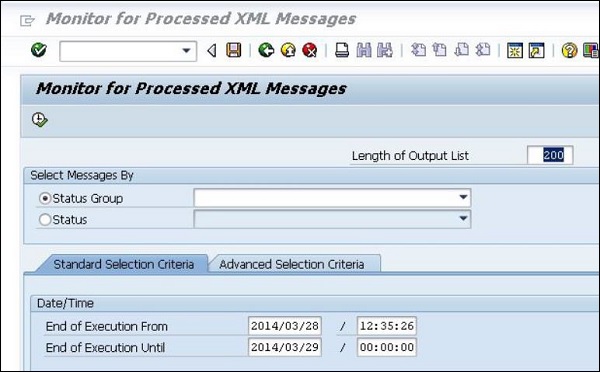
Using SXI_MONITOR − Message Monitor Transaction Code
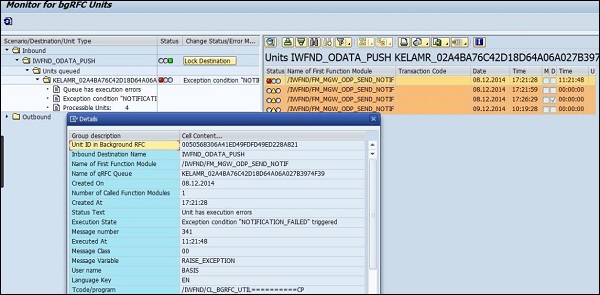
Using SBGRFCMON − bgRFC Monitor Transaction Code
The following message types should be used to enable integration −
- OrderRequest (outbound)
- ConfirmationRequest (inbound)
- ShipNoticeRequest (inbound)
- ServiceEntryRequest (inbound)
- ReceiptRequest (outbound)
- InvoiceDetailRequest (inbound)
- CopyRequest.InvoiceDetailRequest (outbound)
- StatusUpdateRequest (outbound)
- PaymentProposalRequest (outbound)
- CopyRequest.PaymentProposalRequest (inbound)
- PaymentRemittanceRequest (outbound)
- PaymentRemittanceStatusUpdateRequest (outbound)
