- Metasploit - Home
- Metasploit - Introduction
- Metasploit - Environment Setup
- Metasploit - Basic Commands
- Metasploit - Armitage GUI
- Metasploit - Pro Console
- Metasploit - Vulnerable Target
- Metasploit - Discovery Scans
- Metasploit - Task Chains
- Metasploit - Import Data
- Metasploit - Vulnerability Scan
- Metasploit - Vulnerability Validation
- Metasploit - Exploit
- Metasploit - Payload
- Metasploit - Credential
- Metasploit - Brute-Force Attacks
- Metasploit - Pivoting
- Metasploit - Maintaining Access
- Metasploit - MetaModules
- Metasploit - Social Engineering
- Metasploit - Export Data
- Metasploit - Reports
Metasploit - Vulnerability Validation
In this chapter, we will learn how to validate the vulnerabilities that we have found from vulnerability scanners like Nexpose. This process is also known as vulnerability analysis.
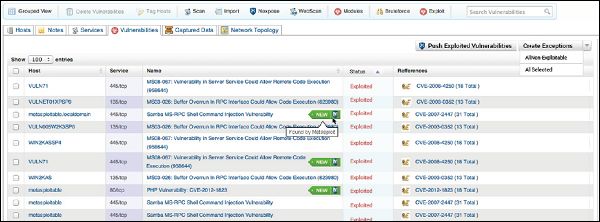
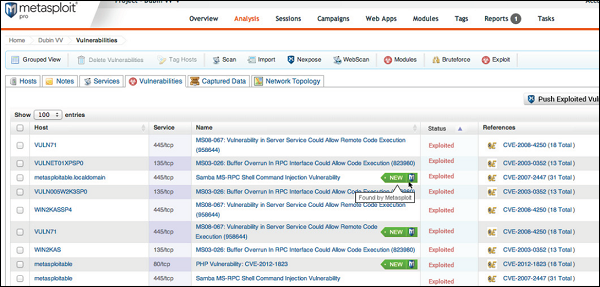
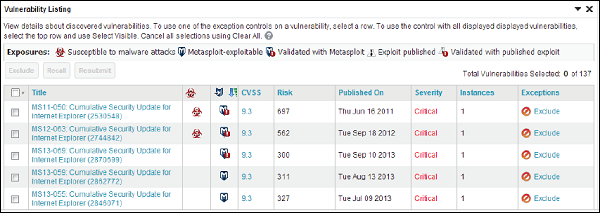
As shown in the following screenshot, a vulnerability scanner can sometimes give you hundreds of vulnerabilities. In such a case, it can be quite time-consuming to validate each and every vulnerability.
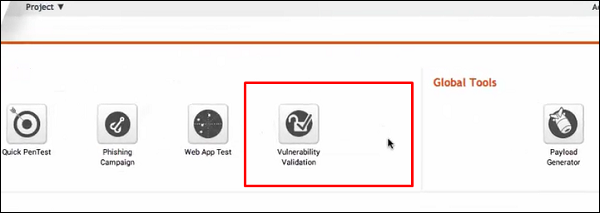
Metasploit Pro has a feature called Vulnerability Validation to help you save time by validating the vulnerabilities automatically and give you an overview of the most crucial vulnerabilities that can be very harmful for your system. It also has an option to classify the vulnerabilities according to their severity.
Lets see how you can use this option. Open Metasploit Pro Web Console → Project → Vulnerability Validation.
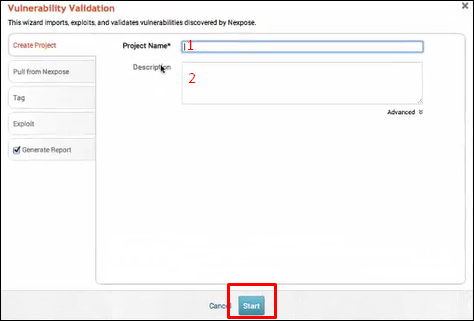
Next, enter the Project Name and provide an easy description about the project. Then, click the Start button.
Click "Pull from Nexpose". Select "Import existing Nexpose vulnerability data" as shown in the following screenshot.

Click Tag → Automatically Tag by OS. It will separate the vulnerabilities for you.
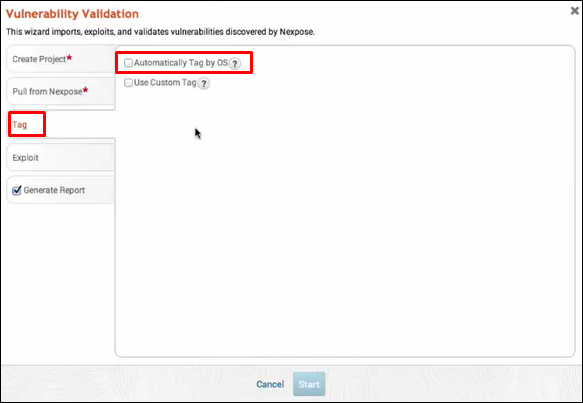
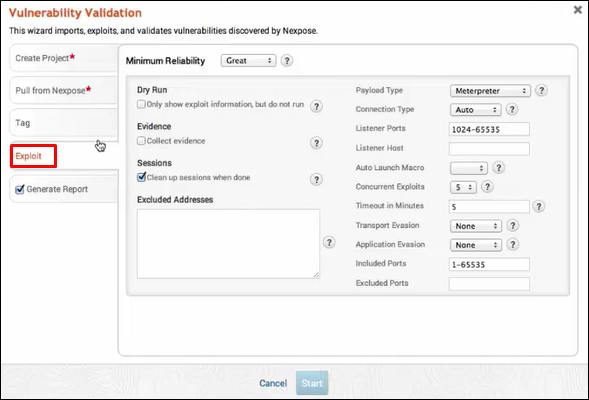
Next, go to Exploit → Sessions and check the option "Clean up sessions when done". It means when the vulnerability will be checked, there will be interaction between the Metasploit machine and the vulnerable machine.
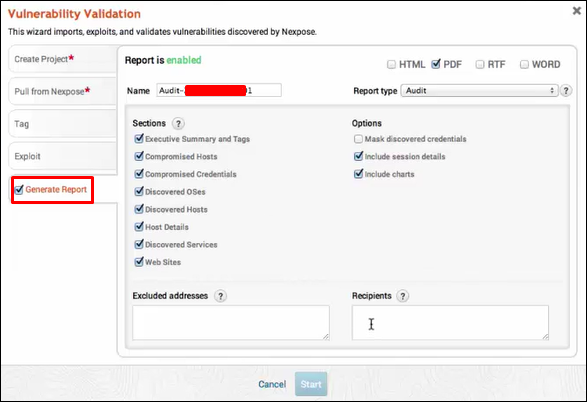
Click Generate Report → Start.
Next, you will see a Validation Wizard. Here, you need to click the Push validations button.
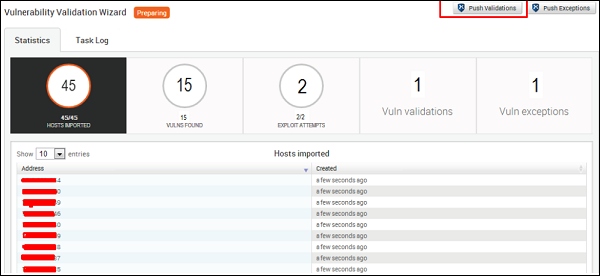
You will get the following screen after you have all the list of the vulnerabilities tested.
To see the results of the tested vulnerabilities, go to Home → Project Name → Vulnerabilities.