
Article Categories
- All Categories
-
 Data Structure
-
 Networking
-
 RDBMS
RDBMS
-
 Operating System
-
 Java
Java
-
 MS Excel
-
 iOS
iOS
-
 HTML
HTML
-
 CSS
CSS
-
 Android
-
 Python
-
 C Programming
-
 C++
C++
-
 C#
C#
-
 MongoDB
-
 MySQL
MySQL
-
 Javascript
-
 PHP
PHP
-
 Economics & Finance
Interface proximity sensor with Arduino
There are various types of proximity sensors available. Ultrasound sensor, which we discussed in another article for measuring distance, can also be used as a proximity sensor. In this article however, we will consider IR proximity sensor.
A typical IR proximity sensor looks like the one below −
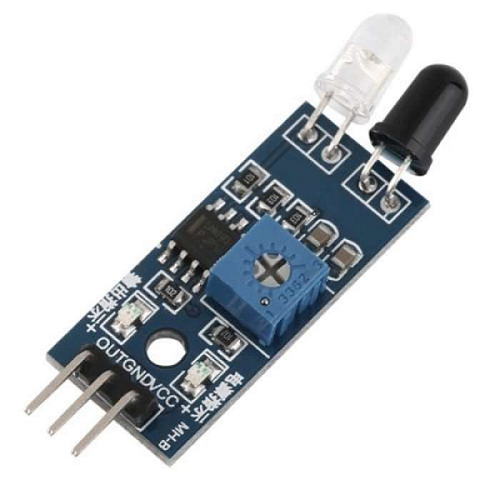
There is an IR Emitter LED and an IR Receiver (photodiode). As you can see, the sensor has 3 pins (VCC, GND and OUT). The OUT pin gives a LOW signal when the there is an obstacle which acts as a reflecting surface, and the light from the LED is reflected back to the received.
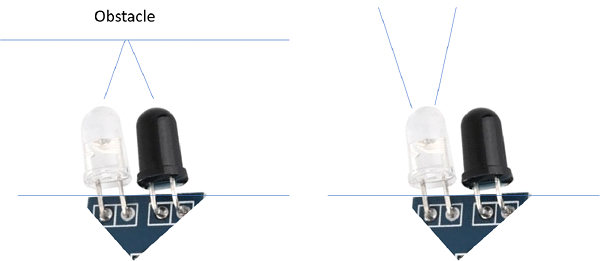
Using the property of the OUT pin (LOW when obstacle is detected), we can program our Arduino to determine if an object is nearby.
Circuit Diagram
The Circuit Diagram is shown below −
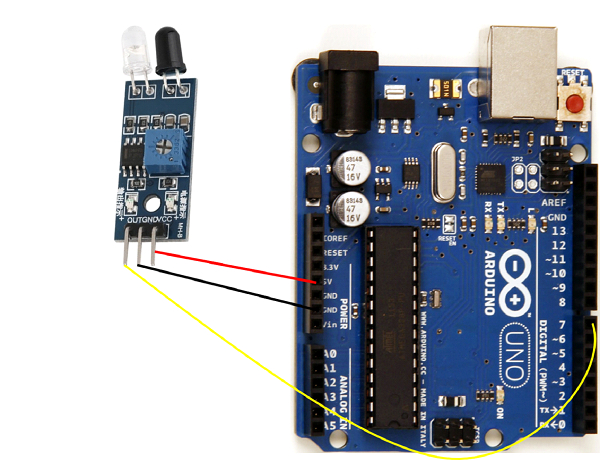
As you can see, the Vcc pin is connected to 5V on Arduino, GND to GND, and OUT to pin 7.
Example Code
The code is quite straightforward, as you can see below −
int signalPin = 7;
void setup() {
   // put your setup code here, to run once:
   Serial.begin(9600);
   pinMode(signalPin,INPUT);
}
void loop() {
   // put your main code here, to run repeatedly:
   if (digitalRead(signalPin) == HIGH) {
      Serial.println("Obstacle present right now!");
   } else {
      Serial.println("No obstacle!");
   }
   delay(1000);
}
Try placing your hand in front of the IR sensor, and then removing it. And observe the changes in print statement on the Serial monitor.

3K+ Views
