
Article Categories
- All Categories
-
 Data Structure
-
 Networking
-
 RDBMS
RDBMS
-
 Operating System
-
 Java
Java
-
 MS Excel
-
 iOS
iOS
-
 HTML
HTML
-
 CSS
CSS
-
 Android
-
 Python
-
 C Programming
-
 C++
C++
-
 C#
C#
-
 MongoDB
-
 MySQL
MySQL
-
 Javascript
-
 PHP
PHP
-
 Economics & Finance
How to Take a Screenshot on Microsoft Windows?
The several versions of Windows software with 11, 10, 8, and 7 may be confusing, but they all have the standard screenshot facility. The study, research, work, and recreation too may require the recording of the screen or a part of the screen. Accomplish that task of taking screenshots in several easy ways. Along with the PrintScreen key on every keyboard, use some shortcuts to speed up the process. You also have the snipping tool that captures a square or rectangle of any screen area, large or small. Explore a few more screenshot-capturing methods to elevate work and communication, keep records, prepare official documents and research papers, and set reminders.
How to capture screenshots in Windows 11?
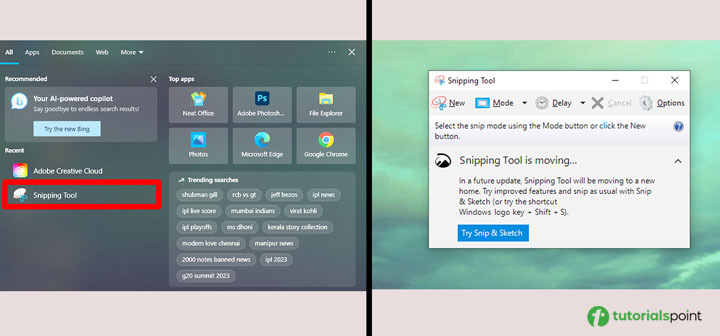
Snipping Tool
You need to type the snipping tool and open the app in the start menu. After clicking new in the snipping tool menu that appears, you are ready to specify the type. Choose from rectangle, freeform, and fullscreen, according to your need. After selecting the type, use the cursor to specify the screen part to be captured. Releasing the cursor indicates that the screenshot has been captured. Save the screenshot in the desired location with a file name.
Keyboard Shortcuts
Press and briefly hold the PrtScn key. Save the screenshot somewhere for later use. Search online and find several third party apps for screenshots. Choose the one you fancy.

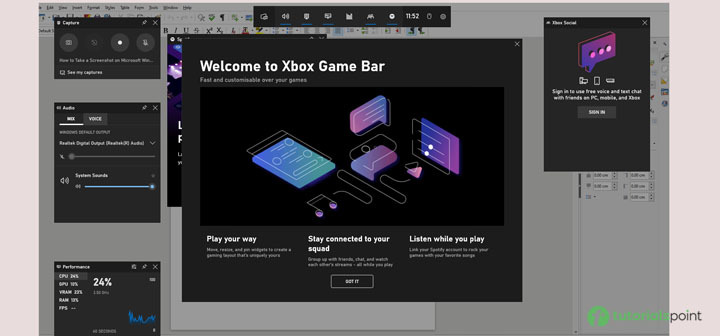
Xbox Game Bar
Press together the Windows and G keys. Go to the corner on the top left. Find and select the Take Screenshot option. Find the saved screenshot in the Captured videos.
How to Capture Screenshots in Windows 10?
Scribe tool free Chrome extension, PrtScn key, snipping tool, Game bar, and Snip and Sketch are five different methods to capture screenshots in Windows 10.
#4 Ways Capture Full Screen Screenshots on Windows Computer
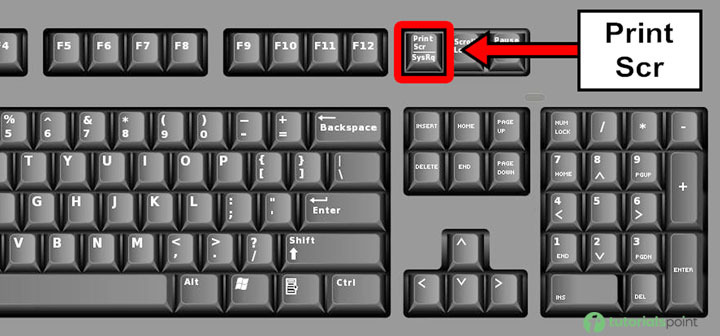
Printscreen Key
Is the screen displayed that you wish to capture? Make sure that no other apps or programs are displayed. Find and press the PrintScreen key that is found on the top-right of the keyboard. The entire screen is captured. The key may be named PrtScn or something like that. Do you have an Fn key at the bottom-left of the keyboard? It may be necessary to press Fn and PrintScreen keys together.
Paint App
Capture the screenshot with the PrintScreen key. Open the Paint app by typing paint in the start and search bar. The procedure differs in Windows 8 and Windows XP computers. Windows 8 has paint in search results. In Windows XP, select Programs and Accessories.
When the Paint app opens, you must press Ctrl and V together to paste the captured screenshot into the Paint window. You can see it appear immediately.
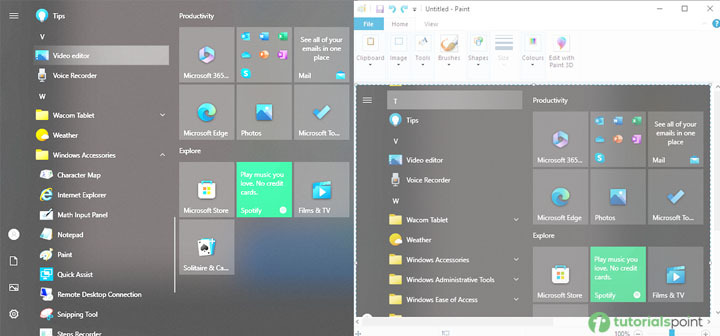
Suppose you want to save the screenshot; press Ctrl and S together. Now select the preferred location folder for saving the screenshot and press Save. Also, choosing a different format or type for saving, like JPEG or PNG, is possible from the drop-down menu.
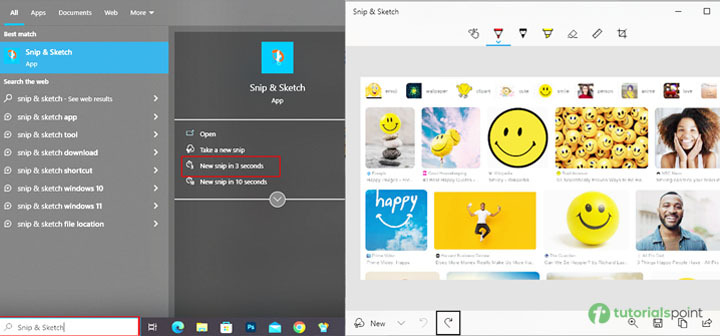
Snip & Sketch
The app opens up when you type Snip & Sketch in the start search box. The app has the word New which indicates the use of the cursor to create a new snip on any part of the screen. Click on New and capture the screen part now or delay the process by 3 or 10 seconds. The captured snip appears in the app display, but that is not all. In addition to zoom and save, you may add various artistic touches through colors, pencils, brushes, etc. Indulge the craving to create art and fantasy effects based on the snip. Save and share attractive art compositions and attract likes and popularity.
External Apps
Wouldn?t it be great to have all the screenshot needs fulfilled through windows inbuilt apps? Some may prefer external apps, and a few are listed here, both free and paid for.
GreenShot
LightShot
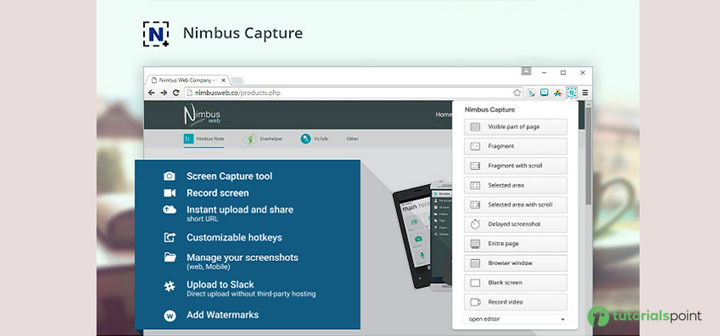
Nimbus Screenshot
SnagIt
How to capture several windows consecutively in one file?
So far, we have talked about capturing a single screen or parts of the screen. The method to capture several screens in a row requires a program called PSR.exe. The program is inbuilt into every windows computer. You can capture numerous screens and save them together in a single document. Details of where the clicking and actions taken are also reflected
Step 1
Find the first page of the planned screenshots as the beginning of the sequence. Go to the Start menu by clicking the windows logo. Type the command to open PSR, psr.exe, and click OK. Now you can see a little rectangular toolbar at the screen top.
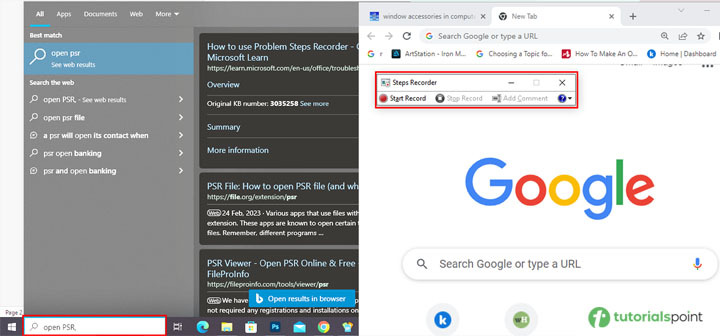
Step 2
You have to click Start Record in the toolbar. The Steps Recorder launches and records the following 25 screen changes. If you need to record more than 25 screens, click Settings on the right side in the drop-down menu. Here you find the option to change the number of screens to store. Change the number from 25 to the required number.
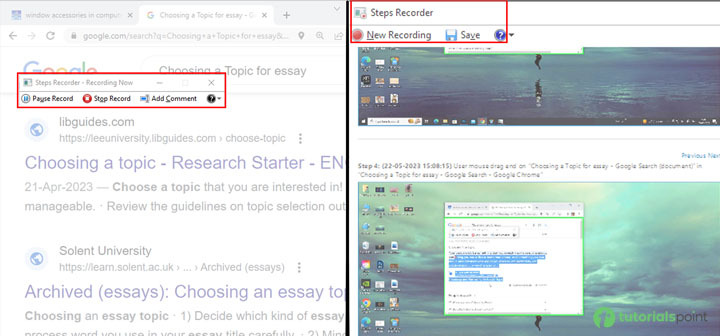
Step 3
Now click on several screens, and the Steps Recorder captures the screenshot each time. At the top of the toolbar is Stop Record. When you click that, the recording stops, and the results window opens.
Step 4
Check the captured screenshots, ensure all are included and save them in a Zip folder. Click save and use a file name and specify the location. Screenshots are saved in a single HTML file that may be opened in the browser for viewing.
How to capture screenshots on Microsoft Surface Devices?
Pressing keys to capture the entire screen is also possible on Surface devices. Similar to procedures on phones and tablets, press the touch button and volume down button together. The touch button is on the bottom screen, and the volume down button is on the device side. The screen turns to light. Find the screenshot in the pictures folder saved as Screenshots.
Touchscreen-enabled surface devices use a surface pen to take a picture of the complete screen. You need to click two times on a button at the back of the surface pen. Snip and Sketch open up, and editing is facilitated.
Recording screenshots serves various purposes, and the methods are relatively simple, primarily inbuilt into windows computers. Learn how and start using this beneficial and vital facility.

490 Views
