
Article Categories
- All Categories
-
 Data Structure
-
 Networking
-
 RDBMS
RDBMS
-
 Operating System
-
 Java
Java
-
 MS Excel
-
 iOS
iOS
-
 HTML
HTML
-
 CSS
CSS
-
 Android
-
 Python
-
 C Programming
-
 C++
C++
-
 C#
C#
-
 MongoDB
-
 MySQL
MySQL
-
 Javascript
-
 PHP
PHP
-
 Economics & Finance
How to programmatically take a screenshot on iOS?
In this post we will learn how to take screen shot programmatically in iOS.
We will add on textField where we will change the value, take the screen shot by press of a button and then show the screen shot in an imageView which we will place just below the button itself.
Remember that you can add this functionality on long press or any other gesture, and even save the image if you want. But right now we will just focus on capturing the screen shot and showing it on an image view.
So let’s get started
Step 1 − Open Xcode → New Project → Single View Application → Let’s name it “TakeScreenShot”
Step 2 − Open Main.storyboard add one UITextField, one button and one UIImageView as shown below
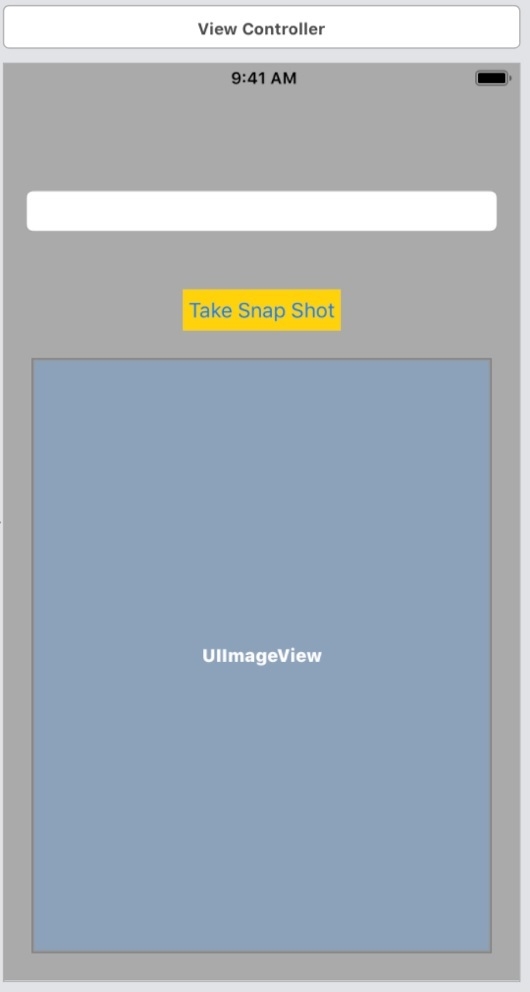
Step 3 − Attach one @IBOutlet for the image view. Name it snapShotImageView. This is the image view where we will sow the captured screen shot.
Step 4 − Add one @IBAction for touchUpInside of ‘Take Snap Shot’ button. Name the function as takeSnapShotClicked.
Step 5 − In viewDidLoad of ViewController class set the border color and width for image the imageView to distinguish it from other part of the view.
self.snapShotImageView.layer.borderColor = UIColor.red.cgColor
self.snapShotImageView.layer.borderWidth = 2.0
Step 6 − We will be using the following method to capture the screenshot.
- Start the graphic context.
- Capture the current context in a variable.
- Int the context variable, render the current views layer.
- Get the image from context variable. Note that the context at this point will contain the screen shot of currently whatever is available on the view.
- We will set the captured image from context to our imageView
- End the graphic context
All of the above we will do in takeSnapShotClicked method. Which now would look like this
@IBAction func takeSnapShotClicked(_ sender: Any) {
   UIGraphicsBeginImageContextWithOptions(self.view.layer.frame.size, false, UIScreen.main.scale);
   guard let context = UIGraphicsGetCurrentContext() else {return }
   self.view.layer.render(in:context)
   self.snapShotImageView.image = UIGraphicsGetImageFromCurrentImageContext()
   UIGraphicsEndImageContext()
}
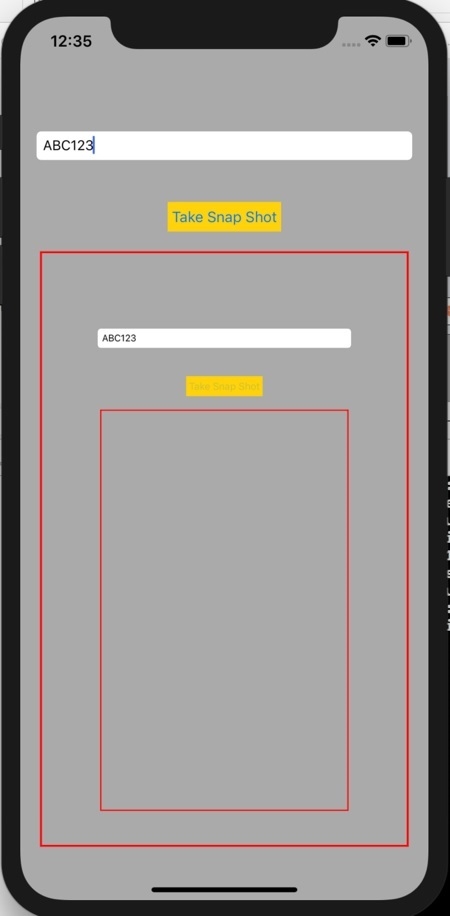
Step 7 − Build and run the project. Click on the take snapshot button. You should see the snapshot in the bottom image view.
1K+ Views
