
Article Categories
- All Categories
-
 Data Structure
-
 Networking
-
 RDBMS
RDBMS
-
 Operating System
-
 Java
Java
-
 MS Excel
-
 iOS
iOS
-
 HTML
HTML
-
 CSS
CSS
-
 Android
-
 Python
-
 C Programming
-
 C++
C++
-
 C#
C#
-
 MongoDB
-
 MySQL
MySQL
-
 Javascript
-
 PHP
PHP
How to design a logo using Canva?
If you are looking to create a logo that represents the face of your company but you don’t have the skills, you can always use Canva. Canva helps you create professional designs in a few minutes. Besides, Canva is free and open to everyone.
To create a logo using Canva, follow these four steps.
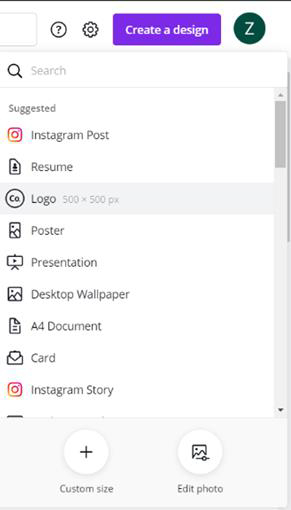
Click ‘create a design’
Go to the homepage of Canva and press the ‘create a design’ button. You will find it on the topmost right corner of your dashboard.
From the drop−down list of options, select the logo.
You will be automatically redirected to the design tab.
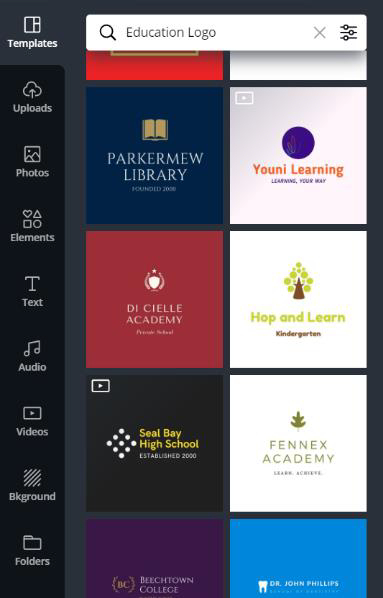
Select a suitable template
This is how your design tab will look like.
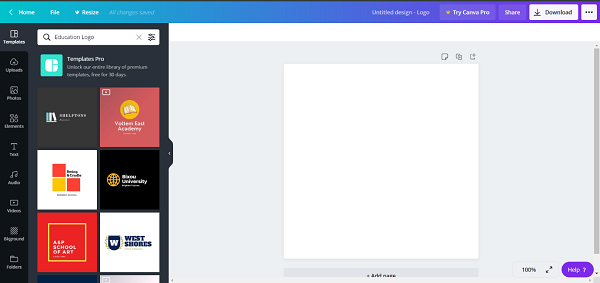
You can either select a template and start editing or create a new design from scratch using texts, images, and elements.
Here we will design a new logo to represent a library. So, we will search for educational templates and select the one most suitable for our use.
Add, edit, or delete text, background, and elements.
A professional logo has one or more of the following features −
Elements, (the most important part)
Text, and
Background
Conventionally, images or photos aren’t added in logos. But it depends on the type of the brand and there is no such rule against it. To keep it simple and professional, better to exclude photos and focus on selecting an element that will represent your brand.
Avoid detailed text because a logo is for providing information. It is the face of an organization.
So, we will edit the text and just add the basic details, like the name and when it was established.
After adding the necessary details, we will add the necessary elements to make the logo appealing.
To add elements, go to the elements tab. Scroll down or search for the element you are looking for. Click on the most suitable elements to add them to your design.
For our logo, we will add a box and replace the book element with another similar element to make our logo look unique.
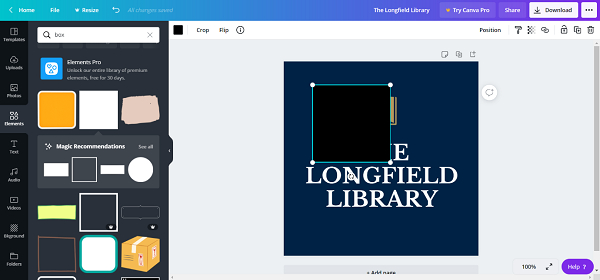
We will use the transparency feature to the box that we add so that the texts and elements have good visibility.
![]()

We will adjust the box, use the left mouse button to drag or send elements backward, forward, front, or back so that all the features are in a proper hierarchy.
Now we will replace the book element with another element to finalize our design.
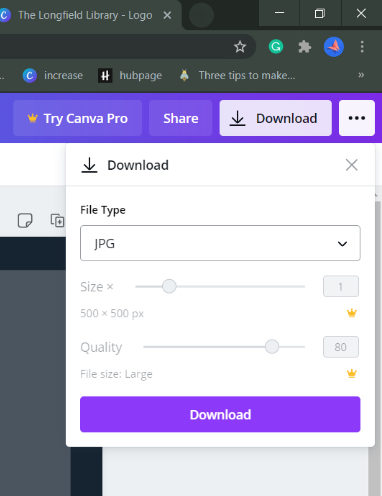
Download your design
After completing the design of your logo, save it to your local file.
All your designs are automatically saved to your account’s local cloud storage so that you can access them in the future. To save your design in your local files, click on download, select the file type you want, and press on the download button of the drop−down list.
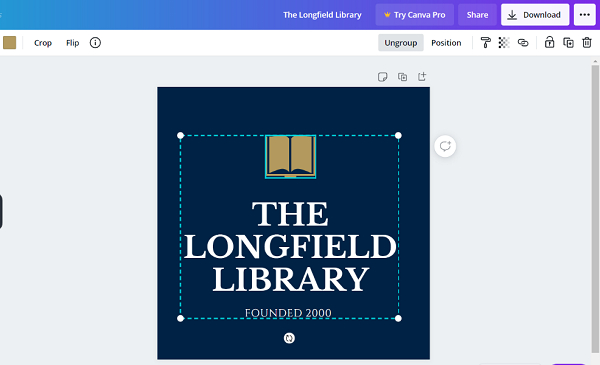
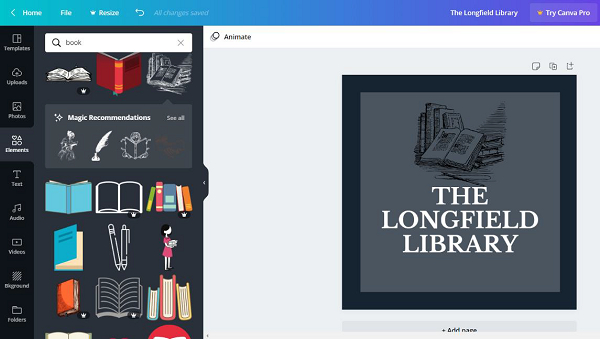
Final Logo Design
This is how the logo we designed looks like.
![]()
1K+ Views
