
Article Categories
- All Categories
-
 Data Structure
-
 Networking
-
 RDBMS
RDBMS
-
 Operating System
-
 Java
Java
-
 MS Excel
-
 iOS
iOS
-
 HTML
HTML
-
 CSS
CSS
-
 Android
-
 Python
-
 C Programming
-
 C++
C++
-
 C#
C#
-
 MongoDB
-
 MySQL
MySQL
-
 Javascript
-
 PHP
PHP
-
 Economics & Finance
How to create Calendar in ReactJS?
In some web applications, we require the user to take a date input. For example, we need to take the user's birth date or any other particular date as input. In such cases, it is a good idea to show the calendar to users and ask them to select the date rather than taking the date input as a string, as users can make mistakes in entering the string.
In this tutorial, we will learn to add the calendar component using the built-in react js libraries or create a calendar component from scratch.
Using the React-calendar Library to Create a Calendar in ReactJS
The ?react-calendar? is a built-in react library allowing us to embed the calendar component in ReactJS. Also, it takes the props to customize the calendar according to our requirements.
Programmers can execute the below command in the terminal to install the ?react-calendar? in the project directory.
npm i react-calendar
Syntax
Users can follow the syntax below to use the calendar component of the ?react-calendar? library.
<Calendar value = {date} />
In the above syntax, we have passed the ?date? variable?s value as a prop to show the selected date. However, we can also pass other props given into the documentation of the ?react-calendar? library.
Example
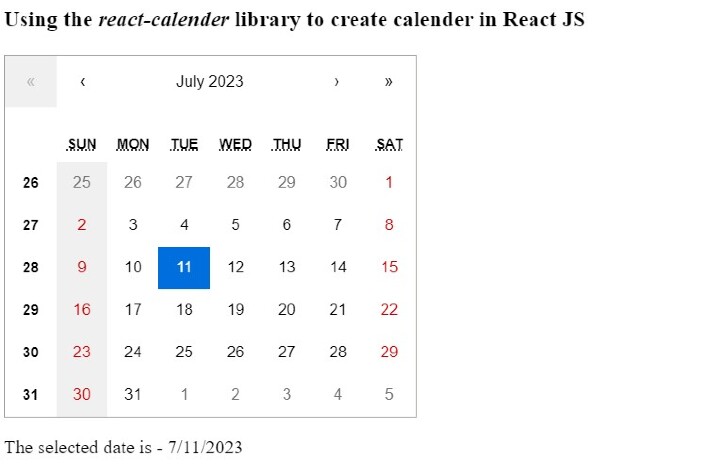
In the example below, we have imported the ?Calendar? component from the ?react-calendar? library. After that, we define the state variable named ?date? to store the selected date. Also, we used the ?calendar? component to show the calendar and passed the ?date? and ?changeValue? functions as a prop. The ?changeValue? function is used to change the value of the selected date.
In the output, users can select the date, month, year, etc.
import React, { useState } from "react";
import Calendar from "react-calendar";
import "react-calendar/dist/Calendar.css";

function App() {
   const [date, changeDate] = useState(new Date());

   function changeValue(val) {
      changeDate(val);
   }

   return (
      <div>
         <h3>
            {" "} Using the <i> react-calender </i> library to create calender in React JS{" "}
         </h3>
         <Calendar onChange = {changeValue} value = {date} />
         <p>The selected date is - {date.toLocaleDateString()}</p>
      </div>
   );
}
export default App;
Output

Example
In the example below, we used some more props with the ?Calendar? component. The ?minDate? and ?maxDate? is used to set the minimum and maximum date selection range, respectively.
The ?showWeekNumbers? shows the week number according to the date selection range, and ?calenderType? is used to change the calendar type according to the locale. The ?tileDisabled? prop is used to disable the selection of the ?Sunday?.
import React, { useState } from "react";
import Calendar from "react-calendar";
import "react-calendar/dist/Calendar.css";

function App() {
   const [date, changeDate] = useState(new Date());

   function changeValue(val) {
      changeDate(val);
   }

   return (
      <div>
         <h3>
            {" "}
            Using the <i> react-calender </i> library to create calender in React
            JS{" "}
         </h3>
         <Calendar
            onChange = {changeValue}
            value = {date}
            minDate = {new Date(2022, 8, 21)} // To set minimum date
            maxDate = {new Date(2025, 12, 22)} // To set maximum date
            showWeekNumbers = {true} // TO show week numbers
            showNeighboringMonth = {true}
            calendarType = "US" // Changing the calender type
            tileDisabled = {({ date }) => date.getDay() === 0} // Disabaling the sunday
         />

         <p>The selected date is - {date.toLocaleDateString()}</p>
      </div>
   );
}

export default App;
Output
Creating the Calendar Component from Scratch
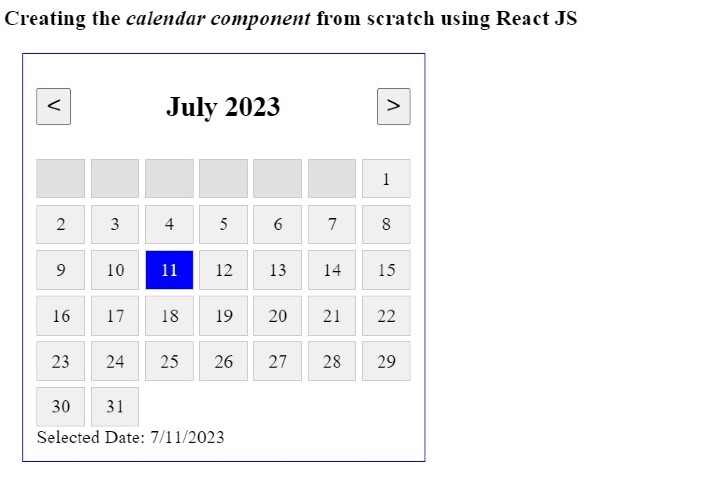
When we require a more customized calendar, creating a calendar from scratch is necessary. In this section, we will use the basic functionality of React to create the calendar component and style it using CSS.
Example
In the example below, we created the calendar component, which allows us to select a specific date. Also, the calendar component contains the previous and next buttons to move to the previous and next month, respectively.
Also, we have written some CSS in the App.CSS file to style the calendar component. Users may follow the below steps to understand the example code.
Step 1 ? Create the ?sDate? state variable to store the selected date.
Step 2 ? Create the findMonthDays() function to find the total days of the current month using the getDate() method.
Step 3 ? Create the findFirstDay() function to find the first day of the current month using the getDay() method.
Step 4 ? Define the changeToPrevMonth() function to change the month to the previous month. It sets the selected date value to the 1st day of the previous month. Similarly, define the changeToNextMonth() function to change the month to the next month.
Step 5 ? Define the handleDateClick() function to change the selected date when users click any day.
Step 6 ? Now, define the showCalendar() function to show the calendar component.
Step 6.1 ? In the showCalendar() function, take the year, month, total month days, and the first day of the selected date.
Step 6.2 ? Define the allDays[] array to store all days into that.
Step 6.3 ? Make iterations equal to the ?fDay? to show an empty box initially.
Step 6.4 ? Then, make total iterations equal to the month days to store the days component into the ?allDays? array. Next, Create a new date using the current day, month, and year, and push it to the array. If the date is selected, add the ?selected? class name component to the day.
Step 6.5 ? Return allDays[] array.
Step 7 ? Write the HTML part to show the calendar component. First, show the previous and next buttons with the month and year in the middle.
Step 8 ? After that, execute the showCalendar() function to show calendar grids.
Step 9 ? At last, show the selected date. Also, write the required CSS code.
Filename ? App.js
import React, { useState } from "react";
import "./App.css";

function App() {
   const [sDate, setsDate] = useState(new Date());

   const findMonthDays = (y, m) => {
      return new Date(y, m + 1, 0).getDate();
   };

   const findFirstDay = (y, m) => {
      return new Date(y, m, 1).getDay();
   };

   const changeToPrevMonth = () => {
      setsDate((pDate) => {
         const pMonth = pDate.getMonth() - 1;
         const pYear = pDate.getFullYear();
         return new Date(pYear, pMonth);
      });
   };

   const changeToNextMonth = () => {
      setsDate((pDate) => {
         const nMonth = pDate.getMonth() + 1;
         const nYear = pDate.getFullYear();
         return new Date(nYear, nMonth);
      });
   };

   const handleDateClick = (date) => {
      setsDate(date);
   };

   const showCalendar = () => {
      const currDate = new Date();
      const y = sDate.getFullYear();
      const m = sDate.getMonth();
      const mDays = findMonthDays(y, m);
      const fDay = findFirstDay(y, m);

      const allDays = [];

      // For empty cells
      for (let p = 0; p < fDay; p++) {
         allDays.push(<div key = {`em-${p}`} className = "box empty"></div>);
      }

      // Show actual days
      for (let d = 1; d <= mDays; d++) {
         const date = new Date(y, m, d);
         const isSelected = sDate && date.toDateString() === sDate.toDateString();

         allDays.push(
            <div
               key = {`d-${d}`}
               className = {`box ${isSelected ? "selected" : ""}`}
               onClick = {() => handleDateClick(date)}
               >
               {d}
            </div>
         );
      }

      return allDays;
   };

   return (
      <div>
      <h3>
         Creating the <i> calendar component </i> from scratch using React JS
      </h3>
      <div className = "main">
         <div className = "header">
            <button onClick = {changeToPrevMonth}> < </button>
            <h2>
               {sDate.toLocaleString("default", {
                  month: "long",
                  year: "numeric",
               })}
            </h2>
            <button onClick = {changeToNextMonth}> > </button>
         </div>
         <div className = "body">{showCalendar()} </div>
            {sDate && (
               <div className = "selected-date">
                  Selected Date: {sDate.toLocaleDateString()}
               </div>
            )}
         </div>
      </div>
   );
}

export default App;
Filename - App.css
.main {
   width: 20rem;
   padding: 0.7rem;
   margin-left: 1rem;
   border: 1px solid blue;
}
.header {
   display: flex;
   margin-bottom: 0.7rem;
   justify-content: space-between;
   align-items: center;
}
.header button {
   font-size: 1.4rem;
   cursor: pointer;
}
.body {
   display: grid;
   grid-template-columns: repeat(7, 1fr);
   gap: 5px;
}
.box {
   height: 2rem;
   background-color: #f0f0f0;
   border: 1px solid #ccc;
   display: flex;
   justify-content: center;
   align-items: center;
   cursor: pointer;
}
.box.empty {
   background-color: #e0e0e0;
   cursor: default;
}
.box.selected {
   background-color: blue;
   color: white;
}
Output
We learned to use the ?react-calendar? library to add the calendar to the web application. Also, we learned to create the calendar component from scratch. However, it contains only the basic features of a calendar, but programmers may add them according to the requirements.

6K+ Views
