
Article Categories
- All Categories
-
 Data Structure
-
 Networking
-
 RDBMS
RDBMS
-
 Operating System
-
 Java
Java
-
 MS Excel
-
 iOS
iOS
-
 HTML
HTML
-
 CSS
CSS
-
 Android
-
 Python
-
 C Programming
-
 C++
C++
-
 C#
C#
-
 MongoDB
-
 MySQL
MySQL
-
 Javascript
-
 PHP
PHP
How to create Price Range Selector in ReactJS?
The price range selector allows us to select two values representing the range. Sometimes, we require to create a range slider to allow users to select a range.
For example, we can allow users to select a minimum and maximum price using the price range selector. We can also show the products by filtering based on the selected minimum and maximum prices.
In this tutorial, we will learn to create a price range selector using various libraries in ReactJS.
Using the material UI to create a range selector
The material UI provides various components we can import into the project and use directly. It also contains the Slider component, which works as a price range selector.
Users should use the below command to install the material Ui in the project.
npm install @mui/material @emotion/react @emotion/styled
Syntax
Users can follow the syntax below to use the material ui library to create a price range selector.
<Slider value={range} onChange={handleChanges} valueLabelDisplay="auto" />
In the above syntax, we have used the Slider component from Material UI to create a range slider.
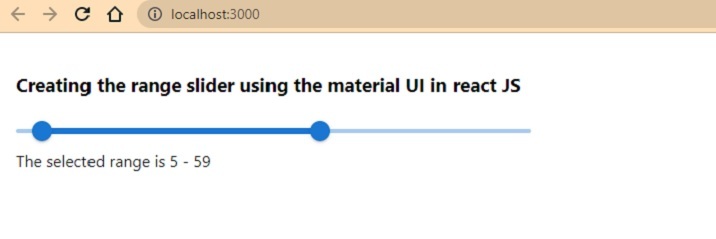
Example 1
In the example below, we have imported the Slider component first. We have passed the value as a prop of the slider component. The value is an array of two values representing the minimum and maximum value on the price range selector.
Also, we invoke the hanldleChange() function to update the price ranges whenever the user changes the range on the slider.
import React from "react";
import Slider from "@mui/material/Slider";
function App() {
   const [range, setRange] = React.useState([5, 30]);
   function handleChanges(event, newValue) {
      setRange(newValue);
   }
   return (
      <div style = {{ width: "32rem", padding: "20px" }}>
         <h3> Creating the range slider using the material UI in react JS </h3>
         <Slider value = {range} onChange = {handleChanges} valueLabelDisplay="auto"/>
         The selected range is {range[0]} - {range[1]}
      </div>
   );
}
export default App;
Output
Use the rsuite library
The rsuite is also a react library with various components like buttons, sliders, range selectors, etc. Here, we will use the RangeSlider component from the rsuite library.
Users can execute the below command in the terminal to install the rsuite library in the app.
npm i resuite
Syntax
Users can follow the syntax below to use the RangeSlider component from the rsuite library.
<RangeSlider defaultValue={[2, 10]} onChange={handleRanges} />
In the above syntax, users can observe how we passed the RangeSlider component's default value.
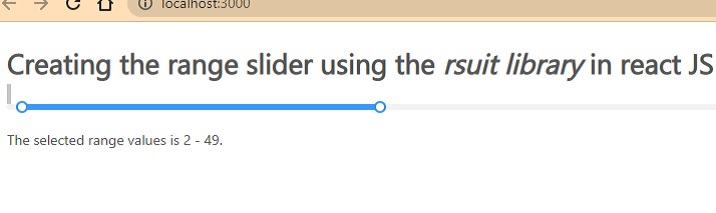
Example 2
We have imported the RangeSlider component from the rsuite library in the example below. Also, we have imported the style from the rsuite to apply some CSS on the RangeSlider.
In the output, users can observe the selected range.
import React from "react";
import RangeSlider from "rsuite/RangeSlider";
import "rsuite/dist/rsuite.css";
import { useState } from "react";
function App() {
   const [firstValue, setFirstValue] = useState(2);
   const [secondValue, setSecondValue] = useState(10);
   function handleRanges(value) {
      setFirstValue(value[0]);
      setSecondValue(value[1]);
   }
   return (
      <div style = {{ width: "50rem", padding: "20px" }}>
         <h3>Creating the range slider using the <i> rsuit library</i> in react JS </h3>
         <br />
         <RangeSlider defaultValue={[2, 10]} onChange={handleRanges} />
         <br />
         The selected range value is {firstValue} - {secondValue}.
      </div>
   );
}
export default App;
Output
We learned two different ways to create a price range selector in ReactJS. The first way is using the Material UI library, and another is using the rsuite library. Users should use any library according to their requirements, as every library contains its features.

6K+ Views
