- Entity Framework - Home
- Entity Framework - Overview
- Entity Framework - Architecture
- Entity F - Environment Setup
- Entity Framework - Database Setup
- Entity Framework - Data Model
- Entity Framework - DbContext
- Entity Framework - Types
- Entity Framework - Relationships
- Entity Framework - Lifecycle
- Entity F - Code First Approach
- Entity F - Model First Approach
- Entity F - Database First Approach
- Entity Framework - DEV Approaches
- Entity F - Database Operations
- Entity Framework - Concurrency
- Entity Framework - Transaction
- Entity Framework - Views
- Entity Framework - Index
- Entity F - Stored Procedures
- Entity F - Disconnected Entities
- Entity F - Table-Valued Function
- Entity Framework - Native SQL
- Entity Framework - Enum Support
- Entity F - Asynchronous Query
- Entity Framework - Persistence
- Entity F - Projection Queries
- Entity F - Command Logging
- Entity F - Command Interception
- Entity Framework - Spatial Data Type
- Entity Framework - Inheritance
- Entity Framework - Migration
- Entity Framework - Eager Loading
- Entity Framework - Lazy Loading
- Entity Framework - Explicit Loading
- Entity Framework - Validation
- Entity Framework - Track Changes
- Entity Framework - Colored Entities
- Entity F - Code First Approach
- Entity Framework - First Example
- Entity Framework - Data Annotations
- Entity Framework - Fluent API
- Entity Framework - Seed Database
- Entity F - Code First Migration
- Entity F - Multiple DbContext
- Entity F - Nested Entity Types
- Entity Framework - Quick Guide
- Entity Framework - Useful Resources
- Entity Framework - Bulk Extensions
- Entity Framework - Discussion
Entity Framework - Model First Approach
In this chapter, let us learn how to create an entity data model in the designer using the workflow referred to as Model First.
Model First is great for when you're starting a new project where the database doesn't even exist yet.
The model is stored in an EDMX file and can be viewed and edited in the Entity Framework Designer.
In Model First, you define your model in an Entity Framework designer then generate SQL, which will create database schema to match your model and then you execute the SQL to create the schema in your database.
The classes that you interact with in your application are automatically generated from the EDMX file.
Following is a simple example of creating a new console project using Model First approach.
Step 1 − Open Visual Studio and select File → New → Project
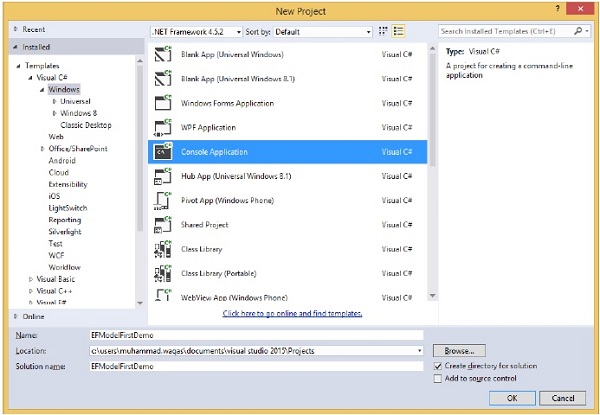
Step 2 − Select Installed → Templates → Visual C# → Windows from left pane and then in middle pane, select Console Application.
Step 3 − Enter EFModelFirstDemo in the Name field.
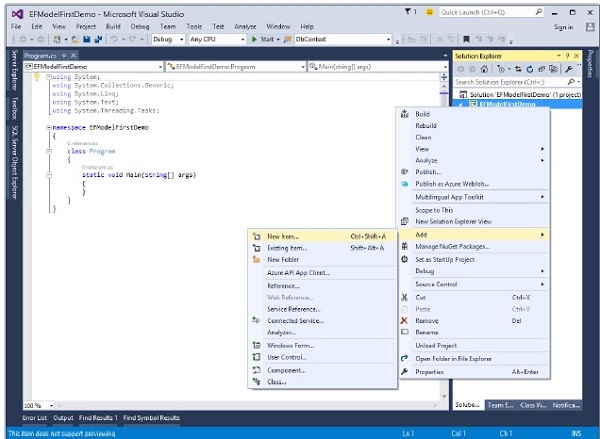
Step 4 − To create model, first right-click on your console project in solution explorer and select Add → New Items
The following dialog will open.
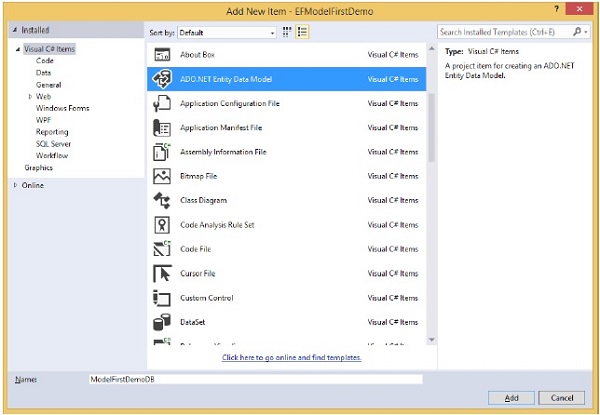
Step 5 − Select ADO.NET Entity Data Model from middle pane and enter name ModelFirstDemoDB in the Name field.
Step 6 − Click Add button which will launch the Entity Data Model Wizard dialog.
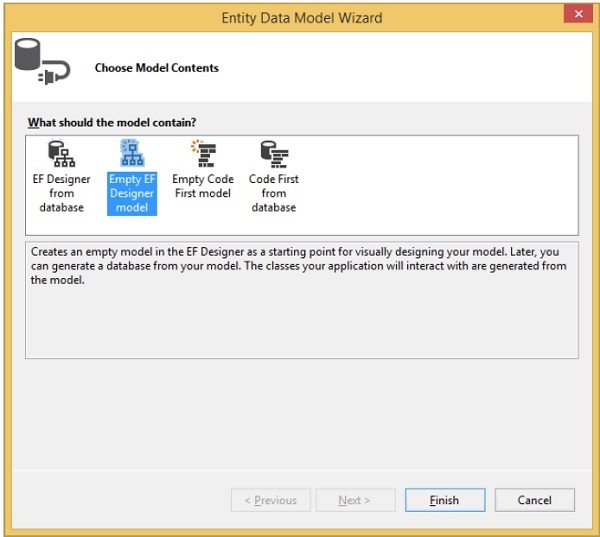
Step 7 − Select Empty EF Designer model and click Next button. The Entity Framework Designer opens with a blank model. Now we can start adding entities, properties and associations to the model.
Step 8 − Right-click on the design surface and select Properties. In the Properties window, change the Entity Container Name to ModelFirstDemoDBContext.
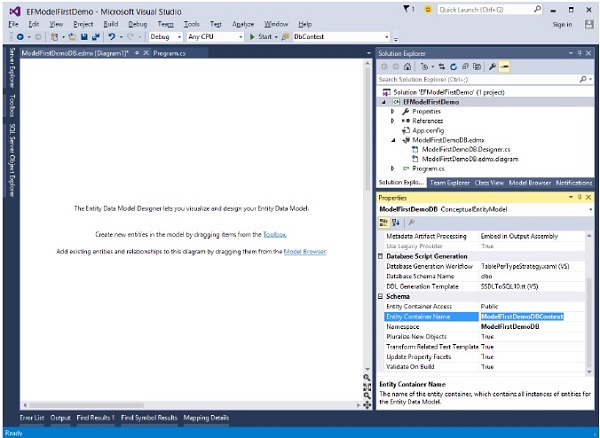
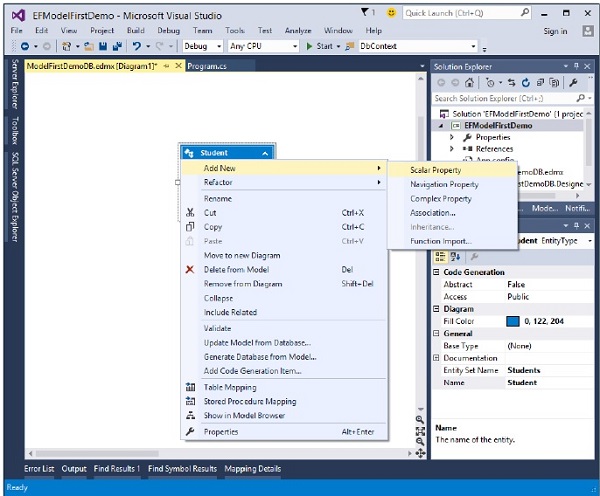
Step 9 − Right-click on the design surface and select Add New → Entity
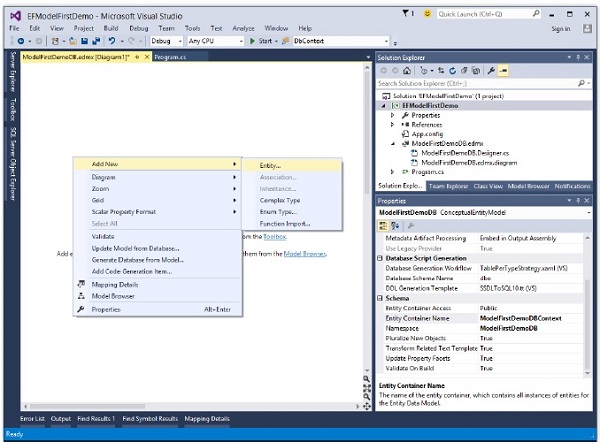
Add Entity dialog will open as shown in the following image.
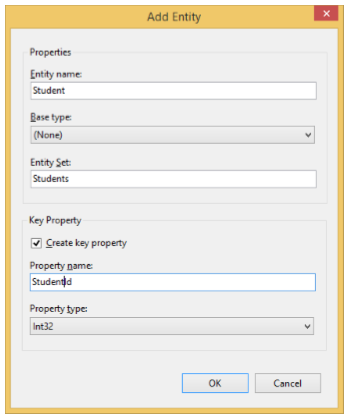
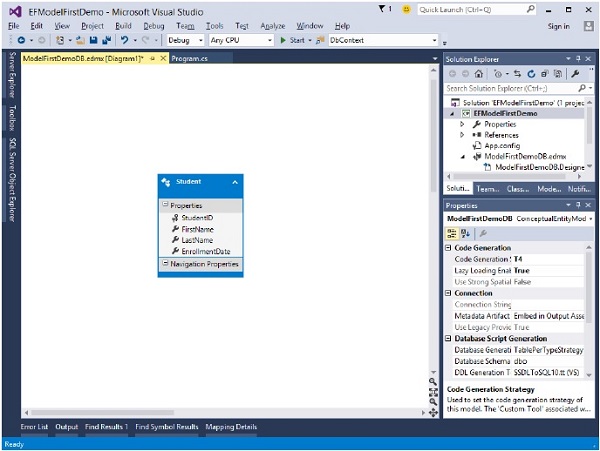
Step 10 − Enter Student as entity name and Student Id as property name and click Ok.
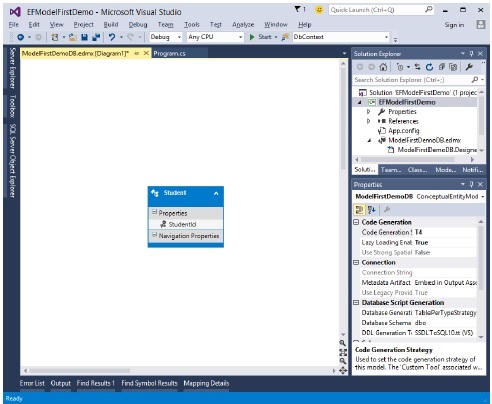
Step 11 − Right-click on the new entity on the design surface and select Add New → Scalar Property, enter Name as the name of the property.
Step 12 − Enter FirstName and then add another two scalar properties such as LastName and EnrollmentDate.
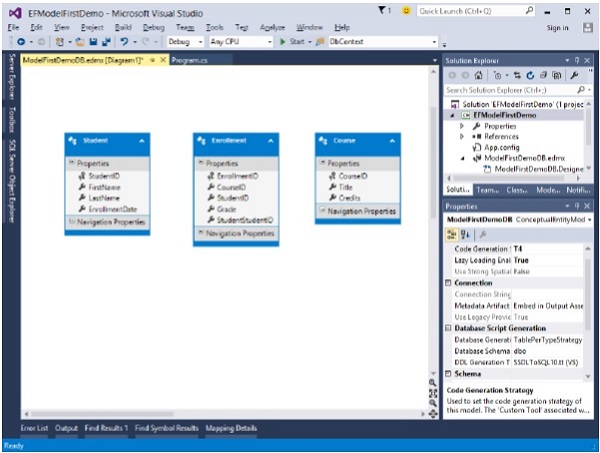
Step 13 − Add two more Entities Course and Enrollment by following all the steps mentioned above and also add some Scalar properties as shown in the following steps.
Step 14 − We have three entities in Visual Designer, lets add some association or relationship between them.
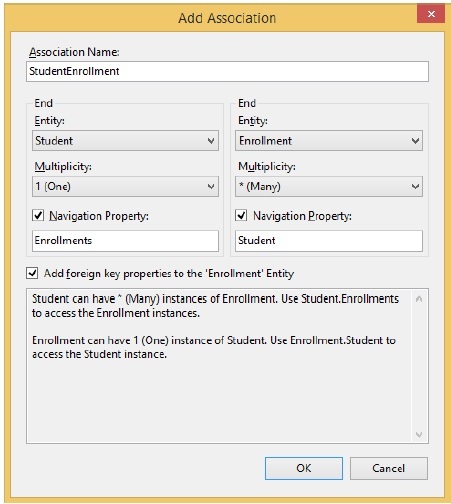
Step 15 − Right-click on the design surface and select Add New → Association
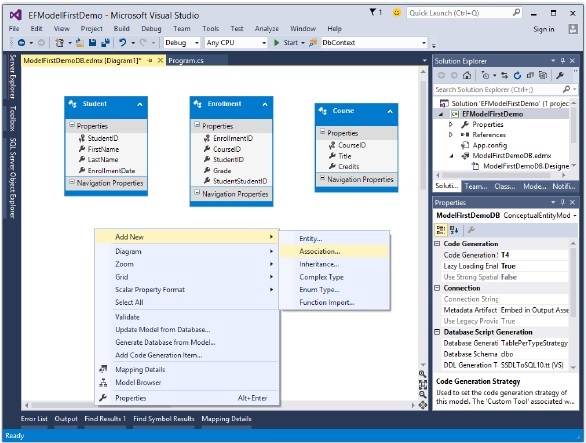
Step 16 − Make one end of the relationship point to Student with a multiplicity of one and the other end point to Enrollment with a multiplicity of many.

Step 17 − This means that a Student has many Enrollments and Enrollment belongs to one Student.
Step 18 − Ensure the Add foreign key properties to 'Post' Entity box is checked and click OK.
Step 19 − Similarly, add one more association between Course and Enrollment.
Step 20 − Your data model will look like the following screen after adding associations between entities.
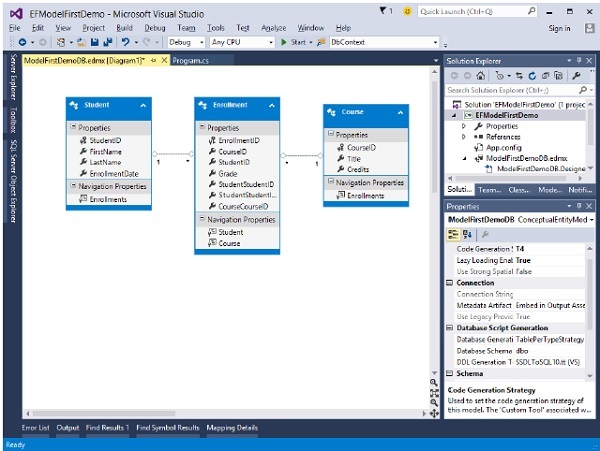
We now have a simple model that we can generate a database from and use to read and write data. Let's go ahead and generate the database.
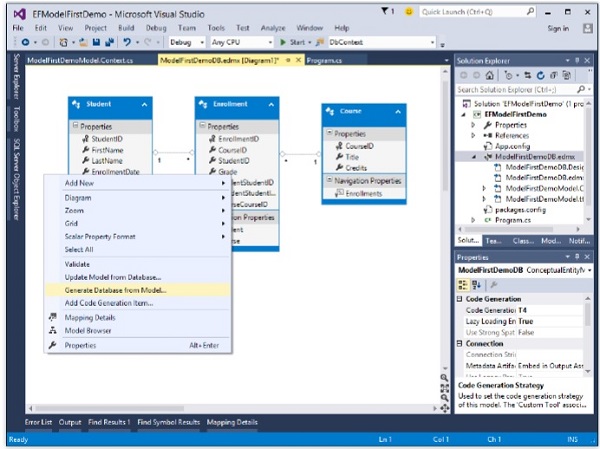
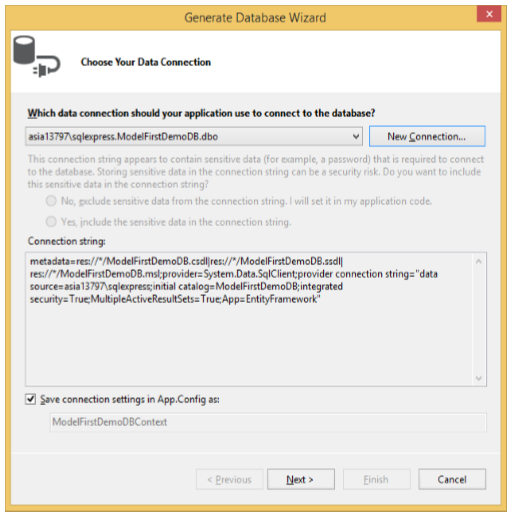
Step 1 − Right-click on the design surface and select Generate Database from Model
Step 2 − You can select existing database or create a new connection by clicking on New Connection
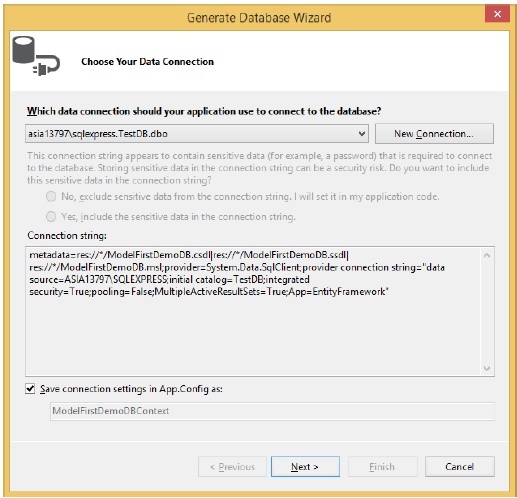
Step 3 − To create new Database, click on New Connection
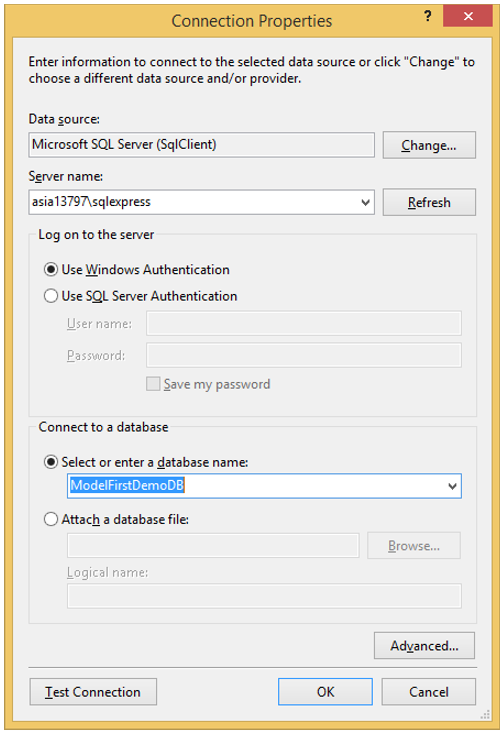
Step 4 − Enter Server name and database name.
Step 5 − Click Next.
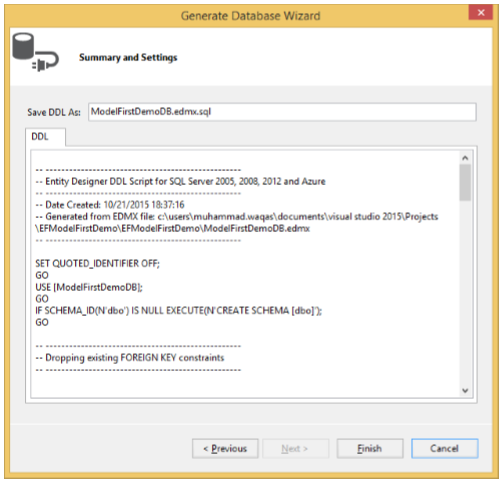
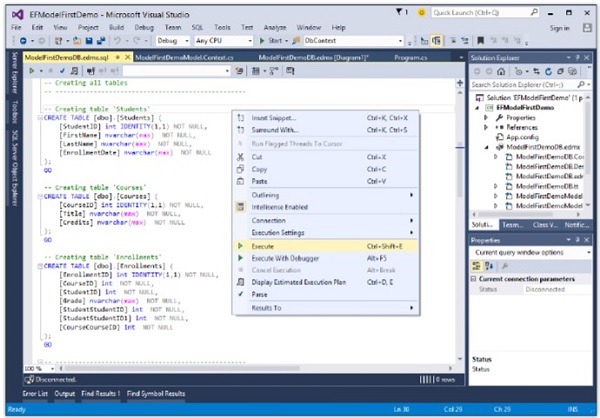
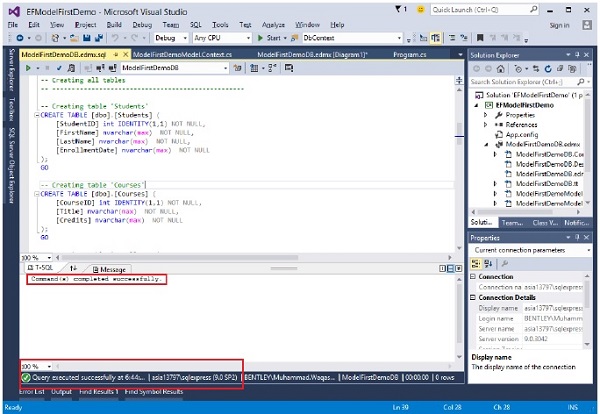
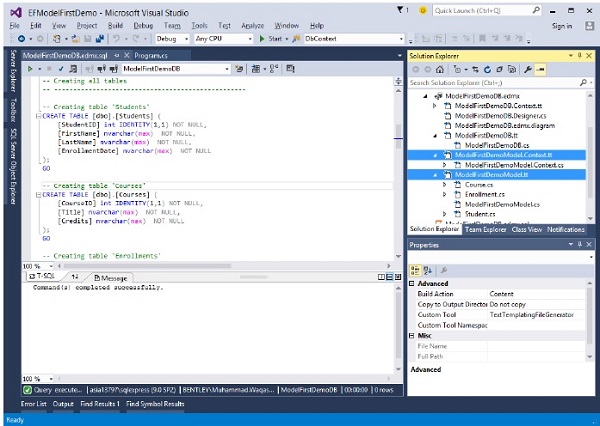
Step 6 − Click Finish. This will add *.edmx.sql file in the project. You can execute DDL scripts in Visual Studio by opening .sql file, then right-click and select Execute.
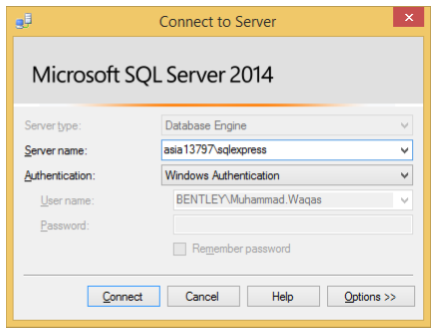
Step 7 − The following dialog will be displayed to connect to database.
Step 8 − On successful execution, you will see the following message.
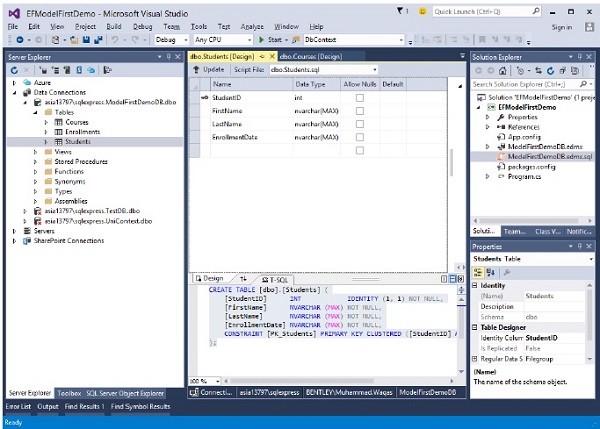
Step 9 − Go to the server explorer, you will see that the database is created with three tables which are specified.
Next, we need to swap our model to generate code that makes use of the DbContext API.
Step 1 − Right-click on an empty spot of your model in the EF Designer and select Add Code Generation Item
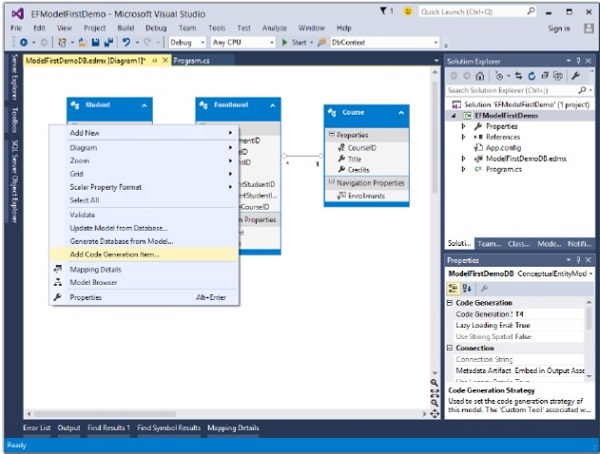
You will see that the following Add New Item dialog opens.
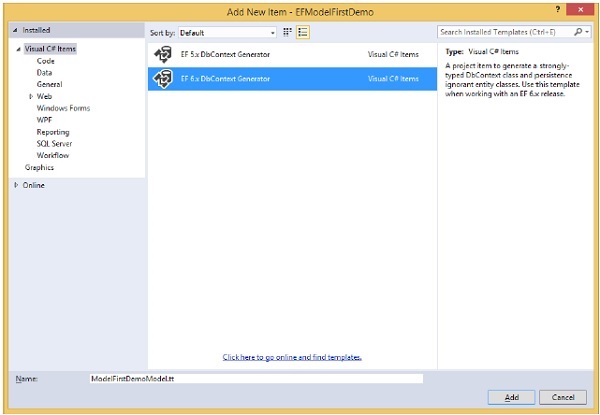
Step 2 − Select EF 6.x DbContext Generator in middle pane and enter ModelFirstDemoModel in Name field.
Step 3 − You will see in your solution explorer that ModelFirstDemoModel.Context.tt and ModelFirstDemoModel.tt templates are generated.
The ModelFirstDemoModel.Context generates the DbCcontext and the object sets that you can return and use for querying, say for context, Students and Courses etc.
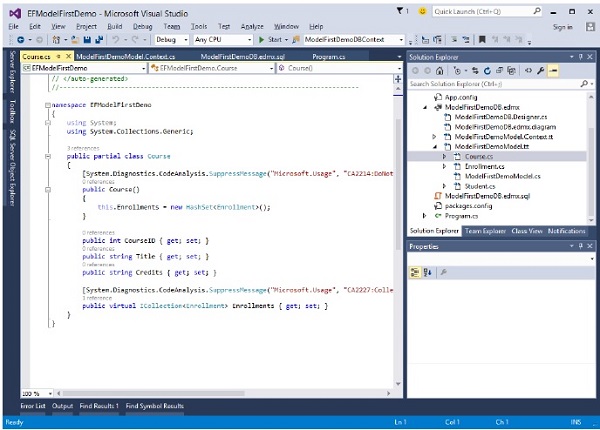
The other template deals with all the types Student, Courses etc. Following is the Student class, which is generated automatically from the Entity Model.
Following is the C# code in which some data are entered and retrieved from database.
using System;
using System.Linq;

namespace EFModelFirstDemo {

   class Program {

      static void Main(string[] args) {

         using (var db = new ModelFirstDemoDBContext()) {

            // Create and save a new Student

            Console.Write("Enter a name for a new Student: ");
            var firstName = Console.ReadLine();

            var student = new Student {
               StudentID = 1,
               FirstName = firstName
            };

            db.Students.Add(student);
            db.SaveChanges();

            var query = from b in db.Students
               orderby b.FirstName select b;

            Console.WriteLine("All student in the database:");

            foreach (var item in query) {
               Console.WriteLine(item.FirstName);
            }

            Console.WriteLine("Press any key to exit...");
            Console.ReadKey();
         }
      }
   }
}
When the above code is executed, you will receive the following output −
Enter a name for a new Student:
Ali Khan
All student in the database:
Ali Khan
Press any key to exit...
We recommend you to execute the above example in a step-by-step manner for better understanding.
