- Entity Framework - Home
- Entity Framework - Overview
- Entity Framework - Architecture
- Entity F - Environment Setup
- Entity Framework - Database Setup
- Entity Framework - Data Model
- Entity Framework - DbContext
- Entity Framework - Types
- Entity Framework - Relationships
- Entity Framework - Lifecycle
- Entity F - Code First Approach
- Entity F - Model First Approach
- Entity F - Database First Approach
- Entity Framework - DEV Approaches
- Entity F - Database Operations
- Entity Framework - Concurrency
- Entity Framework - Transaction
- Entity Framework - Views
- Entity Framework - Index
- Entity F - Stored Procedures
- Entity F - Disconnected Entities
- Entity F - Table-Valued Function
- Entity Framework - Native SQL
- Entity Framework - Enum Support
- Entity F - Asynchronous Query
- Entity Framework - Persistence
- Entity F - Projection Queries
- Entity F - Command Logging
- Entity F - Command Interception
- Entity Framework - Spatial Data Type
- Entity Framework - Inheritance
- Entity Framework - Migration
- Entity Framework - Eager Loading
- Entity Framework - Lazy Loading
- Entity Framework - Explicit Loading
- Entity Framework - Validation
- Entity Framework - Track Changes
- Entity Framework - Colored Entities
- Entity F - Code First Approach
- Entity Framework - First Example
- Entity Framework - Data Annotations
- Entity Framework - Fluent API
- Entity Framework - Seed Database
- Entity F - Code First Migration
- Entity F - Multiple DbContext
- Entity F - Nested Entity Types
- Entity Framework - Quick Guide
- Entity Framework - Useful Resources
- Entity Framework - Bulk Extensions
- Entity Framework - Discussion
Entity Framework - Enum Support
In Entity Framework, this feature will allow you to define a property on a domain class that is an enum type and map it to a database column of an integer type. Entity Framework will then convert the database value to and from the relevant enum as it queries and saves data.
Enumerated types have all sorts of benefits when working with properties that have a fixed number of responses.
The security and reliability of an application both increase when you use enumerations.
Enumeration makes it much harder for the user to make mistakes, and issues such as injection attacks are nonexistent.
In Entity Framework, an enumeration can have the following underlying types −
- Byte
- Int16
- Int32
- Int64
- SByte
The default underlying type of the enumeration elements is int.
By default, the first enumerator has the value 0, and the value of each successive enumerator is increased by 1.
Lets take a look at the following example in which we will be creating an entity in designer and then will add some properties.
Step 1 − Create new project from File → New → Project menu option.
Step 2 − In the left pane, select the Console Application.
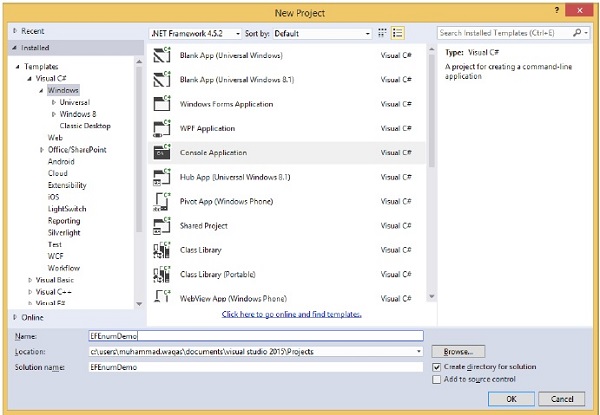
Step 3 − Enter EFEnumDemo as the name of the project and click OK.
Step 4 − Right-click on the project name in Solution Explorer and select Add → New Item menu option.
Step 5 − Select ADO.NET Entity Data Model in the Templates pane.
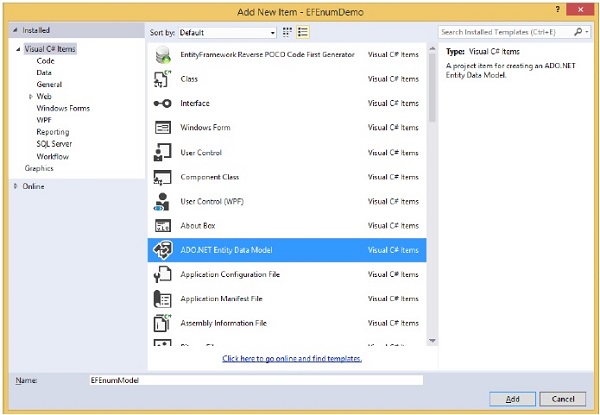
Step 6 − Enter EFEnumModel.edmx for the file name, and then click Add.
Step 7 − On the Entity Data Model Wizard page, select Empty EF designer Model.
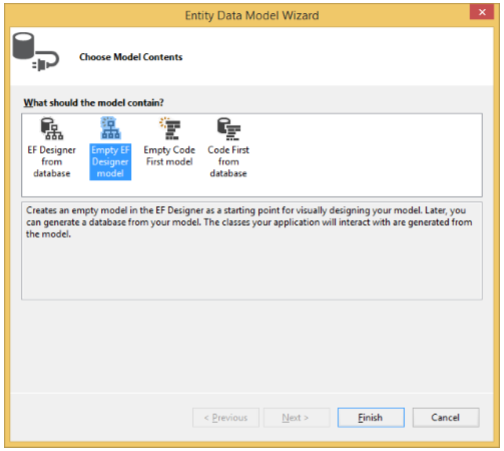
Step 8 − Click Finish
Step 9 − Then right click on designer window and select Add → Entity.
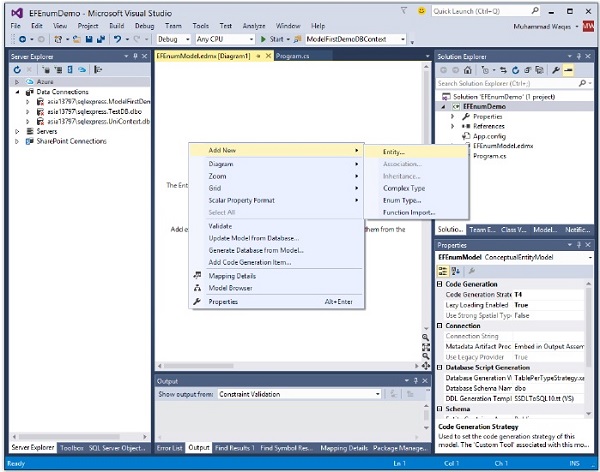
The New Entity dialog box appears as shown in the following image.
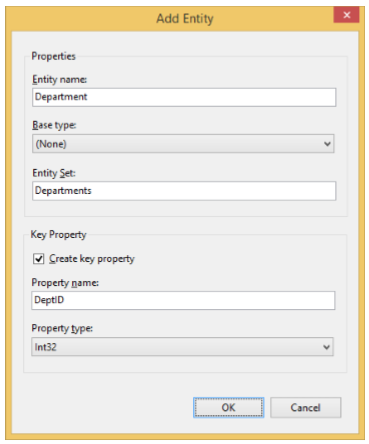
Step 10 − Enter Department as an Entity name and DeptID as a property name, leave the Property type as Int32 and click OK.
Step 11 − Right click the entity and select Add New → Scalar Property.

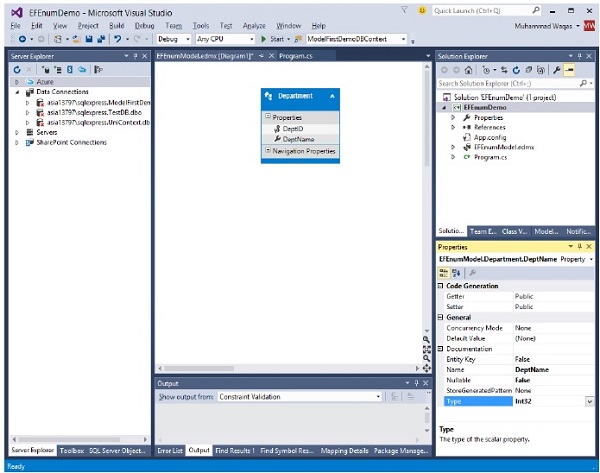
Step 12 − Rename the new property to DeptName.
Step 13 − Change the type of the new property to Int32 (by default, the new property is of String type).
Step 14 − To change the type, open the Properties window and change the Type property to Int32.
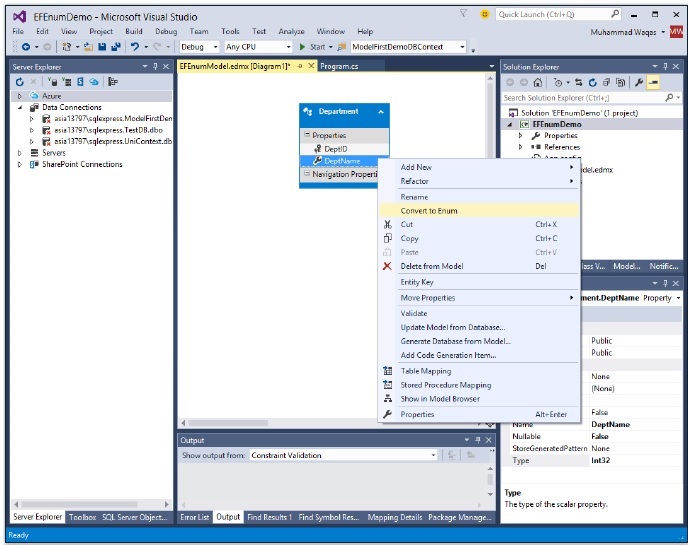
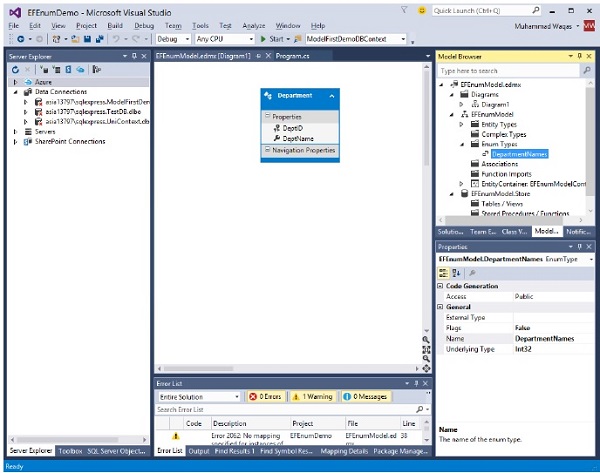
Step 15 − In the Entity Framework Designer, right click the Name property, select Convert to enum.
Step 16 − In the Add Enum Type dialog box, enter DepartmentNames for the Enum Type Name, change the Underlying Type to Int32, and then add the following members to the type: Physics, Chemistry, Computer, and Economics.
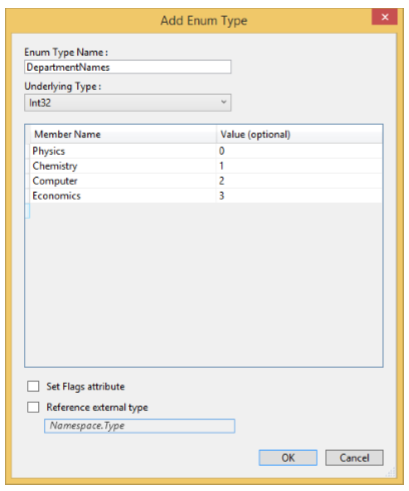
Step 17 − Click Ok.
If you switch to the Model Browser window, you will see that the type was also added to the Enum Types node.
Lets generate database from model by following all the steps mentioned in Model First approach chapter.
Step 1 − Right click Entity Designer surface and select Generate Database from Model.
The Choose Your Data Connection Dialog Box of the Generate Database Wizard is displayed.
Step 2 − Click the New Connection button.
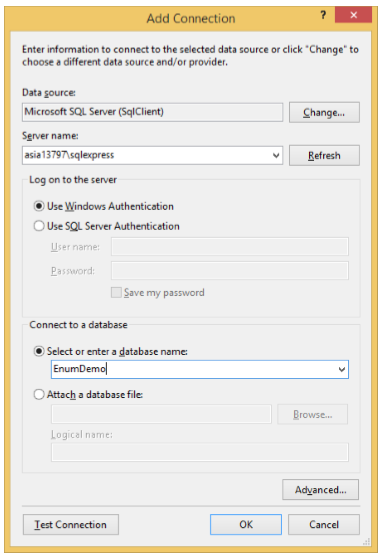
Step 3 − Enter the server name and EnumDemo for the database and click OK.
Step 4 − A dialog asking if you want to create a new database will pop up, click Yes.
Step 5 − Click Next and the Create Database Wizard generates data definition language (DDL) for creating a database. Now click Finish.
Step 6 − Right-click on T-SQL Editor and select Execute.
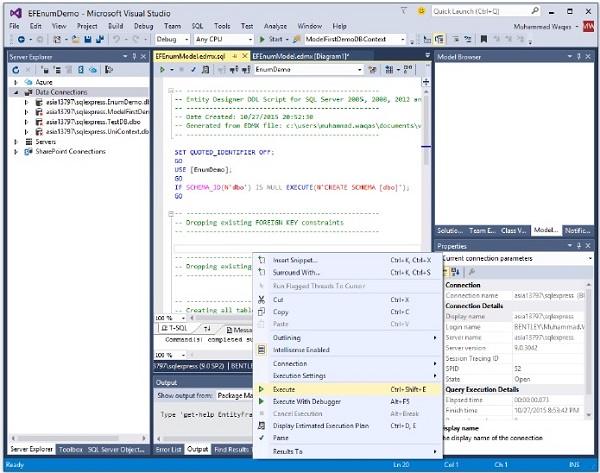
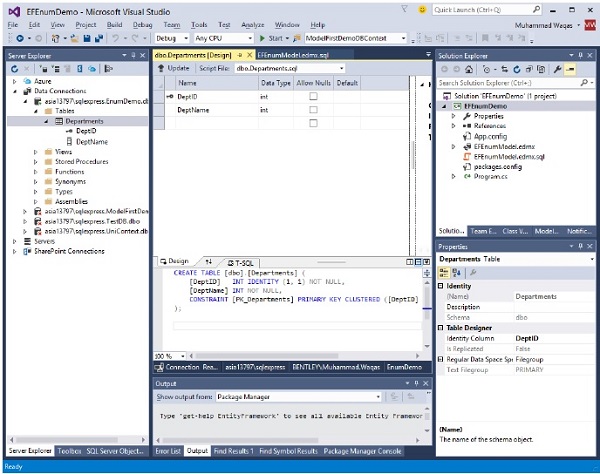
Step 7 − To view the generated schema, right click on the database name in SQL Server Object Explorer and select Refresh.
You will see the Departments table in the database.
Lets take a look at the following example in which some new Department objects to the context are added and saved. And then retrieve the Computer department.
class Program {

   static void Main(string[] args) {

      using (var context = new EFEnumModelContainer()) {

         context.Departments.Add(new Department { DeptName = DepartmentNames.Physics});
         context.Departments.Add(new Department { DeptName = DepartmentNames.Computer});
         context.Departments.Add(new Department { DeptName = DepartmentNames.Chemistry});
         context.Departments.Add(new Department { DeptName = DepartmentNames.Economics});

         context.SaveChanges();

         var department = (
            from d in context.Departments
            where d.DeptName == DepartmentNames.Computer
            select d
         ).FirstOrDefault();

         Console.WriteLine(
            "Department ID: {0}, Department Name: {1}",
               department.DeptID, department.DeptName
         );

         Console.ReadKey();
      }
   }
}
When the above code is executed, you will receive the following output −
Department ID: 2, Department Name: Computer
We recommend that you execute the above example in a step-by-step manner for better understanding.
