- Entity Framework - Home
- Entity Framework - Overview
- Entity Framework - Architecture
- Entity F - Environment Setup
- Entity Framework - Database Setup
- Entity Framework - Data Model
- Entity Framework - DbContext
- Entity Framework - Types
- Entity Framework - Relationships
- Entity Framework - Lifecycle
- Entity F - Code First Approach
- Entity F - Model First Approach
- Entity F - Database First Approach
- Entity Framework - DEV Approaches
- Entity F - Database Operations
- Entity Framework - Concurrency
- Entity Framework - Transaction
- Entity Framework - Views
- Entity Framework - Index
- Entity F - Stored Procedures
- Entity F - Disconnected Entities
- Entity F - Table-Valued Function
- Entity Framework - Native SQL
- Entity Framework - Enum Support
- Entity F - Asynchronous Query
- Entity Framework - Persistence
- Entity F - Projection Queries
- Entity F - Command Logging
- Entity F - Command Interception
- Entity Framework - Spatial Data Type
- Entity Framework - Inheritance
- Entity Framework - Migration
- Entity Framework - Eager Loading
- Entity Framework - Lazy Loading
- Entity Framework - Explicit Loading
- Entity Framework - Validation
- Entity Framework - Track Changes
- Entity Framework - Colored Entities
- Entity F - Code First Approach
- Entity Framework - First Example
- Entity Framework - Data Annotations
- Entity Framework - Fluent API
- Entity Framework - Seed Database
- Entity F - Code First Migration
- Entity F - Multiple DbContext
- Entity F - Nested Entity Types
- Entity Framework - Quick Guide
- Entity Framework - Useful Resources
- Entity Framework - Bulk Extensions
- Entity Framework - Discussion
Entity Framework - Multiple DbContext
In this chapter, we will be learning how to migrate changes into the database when there are multiple DbContext classes in the application.
- Multiple DbContext was first introduced in Entity Framework 6.0.
- Multiple context classes may belong to a single database or two different databases.
In our example, we will define two Context classes for the same database. In the following code, there are two DbContext classes for Student and Teacher.
public class Student {
   public int ID { get; set; }
   public string LastName { get; set; }
   public string FirstMidName { get; set; }
   public DateTime EnrollmentDate { get; set; }
}

public class MyStudentContext : DbContext {
   public MyStudentContext() : base("UniContextDB") {}
   public virtual DbSet<Student> Students { get; set; }
}

public class Teacher {
   public int ID { get; set; }
   public string LastName { get; set; }
   public string FirstMidName { get; set; }
   public DateTime HireDate { get; set; }
}

public class MyTeacherContext : DbContext {
   public MyTeacherContext() : base("UniContextDB") {}
   public virtual DbSet<Teacher> Teachers { get; set; }
}
As you can see in the above code, there are two models called Student and Teacher. Each one is associated with a particular corresponding context class, i.e., Student is associated with MyStudentContext and Teacher is associated with MyTeacherContext.
Here is the basic rule to migrate changes in database, when there are multiple Context classes within the same project.
enable-migrations -ContextTypeName <DbContext-Name-with-Namespaces> MigrationsDirectory:<Migrations-Directory-Name>
Add-Migration -configuration <DbContext-Migrations-Configuration-Class-withNamespaces> <Migrations-Name>
Update-Database -configuration <DbContext-Migrations-Configuration-Class-withNamespaces> -Verbose
Lets enable migration for MyStudentContext by executing the following command in Package Manager Console.
PM→ enable-migrations -ContextTypeName:EFCodeFirstDemo.MyStudentContext
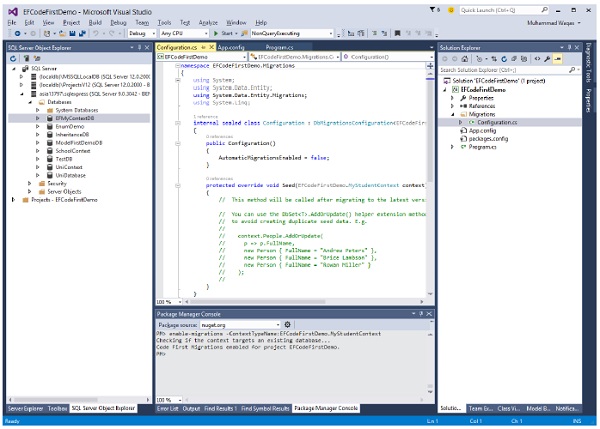
Once it is executed, we will add the model in the migration history and for that, we have to fire add-migration command in the same console.
PM→ add-migration -configuration EFCodeFirstDemo.Migrations.Configuration Initial
Let us now add some data into Students and Teachers tables in the database.
static void Main(string[] args) {

   using (var context = new MyStudentContext()) {

      //// Create and save a new Students
      Console.WriteLine("Adding new students");

      var student = new Student {
         FirstMidName = "Alain",
         LastName = "Bomer",
         EnrollmentDate = DateTime.Parse(DateTime.Today.ToString())
         //Age = 24
      };

      context.Students.Add(student);

      var student1 = new Student {
         FirstMidName = "Mark",
         LastName = "Upston",
         EnrollmentDate = DateTime.Parse(DateTime.Today.ToString())
         //Age = 30
      };

      context.Students.Add(student1);
      context.SaveChanges();

      // Display all Students from the database
      var students = (from s in context.Students orderby s.FirstMidName
         select s).ToList<Student>();

      Console.WriteLine("Retrieve all Students from the database:");

      foreach (var stdnt in students) {
         string name = stdnt.FirstMidName + " " + stdnt.LastName;
         Console.WriteLine("ID: {0}, Name: {1}", stdnt.ID, name);
      }

      Console.WriteLine("Press any key to exit...");
      Console.ReadKey();
   }

   using (var context = new MyTeacherContext()) {

      //// Create and save a new Teachers
      Console.WriteLine("Adding new teachers");

      var student = new Teacher {
         FirstMidName = "Alain",
         LastName = "Bomer",
         HireDate = DateTime.Parse(DateTime.Today.ToString())
         //Age = 24
      };

      context.Teachers.Add(student);

      var student1 = new Teacher {
         FirstMidName = "Mark",
         LastName = "Upston",
         HireDate = DateTime.Parse(DateTime.Today.ToString())
         //Age = 30
      };

      context.Teachers.Add(student1);
      context.SaveChanges();

      // Display all Teachers from the database
      var teachers = (from t in context.Teachers orderby t.FirstMidName
         select t).ToList<Teacher>();

      Console.WriteLine("Retrieve all teachers from the database:");

      foreach (var teacher in teachers) {
         string name = teacher.FirstMidName + " " + teacher.LastName;
         Console.WriteLine("ID: {0}, Name: {1}", teacher.ID, name);
      }

      Console.WriteLine("Press any key to exit...");
      Console.ReadKey();
   }
}
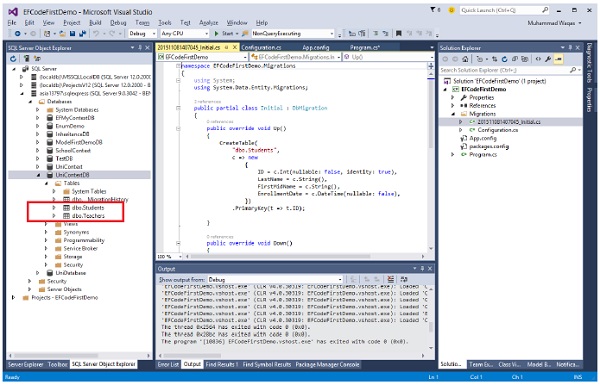
When the above code is executed, you will see that two different tables are created for two different models as shown in the following image.
We recommend that you execute the above example in a step-by-step manner for better understanding.
