- Entity Framework - Home
- Entity Framework - Overview
- Entity Framework - Architecture
- Entity F - Environment Setup
- Entity Framework - Database Setup
- Entity Framework - Data Model
- Entity Framework - DbContext
- Entity Framework - Types
- Entity Framework - Relationships
- Entity Framework - Lifecycle
- Entity F - Code First Approach
- Entity F - Model First Approach
- Entity F - Database First Approach
- Entity Framework - DEV Approaches
- Entity F - Database Operations
- Entity Framework - Concurrency
- Entity Framework - Transaction
- Entity Framework - Views
- Entity Framework - Index
- Entity F - Stored Procedures
- Entity F - Disconnected Entities
- Entity F - Table-Valued Function
- Entity Framework - Native SQL
- Entity Framework - Enum Support
- Entity F - Asynchronous Query
- Entity Framework - Persistence
- Entity F - Projection Queries
- Entity F - Command Logging
- Entity F - Command Interception
- Entity Framework - Spatial Data Type
- Entity Framework - Inheritance
- Entity Framework - Migration
- Entity Framework - Eager Loading
- Entity Framework - Lazy Loading
- Entity Framework - Explicit Loading
- Entity Framework - Validation
- Entity Framework - Track Changes
- Entity Framework - Colored Entities
- Entity F - Code First Approach
- Entity Framework - First Example
- Entity Framework - Data Annotations
- Entity Framework - Fluent API
- Entity Framework - Seed Database
- Entity F - Code First Migration
- Entity F - Multiple DbContext
- Entity F - Nested Entity Types
- Entity Framework - Quick Guide
- Entity Framework - Useful Resources
- Entity Framework - Bulk Extensions
- Entity Framework - Discussion
Entity Framework - Environment Setup
Whats New in Entity Framework 6?
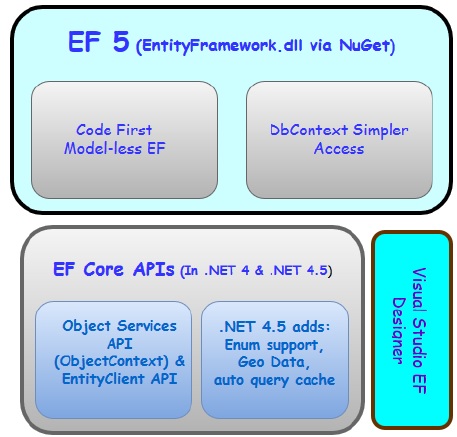
Framework has a complex API that lets you have granular control over everything from its modeling to its runtime behavior. Part of Entity Framework 5 lives inside of .NET. And another part of it lives inside of an additional assembly that's distributed using NuGet.
The core functionality of Entity Framework is built into the .NET Framework.
The Code First support, that's what lets Entity Framework use classes in lieu of a visual model, and a lighter way API for interacting with EF are in the NuGet package.
The core is what provides the querying, change tracking and all of the transformation from your queries to SQL queries as well as from data return into the objects.
You can use the EF 5 NuGet package with both .NET 4 and with .NET 4.5.
One big point of confusion - .NET 4.5 added support for enums and spatial data to the core Entity Framework APIs, which means if you're using EF 5 with .NET 4, you won't get these new features. You'll only get them when combining EF5 with .NET 4.5.
Let us now take a look at Entity Framework 6. The core APIs which were inside of .NET in Entity Framework 6 are now a part of NuGet package.

It means −
All of the Entity Framework lives insides this assembly that's distributed by NuGet
You won't be dependent on .NET to provide specific features like the Entity Framework enum support and special data support.
You'll see that one of the features of EF6 is that it supports enums and spatial data for .NET 4
To start working on Entity Framework you need to install the following development tools −
- Visual Studio 2013 or above
- SQL Server 2012 or above
- Entity Framework updates from NuGet Package
Microsoft provides a free version of visual studio which also contains SQL Server and it can be downloaded from www.visualstudio.com.
Installation
Step 1 − Once downloading is complete, run the installer. The following dialog will be displayed.
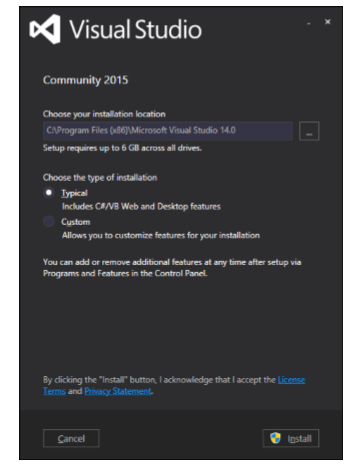
Step 2 − Click on the Install button and it will start the installation process.

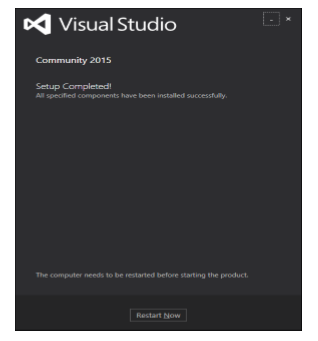
Step 3 − Once the installation process is completed successfully, you will see the following dialog. Close this dialog and restart your computer if required.
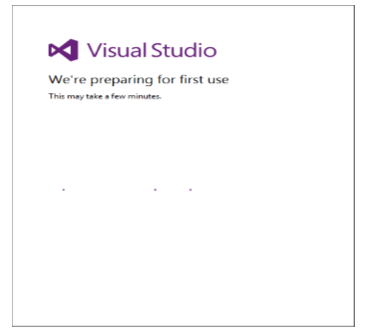
Step 4 − Open Visual Studio from start Menu which will open the following dialog. It will be a while for the first time for preparation.
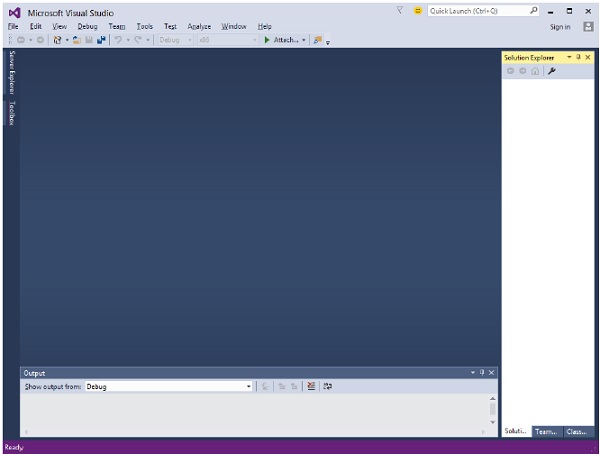
Step 5 − Once all is done you will see the main window of Visual studio.
Lets create a new project from File → New → Project
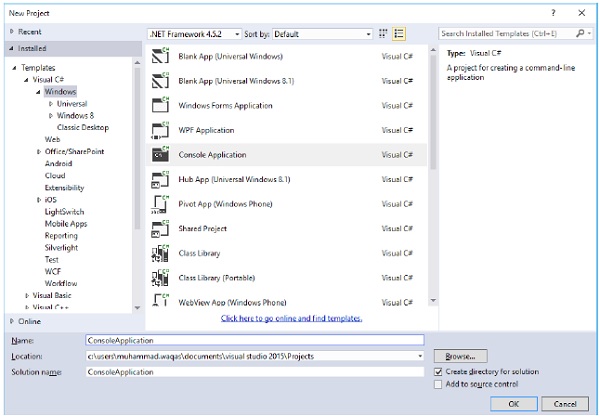
Step 1 − Select Console Application and click OK button.
Step 2 − In solution Explorer, right-click on your project.
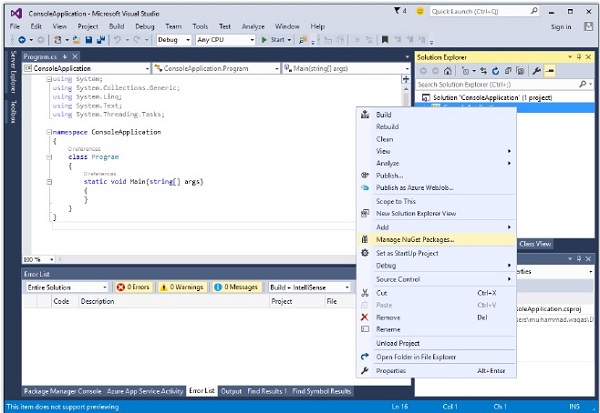
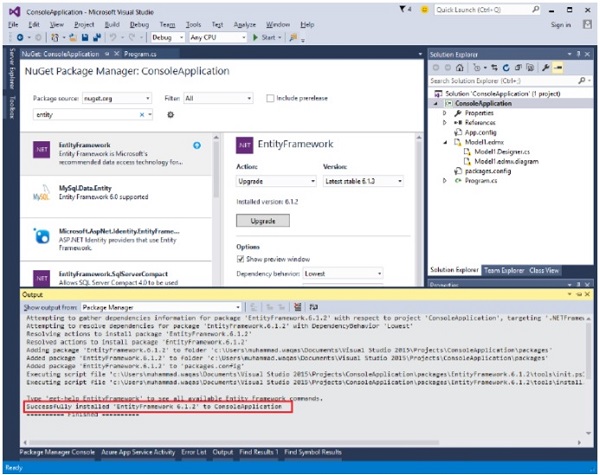
Step 3 − Select Manage NuGet Packages as shown in the above image, which will open the following window in Visual Studio.
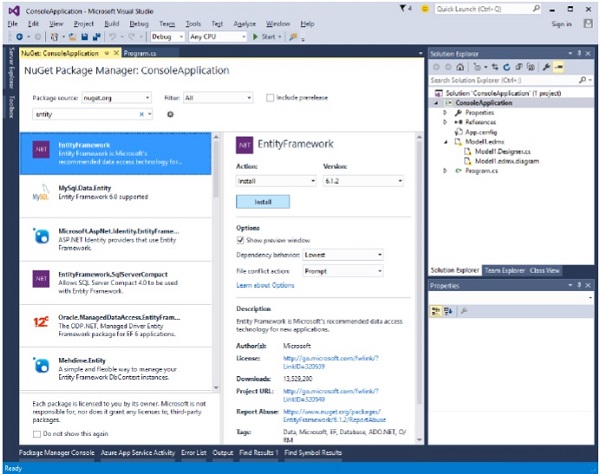
Step 4 − Search for Entity Framework and install the latest version by pressing the install button.
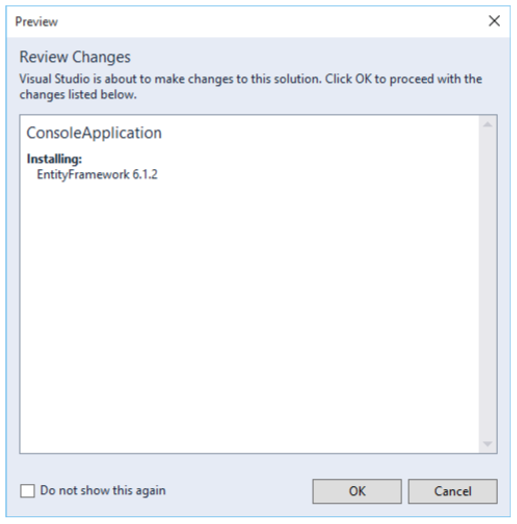
Step 5 − Click Ok. Once installation is done, you will see the following message in your output Window.
You are now ready to start your application.
