- SpecFlow Tutorial
- SpecFlow - Home
- SpecFlow - Introduction
- Test Driven Development
- Behaviour Driven Development
- SpecFlow - Visual Studio Installation
- Visual Studio Extension Installation
- SpecFlow - Project Set Up
- Other Project Dependencies
- SpecFlow - Runner Activation
- SpecFlow - HTML Reports
- SpecFlow - Binding Test Steps
- SpecFlow - Creating First Test
- Configure Selenium Webdriver
- SpecFlow - Gherkin
- SpecFlow - Gherkin Keywords
- SpecFlow - Feature File
- SpecFlow - Step Definition File
- SpecFlow - Hooks
- SpecFlow - Background Illustration
- Data Driven Testing with Examples
- Data Driven Testing without Examples
- Table conversion to Data Table
- Table conversion to Dictionary
- Table with CreateInstance
- SpecFlow - Table with CreateSet
- SpecFlow Useful Resources
- SpecFlow - Quick Guide
- SpecFlow - Useful Resources
- SpecFlow - Discussion
SpecFlow - Runner Activation
We have to perform the activation of SpecFlow + Runner. Navigate to View menu, then select the option Output.

Then choose Tests in the Show output from − dropdown.
We should obtain the test output along with the activation link of the runner. We should have this link available only if we have chosen SpecFlow+ Runner at the time of project set up.
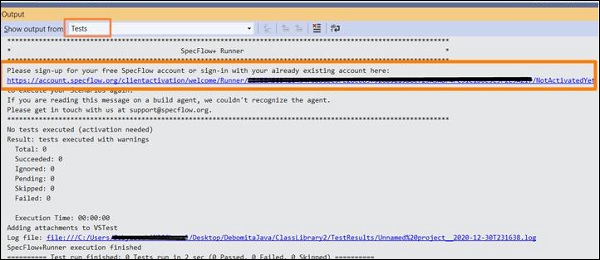
Activate Link
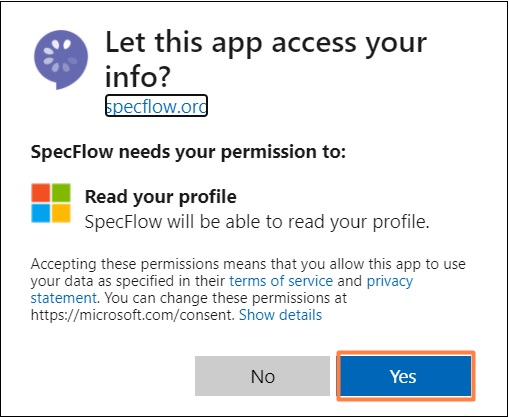
Open the activation link on a browser. We should get navigated to the SpecFlow landing page. Click on Sign in with Microsoft.

Click on Yes for letting Microsoft to access our SpecFlow account.
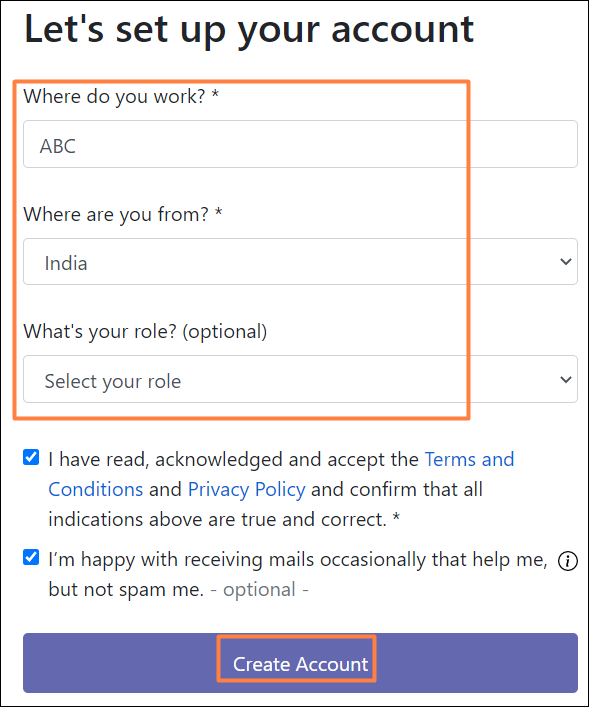
For setting up the account, provide the information needed. Then click on Create Account.
We shall now have the SpecFlow account successfully activated.

Now, if we again execute the test from the Text Explorer, it will display the proper results.