- Salesforce Tutorial
- Salesforce - Home
- Salesforce - Overview
- Salesforce - Architecture
- Salesforce - Environment
- Salesforce - Sales Cloud
- Salesforce - Service Cloud
- Salesforce - Navigating Setup
- Salesforce Objects
- Salesforce - Standard Objects
- Salesforce - Custom Objects
- Salesforce - Master Detail
- Salesforce - Lookup Relationship
- Salesforce - Schema Builder
- Data Security
- Salesforce - Control Access Org
- Salesforce - Control Access Objects
- Salesforce - Control Access Fields
- Salesforce - Control Access Records
- Salesforce - Create a Role Hierarchy
- Salesforce - Define Sharing Rules
- Process Builder
- Automate Business Processes
- Salesforce - Importing Data
- Salesforce - Exporting Data
- Salesforce - Reports
- Salesforce - Dashboards
- Salesforce - Using Formula Fields
- Visualforce
- Salesforce - Visualforce Pages
- Salesforce - Variables & Formulas
- Salesforce - Standard Controllers
- Salesforce - Records, Fields & Tables
- Salesforce - Using Forms
- Salesforce - List Controllers
- Salesforce - Static Resources
- Salesforce Useful Resources
- Salesforce - Quick Guide
- Salesforce - Useful Resources
- Salesforce - Discussion
Salesforce - Importing Data
In this chapter, we will learn how to import data in Salesforce. Salesforce provides a robust platform for data manipulation. We can Insert, View, Edit and Delete the relevant data with proper user permissions. At times, we need to add a large number of records to the respective Saleforce object in one go. Most likely these records have come from another source. The format of the incoming data has to match with the format in which the salesforce object is expecting it.
The import feature is available with CSV file structures from four sources. The sources are CSV, Outlook CSV, ACT! CSV and GMail CSV. In the example given below, we will use the normal csv file for importing data to the Salesforce platform.
The import happens in the following three steps −
Step 1
Navigate to Setup Home → Data → Data Import Wizard. A page opens which gives instruction on how to proceed with the Wizard. The most important point to remember is the record limits which restricts the number of records to be imported in one go to 50000. Click the Launch Wizard button to start the import process. The following screen appears, asking us to choose the kind of object to which we can import the data.
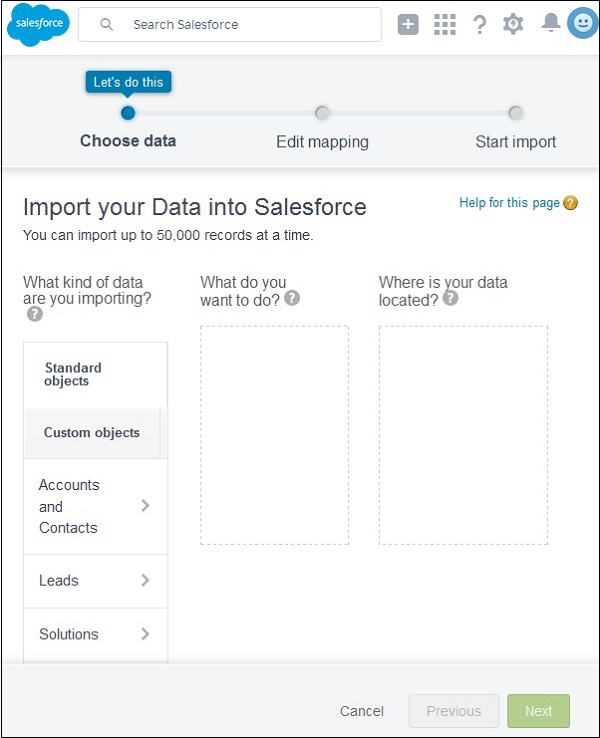
We select Accounts and Contacts in the above screen and click Next.
Step 2
In this step, we choose the file containing the data to be imported. Also we are presented with the option of Adding New Records or Updating the Existing Records or both. We choose adding the new records as shown below.
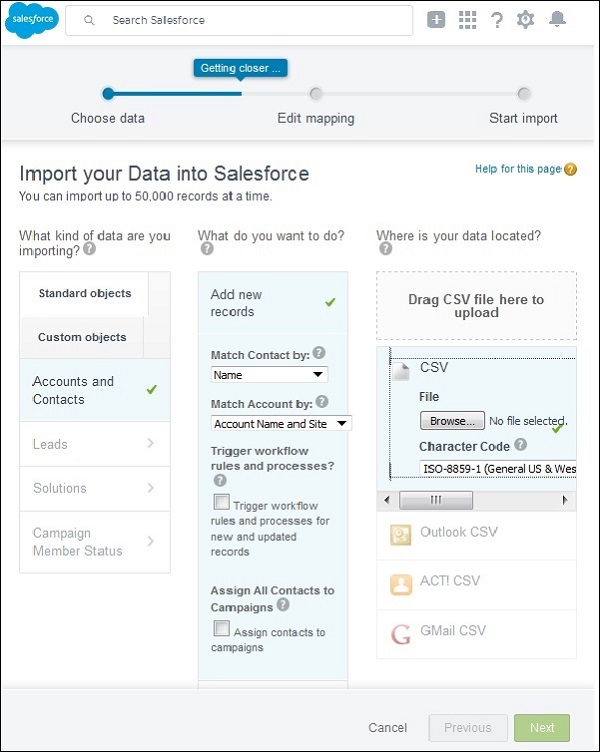
We also select the field used to match the existing record with the incoming record. For this, we choose Account name and site under the dropdown Match Account by, and then we click Next.
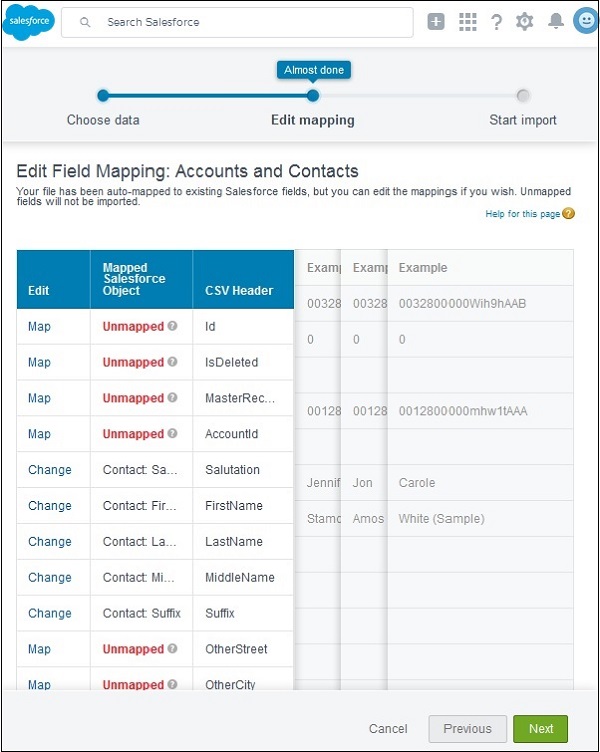
Step 3
This is the last step before the import starts. In this step, we do the very important task of matching the incoming field names with the column names of the salesforce fields. Though Salesforce does automatic matching of most of the field names, still there may be some cases where we have to match the field names manually. As you can see below, we have unmapped fields which needs to be mapped. On successfully completing the mapping, click Next and the import starts.