- Salesforce Tutorial
- Salesforce - Home
- Salesforce - Overview
- Salesforce - Architecture
- Salesforce - Environment
- Salesforce - Sales Cloud
- Salesforce - Service Cloud
- Salesforce - Navigating Setup
- Salesforce Objects
- Salesforce - Standard Objects
- Salesforce - Custom Objects
- Salesforce - Master Detail
- Salesforce - Lookup Relationship
- Salesforce - Schema Builder
- Data Security
- Salesforce - Control Access Org
- Salesforce - Control Access Objects
- Salesforce - Control Access Fields
- Salesforce - Control Access Records
- Salesforce - Create a Role Hierarchy
- Salesforce - Define Sharing Rules
- Process Builder
- Automate Business Processes
- Salesforce - Importing Data
- Salesforce - Exporting Data
- Salesforce - Reports
- Salesforce - Dashboards
- Salesforce - Using Formula Fields
- Visualforce
- Salesforce - Visualforce Pages
- Salesforce - Variables & Formulas
- Salesforce - Standard Controllers
- Salesforce - Records, Fields & Tables
- Salesforce - Using Forms
- Salesforce - List Controllers
- Salesforce - Static Resources
- Salesforce Useful Resources
- Salesforce - Quick Guide
- Salesforce - Useful Resources
- Salesforce - Discussion
Salesforce - Create a Role Hierarchy
Role hierarchy is a mechanism to control the data access to the records on a salesforce object based on the job role of a user. For example, a manager needs to have access to all the data pertaining to the employees who report to him, but the employees have no access to the data that is only owned by their manager. In this manner, the access model looks similar to the org chart in an organization but it need not be exactly same as the Org chart.
The role hierarchy automatically grants record access to users above the record owner in the hierarchy. This option is enabled for all objects by default. To change this, we take help of custom objects and manual aces grants.
Defining a Role Hierarchy
In this section, we will discuss how to define a role hierarchy. The steps are described below −
Step 1
To create a Role Hierarchy, we go to the link path Setup Home → Users → Roles → Setup Roles. The default role hierarchy appears as shown below.
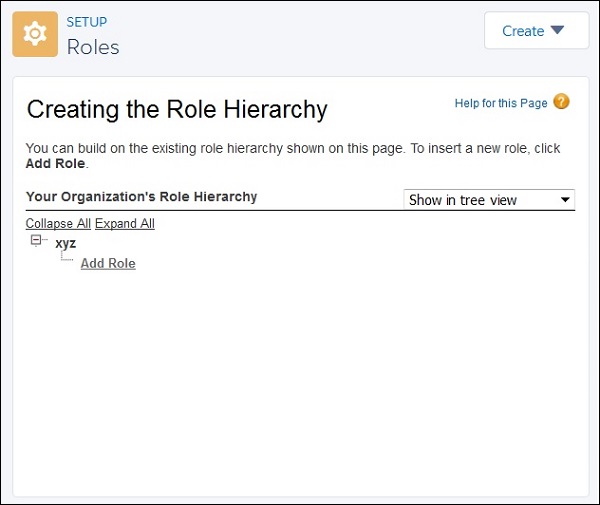
The default view is Tree View, which is easiest to use. The other two views are sorted list view and list view. You can change this view as per your need.
Step 2
In the next step, we add a role to the existing hierarchy by filling in the role details. Click on Add Role. The next window appears asking for the following details.
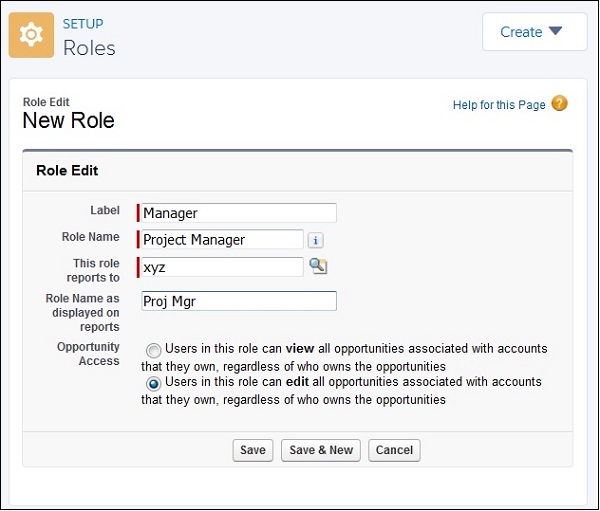
While filling these details, we also take care to define if the users can only view the opportunities or can also edit the opportunities. On clicking save we get the Role created as shown below.

Step 3
In this step, you can assign users to the roles. Click on Assign Users to Role. Upon clicking, you will be directed to a window where you can select All users form the dropdown and move users from the left box to the right box.
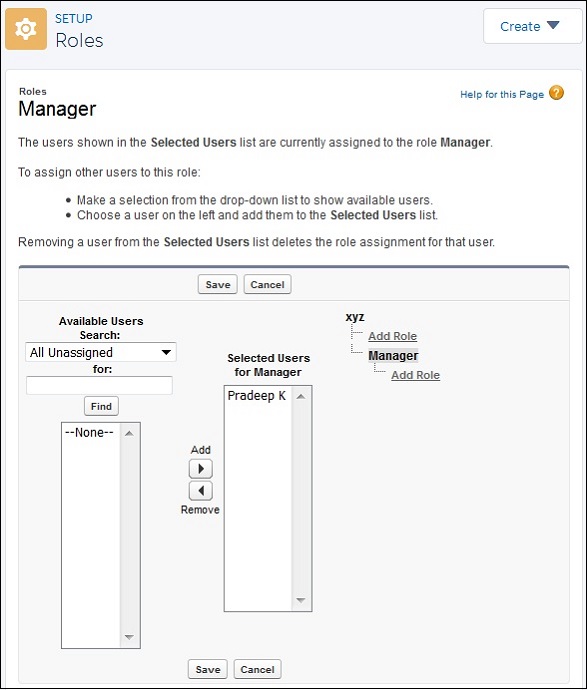
In this way, you can create roles within the role hierarchy and add users to them. So the users can have access to the objects and data as per their roles.