- ReactJS Tutorial
- ReactJS - Home
- ReactJS - Introduction
- ReactJS - Installation
- ReactJS - Features
- ReactJS - Advantages & Disadvantages
- ReactJS - Architecture
- ReactJS - Creating a React Application
- ReactJS - JSX
- ReactJS - Components
- ReactJS - Nested Components
- ReactJS - Using Newly Created Components
- ReactJS - Component Collection
- ReactJS - Styling
- ReactJS - Properties (props)
- ReactJS - Creating Components using Properties
- ReactJS - props Validation
- ReactJS - Constructor
- ReactJS - Component Life Cycle
- ReactJS - Event management
- ReactJS - Creating an Event−Aware Component
- ReactJS - Introduce Events in Expense Manager APP
- ReactJS - State Management
- ReactJS - State Management API
- ReactJS - Stateless Component
- ReactJS - State Management Using React Hooks
- ReactJS - Component Life Cycle Using React Hooks
- ReactJS - Layout Component
- ReactJS - Pagination
- ReactJS - Material UI
- ReactJS - Http client programming
- ReactJS - Form Programming
- ReactJS - Controlled Component
- ReactJS - Uncontrolled Component
- ReactJS - Formik
- ReactJS - Conditional Rendering
- ReactJS - Lists
- ReactJS - Keys
- ReactJS - Routing
- ReactJS - Redux
- ReactJS - Animation
- ReactJS - Bootstrap
- ReactJS - Map
- ReactJS - Table
- ReactJS - Managing State Using Flux
- ReactJS - Testing
- ReactJS - CLI Commands
- ReactJS - Building and Deployment
- ReactJS - Example
- Hooks
- ReactJS - Introduction to Hooks
- ReactJS - Using useState
- ReactJS - Using useEffect
- ReactJS - Using useContext
- ReactJS - Using useRef
- ReactJS - Using useReducer
- ReactJS - Using useCallback
- ReactJS - Using useMemo
- ReactJS - Custom Hooks
- ReactJS Advanced
- ReactJS - Accessibility
- ReactJS - Code Splitting
- ReactJS - Context
- ReactJS - Error Boundaries
- ReactJS - Forwarding Refs
- ReactJS - Fragments
- ReactJS - Higher Order Components
- ReactJS - Integrating With Other Libraries
- ReactJS - Optimizing Performance
- ReactJS - Profiler API
- ReactJS - Portals
- ReactJS - React Without ES6 ECMAScript
- ReactJS - React Without JSX
- ReactJS - Reconciliation
- ReactJS - Refs and the DOM
- ReactJS - Render Props
- ReactJS - Static Type Checking
- ReactJS - Strict Mode
- ReactJS - Web Components
- Additional Concepts
- ReactJS - Date Picker
- ReactJS - Helmet
- ReactJS - Inline Style
- ReactJS - PropTypes
- ReactJS - BrowserRouter
- ReactJS - DOM
- ReactJS - Carousel
- ReactJS - Icons
- ReactJS - Form Components
- ReactJS - Reference API
- ReactJS Useful Resources
- ReactJS - Quick Guide
- ReactJS - Useful Resources
- ReactJS - Discussion
ReactJS - useTransition Hook
In React 18, the new hook is available called useTransition hook. So we will examine the fundamentals of the useTransition hook and how it can be applied to boost a React application's performance.
Performance is an important factor to take into account while creating interactive user interfaces. With the help of the useTransition hook is one technique to improve a React application's performance. By separating the state changes connected to the animation from the other state changes in our component, this hook lets us update the state without interrupting the user interface.
We can decide which state changes are urgent or critical and which are not using the useTransition hook.
All state updates are considered to be essential in React. It can be able to do some fast UI changes, like selecting a value from a dropdown menu.
Syntax
const [isPending, startTransition] = useTransition()
Parameters
The useTransition hook does not take any argument.
Return Value
The hook useTransition returns an array with exactly two elements.
isPending − The isPending flag shows that a transition is currently pending.
startTransition − A state update can be defined as a transition using the startTransition function.
How to use it?
In React, we can define a state update as a transition using the startTransition function returned by useTransition.
function Container() {
   const [isPending, startTransition] = useTransition();
   const [screen, setScreen] = useState('home');
   function selectScreen(nextScreen) {
      startTransition(() => {
         setScreen(nextScreen);
      });
   }
}
We can use the given hook ‘useTransition’ in different ways like changing the main part during transition. So we will discuss this in detail with the help of an example.
Examples
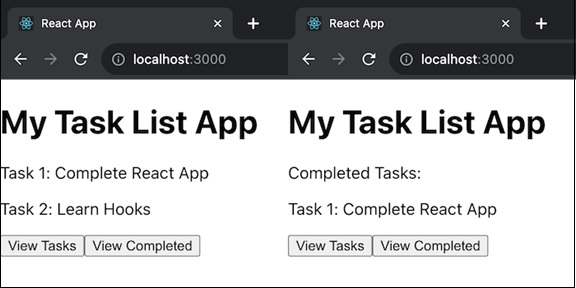
Example − Task List App
In this app we will have a task list with two screens: one for viewing tasks and another screen for viewing completed tasks. And also we will have Buttons which allow us to switch between these screens. So the code for this app using useTransition hook is given below −
import React, { useState, useTransition } from 'react';

function Container() {
   const [isPending, startTransition] = useTransition();
   const [screen, setScreen] = useState('tasks');
   function selectScreen(nextScreen) {
      startTransition(() => {
         setScreen(nextScreen);
      });
   }

   return (
      <div>
         <h1>My Task List App</h1>
         {screen === 'tasks' && (
            <div>
               <p>Task 1: Complete React App</p>
               <p>Task 2: Learn Hooks</p>
            </div>
         )}
         {screen === 'completed' && (
            <div>
               <p>Completed Tasks:</p>
               <p>Task 1: Complete React App</p>
            </div>
         )}
         <button onClick={() => selectScreen('tasks')}>View Tasks</button>
         <button onClick={() => selectScreen('completed')}>View Completed</button>
      </div>
   );
}

export default Container;
Output
Example − Changing the main part during transition
We can use the useTransition hook to change the state of a parent component. When we click a tab in this LightSwitch component, for example, it modifies the parent component's state. This update is considered as a transition, allowing us to easily navigate between tabs with no user interaction delays.
export default function LightSwitch({ isOn, toggleSwitch }) {
   const [isPending, startTransition] = useTransition();
   return (
      <button onClick={() => {
         startTransition(() => {
            toggleSwitch(); // This updates the parent's state.
         });
      }}>
      {isOn ? "Turn Off" : "Turn On"}
      </button>
   );
}
When we click the button, the LightSwitch component changes the state of a light switch in the parent component. This state change is handled as a transition, allowing us to turn on and off the light without any delays.
So we will create a small application to showcase the usage of the useTransition hook for better understanding.
App
Let us build a small app that is switching between different sections using tabs.
This app will be divided into three tabs: "Home," "Products," and "Contact." When we click on a tab, the related content shows. And with the usage of the useTransition hook we will provide smooth tab transitions, and it will simulate a basic website layout where we can access information about the home page, items, and contact information.
TabButton.js
import { useTransition } from 'react';

export default function TabButton({ children, isActive, onClick }) {
   const [isPending, startTransition] = useTransition();
   if (isActive) {
      return <b>{children}</b>
   }
   return (
      <button onClick={() => {
         startTransition(() => {
            onClick();
         });
      }}>
      {children}
      </button>
   );
}
Home.js
export default function Home() {
   return (
      <div>
         <h2>Welcome to our Home page!</h2>
         <p>This is the main page of our website.</p>
      </div>
   );
}
Products.js
export default function Products() {
   return (
      <div>
         <h2>Our Products</h2>
         <ul>
            <li>Product 1</li>
            <li>Product 2</li>
            <li>Product 3</li>
         </ul>
      </div>
   );
}
Contact.js
export default function Contact() {
   return (
      <div>
         <h2>Contact Us</h2>
         <p>You can reach us via email or phone:</p>
         <ul>
            <li>Email: contact@mywebsite.com</li>
            <li>Phone: 12345 - 67890</li>
         </ul>
      </div>
   );
}
App.js
import { useState } from 'react';
import TabButton from './TabButton';
import Home from './Home';
import Products from './Products';
import Contact from './Contact';

export default function App() {
   const [tab, setTab] = useState('home');
   return (
      <>
         <TabButton
            isActive={tab === 'home'}
            onClick={() => setTab('home')}
         >
            Home
         </TabButton>
         <TabButton
            isActive={tab === 'products'}
            onClick={() => setTab('products')}
         >
            Products
         </TabButton>
         <TabButton
            isActive={tab === 'contact'}
            onClick={() => setTab('contact')}
         >
            Contact
         </TabButton>
         <hr />
         {tab === 'home' && <Home />}
         {tab === 'products' && <Products />}
         {tab === 'contact' && <Contact />}
      </>
   );
}
Output

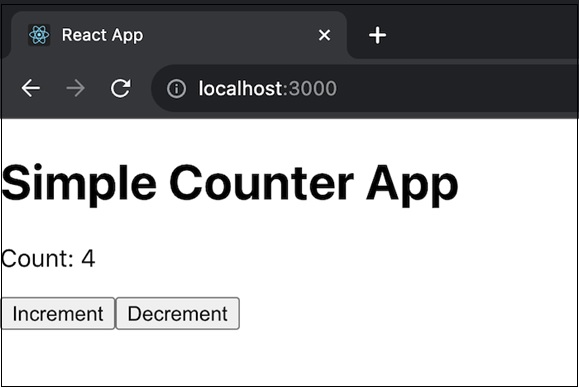
Example − Counter Container App (Increment/Decrement)
Here is another simple example of a React app using the Container function with useTransition and useState. This app is a basic counter application. There is a counter that starts at 0. We can click the "Increment" button to increase the count and the "Decrement" button to decrease it. The count is displayed on the screen, and the transitions are used to provide a smooth user experience when the count is updated. The code for this app is given below −
import React, { useState, useTransition } from 'react';

function Container() {
   const [isPending, startTransition] = useTransition();
   const [count, setCount] = useState(0);

   function increment() {
      startTransition(() => {
         setCount(count + 1);
      });
   }

   function decrement() {
      startTransition(() => {
         setCount(count - 1);
      });
   }

   return (
      <div>
         <h1>Simple Counter App</h1>
         <p>Count: {count}</p>
         <button onClick={increment}>Increment</button>
         <button onClick={decrement}>Decrement</button>
      </div>
   );
}

export default Container;
Output
Limitations
UseTransition can only be used within specific sections of our code, such as components or custom methods. Instead of "startTransition," we should use "startTransition" to begin a transition from somewhere else.
Only if we have access to the function that modifies the state can we put it in a transition. If we want to start a transition in response to something like a variable or a custom function, we should use "useDeferredValue."
The function we give to "startTransition" must be quick and straightforward. React will run it right away, and any state changes that happen during that time will be treated as transitions. If we try to make more state changes later, like using a timeout, they will not be treated as transitions.
A transition can be interrupted by other state changes. For example, if we are updating a chart during a transition and then start typing in an input field, React will stop the chart update and handle the input first.
Transitions can not be used to control text input fields.
If there are multiple transitions happening at the same time, React will combine them together.
To Continue Learning Please Login