- ReactJS Tutorial
- ReactJS - Home
- ReactJS - Introduction
- ReactJS - Installation
- ReactJS - Features
- ReactJS - Advantages & Disadvantages
- ReactJS - Architecture
- ReactJS - Creating a React Application
- ReactJS - JSX
- ReactJS - Components
- ReactJS - Nested Components
- ReactJS - Using Newly Created Components
- ReactJS - Component Collection
- ReactJS - Styling
- ReactJS - Properties (props)
- ReactJS - Creating Components using Properties
- ReactJS - props Validation
- ReactJS - Constructor
- ReactJS - Component Life Cycle
- ReactJS - Event management
- ReactJS - Creating an Event−Aware Component
- ReactJS - Introduce Events in Expense Manager APP
- ReactJS - State Management
- ReactJS - State Management API
- ReactJS - Stateless Component
- ReactJS - State Management Using React Hooks
- ReactJS - Component Life Cycle Using React Hooks
- ReactJS - Layout Component
- ReactJS - Pagination
- ReactJS - Material UI
- ReactJS - Http client programming
- ReactJS - Form Programming
- ReactJS - Controlled Component
- ReactJS - Uncontrolled Component
- ReactJS - Formik
- ReactJS - Conditional Rendering
- ReactJS - Lists
- ReactJS - Keys
- ReactJS - Routing
- ReactJS - Redux
- ReactJS - Animation
- ReactJS - Bootstrap
- ReactJS - Map
- ReactJS - Table
- ReactJS - Managing State Using Flux
- ReactJS - Testing
- ReactJS - CLI Commands
- ReactJS - Building and Deployment
- ReactJS - Example
- Hooks
- ReactJS - Introduction to Hooks
- ReactJS - Using useState
- ReactJS - Using useEffect
- ReactJS - Using useContext
- ReactJS - Using useRef
- ReactJS - Using useReducer
- ReactJS - Using useCallback
- ReactJS - Using useMemo
- ReactJS - Custom Hooks
- ReactJS Advanced
- ReactJS - Accessibility
- ReactJS - Code Splitting
- ReactJS - Context
- ReactJS - Error Boundaries
- ReactJS - Forwarding Refs
- ReactJS - Fragments
- ReactJS - Higher Order Components
- ReactJS - Integrating With Other Libraries
- ReactJS - Optimizing Performance
- ReactJS - Profiler API
- ReactJS - Portals
- ReactJS - React Without ES6 ECMAScript
- ReactJS - React Without JSX
- ReactJS - Reconciliation
- ReactJS - Refs and the DOM
- ReactJS - Render Props
- ReactJS - Static Type Checking
- ReactJS - Strict Mode
- ReactJS - Web Components
- Additional Concepts
- ReactJS - Date Picker
- ReactJS - Helmet
- ReactJS - Inline Style
- ReactJS - PropTypes
- ReactJS - BrowserRouter
- ReactJS - DOM
- ReactJS - Carousel
- ReactJS - Icons
- ReactJS - Form Components
- ReactJS Useful Resources
- ReactJS - Quick Guide
- ReactJS - Useful Resources
- ReactJS - Discussion
ReactJS - Using useReducer
useReducer hook is an advanced version of useState hook. As we know, the purpose of the useState is to manage a state variable. useState returns a function, which accepts a value and updates the state variable with the given value.
// counter = 0
const [counter, setCounter] = useState(0)

// counter = 1
setCounter(1)

// counter = 2
setCounter(2)
The useReducer hook accepts a reducer function along with the initial value and returns a dispatcher function. Reducer function will accept the initial state and an action (specific scenario) and then provides logic to update the state based on the action. The dispatcher function accepts the action (and corresponding details) and call the reducer function with provided action.
For example, useReducer can be used to update the counter state based on increment and decrement action. Increment action will increment the counter state by 1 and decrement action will decrement the counter by 1.
Let us learn how to use useReducer hook in this chapter.
Signature of the useReducer hook
The signature of the useReducer hook is as follows −
const [<state>, <dispatch function>] = useReducer(<reducer function>, <initial argument>, <init function>);
Here,
state represents the information to be maintained in the state
reducer function is a javascript function used to update the state based on the action.
Following is the syntax of the reducer function −
(<state>, <action>) => <updated state>
Where,
state − Current state information
action − Action to be carried out (should have payload to do the action)
updated state − Updated state
initial argument −represents the initial value of the state
init function − represents initialization function, which can be used to set the initial value / reset the current value of the state. If initial value needs to be computed, then we can use the init function. Otherwise, the argument can be skipped.
Applying reducer hook
Let us create a react application to manage a collection of todo items. First of all, we will implement it using useState and then convert it to use useReducer. By implementing the application using both hook, we will understand the benefit of useReducer over useState. Also, we can able to choose the hook wisely depending on the situation.
First of all, create a new react application and start it using below command.
create-react-app myapp
cd myapp
npm start
Next, create a react component, TodoList under component folder (src/components/TodoList.js).
function TodoList() {
   return <div>Todo List</div>
}
export default TodoList
Next, update the root component, App.js to use the newly created TodoList component.
import logo from './logo.svg';
import './App.css';
import TodoList from './components/TodoList';
function App() {
   return (
      <div style={{ padding: "5px"}}>
         <TodoList />
      </div>
   );
}
export default App;
Next, create a variable, todoData to manage todo list and set it to the state using useState hook.
const [todoData, setTodoData] = useState({
   action: '',
   items: [],
   newItem: null,
   id: 0
})
Here,
action is used to represent the current action, add & delete to be applied on the current list of todo items (items).
items is an array used to hold the current list of todo items.
newItem is an object used to represent the current todo item. The object will have two field, id and todo.
id is the id of the current item to be deleted during delete action.
useState is used to get and set the todo list (todoData).
Next, render the current list of todo item (todoData.items) along with a delete button and a input text field to enter new todo item.
<div>
   <p>List of Todo list</p>
   <ul>
      {todoData.items && todoData.items.map((item) =>
         <li key={item.id}>{item.todo} <span><button onClick={(e) =>
         handleDeleteButton(item.id, e)}>Delete</button></span></li>
      )}
      <li><input type="text" name="todo" onChange={handleInput} />
      <button onClick={handleAddButton}>Add</button></li>
   </ul>
</div>
Here,
Rendered the current list of todo items from the state variable, todoData.
Rendered a input field for the user to enter new todo item and attached onChange event handler, handleInput. The event handler will update newItem in the todo state (todoData) with the data entered by user in the input field.
Rendered a button for the user to add the newly entered todo item to the current todo list and attached onClick event handler, handleAddButton. The event handler will add the current / new todo item to the todo state.
Rendered a button for every item in the todo list and attached onClick event handler, handleDeleteButton. The event handler will delete the corresponding todo item from the todo state.
Next, implement handleInput event handler as shown below −
const handleInput = (e) => {
   var id = 0
   if(todoData.newItem == null) {
      for(let i = 0; i < todoData.items.length; i++) {
         if(id < todoData.items[i].id) {
            id = todoData.items[i].id
         }
      }
      id += 1
   } else {
      id = todoData.newItem.id
   }
   let data = {
      actions: '',
      items: todoData.items,
      newItem: {
         id: id,
         todo: e.target.value
      },
      id: 0
   }
   setTodoData(data)
}
Here we have,
Updated the newItem.todo with user entered data (e.target.value)
Created and set the id for the new item.
Next, implement handleDeleteButton event handler as shown below −
const handleDeleteButton = (deleteId, e) => {
   let data = {
      action: 'delete',
      items: todoData.items,
      newItem: todoData.newItem,
      id: deleteId
   }
   setTodoData(data)
}
Here, the handler set the id (deleteid) of the todo item to be deleted and delete action in the todo state
Next, implement handleAddButton event handler as shown below −
const handleAddButton = () => {
   let data = {
      action: 'add',
      items: todoData.items,
      newItem: todoData.newItem,
      id: 0
   }
   setTodoData(data)
}
Here, the handler set the new item and add action in the state
Next, implement add action as shown below −
if(todoData.action == 'add') {
   if(todoData.newItem != null) {
      let data = {
         action: '',
         items: [...todoData.items, todoData.newItem],
         newItem: null,
         id: 0
      }
      setTodoData(data)
   }
}
Here, new item is added to the exiting list (todoData.items) in the todo state.
Next, implement the delete action as shown below −
if(todoData.action == 'delete' && todoData.id != 0) {
   var newItemList = []
   for(let i = 0; i < todoData.items.length; i++) {
      if(todoData.items[i].id != todoData.id) {
         newItemList.push(todoData.items[i])
      }
   }
   let data = {
      action: '',
      items: newItemList,
      newItem: null,
      id: 0
   }
   setTodoData(data)
}
Here, the item with specified id is removed from the todo list (todoData.items).
The complete source code of the component is as follows −
import { useState } from "react"
function TodoList() {
   const [todoData, setTodoData] = useState({
      action: '',
      items: [],
      newItem: null,
      id: 0
   })
   if(todoData.action == 'add') {
      if(todoData.newItem != null) {
         let data = {
            action: '',
            items: [...todoData.items, todoData.newItem],
            newItem: null,
            id: 0
         }
         setTodoData(data)
      }
   }
   if(todoData.action == 'delete' && todoData.id != 0) {
      var newItemList = []
      for(let i = 0; i < todoData.items.length; i++) {
         if(todoData.items[i].id != todoData.id) {
            newItemList.push(todoData.items[i])
         }
      }
      let data = {
         action: '',
         items: newItemList,
         newItem: null,
         id: 0
      }
      setTodoData(data)
   }
   const handleInput = (e) => {
      var id = 0
      if(todoData.newItem == null) {
         for(let i = 0; i < todoData.items.length; i++) {
            if(id < todoData.items[i].id) {
               id = todoData.items[i].id
            }
         }
         id += 1
      } else {
         id = todoData.newItem.id
      }
      let data = {
         action: '',
         items: todoData.items,
         newItem: {
            id: id,
            todo: e.target.value
         },
         id: 0
      }
      setTodoData(data)
   }
   const handleDeleteButton = (deleteId, e) => {
      let data = {
         action: 'delete',
         items: todoData.items,
         newItem: todoData.newItem,
         id: deleteId
      }
      setTodoData(data)
   }
   const handleAddButton = () => {
      let data = {
         action: 'add',
         items: todoData.items,
         newItem: todoData.newItem,
         id: 0
      }
      setTodoData(data)
   }
   return (
      <div>
         <p>List of Todo list</p>
         <ul>
            {todoData.items && todoData.items.map((item) =>
            <li key={item.id}>{item.todo} <span><button onClick={(e) => handleDeleteButton(item.id, e)}>Delete</button></span></li>
            )}
            <li><input type="text" name="todo" onChange={handleInput} /><button onClick={handleAddButton}>Add</button></li>
         </ul>
      </div>
   )
}
export default TodoList
Here, the application uses the useState hook to do the functionality.
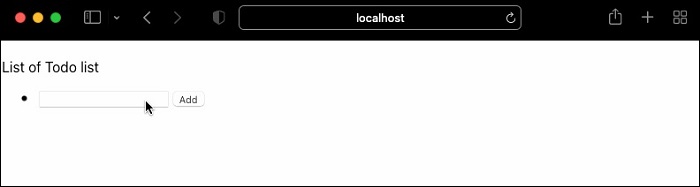
Next, open the browser and add / delete the todo item. The application will run as shown below −
Using useReducer
Let us reimplement the functionality using useReducer
First of all, create a react component, TodoReducerList under component folder (src/components/TodoReducerList.js)
function TodoReducerList() {
   return <div>Todo List</div>
}
export default TodoReducerList
Next, update the root component, App.js to use the newly created TodoReducerList component.
import './App.css';
import TodoReducerList from './components/TodoReducerList';
function App() {
   return (
      <div style={{ padding: "5px"}}>
         <TodoReducerList />
      </div>
   );
}
export default App;
Next, implement a reducer function, todoReducer, which will receive two argument as shown below −
Current todo list (items)
Action (action.type) along with action related information (action.payload). For add action (action.type), the payload (action.payload) will have the new todo item and for delete action (action.type), it will have the id of the todo item to be deleted
The reducer will apply the relevant action to the todo list and sent back the modified todo list as shown below −
function todoReducer(items, action) {
   // action = { type: 'add / delete', payload: 'new todo item'}
   let newTodoList = []

   switch (action.type) {
      case 'add':
         var id = 0
         for(let i = 0; i < items.length; i++) {
            if(id < items[i].id) {
               id = items[i].id
            }
         }
         action.payload.id = id + 1
         newTodoList = [...items, action.payload]
      break;
      case 'delete':
         for(let i = 0; i < items.length; i++) {
            if(items[i].id != action.payload.id) {
               newTodoList.push(items[i])
            }
         }
      break;
      default:
         throw new Error()
   }
   return newTodoList
}
Here we have,
Used a switch statement two handle actions.
Added action adds the payload to the existing todo list.
deleted action removes the item specified in the payload from the existing todo list
Finally, the function returns the updated todo list
Next, use the newly created reducer in the TodoReducerList component as shown below −
const [items, dispatch] = useReducer(todoReducer, [])
Here, useReducer receives two argument, a) reducer function and b) the current todo list and returns the current todo list and a dispatcher function dispatch. The dispatcher function (dispatch) should be called with either add or delete action with relevant payload information.
Next, create handler function for input text field (new todo item) and two buttons (add and delete) as shown below −
const [todo, setTodo] = useState('')
const handleInput = (e) => {
   setTodo(e.target.value)
}
const handleAddButton = () => {
   dispatch({
      type: 'add',
      payload: {
         todo: todo
      }
   })
   setTodo('')
}
const handleDeleteButton = (id) => {
   dispatch({
      type: 'delete',
      payload: {
      id: id
      }
   })
}
Here we have,
Used useState to manage the user input (todo)
Used dispatch method to process add and delete action in relevant handler
Passed the payload specific to the action in the handler.
Next, update the render method as shown below −
<div>
   <p>List of Todo list</p>
   <ul>
      {items && items.map((item) =>
         <li key={item.id}>{item.todo} <span><button onClick={(e) =>
         handleDeleteButton(item.id)}>Delete</button></span></li>
       )}
      <li><input type="text" name="todo" value={todo} onChange={handleInput} />
      <button onClick={handleAddButton}>Add</button></li>
   </ul>
</div>
The complete source code of the component along with the reducer function is as follows −
import {
   useReducer,
   useState
} from "react"
function todoReducer(items, action) {

   // action = { type: 'add / delete', payload: 'new todo item'}
   let newTodoList = []
   switch (action.type) {
      case 'add':
         var id = 0
         for(let i = 0; i < items.length; i++) {
            if(id < items[i].id) {
               id = items[i].id
            }
         }
         action.payload.id = id + 1
         newTodoList = [...items, action.payload]
      break;
      case 'delete':
         for(let i = 0; i < items.length; i++) {
            if(items[i].id != action.payload.id) {
               newTodoList.push(items[i])
         }
      }
      break;
      default:
         throw new Error()
   }
   return newTodoList
}
function TodoReducerList() {
   const [todo, setTodo] = useState('')
   const [items, dispatch] = useReducer(todoReducer, [])
   const handleInput = (e) => {
      setTodo(e.target.value)
   }
   const handleAddButton = () => {
      dispatch({
         type: 'add',
         payload: {
            todo: todo
         }
      })
      setTodo('')
   }
   const handleDeleteButton = (id) => {
      dispatch({
         type: 'delete',
         payload: {
            id: id
         }
      })
   }
   return (
      <div>
         <p>List of Todo list</p>
         <ul>
            {items && items.map((item) =>
            <li key={item.id}>{item.todo} <span><button onClick={(e) =>
               handleDeleteButton(item.id)}>Delete</button></span></li>
            )}
            <li><input type="text" name="todo" value={todo} onChange={handleInput} />
               <button onClick={handleAddButton}>Add</button></li>
         </ul>
      </div>
   )
}
export default TodoReducerList
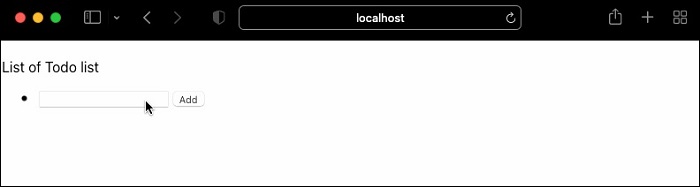
Next, open the browser and check the output.
We can clearly understand that the useReducer implementation is simple, easy and understandable compared to the pure useState implementation.
Summary
useReducer hook introduces a reducer pattern in the state management. It encourages the code reuse and increases readability and understandability of the component. Overall, useReducer is an essential and powerful tool in the react developer's toolkit.