- ReactJS Tutorial
- ReactJS - Home
- ReactJS - Introduction
- ReactJS - Installation
- ReactJS - Features
- ReactJS - Advantages & Disadvantages
- ReactJS - Architecture
- ReactJS - Creating a React Application
- ReactJS - JSX
- ReactJS - Components
- ReactJS - Nested Components
- ReactJS - Using Newly Created Components
- ReactJS - Component Collection
- ReactJS - Styling
- ReactJS - Properties (props)
- ReactJS - Creating Components using Properties
- ReactJS - props Validation
- ReactJS - Constructor
- ReactJS - Component Life Cycle
- ReactJS - Event management
- ReactJS - Creating an Event−Aware Component
- ReactJS - Introduce Events in Expense Manager APP
- ReactJS - State Management
- ReactJS - State Management API
- ReactJS - Stateless Component
- ReactJS - State Management Using React Hooks
- ReactJS - Component Life Cycle Using React Hooks
- ReactJS - Layout Component
- ReactJS - Pagination
- ReactJS - Material UI
- ReactJS - Http client programming
- ReactJS - Form Programming
- ReactJS - Controlled Component
- ReactJS - Uncontrolled Component
- ReactJS - Formik
- ReactJS - Conditional Rendering
- ReactJS - Lists
- ReactJS - Keys
- ReactJS - Routing
- ReactJS - Redux
- ReactJS - Animation
- ReactJS - Bootstrap
- ReactJS - Map
- ReactJS - Table
- ReactJS - Managing State Using Flux
- ReactJS - Testing
- ReactJS - CLI Commands
- ReactJS - Building and Deployment
- ReactJS - Example
- Hooks
- ReactJS - Introduction to Hooks
- ReactJS - Using useState
- ReactJS - Using useEffect
- ReactJS - Using useContext
- ReactJS - Using useRef
- ReactJS - Using useReducer
- ReactJS - Using useCallback
- ReactJS - Using useMemo
- ReactJS - Custom Hooks
- ReactJS Advanced
- ReactJS - Accessibility
- ReactJS - Code Splitting
- ReactJS - Context
- ReactJS - Error Boundaries
- ReactJS - Forwarding Refs
- ReactJS - Fragments
- ReactJS - Higher Order Components
- ReactJS - Integrating With Other Libraries
- ReactJS - Optimizing Performance
- ReactJS - Profiler API
- ReactJS - Portals
- ReactJS - React Without ES6 ECMAScript
- ReactJS - React Without JSX
- ReactJS - Reconciliation
- ReactJS - Refs and the DOM
- ReactJS - Render Props
- ReactJS - Static Type Checking
- ReactJS - Strict Mode
- ReactJS - Web Components
- Additional Concepts
- ReactJS - Date Picker
- ReactJS - Helmet
- ReactJS - Inline Style
- ReactJS - PropTypes
- ReactJS - BrowserRouter
- ReactJS - DOM
- ReactJS - Carousel
- ReactJS - Icons
- ReactJS - Form Components
- ReactJS - Reference API
- ReactJS Useful Resources
- ReactJS - Quick Guide
- ReactJS - Useful Resources
- ReactJS - Discussion
ReactJS - renderToReadableStream() Method
Rendering components is a very basic task in the field of React web development. One method is to use the renderToReadableStream function to render React components as streams.
What is renderToReadableStream?
React provides the renderToReadableStream method for server-side rendering of React components. We can use this method to render our React tree as HTML into a Readable Web Stream. It allows us to transfer online content in a streaming format rather than creating and distributing the entire webpage at once.
How does it work?
When we call renderToReadableStream, we pass in a React component that we want to render as a web stream. This component should represent the full document, including the HTML structure. The function also accepts optional parameters, which can be used to customize the stream's behavior.
Syntax
const stream = await renderToReadableStream(reactNode, optional)
Parameters
reactNode − It is a React node to be rendered to HTML. For example, a JSX element like <App />. The App component should render the <html> tag because it is created to represent the full content.
optional − It is an object with streaming options.
Return value
A Promise is returned by the renderToReadableStream method. If the shell is successfully rendered, this Promise resolves to a Readable Web Stream containing the produced HTML content. If the rendering fails, the Promise is rejected, giving users the opportunity to supply a fallback shell.
Examples
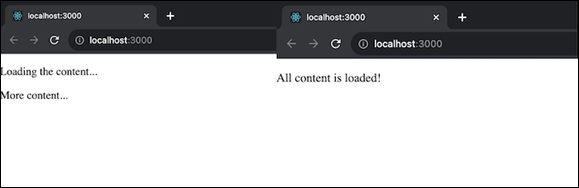
Example − Loading the Content
We can use renderToReadableStream method in different ways in React −
Stream Content − To make our website more user-friendly, we can display sections of it as they load.
import React, { useState, useEffect } from 'react';
import { renderToReadableStream } from 'react-dom/server';

const App = () => {
   const [content, setContent] = useState([]);
   useEffect(() => {

      // loading content progressively
      const loadDataProgressively = async () => {
         await new Promise(resolve => setTimeout(resolve, 1000));
         setContent(['Loading the content...']);
         await new Promise(resolve => setTimeout(resolve, 2000));
         setContent(['Loading the content...', 'More content...']);
         await new Promise(resolve => setTimeout(resolve, 2000));
         setContent(['All content is loaded!']);
      };

      loadDataProgressively();
   }, []);

   return (
      <div>
         {content.map((item, index) => (
            <p key={index}>{item}</p>
         ))}
      </div>
   );
};

const stream = renderToReadableStream(<App />);
Output
Add Custom Scripts − we can introduce custom scripts to customize the behavior of the webpage as it is shown.
// Inside our component
useEffect(() => {

   // Create a new element
   const script = document.createElement('script');
   script.text = 'console.log("Custom Script has been Executed");';
   document.body.appendChild(script);
}, []);
Handle errors − Before displaying the content, we can handle server errors and even change the error status code.
// Inside the component
const [error, setError] = useState(null);

useEffect(() => {
   try {
      // Code that can throw an error
   } catch (err) {
      setError(err);
   }
}, []);

return (
   <div>
      {error ? <p>Error is: {error.message}</p> : null}
   </div>
);
Abort Rendering − We can stop server rendering and let the client handle the rest of the rendering when necessary. To abort rendering, we can simply stop rendering content based on a condition. Here is a simple example −
const [abortRendering, setAbortRendering] = useState(false);

useEffect(() => {
      if (abortRendering) {
         // Stop rendering
      }
   }, []);

return (
   <div>
      {abortRendering ? <p>Rendering aborted</p> : <p>Content goes here</p>}
   </div>
);
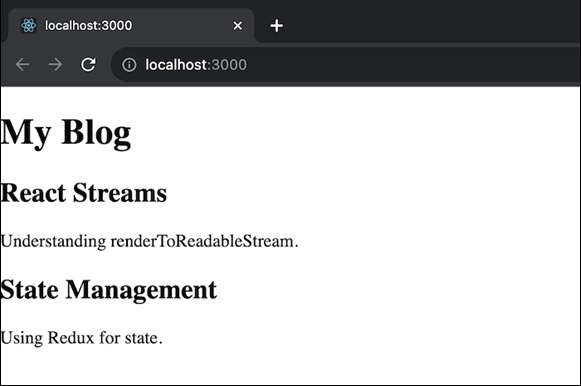
Example − Blog App with Posts
This app is a simple blog application that shows a list of blog posts. Each post will have a title and content. The BlogApp component takes an array of posts as a prop and renders them using the Post component. So we will have two components Post and BlogApp. Post component will show an individual blog post with a title and content. And the BlogApp will be the main component that takes an array of posts and renders the blog with titles and content. The app will generate a blog with a list of posts.
import { renderToReadableStream } from 'react-render-stream';

// Define the Post and BlogApp components
const Post = ({ title, content }) => (
   <div>
      <h2>{title}</h2>
      <p>{content}</p>
   </div>
);
const BlogApp = ({ posts }) => (
   <div>
      <h1>My Blog</h1>
      {posts.map((post, index) => (
         <Post key={index} {...post} />
      ))}
   </div>
);

// Create some sample blog posts
const posts = [
   { title: 'React Streams', content: 'Understanding renderToReadableStream.' },
   { title: 'State Management', content: 'Using Redux for state.' },
   // Add more posts as needed
];

// Render the BlogApp component
const App = () => (
   <div>
      <BlogApp posts={posts} />
   </div>
);

const stream = await renderToReadableStream(<App />);
Output
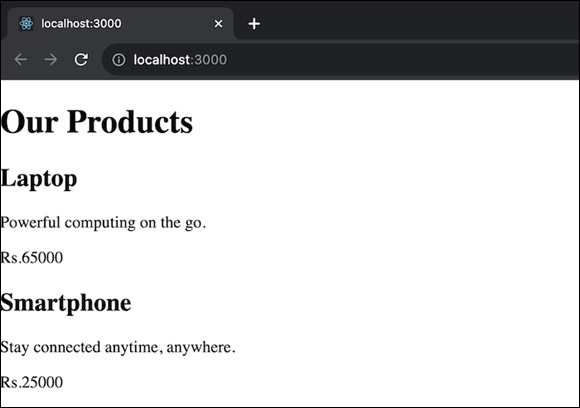
Example − E-commerce Product Catalog
In this app we will have an e-commerce product catalog that shows a list of products. Each product has a name, price, and description. The ECommerceApp component takes an array of products as a prop and renders them using the Product component. We will have two components: Product and ECommerceApp. The Product component shows an individual product with a name, price, and description. And the ECommerceApp component will be the main component that takes an array of products and renders the product catalog. The app will generate an e-commerce catalog with a list of products.
import { renderToReadableStream } from 'react-render-stream';

// Define the components
const Product = ({ name, price, description }) => (
   <div>
      <h2>{name}</h2>
      <p>{description}</p>
      <p>${price}</p>
   </div>
);
const ECommerceApp = ({ products }) => (
   <div>
   <h1>Our Products</h1>
   {products.map((product, index) => (
      <Product key={index} {...product} />
   ))}
   </div>
);

// Sample products
const products = [
   { name: 'Laptop', price: 999, description: 'Powerful computing on the go.' },
   { name: 'Smartphone', price: 599, description: 'Stay connected anytime, anywhere.' },
];

// Render the ECommerceApp component
const App = () => (
   <div>
      <ECommerceApp products={products} />
   </div>
);

const stream = await renderToReadableStream(<App />);
Output
Summary
renderToReadableStream is a powerful method for rendering React components as streams. It allows us to create more responsive applications and improve the user experience.
To Continue Learning Please Login