- ReactJS Tutorial
- ReactJS - Home
- ReactJS - Introduction
- ReactJS - Installation
- ReactJS - Features
- ReactJS - Advantages & Disadvantages
- ReactJS - Architecture
- ReactJS - Creating a React Application
- ReactJS - JSX
- ReactJS - Components
- ReactJS - Nested Components
- ReactJS - Using Newly Created Components
- ReactJS - Component Collection
- ReactJS - Styling
- ReactJS - Properties (props)
- ReactJS - Creating Components using Properties
- ReactJS - props Validation
- ReactJS - Constructor
- ReactJS - Component Life Cycle
- ReactJS - Event management
- ReactJS - Creating an Event−Aware Component
- ReactJS - Introduce Events in Expense Manager APP
- ReactJS - State Management
- ReactJS - State Management API
- ReactJS - Stateless Component
- ReactJS - State Management Using React Hooks
- ReactJS - Component Life Cycle Using React Hooks
- ReactJS - Layout Component
- ReactJS - Pagination
- ReactJS - Material UI
- ReactJS - Http client programming
- ReactJS - Form Programming
- ReactJS - Controlled Component
- ReactJS - Uncontrolled Component
- ReactJS - Formik
- ReactJS - Conditional Rendering
- ReactJS - Lists
- ReactJS - Keys
- ReactJS - Routing
- ReactJS - Redux
- ReactJS - Animation
- ReactJS - Bootstrap
- ReactJS - Map
- ReactJS - Table
- ReactJS - Managing State Using Flux
- ReactJS - Testing
- ReactJS - CLI Commands
- ReactJS - Building and Deployment
- ReactJS - Example
- Hooks
- ReactJS - Introduction to Hooks
- ReactJS - Using useState
- ReactJS - Using useEffect
- ReactJS - Using useContext
- ReactJS - Using useRef
- ReactJS - Using useReducer
- ReactJS - Using useCallback
- ReactJS - Using useMemo
- ReactJS - Custom Hooks
- ReactJS Advanced
- ReactJS - Accessibility
- ReactJS - Code Splitting
- ReactJS - Context
- ReactJS - Error Boundaries
- ReactJS - Forwarding Refs
- ReactJS - Fragments
- ReactJS - Higher Order Components
- ReactJS - Integrating With Other Libraries
- ReactJS - Optimizing Performance
- ReactJS - Profiler API
- ReactJS - Portals
- ReactJS - React Without ES6 ECMAScript
- ReactJS - React Without JSX
- ReactJS - Reconciliation
- ReactJS - Refs and the DOM
- ReactJS - Render Props
- ReactJS - Static Type Checking
- ReactJS - Strict Mode
- ReactJS - Web Components
- Additional Concepts
- ReactJS - Date Picker
- ReactJS - Helmet
- ReactJS - Inline Style
- ReactJS - PropTypes
- ReactJS - BrowserRouter
- ReactJS - DOM
- ReactJS - Carousel
- ReactJS - Icons
- ReactJS - Form Components
- ReactJS - Reference API
- ReactJS Useful Resources
- ReactJS - Quick Guide
- ReactJS - Useful Resources
- ReactJS - Discussion
ReactJS - getSnapshotBeforeUpdate() Method
As we know that in React each component has its own life cycle, which means that they progress via different stages while operating in our project. React provides built-in methods for controlling these processes.
So let's have a look at the getSnapshotBeforeUpdate() method now. Imagine we are creating a web page with React and a chat component that receives messages on a regular basis. Now, we don't want the scroll position to change about every time a new message comes in. allowing the user to lose their place in the conversation. This is where getSnapshotBeforeUpdate comes in.
In simple terms, React will call this function shortly before making modifications to the web page. It allows our component to capture some information from the page, such as where the user scrolled to, before any potential changes happen.
Syntax
getSnapshotBeforeUpdate(prevProps, prevState)
Parameters
prevProps − These are the properties that exist before the change. They can be compared to this.props to see what is new.
prevState − This is the previous state before the change. To determine changes, compare it to this.state.
Return Value
We should either return a snapshot value of any type or null. The value we returned will be sent to componentDidUpdate as the third argument.
Examples
Example 1
Let's build a small React app that makes use of the getSnapshotBeforeUpdate function. In this example, we are going to build a simple chat application where fresh messages come and we want to save the scroll position.
import React, { Component } from 'react';

class App extends Component {
   constructor(props) {
      super(props);
      this.state = {
         messages: [
            { id: 1, text: 'Hello!' },
            { id: 2, text: 'How are you?' },
         ],
         newMessage: '',
      };

      this.chatWindowRef = React.createRef();
   }
   handleInputChange = (event) => {
      this.setState({ newMessage: event.target.value });
   };
   handleSendMessage = () => {
      const { messages, newMessage } = this.state;

      // Create a new message object
      const newMessageObj = {
         id: messages.length + 1,
         text: newMessage,
      };

      // Update the state with the new message
      this.setState({
         messages: [...messages, newMessageObj],
         newMessage: '',
      });
   };
   getSnapshotBeforeUpdate(prevProps, prevState) {
      // Check if new messages are being added
      if (prevState.messages.length < this.state.messages.length) {
         const chatWindow = this.chatWindowRef.current;
         return chatWindow.scrollHeight - chatWindow.scrollTop;
      }
      return null;
   }
   componentDidUpdate(prevProps, prevState, snapshot) {
      // If there's a snapshot, adjust the scroll position
      if (snapshot !== null) {
         const chatWindow = this.chatWindowRef.current;
         chatWindow.scrollTop = chatWindow.scrollHeight - snapshot;
      }
   }
   render() {
      const { messages, newMessage } = this.state;
      return (
         <div>
            <div
               ref={this.chatWindowRef}
               style={{ height: '200px', overflowY: 'scroll', border: '1px solid #ccc', padding: '10px' }}
               >
               {/* Display messages */}
               {messages.map((message) => (
                  <div key={message.id}>{message.text}</div>
               ))}
            </div>

               {/* Input for new message */}
               <div>
                  <input type="text" value={newMessage} onChange={this.handleInputChange} />
                  <button onClick={this.handleSendMessage}>Send Message</button>
            </div>
         </div>
      );
   }
}

export default App;
Output
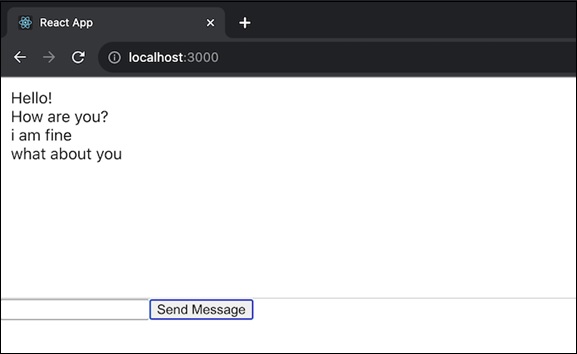
In this App −
The ChatApp component keeps a message list and a form for adding new messages.
The function getSnapshotBeforeUpdate is used to find out if new messages are being added and to record the current scroll position.
If new messages are added, componentDidUpdate updates the scroll position.
The chat window includes a scrollable area for displaying messages.
Example 2
Let us create a simple React app where users can input numbers and perform basic arithmetic operations. Here is the code −
import React, { Component } from 'react';
import './App.css';

class CalculatorApp extends Component {
   constructor(props) {
      super(props);
      this.state = {
         result: 0,
         num1: '',
         num2: '',
         operator: '+',
      };
   }
   handleNumChange = (event, numType) => {
      const value = event.target.value;

      this.setState({
         [numType]: value,
      });
   };
   handleOperatorChange = (event) => {
      this.setState({
         operator: event.target.value,
      });
   };
   handleCalculate = () => {
      const { num1, num2, operator } = this.state;

      // Convert input values to numbers
      const number1 = parseFloat(num1);
      const number2 = parseFloat(num2);

      // Perform calculation based on the selected operator
      let result = 0;
      switch (operator) {
         case '+':
            result = number1 + number2;
         break;
         case '-':
            result = number1 - number2;
         break;
         case '*':
            result = number1 * number2;
         break;
         case '/':
            result = number1 / number2;
         break;
         default:
         break;
      }

      // Update the state with result
      this.setState({
         result,
      });
   };

   render() {
      const { result, num1, num2, operator } = this.state;
      return (
         <div className='App'>
            <div>
               <input type="number" value={num1} onChange={(e) => this.handleNumChange(e, 'num1')} />
               <select value={operator} onChange={this.handleOperatorChange}>
                  <option value="+">+</option>
                  <option value="-">-</option>
                  <option value="*">*</option>
                  <option value="/">/</option>
               </select>
               <input type="number" value={num2} onChange={(e) => this.handleNumChange(e, 'num2')} />
               <button onClick={this.handleCalculate}>Calculate</button>
            </div>
            <div>
               <strong>Result:</strong> {result}
            </div>
         </div>
      );
   }
}

export default CalculatorApp;
Output
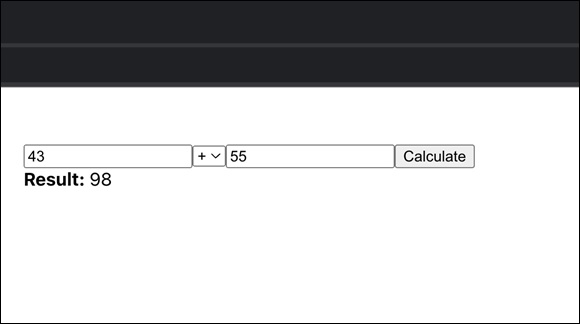
In this code we have created a simple calculator app where users can input two numbers, select an arithmetic operator, and see the result after clicking the Calculate button.
Example 3
Let's create a small React app that lets users enter tasks and mark them as done. When a new task is added, we will use the getSnapshotBeforeUpdate function to scroll to the bottom of the task list. Here is the code for the app −
import React, { Component } from 'react';

class TaskListApp extends Component {
   constructor(props) {
      super(props);
      this.state = {
         tasks: [],
         newTask: '',
      };

      this.taskListRef = React.createRef();
   }
   handleInputChange = (event) => {
      this.setState({ newTask: event.target.value });
   };
   handleAddTask = () => {
      const { tasks, newTask } = this.state;

      // Create a new task object
      const newTaskObj = {
         id: tasks.length + 1,
         text: newTask,
         completed: false,
      };

      // Update the state with the new task
      this.setState({
         tasks: [...tasks, newTaskObj],
         newTask: '',
      });
   };

   getSnapshotBeforeUpdate(prevProps, prevState) {
      // Check if new tasks are being added
      if (prevState.tasks.length < this.state.tasks.length) {
         const taskList = this.taskListRef.current;
         return taskList.scrollHeight - taskList.scrollTop;
      }
      return null;
   }
   componentDidUpdate(prevProps, prevState, snapshot) {
      if (snapshot !== null) {
         const taskList = this.taskListRef.current;
      taskList.scrollTop = taskList.scrollHeight - snapshot;
      }
   }
   handleToggleComplete = (taskId) => {
      const updatedTasks = this.state.tasks.map((task) =>
         task.id === taskId ? { ...task, completed: !task.completed } : task
      );

      this.setState({
         tasks: updatedTasks,
      });
   };
   render() {
      const { tasks, newTask } = this.state;
      return (
         <div>
            <div
               ref={this.taskListRef}
               style={{ height: '200px', overflowY: 'scroll', border: '1px solid #ccc', padding: '10px' }}
            >
               {/* Display tasks */}
               {tasks.map((task) => (
                  <div key={task.id} style={{ textDecoration: task.completed ? 'line-through' : 'none' }}>
                  <input
                     type="checkbox"
                     checked={task.completed}
                     onChange={() => this.handleToggleComplete(task.id)}
                  />
                  {task.text}
                  </div>
               ))}
            </div>

            {/* Input for new task */}
            <div>
               <input type="text" value={newTask} onChange={this.handleInputChange} />
               <button onClick={this.handleAddTask}>Add Task</button>
            </div>
         </div>
      );
   }
}

export default TaskListApp;
Output
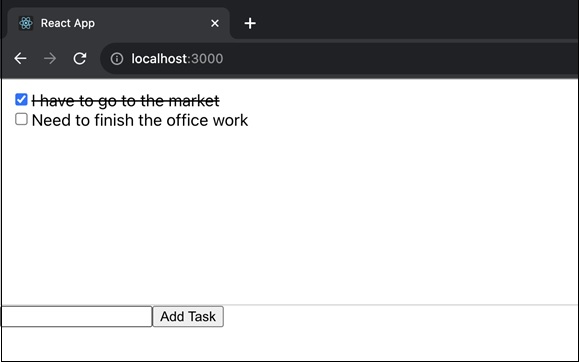
In this app, users can enter tasks, mark them as done, and view the tasks in a list. When a new task is added, the function getSnapshotBeforeUpdate is used to scroll to the bottom of the task list.
Notes
If shouldComponentUpdate is defined and returns false, React will not call getSnapshotBeforeUpdate.
There is no direct equivalent of getSnapshotBeforeUpdate for function components at the moment. If we require this capability, we have to use a class component.
Summary
So we have seen the working mechanism of the getSnapshotBeforeUpdate() function. And also we have created a small app to show the usage of the function. This component can be included into our React application to show how getSnapshotBeforeUpdate can be useful in maintaining the scroll position when new content is added.
To Continue Learning Please Login