- ReactJS Tutorial
- ReactJS - Home
- ReactJS - Introduction
- ReactJS - Installation
- ReactJS - Features
- ReactJS - Advantages & Disadvantages
- ReactJS - Architecture
- ReactJS - Creating a React Application
- ReactJS - JSX
- ReactJS - Components
- ReactJS - Nested Components
- ReactJS - Using Newly Created Components
- ReactJS - Component Collection
- ReactJS - Styling
- ReactJS - Properties (props)
- ReactJS - Creating Components using Properties
- ReactJS - props Validation
- ReactJS - Constructor
- ReactJS - Component Life Cycle
- ReactJS - Event management
- ReactJS - Creating an Event−Aware Component
- ReactJS - Introduce Events in Expense Manager APP
- ReactJS - State Management
- ReactJS - State Management API
- ReactJS - Stateless Component
- ReactJS - State Management Using React Hooks
- ReactJS - Component Life Cycle Using React Hooks
- ReactJS - Layout Component
- ReactJS - Pagination
- ReactJS - Material UI
- ReactJS - Http client programming
- ReactJS - Form Programming
- ReactJS - Controlled Component
- ReactJS - Uncontrolled Component
- ReactJS - Formik
- ReactJS - Conditional Rendering
- ReactJS - Lists
- ReactJS - Keys
- ReactJS - Routing
- ReactJS - Redux
- ReactJS - Animation
- ReactJS - Bootstrap
- ReactJS - Map
- ReactJS - Table
- ReactJS - Managing State Using Flux
- ReactJS - Testing
- ReactJS - CLI Commands
- ReactJS - Building and Deployment
- ReactJS - Example
- Hooks
- ReactJS - Introduction to Hooks
- ReactJS - Using useState
- ReactJS - Using useEffect
- ReactJS - Using useContext
- ReactJS - Using useRef
- ReactJS - Using useReducer
- ReactJS - Using useCallback
- ReactJS - Using useMemo
- ReactJS - Custom Hooks
- ReactJS Advanced
- ReactJS - Accessibility
- ReactJS - Code Splitting
- ReactJS - Context
- ReactJS - Error Boundaries
- ReactJS - Forwarding Refs
- ReactJS - Fragments
- ReactJS - Higher Order Components
- ReactJS - Integrating With Other Libraries
- ReactJS - Optimizing Performance
- ReactJS - Profiler API
- ReactJS - Portals
- ReactJS - React Without ES6 ECMAScript
- ReactJS - React Without JSX
- ReactJS - Reconciliation
- ReactJS - Refs and the DOM
- ReactJS - Render Props
- ReactJS - Static Type Checking
- ReactJS - Strict Mode
- ReactJS - Web Components
- Additional Concepts
- ReactJS - Date Picker
- ReactJS - Helmet
- ReactJS - Inline Style
- ReactJS - PropTypes
- ReactJS - BrowserRouter
- ReactJS - DOM
- ReactJS - Carousel
- ReactJS - Icons
- ReactJS - Form Components
- ReactJS - Reference API
- ReactJS Useful Resources
- ReactJS - Quick Guide
- ReactJS - Useful Resources
- ReactJS - Discussion
ReactJS - getChildContext() Method
The getChildContext() function is a component lifecycle function in React. This function in React allows a parent component to exchange specified information with its child components. It is similar to making a specific box (context) where the parent can store important data. The parent determines what to put in the box and allows the children access it without the need for direct passing by using getChildContext(). This method of communication keeps things organized and simplifies how different portions of the app communicate with one another, similar to how a family has a particular way to discuss critical information without going through each member separately.
Syntax
getChildContext()
In order to use getChildContext(), the component must define a static property called childContextTypes, which specifies the expected types of context data.
Examples
Example 1
Let us create an example using the getChildContext() function. In this example, we will create a simple app that displays user information by passing user data through context.
import PropTypes from 'prop-types';
import React, { Component } from 'react';

// Create a context
const UserContext = React.createContext({
   username: 'Guest',
   age: 0,
});

// Create a component
class UserProvider extends Component {
   // Define child context types
   static childContextTypes = {
      user: PropTypes.shape({
      username: PropTypes.string,
      age: PropTypes.number,
   }),
   };
   getChildContext() {
      return {
         user: {
            username: this.props.username,
            age: this.props.age,
         },
      };
   }

   render() {
      // Render the child components
      return this.props.children;
   }
}

// Create a component that consumes user data from context
class UserInfo extends Component {
   static contextTypes = {
      user: PropTypes.shape({
         username: PropTypes.string,
         age: PropTypes.number,
      }),
   };
   render() {
      return (
         <div>
            <p>Welcome, {this.context.user.username}!</p>
            <p>Your age: {this.context.user.age}</p>
         </div>
      );
   }
}

// Create the main App component
class App extends Component {
   render() {
      return (
         // Wrap the UserInfo component with the UserProvider
         <UserProvider username="Amit" age={25}>
            <UserInfo />
         </UserProvider>
      );
   }
}

export default App;
Output
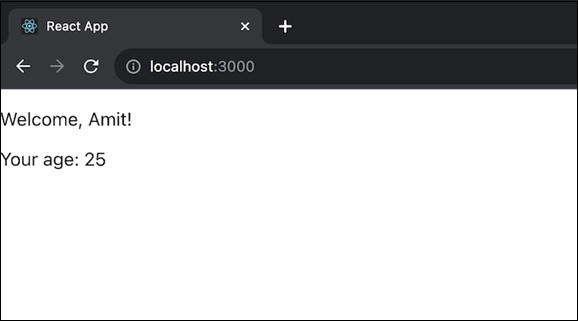
In the above code, the App component wraps the UserInfo component with the UserProvider to pass user data through context.
Example 2
Here is another example using getChildContext() to create a simple theme context in a React app −
import React, { Component } from 'react';
import PropTypes from 'prop-types';

// Create a context for the theme
const ThemeContext = React.createContext({
   theme: 'light',
   toggleTheme: () => {},
});

// Create a component for providing the theme
class ThemeProvider extends Component {

   // Define child context types
   static childContextTypes = {
      themeContext: PropTypes.shape({
         theme: PropTypes.string,
         toggleTheme: PropTypes.func,
      }),
   };

   // Set initial state
   state = {
      theme: 'light',
   };

   // Define a function to toggle the theme
   toggleTheme = () => {
      this.setState((prevState) => ({
         theme: prevState.theme === 'light' ? 'dark' : 'light',
      }));
   };

   // Provide the theme context through getChildContext()
   getChildContext() {
      return {
         themeContext: {
            theme: this.state.theme,
            toggleTheme: this.toggleTheme,
         },
      };
   }

   render() {
      // Render the child components
      return this.props.children;
   }
}

// Create a component
class ThemedComponent extends Component {
   // Define context types
   static contextTypes = {
      themeContext: PropTypes.shape({
         theme: PropTypes.string,
         toggleTheme: PropTypes.func,
      }),
   };

   render() {
      return (
         <div style={{ background: this.context.themeContext.theme === 'light' ? '#fff' : '#333', color: this.context.themeContext.theme === 'light' ? '#333' : '#fff' }}>
            <p>Current Theme: {this.context.themeContext.theme}</p>
            <button onClick={this.context.themeContext.toggleTheme}>Toggle Theme</button>
         </div>
      );
   }
}

// Create the main App component
class ThemeApp extends Component {
   render() {
      return (
         <ThemeProvider>
            <ThemedComponent />
         </ThemeProvider>
      );
   }
}

export default ThemeApp;
Output
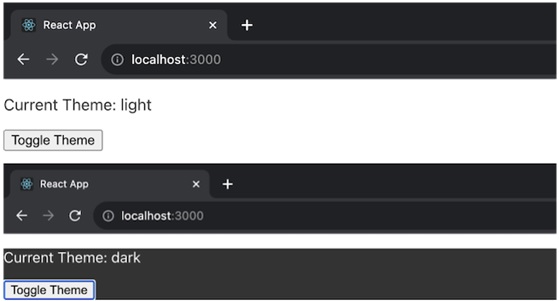
In the above example the ThemeProvider component uses getChildContext() to offer a theme context with the default theme of 'light' and a function to toggle the theme. The ThemedComponent then uses this context to display information about the current theme and a toggle button. The ThemeApp component renders the ThemedComponent within the context of the ThemeProvider.
Example 3
Let us create one more example using getChildContext() to manage user authentication in a React app −
import React, { Component } from 'react';
import PropTypes from 'prop-types';

// Create a context for user authentication
const AuthContext = React.createContext({
   isAuthenticated: false,
   login: () => {},
   logout: () => {},
});

// Create a component for providing authentication context
class AuthProvider extends Component {
   static childContextTypes = {
      authContext: PropTypes.shape({
         isAuthenticated: PropTypes.bool,
         login: PropTypes.func,
         logout: PropTypes.func,
      }),
   };

   // Set initial state
   state = {
      isAuthenticated: false,
   };

   // Define a function to handle user login
   login = () => {
      this.setState({
         isAuthenticated: true,
      });
   };

   // Define a function to handle user logout
   logout = () => {
      this.setState({
         isAuthenticated: false,
      });
   };

   // Provide the authentication context through getChildContext()
   getChildContext() {
      return {
         authContext: {
            isAuthenticated: this.state.isAuthenticated,
            login: this.login,
            logout: this.logout,
         },
      };
   }

   render() {
      // Render the child components
      return this.props.children;
   }
}

// Create a component that consumes the authentication context
class AuthComponent extends Component {
   // Define context types
   static contextTypes = {
      authContext: PropTypes.shape({
         isAuthenticated: PropTypes.bool,
         login: PropTypes.func,
         logout: PropTypes.func,
      }),
   };

   render() {
      return (
         <div>
            <p>User is {this.context.authContext.isAuthenticated ? 'authenticated' : 'not authenticated'}</p>
            {this.context.authContext.isAuthenticated ? (
               <button onClick={this.context.authContext.logout}>Logout</button>
            ) : (
               <button onClick={this.context.authContext.login}>Login</button>
            )}
         </div>
      );
   }
}

// Create the main App component
class App extends Component {
   render() {
      return (
         <AuthProvider>
            <AuthComponent />
         </AuthProvider>
      );
   }
}

export default App;
Output
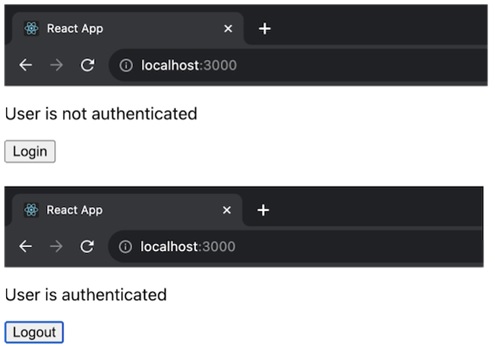
In the above app the AuthProvider component uses getChildContext() to provide an authentication context with the default value of isAuthenticated set to false. It also has functionality for managing login and logout operations. The AuthComponent uses this context to find out that the user is authenticated and to give log in and log out buttons.
Limitations
The getChildContext() function is deprecated as of React 16.3, and its use is discouraged in favor of the new Context API.
Summary
The getChildContext() function can be used to provide context in React components, and developers are advised to adopt the new Context API for improved readability and future compatibility.
To Continue Learning Please Login