- ReactJS Tutorial
- ReactJS - Home
- ReactJS - Introduction
- ReactJS - Installation
- ReactJS - Features
- ReactJS - Advantages & Disadvantages
- ReactJS - Architecture
- ReactJS - Creating a React Application
- ReactJS - JSX
- ReactJS - Components
- ReactJS - Nested Components
- ReactJS - Using Newly Created Components
- ReactJS - Component Collection
- ReactJS - Styling
- ReactJS - Properties (props)
- ReactJS - Creating Components using Properties
- ReactJS - props Validation
- ReactJS - Constructor
- ReactJS - Component Life Cycle
- ReactJS - Event management
- ReactJS - Creating an Event−Aware Component
- ReactJS - Introduce Events in Expense Manager APP
- ReactJS - State Management
- ReactJS - State Management API
- ReactJS - Stateless Component
- ReactJS - State Management Using React Hooks
- ReactJS - Component Life Cycle Using React Hooks
- ReactJS - Layout Component
- ReactJS - Pagination
- ReactJS - Material UI
- ReactJS - Http client programming
- ReactJS - Form Programming
- ReactJS - Controlled Component
- ReactJS - Uncontrolled Component
- ReactJS - Formik
- ReactJS - Conditional Rendering
- ReactJS - Lists
- ReactJS - Keys
- ReactJS - Routing
- ReactJS - Redux
- ReactJS - Animation
- ReactJS - Bootstrap
- ReactJS - Map
- ReactJS - Table
- ReactJS - Managing State Using Flux
- ReactJS - Testing
- ReactJS - CLI Commands
- ReactJS - Building and Deployment
- ReactJS - Example
- Hooks
- ReactJS - Introduction to Hooks
- ReactJS - Using useState
- ReactJS - Using useEffect
- ReactJS - Using useContext
- ReactJS - Using useRef
- ReactJS - Using useReducer
- ReactJS - Using useCallback
- ReactJS - Using useMemo
- ReactJS - Custom Hooks
- ReactJS Advanced
- ReactJS - Accessibility
- ReactJS - Code Splitting
- ReactJS - Context
- ReactJS - Error Boundaries
- ReactJS - Forwarding Refs
- ReactJS - Fragments
- ReactJS - Higher Order Components
- ReactJS - Integrating With Other Libraries
- ReactJS - Optimizing Performance
- ReactJS - Profiler API
- ReactJS - Portals
- ReactJS - React Without ES6 ECMAScript
- ReactJS - React Without JSX
- ReactJS - Reconciliation
- ReactJS - Refs and the DOM
- ReactJS - Render Props
- ReactJS - Static Type Checking
- ReactJS - Strict Mode
- ReactJS - Web Components
- Additional Concepts
- ReactJS - Date Picker
- ReactJS - Helmet
- ReactJS - Inline Style
- ReactJS - PropTypes
- ReactJS - BrowserRouter
- ReactJS - DOM
- ReactJS - Carousel
- ReactJS - Icons
- ReactJS - Form Components
- ReactJS - Reference API
- ReactJS Useful Resources
- ReactJS - Quick Guide
- ReactJS - Useful Resources
- ReactJS - Discussion
ReactJS - AnimationEvent Handler
In React, AnimationEvent handlers are functions that respond to CSS animation events in our web application. These events enable us to perform certain actions at various stages in an animation's lifecycle, such as when it starts, repeats, and ends. So we will see how to use AnimationEvent handlers in a React application in this tutorial.
How to use it?
A sort of event handler for CSS animation events.
<div
   onAnimationStart={e => console.log('onAnimationStart')}
   onAnimationIteration={e => console.log('onAnimationIteration')}
   onAnimationEnd={e => console.log('onAnimationEnd')}
/>
AnimationEvent Handler Parameters
When we create an AnimationEvent handler in React, we just have one parameter, which is usually called e (short for "event"). This parameter is a React event object with information about the animation event. This event object contains extra features particular to AnimationEvent, like −
| Sr.No | Properties & Description |
|---|---|
| 1 | animationName This property specifies the name of the animation that triggered the event. It comes in handy when we have several animations in our application and want to know which one is currently active. |
| 2 | elapsedTime The elapsedTime attribute provides the time in seconds since the animation began. This property can be used to identify how far along the animation is and to conduct certain actions as per the elapsed time. |
| 3 | pseudoElement Pseudo-elements like ::before and ::after in CSS allow us to style certain areas of an element. The pseudoElement attribute defines which pseudo-element is affected by the animation event, giving us more control if our animations contain certain pseudo-elements. |
Now that we've covered the AnimationEvent handler and its parameters, let's create a basic React application to put what we've learned into practice.
Examples
Example − Change Background Color
We will create a basic React application that shows the use of AnimationEvent handlers. So we will have a box that changes its background color through a CSS animation.
App.js
import React from 'react';
import './App.css';

class App extends React.Component {
   handleAnimationStart(e) {
      console.log('Animation started:', e.animationName);
   }
   handleAnimationEnd(e) {
      console.log('Animation ended:', e.animationName);
   }
   render() {
      return (
         <div className="box" onAnimationStart={this.handleAnimationStart} onAnimationEnd={this.handleAnimationEnd}>
            CSS Animation Demo
         </div>
      );
   }
}

export default App;
App.css
.box {
   width: 200px;
   height: 200px;
   background-color: red;
   animation: colorChange 3s infinite;
}

@keyframes colorChange {
   0% {
      background-color: red;
   }
   50% {
      background-color: blue;
   }
   100% {
      background-color: red;
   }
}
Output
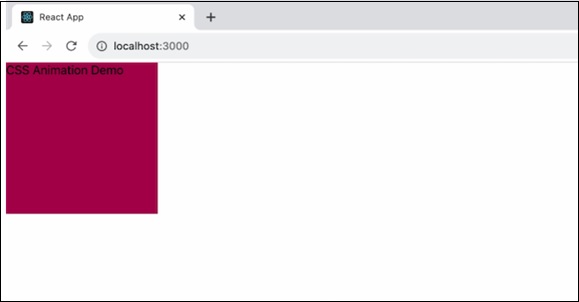
In the above example, We have a simple React class component with two event handlers: handleAnimationStart and handleAnimationEnd. When the animation starts and ends, these handlers will log messages to the console.
When we open the browser's developer console, we will see notifications showing when the animation starts and ends, as well as the name of the animation.
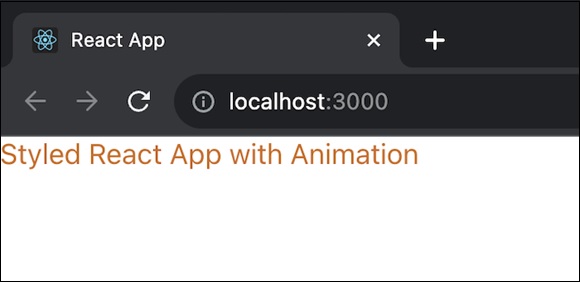
Example − Styled Animation
In this React app we will use a styled animation using CSS. We will use a sliding animation (slide-in) applied to the styled-animation-div class. The animation starts with the element translated outside the viewport and gradually moves it to its original position over a duration of 5 seconds.
App.js
import React from 'react';
import './App.css'; // Import the corresponding CSS file

const App = () => {
   return (
      <div
         onAnimationStart={() => console.log('onAnimationStart')}
         onAnimationIteration={() => console.log('onAnimationIteration')}
         onAnimationEnd={() => console.log('onAnimationEnd')}
         className="styled-animation-div"
         >
         Styled React App with Animation
      </div>
   );
};

export default App;
App.css
.styled-animation-div {
   /* Add desired styles and animations here */
   animation: slide-in 5s ease-in-out;
   color: chocolate;
}

@keyframes slide-in {
   0% {
      transform: translateX(-100%);
   }
   100% {
      transform: translateX(0);
   }
}
Output
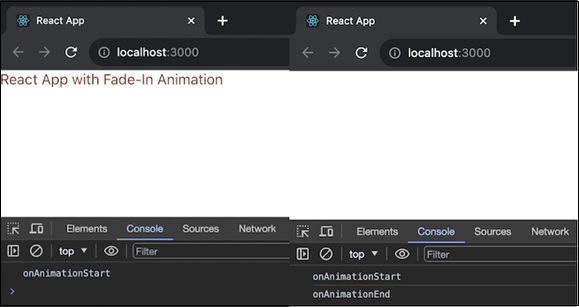
Example − Fade in App
Here is another example of a React app with a different animation. In this we will create App.js and App.css files. The app will use a fade-in animation (fade-in) applied to the fade-in-div class. The element starts with zero opacity and gradually becomes fully opaque over a duration of 5 seconds.
App.js
import React from 'react';
import './App.css'; // Import the corresponding CSS file

const App = () => {
   return (
      <div
         onAnimationStart={() => console.log('onAnimationStart')}
         onAnimationIteration={() => console.log('onAnimationIteration')}
         onAnimationEnd={() => console.log('onAnimationEnd')}
         className="fade-in-div"
         >
         React App with Fade-In Animation
      </div>
   );
};

export default App;
App.css
.fade-in-div {
   opacity: 0;
   animation: fade-in 5s ease-in-out;
   color: rgb(88, 27, 5);
}

@keyframes fade-in {
   0% {
      opacity: 0;
   }
   100% {
      opacity: 1;
   }
}
Output
Summary
We have successfully constructed a React application using AnimationEvent handlers and parameters. This knowledge can now be applied to manage more complex animations and build interesting user experiences in our online applications.
To Continue Learning Please Login