- NativeScript Tutorial
- NativeScript - Home
- NativeScript - Introduction
- NativeScript - Installation
- NativeScript - Architecture
- NativeScript - Angular Application
- NativeScript - Templates
- NativeScript - Widgets
- NativeScript - Layout Containers
- NativeScript - Navigation
- NativeScript - Events Handling
- NativeScript - Data Binding
- NativeScript - Modules
- NativeScript - Plugins
- NativeScript - Native APIs Using JavaScript
- NativeScript - Creating an Application in Android
- NativeScript - Creating an Application in iOS
- NativeScript - Testing
- NativeScript Useful Resources
- NativeScript - Quick Guide
- NativeScript - Useful Resources
- NativeScript - Discussion
NativeScript - Angular Application
Let us create a simple bare bone application to understand the work flow of the NativeScript application.
Creating the Application
Let us learn how to create simple application using NativeScript CLI, tns. tns provides a command create to used to create a new project in NativeScript.
The basic syntax to create a new application is as below −
tns create <projectname> --template <template_name>
Where,
Projectname is the Name of the project.
template_name is Project template. NativeScript provides lot of startup template to create different type of application. Use Angular based template.
Let us create a new directory named NativeScriptSamples to work on our new application. Now, open a new terminal then move to our directory and type the below command −
tns create BlankNgApp --template tns-template-blank-ng
Where, tns-template-blank-ng refers a blank mobile application based on AngularJS.
Output
.....
.....
.....
Project BlankNgApp was successfully created.
Now you can navigate to your project with $ cd BlankNgApp
After that you can preview it on device by executing $ tns preview
Now, our first mobile application, BlankNgApp is created.
Structure of the Application
Let us understand the structure of the NativeScript application by analyzing our first application BlankNgApp in this chapter. NativeScript application is organized into multiple sections and they are as follows −
Configuration section
Node modules
Android sources
iOS Sources
Application source code
The general structure of the application is as follows −
│ angular.json
│ LICENSE
│ nsconfig.json
│ package-lock.json
│ package.json
│ tsconfig.json
│ tsconfig.tns.json
│ tsfmt.json
│ webpack.config.js
│
├───App_Resources
│  ├───Android
│  │
│  └───iOS
│
├───hooks
│
├───node_modules
|
└───src
   │ app.css
   │ main.ts
   │ package.json
   │
   └───app
      │  app-routing.module.ts
      │  app.component.html
      │  app.component.ts
      │  app.module.ts
      │
      └───home
         home-routing.module.ts
         home.component.html
         home.component.ts
         home.module.ts
Let us understand each section of the application and how it helps us to create our application.
Configuration section
All the files in the root of the application are configuration files. The format of the configuration files are in JSON format, which helps the developer to easily understand the configuration details. NativeScript application relies on these files to gets all available configuration information. Let us go through all the configuration files in this section.
package.json
package.json files sets the identity (id) of the application and all the modules that the application depends on for its proper working. Below is our package.json −
{
   "nativescript": {
      "id": "org.nativescript.BlankNgApp",
      "tns-android": {
         "version": "6.3.1"
      }, "tns-ios": {
         "version": "6.3.0"
      }
   }, "description": "NativeScript Application",
   "license": "SEE LICENSE IN <your-license-filename>",
   "repository": "<fill-your-repository-here>",
   "dependencies": {
      "@angular/animations": "~8.2.0",
      "@angular/common": "~8.2.0",
      "@angular/compiler": "~8.2.0",
      "@angular/core": "~8.2.0",
      "@angular/forms": "~8.2.0",
      "@angular/platform-browser": "~8.2.0",
      "@angular/platform-browser-dynamic": "~8.2.0",
      "@angular/router": "~8.2.0",
      "@nativescript/theme": "~2.2.1",
      "nativescript-angular": "~8.20.3",
      "reflect-metadata": "~0.1.12",
      "rxjs": "^6.4.0",
      "tns-core-modules": "~6.3.0",
      "zone.js": "~0.9.1"
   },
   "devDependencies": {
      "@angular/compiler-cli": "~8.2.0",
      "@ngtools/webpack": "~8.2.0",
      "nativescript-dev-webpack": "~1.4.0",
      "typescript": "~3.5.3"
   },
   "gitHead": "fa98f785df3fba482e5e2a0c76f4be1fa6dc7a14",
   "readme": "NativeScript Application"
}
Here,
Identity of the application (nativescript/id) − Sets the id of the application as org.nativescript.BlankNgApp. This id is used to publish our app to the Play Store or iTunes. This id will be our Application Identifier or Package Name.
Dependencies (dependencies) − Specifies all our dependent node modules. Since, the default NativeScript implementation depends on Angular Framework, Angular modules are included.
Development dependencies − Specifies all the tools that the application depends on. Since, we are developing our application in TypeScript, it includes typescript as one of the dependent modules.
angular.json − Angular framework configuration information.
nsconfig.json − NativeScript framework configuration information.
tsconfig.json, tsfmt.json & tsconfig.tns.json − TypeScript language configuration information
webpack.config.js − WebPack configuration written in JavaScript.
Node modules
As NativeScript project are node based project, it stores all its dependencies in the node_modules folder. We can use npm (npm install) or tns to download and install all the application dependency into the node_moduels.
Android source code
NativeScript auto-generates the android source code and place it in App_Resources\Android folder. It will be used to create android application using Android SDK
iOS source code
NativeScript auto-generates the iOS source code and place it in App_Resources\iOS folder. It will be used to create iOS application using iOS SDK and XCode
Application source code
The actual application code is placed in src folder. Our application has below files in src folder.
└───src
   │ app.css
   │ main.ts
   │ package.json
   │
   └───app
   │ app-routing.module.ts
   │ app.component.html
   │ app.component.ts
   │ app.module.ts
   │
   └───home
         home-routing.module.ts
         home.component.html
         home.component.ts
         home.module.ts
Let us understand the purpose of all files and how they are organized in this section −
Step 1
main.ts - Entry point of the application.
// this import should be first in order to load some required settings (like globals and reflect-metadata)
import { platformNativeScriptDynamic } from "nativescript-angular/platform";
import { AppModule } from "./app/app.module";
platformNativeScriptDynamic().bootstrapModule(AppModule);
Here, we have set the AppModule as the bootstrapping module of the application.
Step 2
app.css - Main style sheet of the application is as shown below −
@import "~@nativescript/theme/css/core.css";
@import "~@nativescript/theme/css/brown.css";
/* Place any CSS rules you want to apply on both iOS and Android here.
This is where the vast majority of your CSS code goes. */
Here,
app.css imports the core style sheet and brown color themes style sheet of the NativeScript framework.
Step 3
app\app.module.ts - Root module of the application.
import { NgModule, NO_ERRORS_SCHEMA } from "@angular/core";
import { NativeScriptModule } from "nativescript-angular/nativescript.module";
import { AppRoutingModule } from "./app-routing.module";
import { AppComponent } from "./app.component";
@NgModule(
   {
      bootstrap: [
         AppComponent
      ],
      imports: [
         NativeScriptModule,
         AppRoutingModule
      ],
      declarations: [
         AppComponent
      ], schemas: [
         NO_ERRORS_SCHEMA
      ]
   }
)
export class AppModule { }
Here,
AppModule is created based on NgModule and sets the components and modules of the application. It imports two modules NativeScriptModule and AppRoutingModule and a component, AppComponent. It also set the AppComponent as the root component of the application.
Step 4
app.component.ts - Root component of the application.
import { Component } from "@angular/core";
@Component(
   {
      selector: "ns-app",
      templateUrl: "app.component.html"
   }
)
export class AppComponent { }
Here,
AppComponent sets the template and style sheet of the component. Template is designed in plain HMTL using NativeScript UI components.
Step 5
app-routing.module.ts - Routing module for the AppModule
import { NgModule } from "@angular/core";
import { Routes } from "@angular/router";
import { NativeScriptRouterModule } from "nativescript-angular/router";
const routes: Routes = [
   { path: "", redirectTo: "/home", pathMatch: "full" },
   { path: "home", loadChildren: () =>
   import("~/app/home/home.module").then((m) => m.HomeModule) }
];
@NgModule(
   {
      imports: [NativeScriptRouterModule.forRoot(routes)],
      exports: [NativeScriptRouterModule]
   }
)
export class AppRoutingModule { }
Here,
AppRoutingModule uses the NativeScriptRouterModule and sets the routes of the AppModule. It basically redirects the empty path to /home and the points the /home to HomeModule.
Step 6
app\home\home.module.ts - Defines a new module, HomeModule.
import { NgModule, NO_ERRORS_SCHEMA } from "@angular/core";
import { NativeScriptCommonModule } from "nativescript-angular/common";
import { HomeRoutingModule } from "./home-routing.module";
import { HomeComponent } from "./home.component";
@NgModule(
   {
      imports: [
         NativeScriptCommonModule,
         HomeRoutingModule
      ],
      declarations: [
         HomeComponent
      ],
      schemas: [
         NO_ERRORS_SCHEMA
      ]
   }
)
export class HomeModule { }
Here,
HomeModule imports two modules, HomeRoutingModule and NativeScriptCommonModule and one component HomeComponent
Step 7
app\home\home.component.ts - Defines the Home component and used as home page of the application.
import { Component, OnInit } from "@angular/core";
@Component(
   {
      selector: "Home", templateUrl: "./home.component.html"
   }
)
export class HomeComponent implements OnInit {
   constructor() {
      // Use the component constructor to inject providers.
   }
   ngOnInit(): void {
      // Init your component properties here.
   }
}
Here,
HomeComponent sets the template and selector of the home component.
Step 8
app\home\home-routing.module.ts - Routing module for HomeModule and used to define routing for home module.
import { NgModule } from "@angular/core";
import { Routes } from "@angular/router";
import { NativeScriptRouterModule } from "nativescript-angular/router";
import { HomeComponent } from "./home.component";
const routes: Routes = [
   { path: "", component: HomeComponent }
];
@NgModule(
   {
      imports: [NativeScriptRouterModule.forChild(routes)],
      exports: [NativeScriptRouterModule]
   }
)
export class HomeRoutingModule { }
Here,
HomeRoutingModule set the empty path to HomeComponent.
Step 9
app.component.html and home.component.html - They are used to design the UI of the application using NativeScript UI components.
Run your app
If you want run your app without using any device, then type the below command −
tns preview
After executing this command, this will generate QR code to scan and connect with your device.
Output
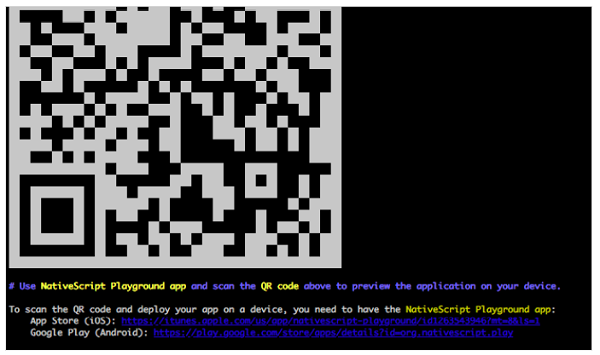
QRCode
Now QR code is generated and connect to PlayGround in next step.
NativeScript PlayGround
Open NativeScript PlayGround app on your iOS or Android mobile then choose Scan QR code option. It will open the camera. Focus the QR code displayed on the console. This will scan the QR Code. Scanning the QR Code will trigger the application build and then sync the application to the device as given below −
Copying template files...
Platform android successfully added. v6.3.1
Preparing project...
File change detected. Starting incremental webpack compilation...
webpack is watching the files…
Hash: 1f38aaf6fcda4e082b88
Version: webpack 4.27.1
Time: 9333ms
Built at: 01/04/2020 4:22:31 PM
               Asset          Size        Chunks         Chunk Names
               0.js           8.32 KiB     0     [emitted]
          bundle.js           22.9 KiB    bundle [emitted] bundle
       package.json          112 bytes           [emitted]
         runtime.js             73 KiB   runtime [emitted] runtime
tns-java-classes.js            0 bytes  [emitted]
          vendor.js            345 KiB   vendor  [emitted] vendor
Entrypoint bundle = runtime.js vendor.js bundle.js
[../$$_lazy_route_resource lazy recursive] ../$$_lazy_route_resource lazy
namespace object 160 bytes {bundle} [built] [./app.css] 1.18 KiB {bundle} [built] [./app/app-routing.module.ts] 688 bytes {bundle} [built]
[./app/app.component.html] 62 bytes {bundle} [built]
[./app/app.component.ts] 354 bytes {bundle} [built]
[./app/app.module.ts] 3.22 KiB {bundle} [built]
[./app/home/home.module.ts] 710 bytes {0} [built]
[./main.ts] 1.84 KiB {bundle} [built]
[@angular/core] external "@angular/core" 42 bytes {bundle} [built] [nativescript-angular/nativescript.module] external "nativescript-
angular/nativescript.module" 42 bytes {bundle} [built]
[nativescript-angular/platform] external "nativescript-angular/platform" 42
bytes {bundle} [built] [tns-core-modules/application] external "tns-core-
modules/application" 42 bytes {bundle} [built]
[tns-core-modules/bundle-entry-points] external "tns-core-modules/bundle-entry-points" 42
bytes {bundle} [built]
[tns-core-modules/ui/frame] external "tns-core-
modules/ui/frame" 42 bytes {bundle} [built]
[tns-core-modules/ui/frame/activity] external "tns-core-
modules/ui/frame/activity" 42 bytes {bundle} [built]
   + 15 hidden modules Webpack compilation complete. Watching for file changes.
Webpack build done!
Project successfully prepared (android)
Start sending initial files for device Bala Honor Holly (ff5e8622-7a01-4f9c-
b02f-3dc6d4ee0e1f).
Successfully sent initial files for device Bala Honor Holly (ff5e8622-7a01-4f9c-b02f-3dc6d4ee0e1f).
LOG from device Bala Honor Holly: HMR: Hot Module Replacement Enabled. Waiting for signal.
LOG from device Bala Honor Holly: Angular is running in the development mode.
Call enableProdMode() to enable the production mode.
Output
After scanning, you should see your BlankNgApp on your device. It is shown below −
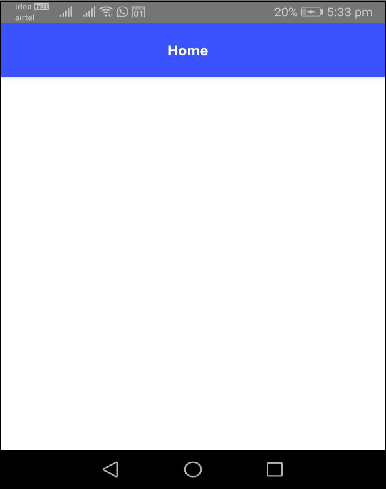
Run your app on device
If you want to test the connected device in your application, you can verify it using the below syntax −
'tns device <Platform> --available-devices'
After that, you can execute your app using the below command −
tns run
The above command is used to build your apps locally and install on Andriod or iOS devices. If you want to run your app on an Android simulator, then type the below command −
tns run android
For iOS device, you can follow the below command −
tns run ios
This will initialize the app in an Android/iOS device. We will discuss this more in detail in the upcoming chapters.
LiveSync
NativeScript provides real time syncing of changes in the application to the preview application. Let us open the project using any of your favourite editor (Visual Studio Code would be the ideal choice for better visualization). Let us add some changes in our code and see how that will be detected in LiveSync.
Now open the file app.css and it will have below content −
@import "~@nativescript/theme/css/core.css";
@import "~@nativescript/theme/css/blue.css";
/* Place any CSS rules you want to apply on both iOS and Android here.
This is where the vast majority of your CSS code goes. */
Here, import statement tells the color scheme of our app. Let’s change the blue color scheme to the brown color scheme as specified below −
@import "~@nativescript/theme/css/core.css";
@import "~@nativescript/theme/css/brown.css";
/* Place any CSS rules you want to apply on both iOS and Android here.
This is where the vast majority of your CSS code goes. */
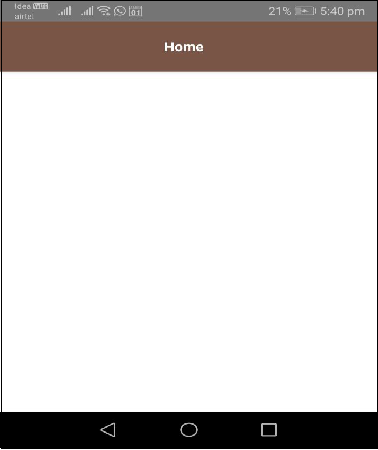
The application in our device refreshes and you should see a brown color ActionBar as shown below −
Output
Below is the BlankNgApp Home Page - Brown Theme.