- Continuous Integration Tutorial
- CI - Home
- CI - Overview
- CI - Software
- CI - Reducing Risks
- CI - Version Control
- CI - Features
- CI - Requirements
- CI - Building a Solution
- CI - Build Scripts
- CI - Building On the Server
- CI - Checking in Source Code
- CI - Creating a Project in TeamCity
- CI - Defining Tasks
- CI - Build Failure Notifications
- CI - Documentation and Feedback
- CI - Testing
- CI - Inspection
- CI - Database
- CI - Deployment
- CI - Best Practices
- Continuous Integration Resources
- CI - Quick Guide
- CI - Useful Resources
- CI - Discussion
Continuous Integration - Deployment
Automated builds and repeatable builds. Automated tests and repeatable tests. Test categories and test frequencies. Continuous inspections. Continuous database integration. These string of tasks in creating an effective CI environment primarily enables one key benefit: releasing working software at any point in time, in any environment.
In our previous chapters, we have accomplished all of the following segments −
- Created our code.
- Ensured a proper build in TeamCity.
- Created a Database Integration process.
- Conducted successful testing.
Now the only thing remaining is to carry out an automated deployment, so that our entire process is complete.
For an automated deployment in our case, we need to follow these steps −
In our deployment server, ensure that IIS is installed.
Ensure that IIS user is given access to our database.
Create a publish profile which will be used to publish the site when it is built.
Ensure we change our MSBuild command to do an automatic deployment.
Automate TeamCity to do an automatic publish.
Do a git commit to ensure all your files are in Git.
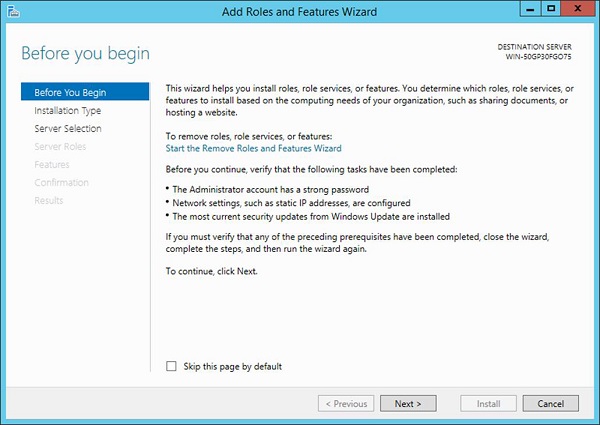
Step 1 − Configure a local IIS Server. If you have a local or remote IIS Server, the following configuration can be carried out to deploy our application. It’s always a good practice to see if a deployment can be done manually before it is done in an automated fashion.
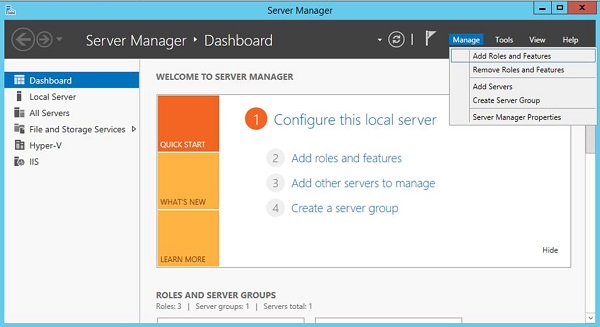
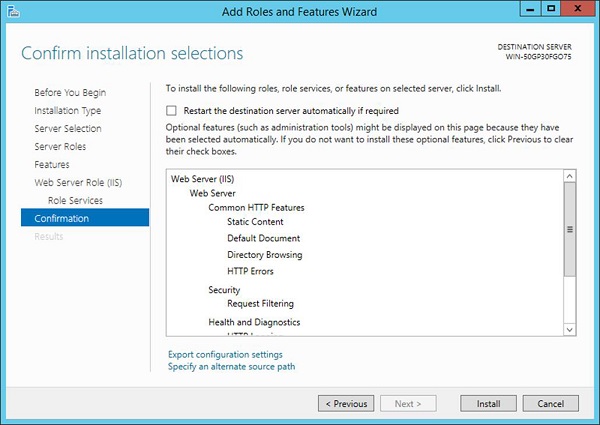
Step 2 − On a Windows 2012 server, go to your Server Manager and click on Add Roles and Features.
Step 3 − Click Next on the following screen that comes up.
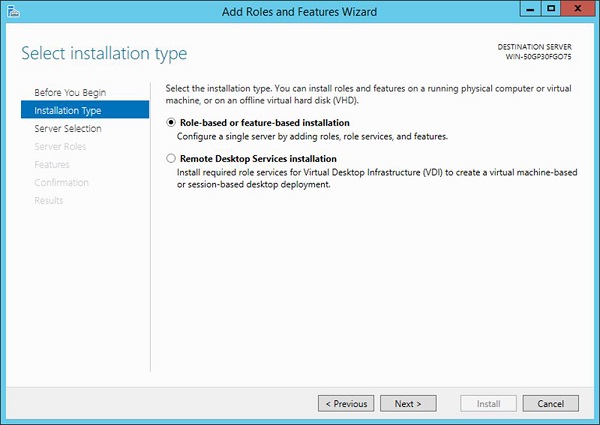
Step 4 − Choose roles-based or feature-based installation on the next screen and click Next.
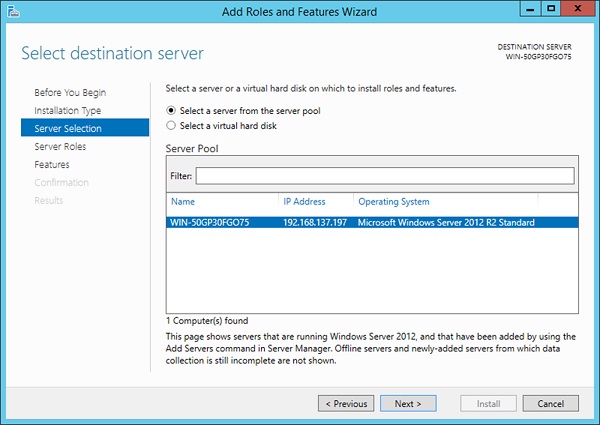
Step 5 − Select the default server and click Next.
Step 6 − Choose the Web server role and click Next.
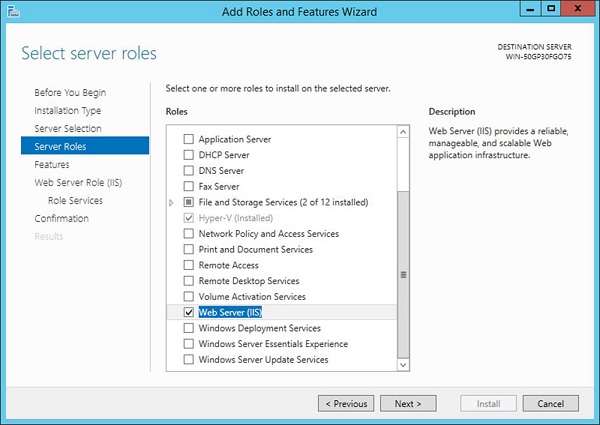
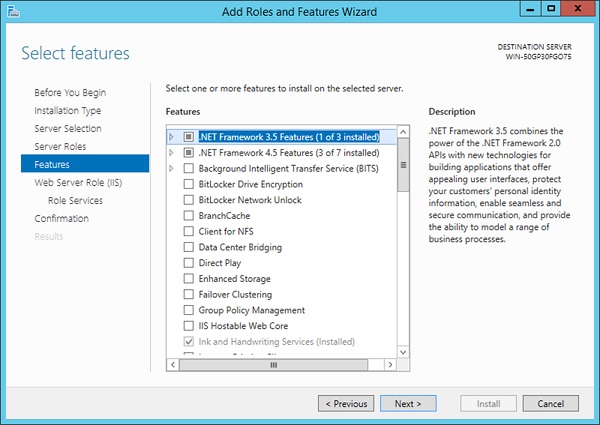
Step 7 − In the next screen that comes up, click Next.
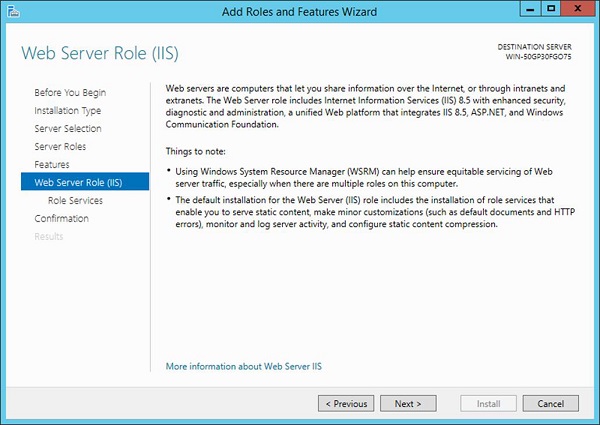
Step 8 − Click Next again on the following screen that appears.
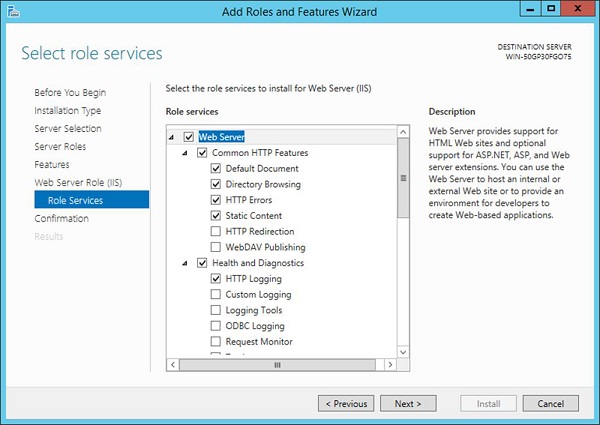
Step 9 − In the next screen that pops up, click Next.
Step 10 − In the final screen, you can click the Install button to install the IIS.
Once you have IIS installed, you can open it by opening the Internet Information Services.
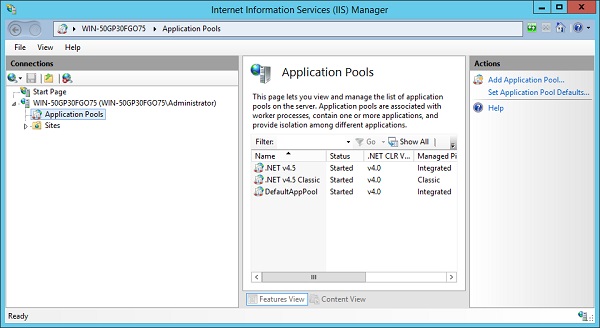
Step 11 − Click Application Pools, you will see a pool with the name of DefaultAppPool. This needs to have access to SQL Server in the next step.
Step 12 − If we need to connect a ASP.Net application to a MS SQL Server application, we have to give access to the default application pool to the SQL Server instance, so that it can connect to our Demodb database.
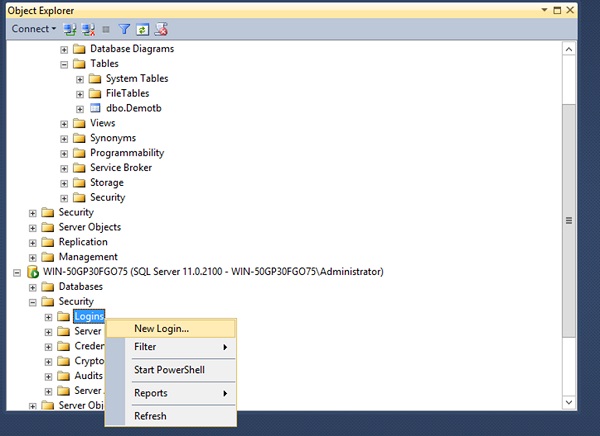
Step 13 − Open SQL Server Management Studio. Go to Logins, right-click and choose the menu option New Login.
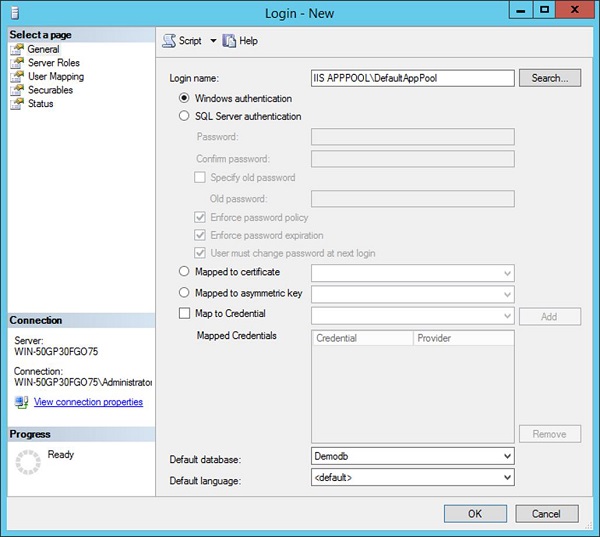
In the next screen, update the following parameters and click OK.
- Login name as IIS APPPOOL\DefaultAppPool.
- Default database – This should be our database, which is demodb.
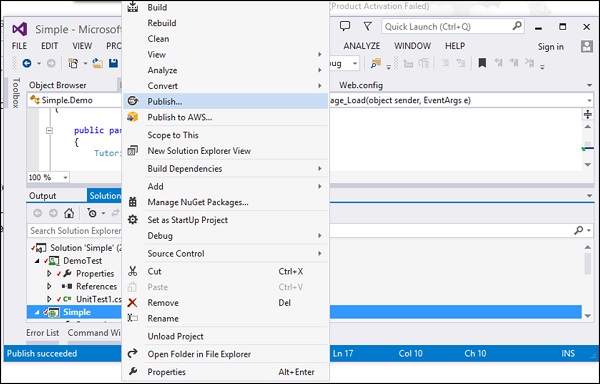
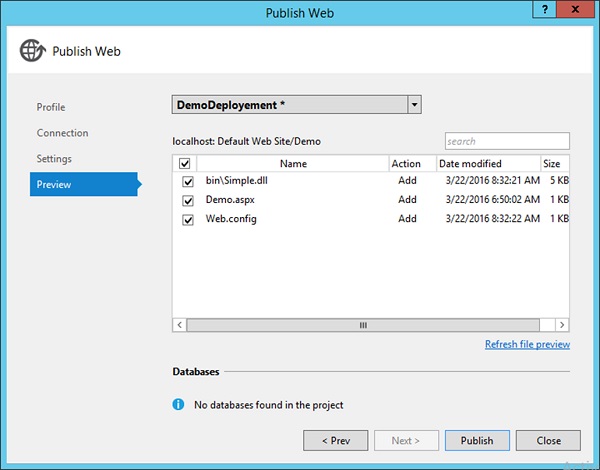
Step 14 − Creating a Publish Profile. The publish profile is used in Visual Studio to create a deployment package that can then be used with MS Build and in any CI Server accordingly. To do this, from Visual Studio, right-click on the project and click the menu option of Publish
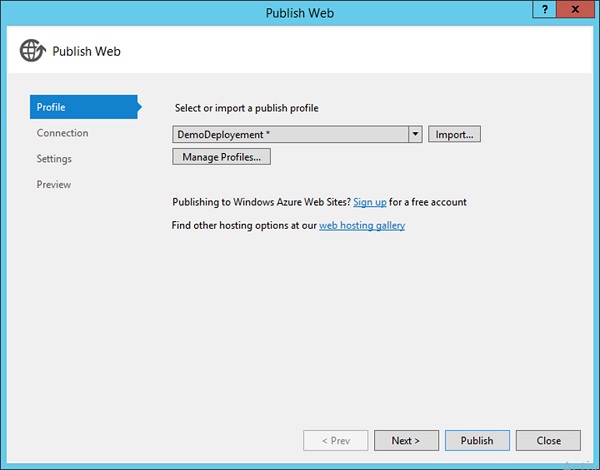
Step 15 − In the next screen that comes up, choose to create a new Publish profile, give it a name – DemoDeployment. Then click the Next button.
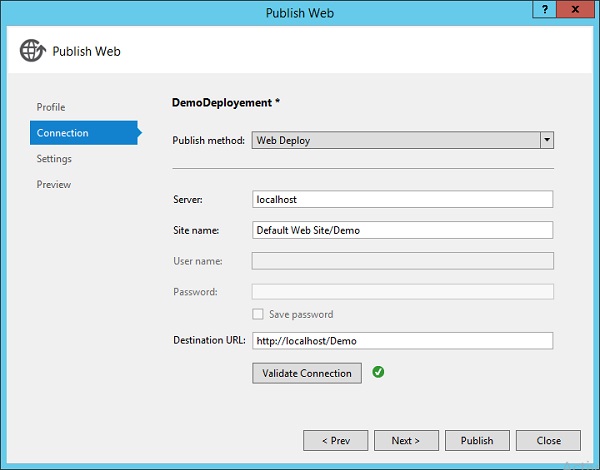
In the ensuing screen that shows up, add the following values −
- Choose the Publish method as Web Deploy.
- Enter the server as localhost.
- Enter the site name as Default Web Site/Demo.
- Put the destination url as http://localhost/Demo
Then click the Next button.
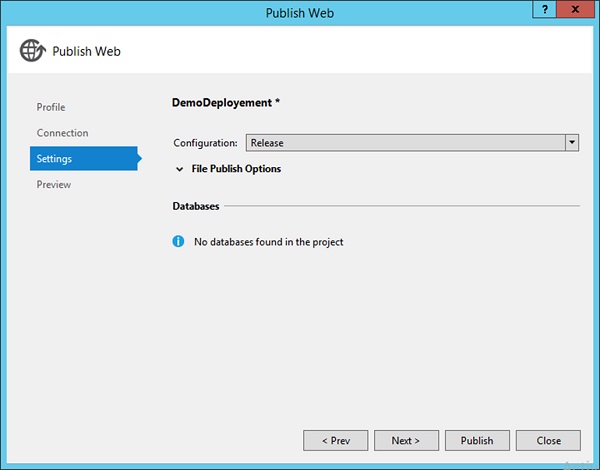
Step 16 − In the next screen, click Next.
Step 17 − In the final screen that comes up, click the Publish button.
Now if you go to the C:\Demo\Simple\Properties\PublishProfiles location of your project, you will see a new publish profile xml file created. This publish profile file will have all the details required to publish your application to the local IIS server.
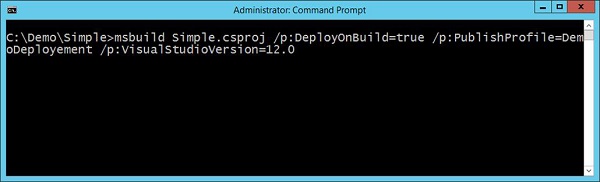
Step 18 − Now let’s customize our MSBuild command and use the above publish profile and see what happens. In our MSBuild command, we specify the following parameters −
Deploy on Build is true – this will trigger an automatic deployment once a successful build is done.
We are then mentioning to use the Publish profile which was used in the above step.
The Visual Studio version is just to be mentioned to the MSBuild deployment capability on what is the version of the Visual Studio being used.
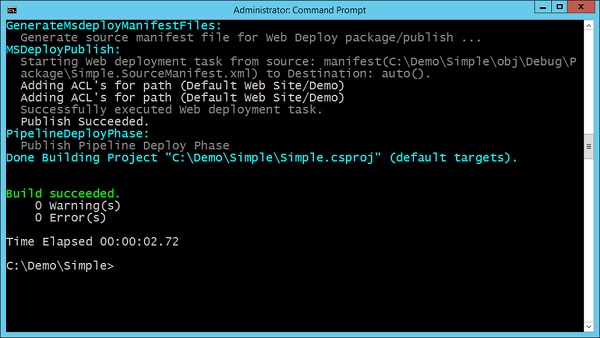
When you run the above command, MSBuild will trigger a build and deployment process. What you will note that, it is deploying it to our Default Website in our IIS Server.
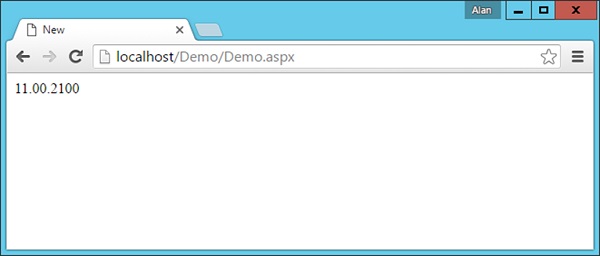
Now if we browse to the site – http://localhost/Demo/Demo.aspx we will see the following output, which means that the MSBuild did a successful deployment to our website.
Step 19 − Automating through TeamCity – Now it is time to add a task to our TeamCity server to automatically use MSBuild to deploy our application, based on the above mentioned steps.
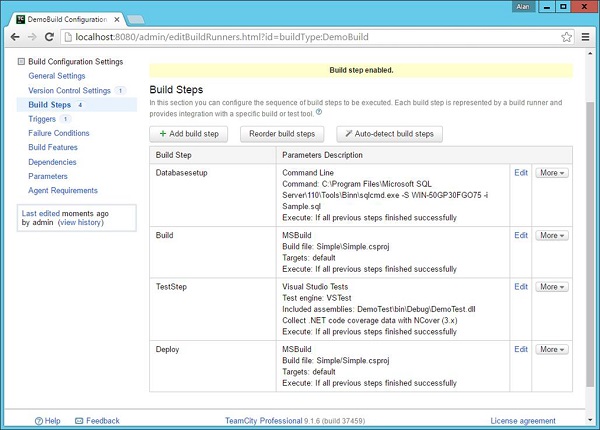
Step 20 − Go to your project dashboard and click Edit Configuration Settings.
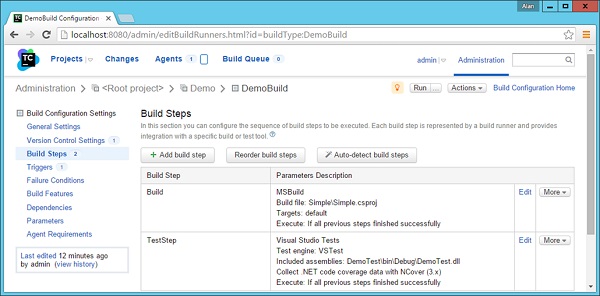
Step 21 − Go to Build Steps and click Add a Build step.
Choose the following options −
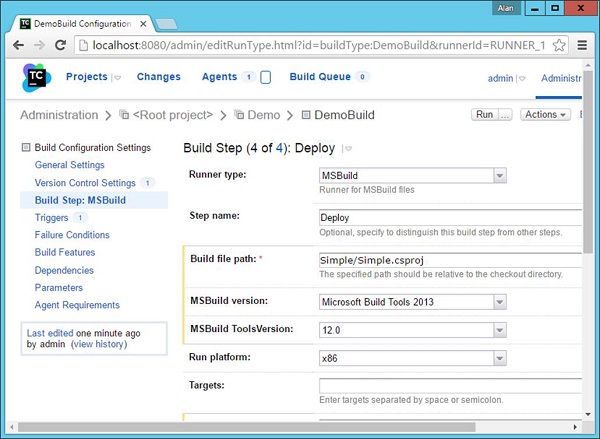
The runner type should be MSBuild
Give an optional Step name
Enter the build path as Simple/Simple.csproj
Keep the MSBuild version as Microsoft Build Tools 2013
Keep the MSBuild Toolsversion as 12.0
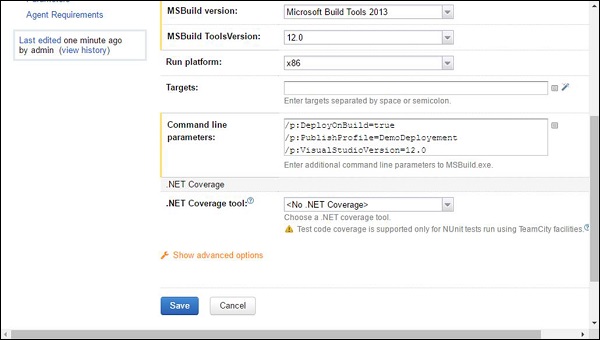
Put the command line as /p:DeployOnBuild = true /p:PublishProfile = DemoDeployement /p:VisualStudioVersion = 12.0
Step 22 − Click Save.
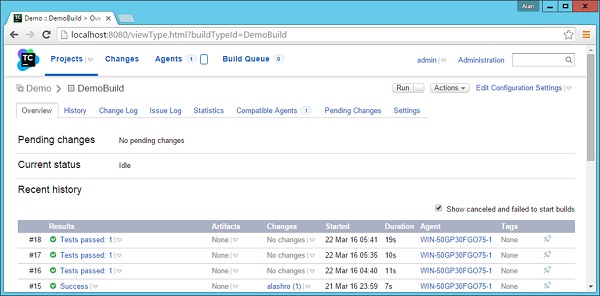
Make sure that in the build steps, the Deploy step is the last step in the chain.
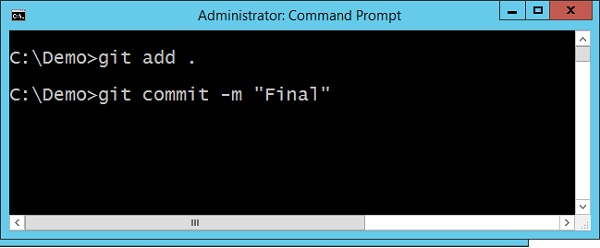
Step 23 − Now let’s do a final git commit, to ensure all the files are in Git and can be used by TeamCity.
Congratulations, you have successfully set up a complete Continuous Integration Cycle for your application, which can be run at any point in time.