- Continuous Integration Tutorial
- CI - Home
- CI - Overview
- CI - Software
- CI - Reducing Risks
- CI - Version Control
- CI - Features
- CI - Requirements
- CI - Building a Solution
- CI - Build Scripts
- CI - Building On the Server
- CI - Checking in Source Code
- CI - Creating a Project in TeamCity
- CI - Defining Tasks
- CI - Build Failure Notifications
- CI - Documentation and Feedback
- CI - Testing
- CI - Inspection
- CI - Database
- CI - Deployment
- CI - Best Practices
- Continuous Integration Resources
- CI - Quick Guide
- CI - Useful Resources
- CI - Discussion
Continuous Integration - Defining Tasks
Now that we have our base code in Git and a link to the Continuous Integration server, its finally time to see the first step of Continuous Integration in action. This is done by defining tasks in the Continuous Integration server such as triggers, which makes the entire Continuous Integration Process as seamless as possible. Let’s make a change to our code in Visual Studio.
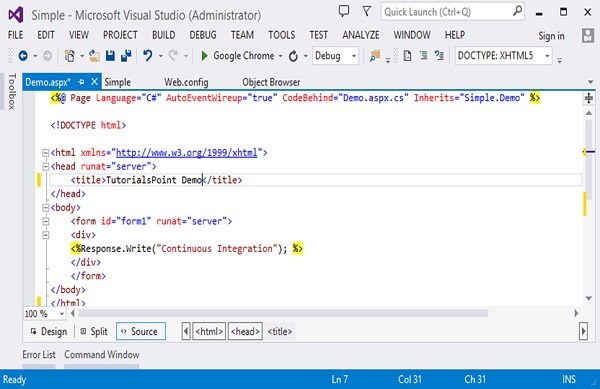
Step 1 − Go to the Demo.aspx page in Visual Studio and make a change to the title of the page.
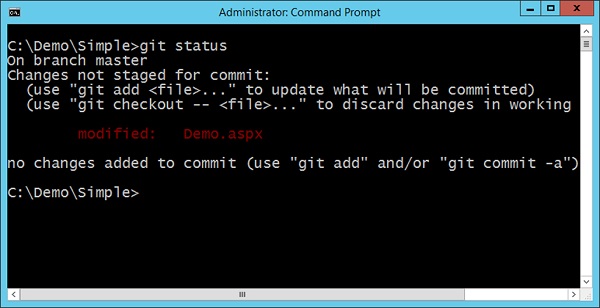
Step 2 − If we query our Git repository via the git status command, you will in fact see that the Demo.aspx file has been modified.
Now we need to ensure that every change in our code should trigger a build in our continuous integration server. For this we need to do the following changes.
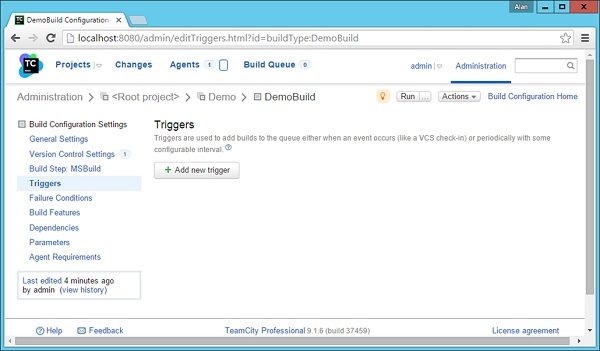
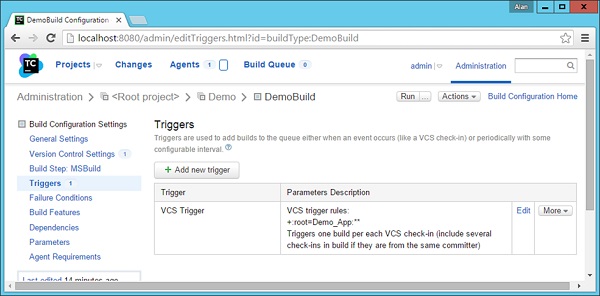
Step 3 − Go to your project dashboard and click the triggers section and click Add new trigger.
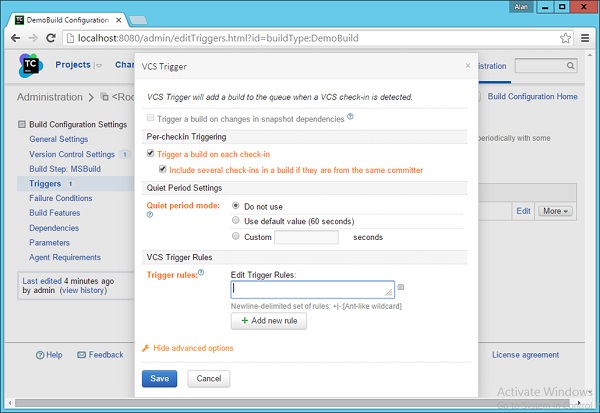
Step 4 − In the next screen that comes up, choose VCS trigger, which will be used to create a trigger so that when a check-in is made to the repository, a build will be triggered.

Step 5 − Click Show Advanced Options and ensure the options shown in the following screenshot are selected.
Step 6 − Click Save. You will now see the trigger successfully registered as shown in the following screenshot.
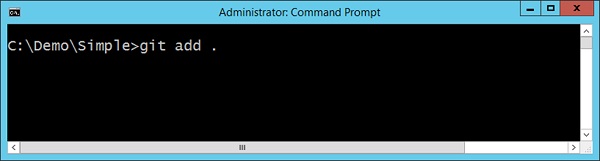
Step 7 − Now it’s time to check in our code into the Git repository and see what happens. So let’s go to our command prompt and issue the git add command to stage our changed files.
Step 8 − Now issue the git commit command, and it will push the changes into the Git repository.

Step 9 − If you now go to your Projects Overview screen, you will now see a new build would have been triggered and run.

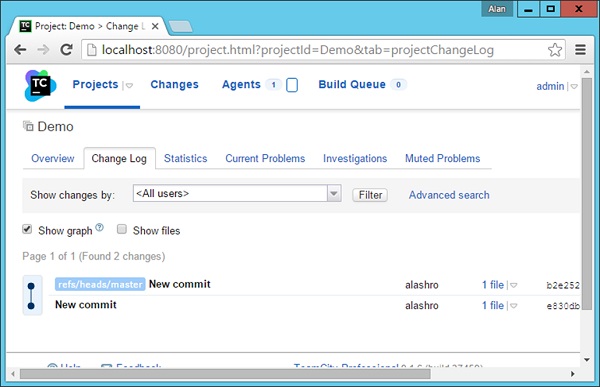
If you see the Change log Tab, you will see the git comment which triggered the build.
Let’s try it one more time. Let’s make another change to the Demo.aspx file. Let’s carry out a git add command and a git commit command with the following commit message.

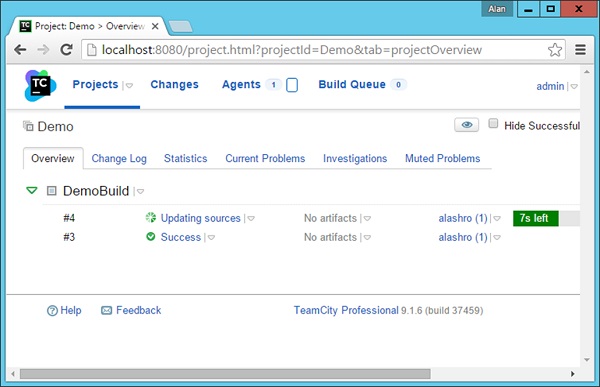
You will now see a build being automatically triggered in the Project dashboard in TeamCity.
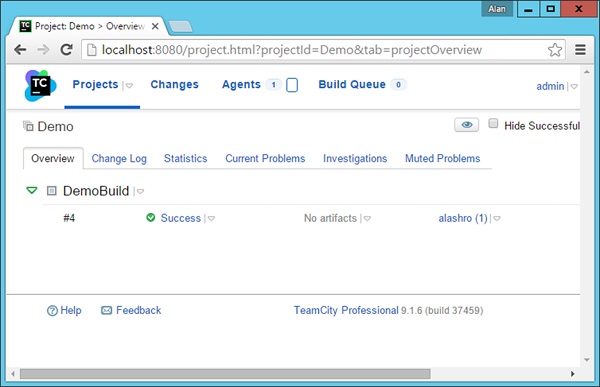
The build will show a success message.
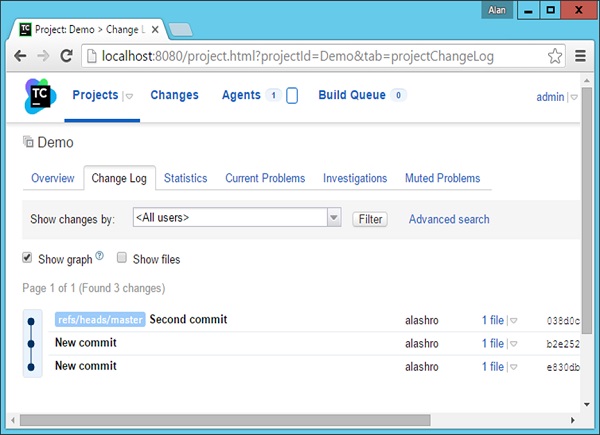
You will now see the message of ‘Second commit’ which was used when the change was committed to the git repository.
We have now successfully completed the first part of the Continuous Integration process.