- Continuous Integration Tutorial
- CI - Home
- CI - Overview
- CI - Software
- CI - Reducing Risks
- CI - Version Control
- CI - Features
- CI - Requirements
- CI - Building a Solution
- CI - Build Scripts
- CI - Building On the Server
- CI - Checking in Source Code
- CI - Creating a Project in TeamCity
- CI - Defining Tasks
- CI - Build Failure Notifications
- CI - Documentation and Feedback
- CI - Testing
- CI - Inspection
- CI - Database
- CI - Deployment
- CI - Best Practices
- Continuous Integration Resources
- CI - Quick Guide
- CI - Useful Resources
- CI - Discussion
Continuous Integration - Software
The software part is the most important aspect of any Continuous Integration process. This chapter focusses on the software which will be needed for the entire Continuous Integration process.
Source Code Repository
The source code repository is used for maintaining all the source code and all the changes made to it. The two most popular ones for source code repository management is subversion and Git with Git being the most recent popular system. We will now look at how to get Git installed on the system.
System Requirements
| Memory | 2 GB RAM (recommended) |
| Disk Space | 200 MB HDD for the installation. Additional storage is required to store the project source code and this is dependent on the source code being added. |
| Operating System Version | Can be installed on Windows, Ubuntu/Debian, Red Hat/Fedora/CentOS, Mac OS X. |
Installing Git
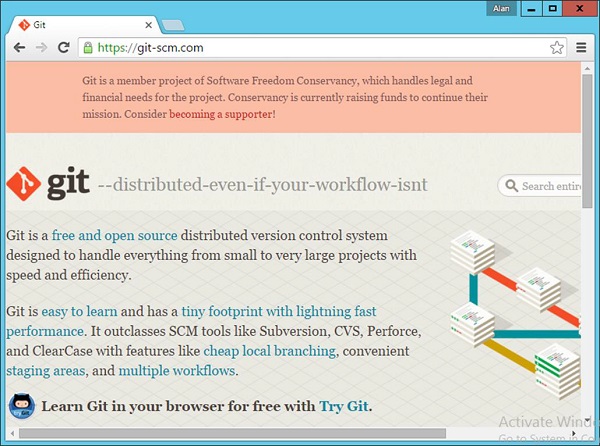
Step 1 − The official website for Git is https://git-scm.com/. If you click on the link, you will get to the home page of the Git official website as shown in the following screenshot.
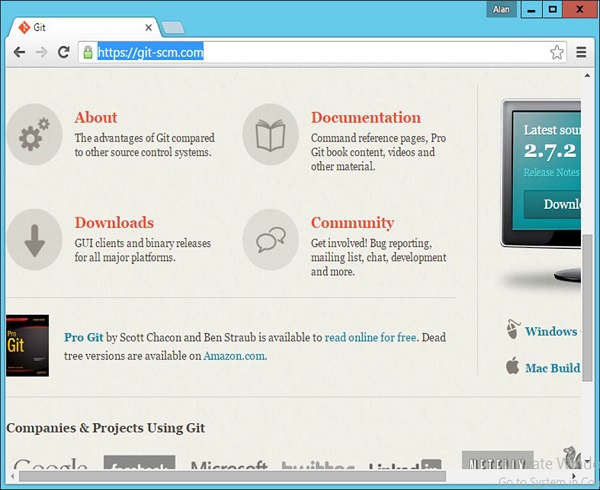
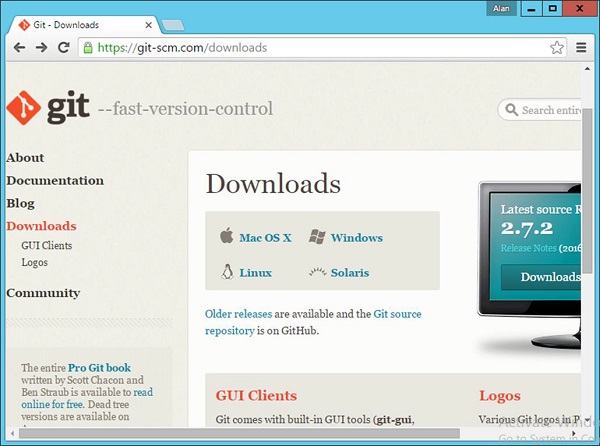
Step 2 − To download Git, just scroll down the screen and go to the Downloads section and click Downloads.
Step 3 − Click the Windows link and the download for Git will begin automatically.
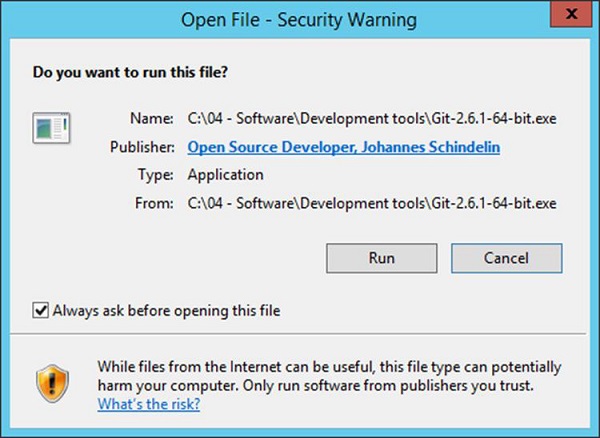
Step 4 − Click the downloaded .exe file for Git. In our case, we are using the Git-2.6.1-64-bit.exe file. Click Run which comes appears on the next screen.
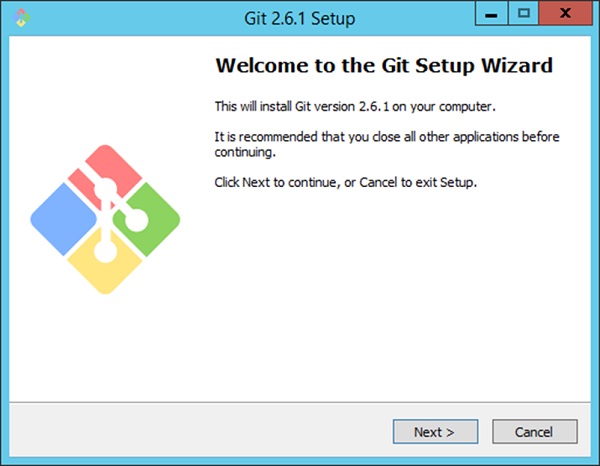
Step 5 − Click the Next button that appears on the following screen.
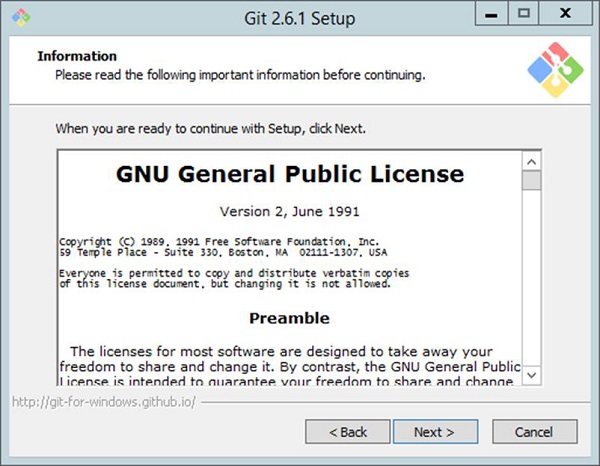
Step 6 − Click Next in the following screen to accept the General License agreement.
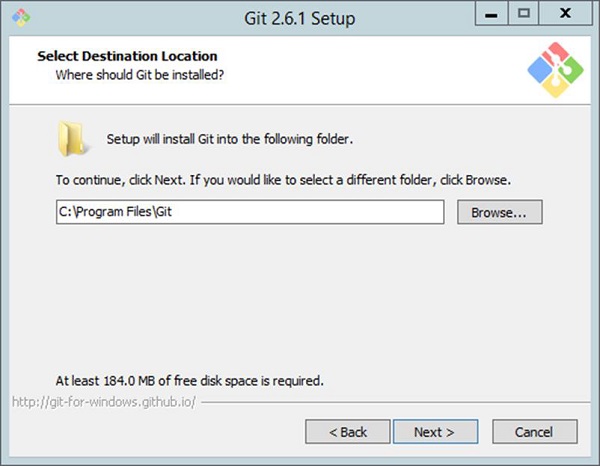
Step 7 − Choose the location for your Git installation.
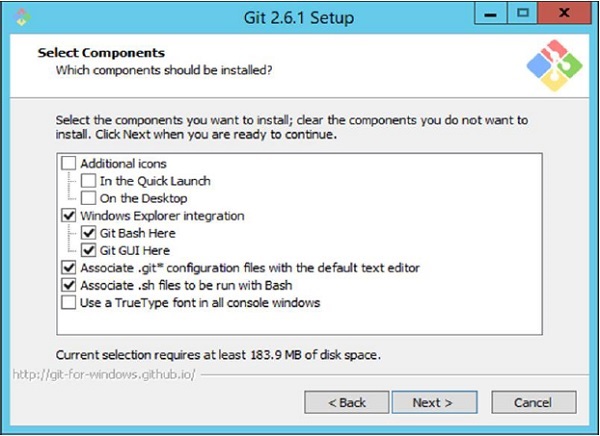
Step 8 − Click Next to accept the default components that are need to be installed.
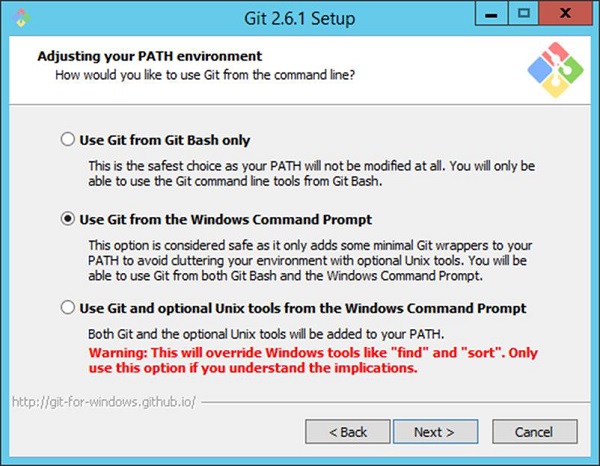
Step 9 − Choose the option of ‘Use Git from the Windows command prompt’ since we are going to be using Git from Windows.
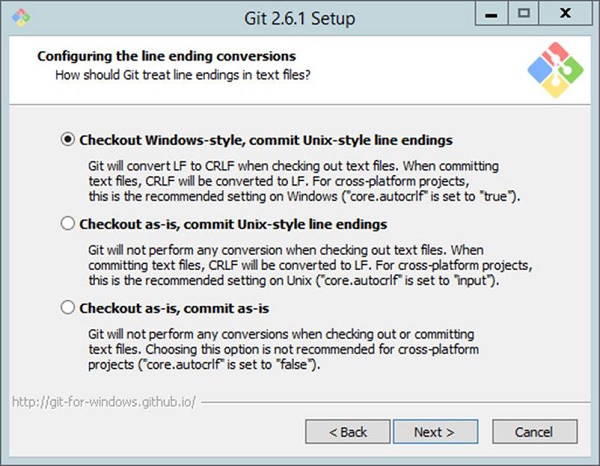
Step 10 − In the following screen, accept the default setting of ‘Checkout Windows-style, commit Unix-style line endings’ and click Next.
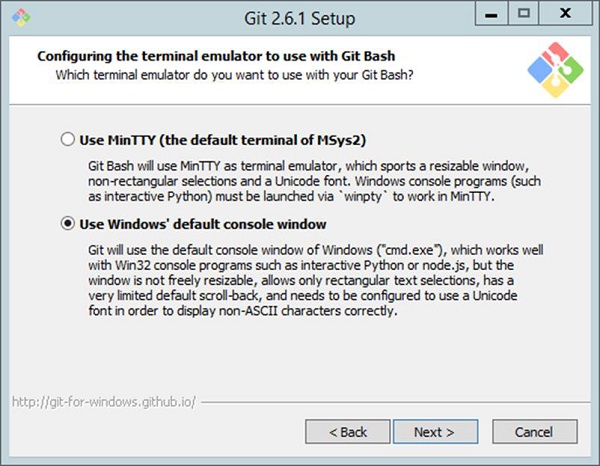
Step 11 − In the following screen, choose the option of ‘Use Windows default console window’, since we are using Windows as the system for installation of Git.
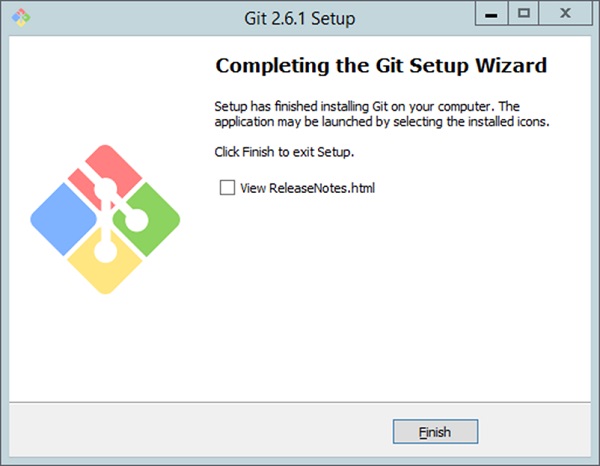
The installation will now start, and the subsequent steps can be followed for configuring Git, once the installation is complete.
Configuring Git
Once Git has been installed, the configuration steps need to be carried out for the initial configuration of Git.
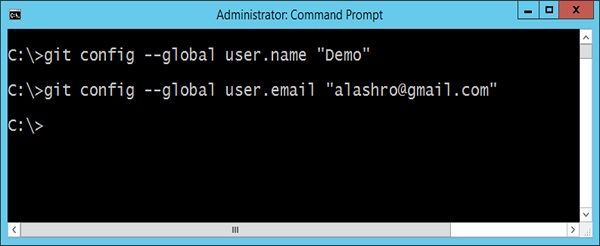
The first thing that needs to be done is to configure the identity in Git and then to configure a user name and email. This is important because every Git commit uses this information, and it’s immutably baked into the commits you start creating. One can do this by opening the command prompt and then enter the following commands −
git config –global user.name “Username”
git config –global user.email “emailid”
The following screenshot is an example for better understanding.
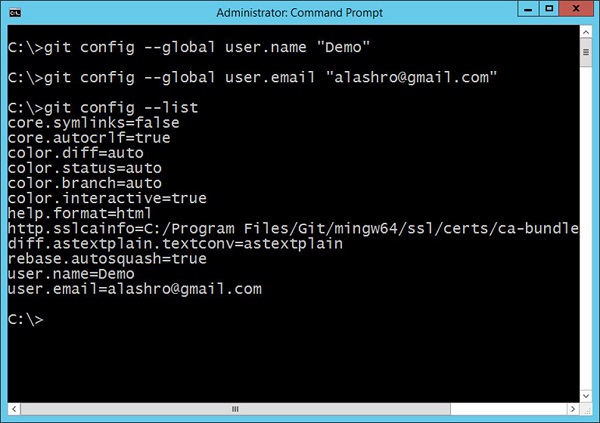
These commands will actually change the configuration file of Git accordingly. To ensure your settings have taken effect, you can list down the settings of the Git configuration file by using issuing the following command.
git config --list
An example of the output is shown in the following screenshot.
Continuous Integration Server
The next crucial software required for the entire continuous integration pipeline is the Continuous Integration software itself. Following are the most commonly used Continuous Integration softwares used in the industry −
Jenkins− This is an open source Continuous Integration software which is used by a lot of development communities.
Jet Brains TeamCity − This is one of the most popular commercial Continuous Integration software’s available and most companies use this for their Continuous Integration needs.
Atlassian Bamboo − This is another popular Continuous Integration software provided by a company called Atlassian Pvt. Ltd.
All of the softwares mentioned above, work on the same model for Continuous Integration. For the purpose of this tutorial, we will look at Jetbrains TeamCity for the Continuous Integration server.
Installing TeamCity
Following are the steps and the system requirements for installing Jet Brains TeamCity in your computer.
System Requirements
| Memory | 4 GB RAM (recommended) |
| Disk Space | 1 GB HDD for the installation. Additional storage is required to store the build workspace for each project. |
| Operating System Version | Can be installed on Windows, Linux, Mac OS X. |
Installation
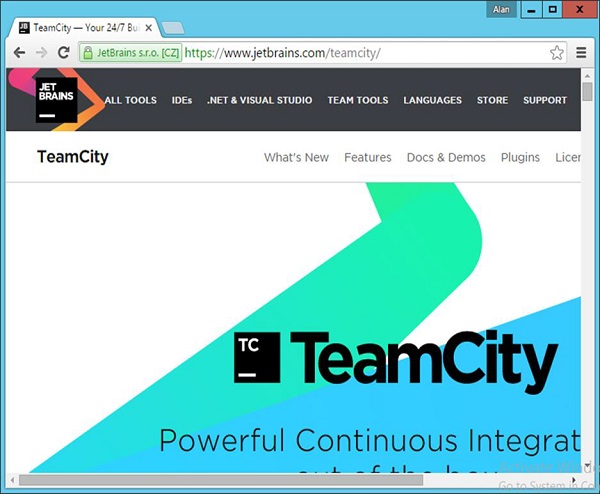
Step 1 − The official website for TeamCity ishttps://www.jetbrains.com/teamcity/. If you click the given link, you will go to the home page of the TeamCity official website as shown in the following screenshot. You can browse the page to download the required software for TeamCity.
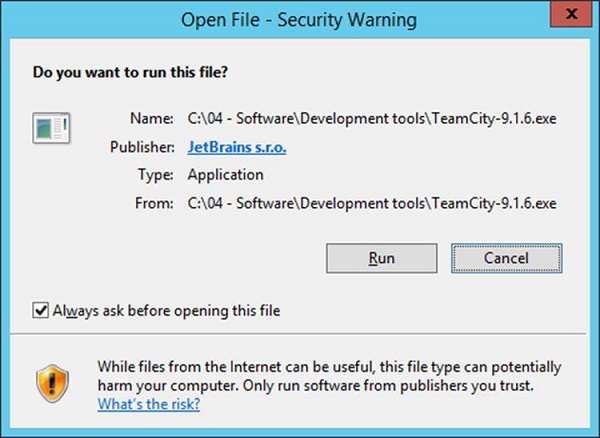
Step 2 − The downloaded .exe is being used for the purpose of executing TeamCity-9.1.6.exe. Double-click the executable and then click Run in the next screen that pops up.
Step 3 − Click Next to start the setup.

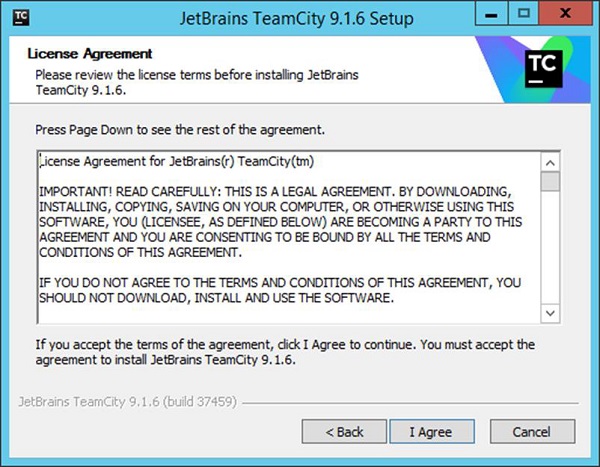
Step 4 − Click the ‘I Agree’ button to accept the license agreement and proceed with the installation.
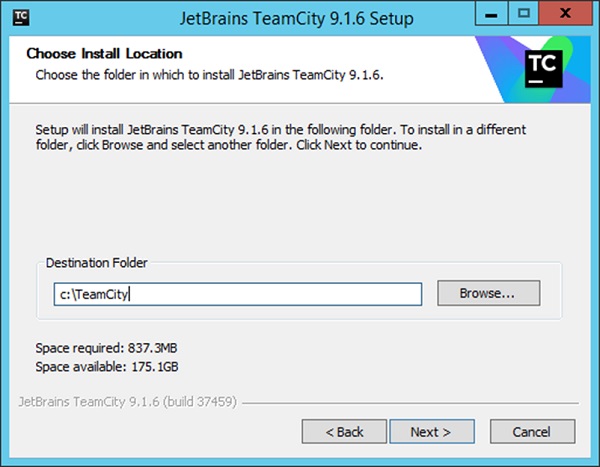
Step 5 − Choose the location for the installation and click Next.
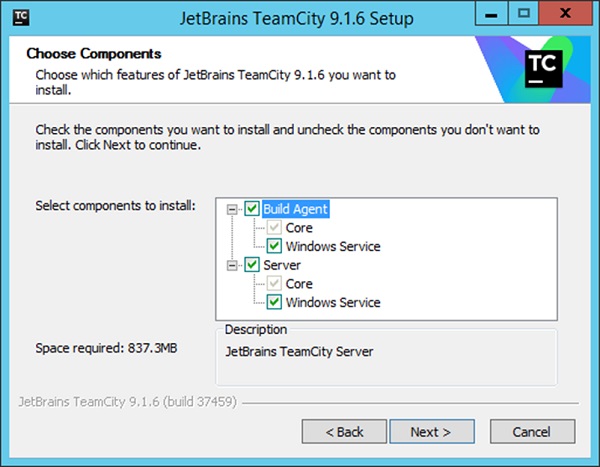
Step 6 − Choose the default components for the installation and click Next
This will start the installation process. Once completed the configuration process will follow.
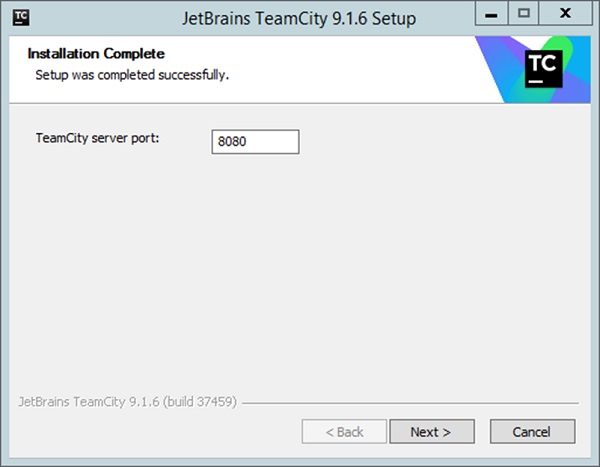
Step 7 − Choose a port number for the server to run. Best is to use a different port such as 8080.
Step 8 − Next it will ask for which account TeamCity needs to run as. Choose the SYSTEM account and Click Next.

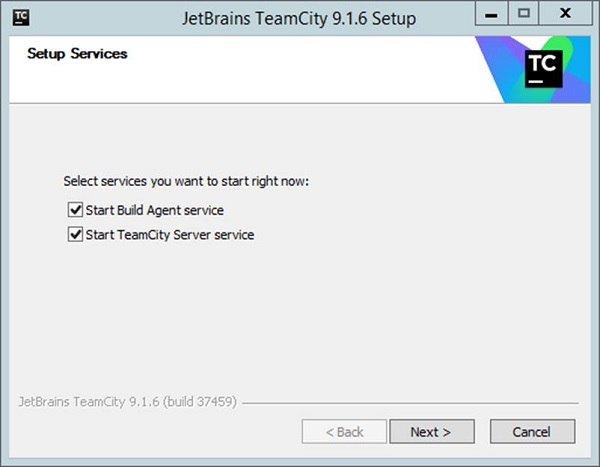
Step 9 − Next it will ask for the services which needs to be started. Accept the default ones and then click Next.
Configuring TeamCity
Once the installation is complete, the next step is the configuration of TeamCity. This software can be opened by browsing on the following URL in the browser −
http://locahost:8080
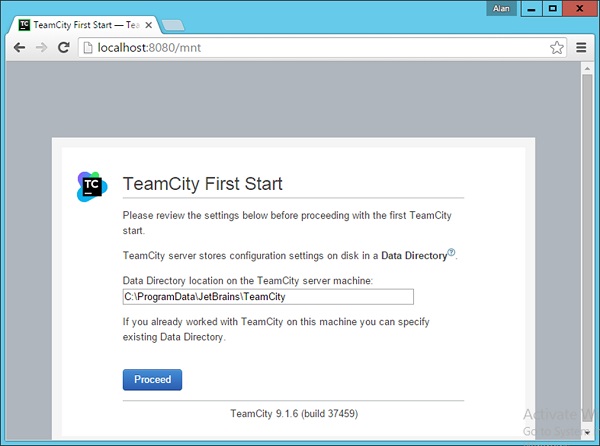
Step 1 − The first step is to provide the location of the builds, which will be carried out by TeamCity. Choose the desired location and click the Proceed button.
Step 2 − The next step is to specify the database for storing all the TeamCity artefacts. For the purpose of the tutorial, one can choose the Internal (HSQLDB), which is an internal database that is best suited when using products for testing purposes.
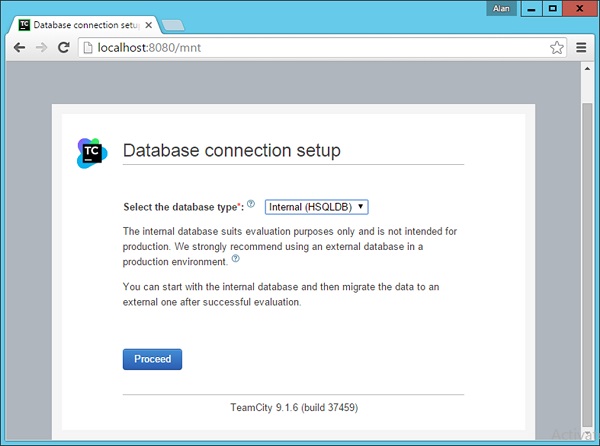
TeamCity will then process all the necessary steps to get it up and running.
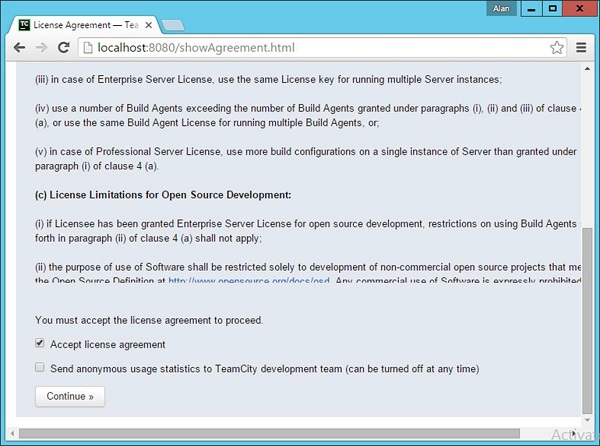
Step 3 − Next you will be requested to Accept the license agreement. Accept the same and click Continue.
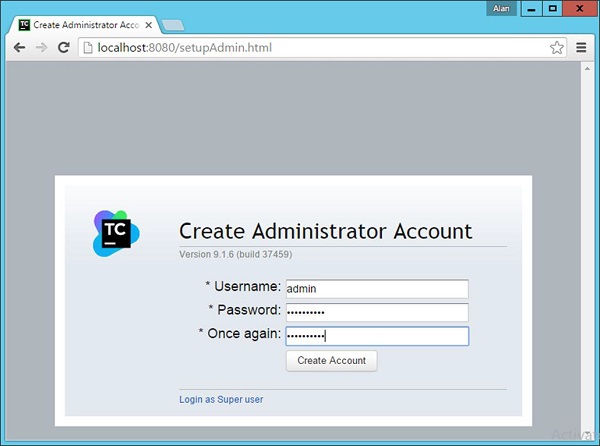
Step 4 − You need to create an administrator account that will be used to log into the TeamCity software. Enter the required details and click the ‘Create Account’ button.
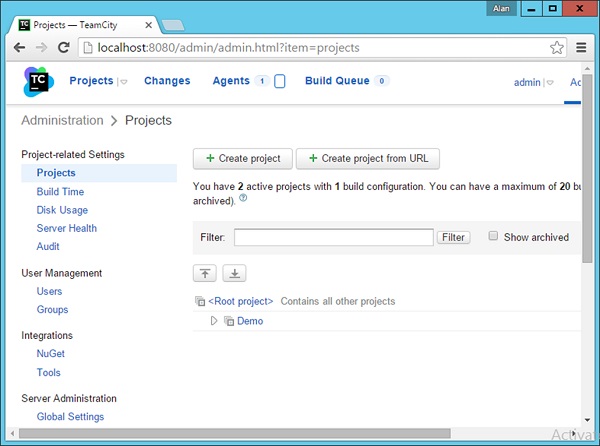
You will now be logged into TeamCity.
The Build Tool
The Build tool is a tool which ensures that the program is built in a particular way. The tool will normally carry out a list of tasks, which are required for the program to be built in a proper manner. Since in our example, we are going to be looking at a .Net program, we will be looking at MSBuild as the build tool. The MSBuild tool looks at a build file which contains a list of tasks that are used to build the project. Let’s look at a typical Build file for a web configuration project.
Following are the key sections of the Build file, which need to be considered.
IIS Settings
Following settings are used to determine which is the port number, what is the path on the web server and what type of authentication is required when the application is run. These are important settings, which will be changed via the MSBuild command when we learn how the deployment will be carried out later on in the tutorial.
<UseIIS>True</UseIIS>
<AutoAssignPort>True</AutoAssignPor>
<DevelopmentServerPort>61581</DevelopmentServerPort>
<DevelopmentServerVPath>/</DevelopmentServerVPath>
<IISUrl>http://localhost:61581/</IISUrl>
<NTLMAuthentication>False</NTLMAuthentication>
ItemGroup
This is used to tell the Build server what are all the dependent binaries that are required to run this project.
<ItemGroup>
   <Reference Include = "System.Web.ApplicationServices" />
   <Reference Include = "System.ComponentModel.DataAnnotations" />
<ItemGroup>
   <Compile Include = "App_Start\BundleConfig.cs" />
   <Compile Include = "App_Start\FilterConfig.cs" />
.Net Framework Version
The TargetFrameworkVersion tells which is the version of .Net that needs to be present for the project to work. This is absolutely required because if the build server does not have this in place, the build will fail.
<TargetFrameworkVersion>v4.5</TargetFrameworkVersion>
Deployment Environment – Amazon
For the purpose of this tutorial, we will ensure our Continuous Integration server has the ability to deploy our application to Amazon. For this, we need to ensure the following artefacts are in place.
Database Server
Perform the following steps to ensure that the database server is in place in Amazon for the deployment.
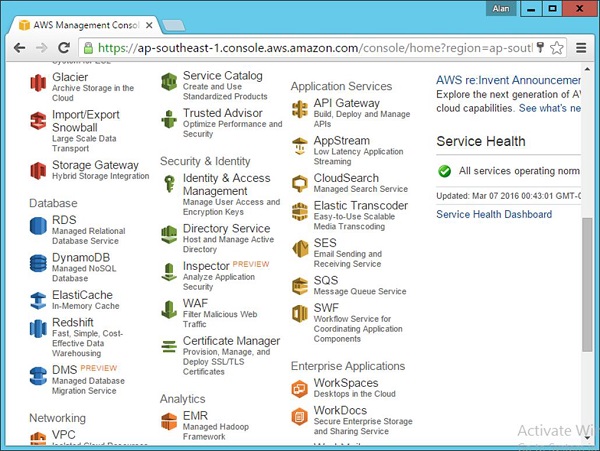
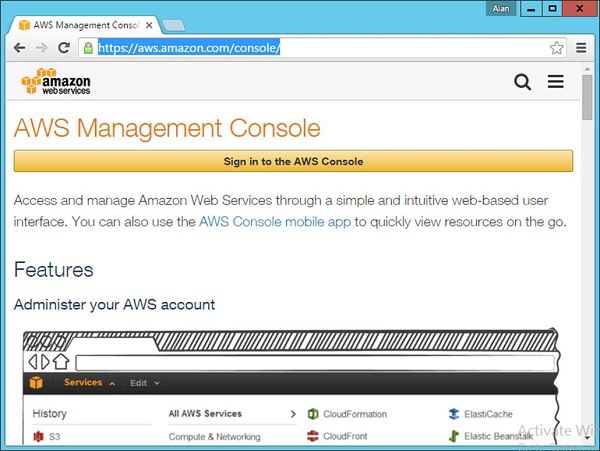
Step 1 − Go to the Amazon Console − https://aws.amazon.com/console/.
Login with your credentials. Note that you can apply for a free id on the amazon site, which will allow you to have a free tier that allows you to use some of the resources on Amazon free of cost.

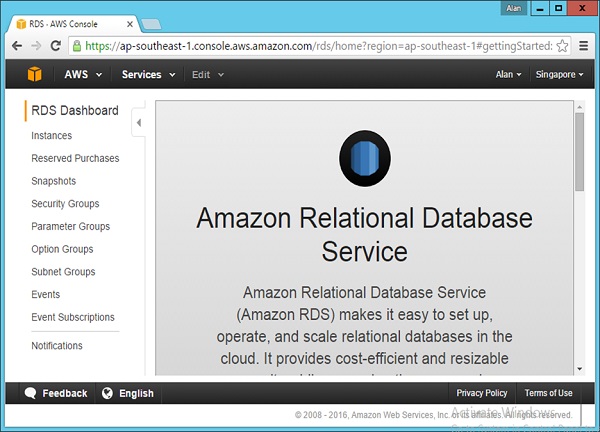
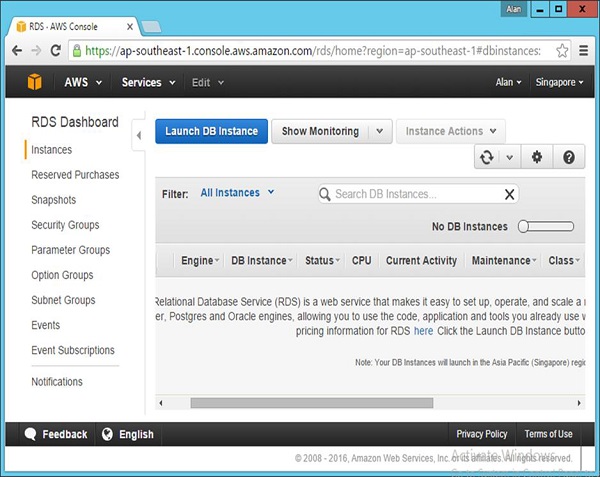
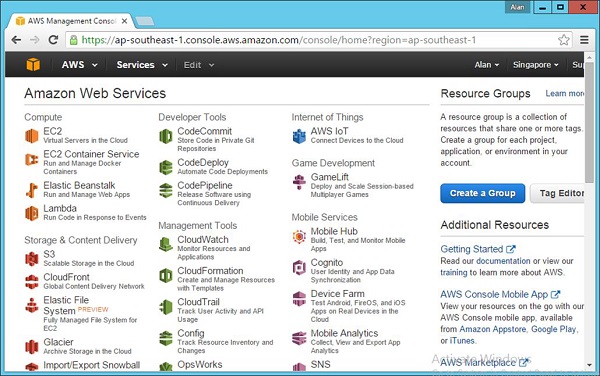
Step 2 − Go to the RDS Section to create your database.
Step 3 − Click Instances in the next screen that pops up.
Step 4 − Click the Launch DB option in the next screen that comes up.
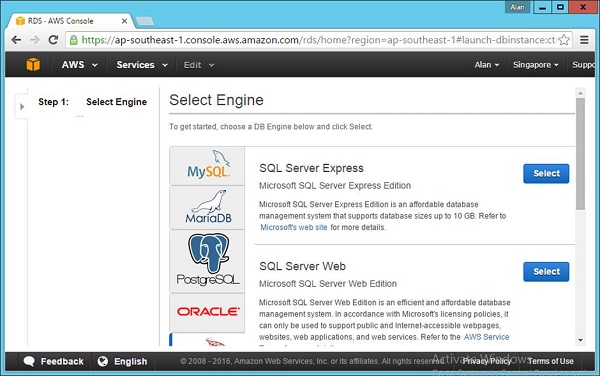
Step 5 − Choose the SQL Server tab and then choose the Select option for SQL Server Express.
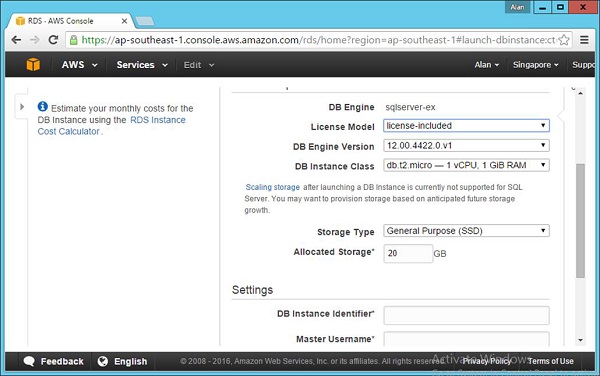
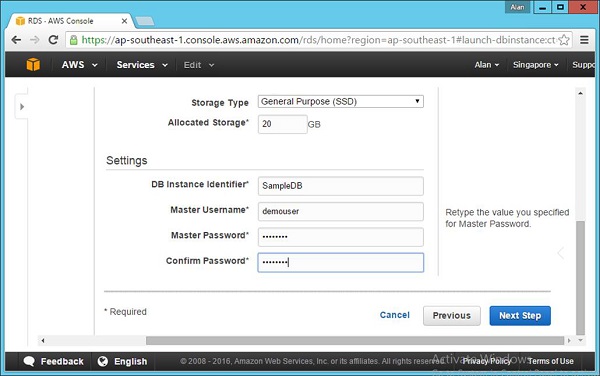
Step 6 − Ensure that the following details are entered to confirm that you are using the free tier of databases available from Amazon.
Step 7 − Click the Next Step button once all the fields are filled.
Step 8 − In the next screen that comes up, accept all the default settings and Click Launch DB Instance.

Step 9 − You will then be presented with a screen that says that the DB is being successfully launched. On the same page, there will be a button to view the DB Instance. Click the link to see your DB Instance being set up.
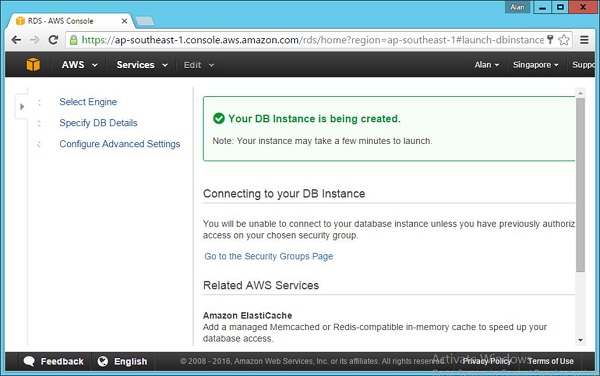
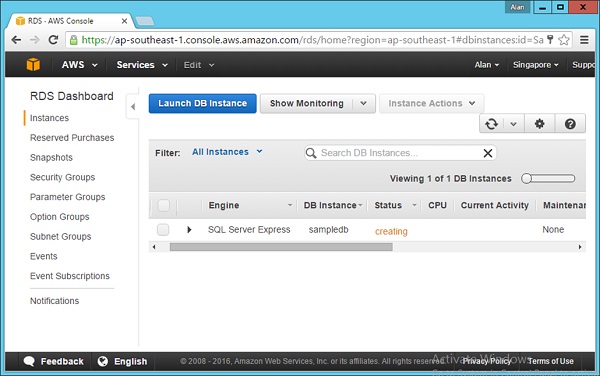
After some time, the status of the above screen will change to notify that the DB Instance has been successfully created.
Web Server
The next step is to create your web server on Amazon, which will host the web application. This can be done by following the subsequent steps to have this in place.
Step 1 − Go to Amazon Console − https://aws.amazon.com/console/.
Login with your credentials. Note that you can apply for a free id on the Amazon site, which will allow you to have a free tier that allows you to use some of the resources on Amazon free of cost.
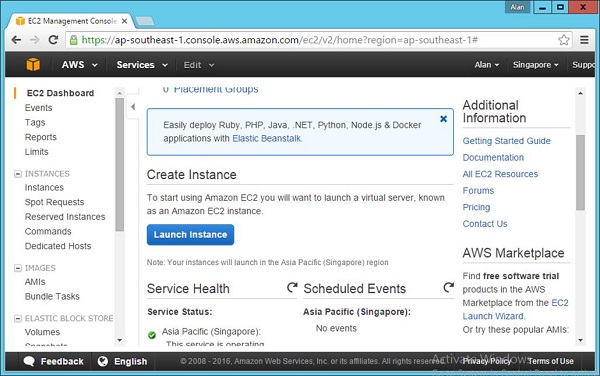
Step 2 − Go to the EC2 section to create your web server.
Step 3 − In the next screen, click Launch Instance.
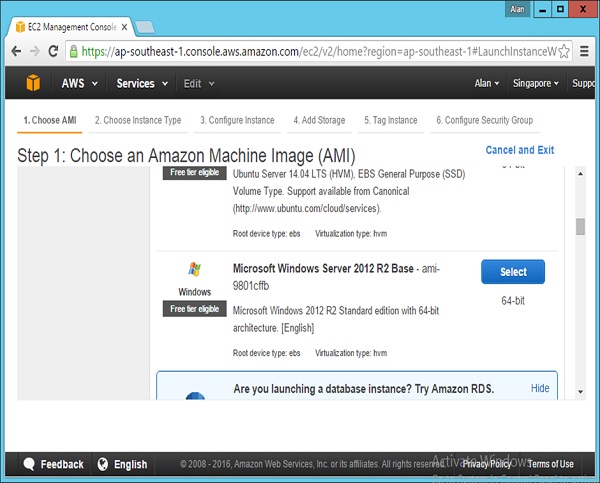
Step 4 − Click Windows – Microsoft Windows Server 2010 R2 Base.
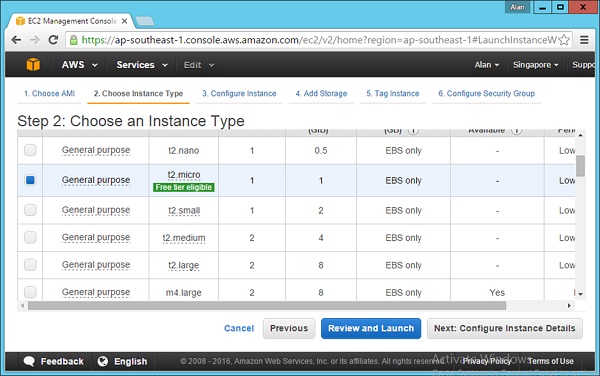
Step 5 − Choose the t2.micro option, which is a part of the free tier. Click Next: Configure Instance Details.
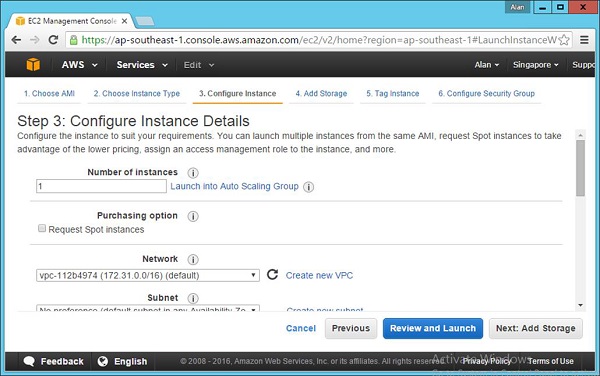
Step 6 − Accept the default settings on the next screen that comes up and then choose the option Next: Add Storage.
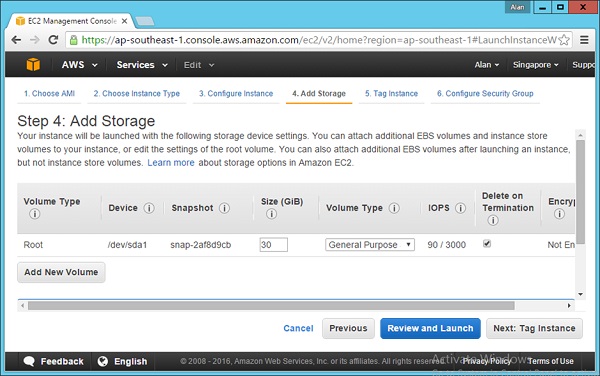
Step 7 − Accept the default settings on the next screen and choose the option Next: Tag Instance.
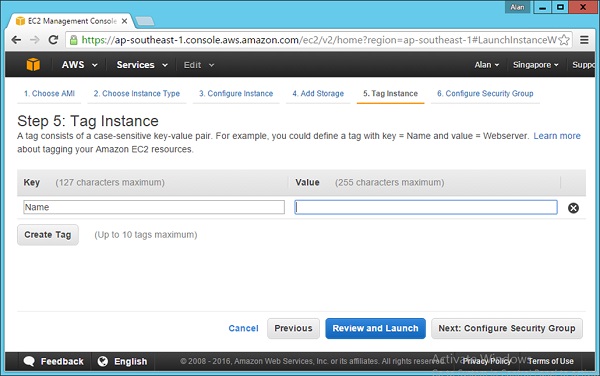
Step 8 − Accept the default settings on the next screen and choose the option of Next: Configure Security Group.
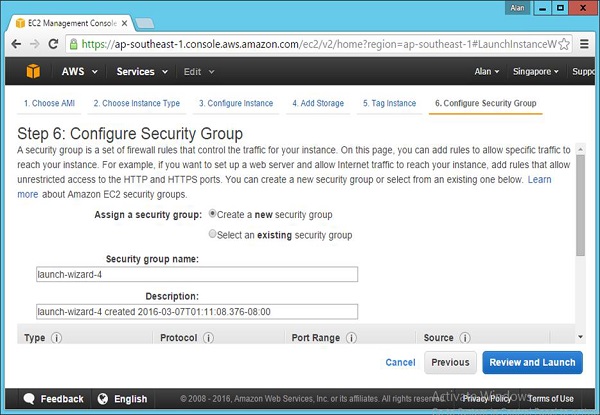
Step 9 − Accept the default settings on the next screen and choose the option of Review and Launch.
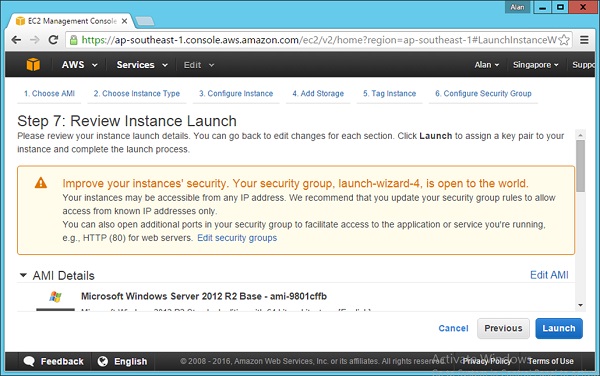
Step 10 − Click Launch in the next screen that comes up.
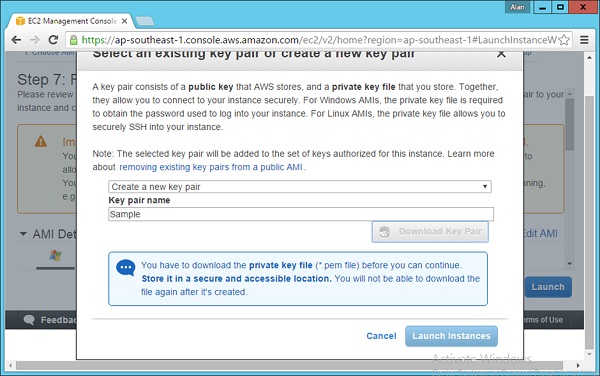
Step 11 − In the next screen that comes up, you will be prompted to create a key pair. This will be used to log into the server at a later point of time. Just create the key pair and click Launch Instance.
The instance will now be set up in Amazon.