- SharePoint - Home
- SharePoint - Overview
- SharePoint - Types
- SharePoint - Capabilities
- SharePoint - Setup Environment
- SharePoint - Create Site Collection
- SharePoint - APIs
- SharePoint - Central Administration
- SharePoint - App Model
- SharePoint - Integration Options
- SharePoint - Development Tools
- SharePoint - List Functionality
- Additional List Functionality
- SharePoint - Custom List
- SharePoint - Libraries
- SharePoint - Web Part
- Site Column & Content Types
- SharePoint - Data
- SharePoint - Server Object Model
- SharePoint - Client Object Model
- SharePoint - REST APIs
- SharePoint - Features & Elements
- SharePoint - Feature\Event Receiver
- SharePoint - Azure Platform
- SharePoint - Packaging & Deploying
- SharePoint - Sandbox Solutions
- SharePoint - Apps
SharePoint - Custom List
Let us have a look at how to create a custom list, where we define the list schema, instead of using a predefined schema like the one we did when we created the Contacts list.
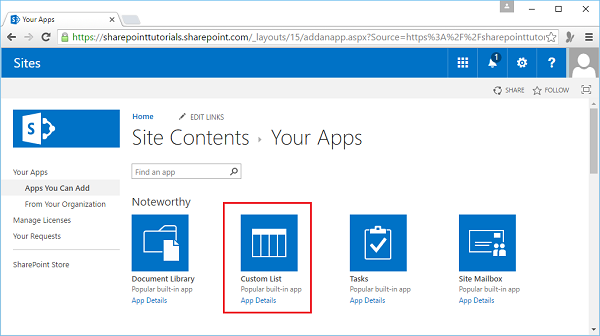
Step 1 − To create a custom list, go to Site Contents and then add an app. Click Custom List.
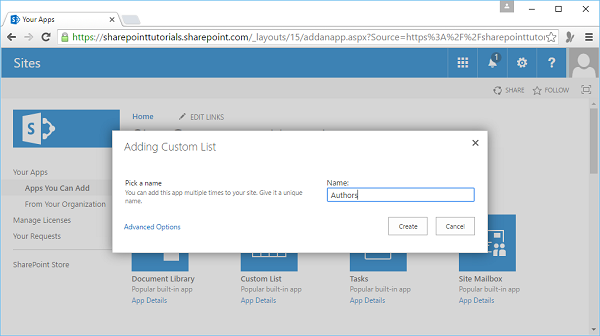
Step 2 − Enter Authors in the Name field and then click Create.
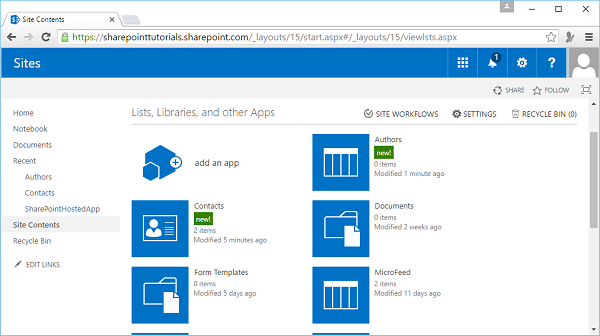
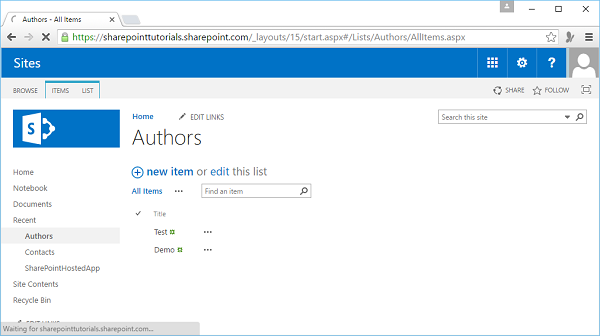
Step 3 − Now you can see that Authors is added. Let us click the Authors app.
Step 4 − Click new item.

Step 5 − You can see, our list has only one column. The field name is Title and it is a required field, so here, we will set the field value to Test and then click Save.
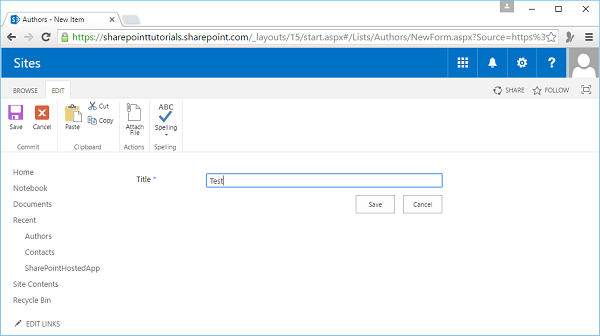
Note − In SharePoint, columns are also called fields, so these terms are synonymous.
Step 6 − Let us add one more item by clicking on the New Item link.

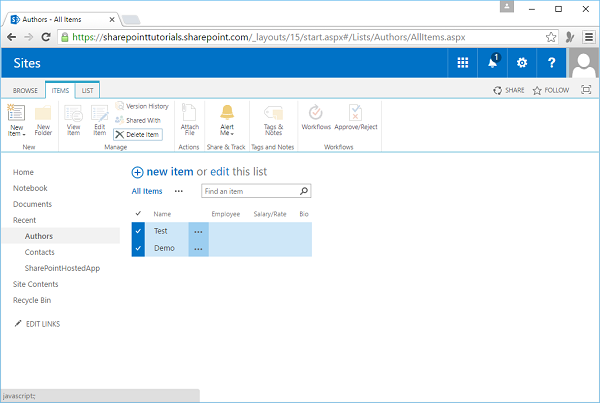
Step 7 − Set the Title field value to Demo and click Save.

You can see we have two items or two rows and we see the values of the Title field. Notice that beside this value, there is a little ellipse, which is a link to open up a menu.
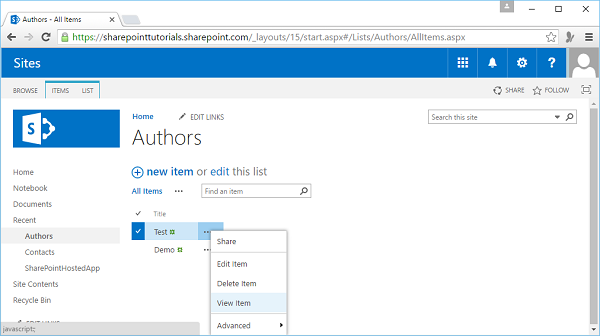
Note − This menu was traditionally called the Edit Control Block or ECB menu, but you will also hear it referred to as the List Item Contacts menu.
We created the custom list because we wanted to define the schema. There are a couple of ways to do this.
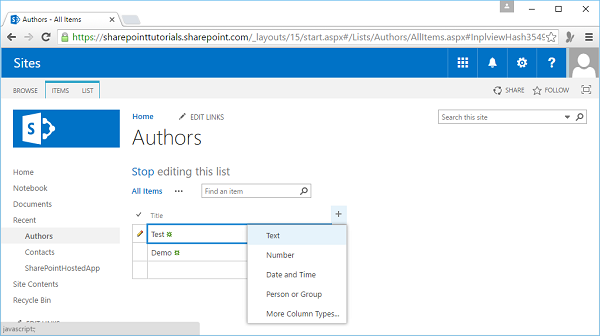
Step 8 − One way is to put the list into Edit mode. Notice that there is an extra column at the end with a + sign above it and here we can add columns to the list.

Step 9 − Click the + sign and we can create a Text column.
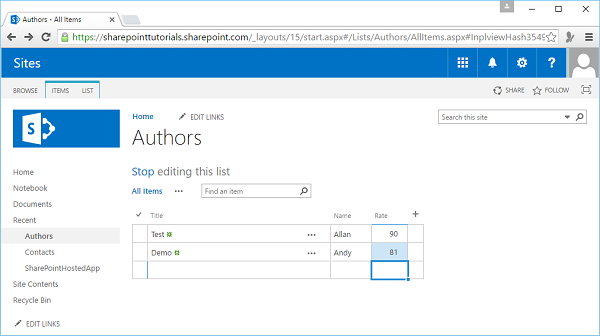
Step 10 − You will see the following page. Call this field- Name.

Step 11 − Enter the names. These will be text.

Step 12 − Now add another column and let us make this as a numeric column such that only numbers can be entered as data. Set this to Rate and add some values.
Now this technique is helpful when you are prototyping out a list, but you do not have a lot of control.
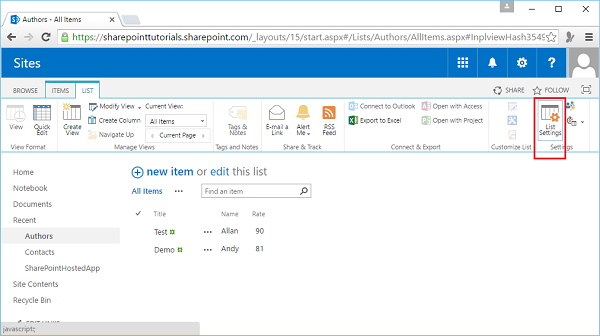
So let us take a look at the other way to define the schema for the list. We will do this through the list settings.
Step 13 − Click the Stop editing link get out of the Edit mode. Select List on the Ribbon and then go to List Settings.
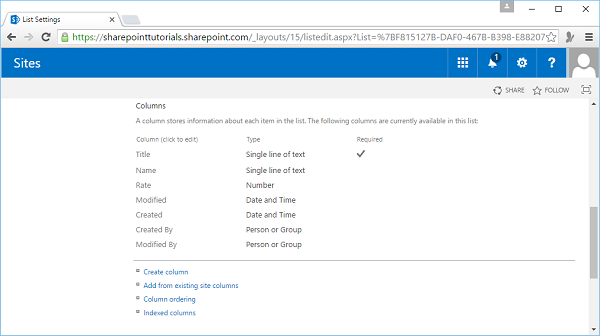
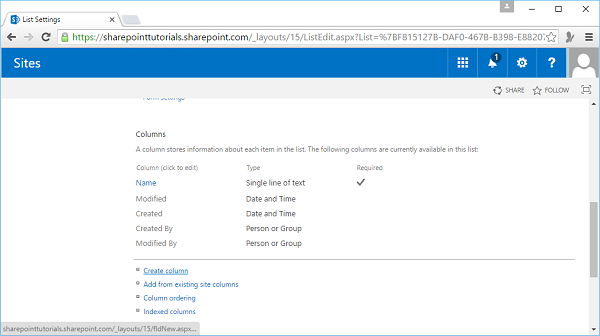
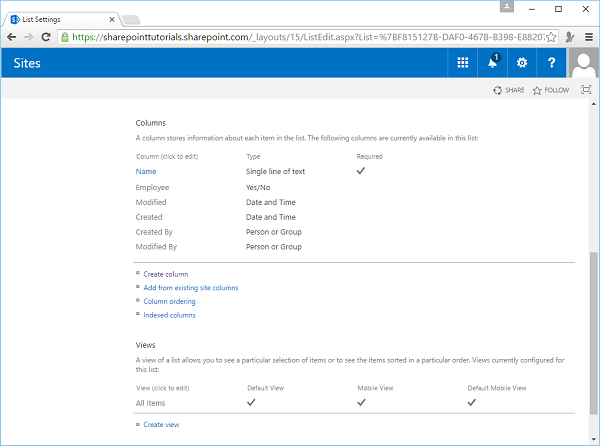
Here, we can define the schema for the list. When we created the column, we already had the Title column. You can see two other columns, which we created and a few other columns, which are hidden and used by SharePoint internally.
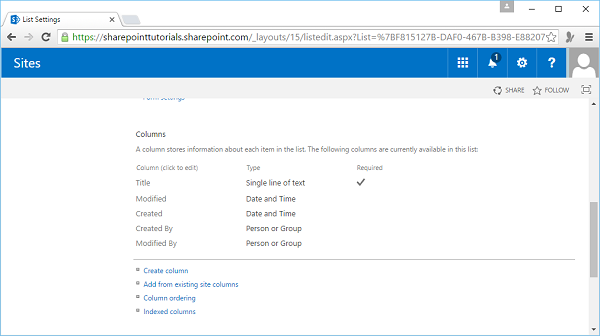
Step 14 − To define the schema of the Author's list, click the Name column and click Delete. Next, delete the Rate column.
Step 15 − Now if we come back to the Author's list, we can see that those columns are gone along with the values we set for them. Go back to List Settings and set the actual schema that you want.
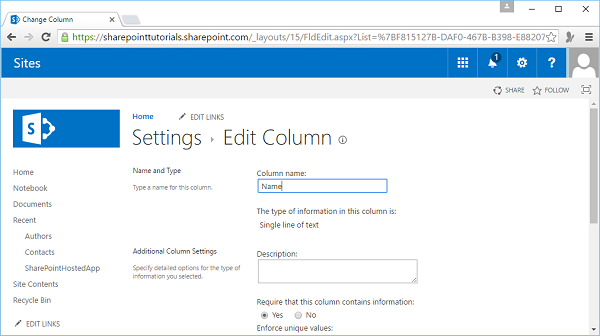
Step 16 − The page shows a column with Title. However, we do not want this column but a column that represents the authors name. Hence, click Title.
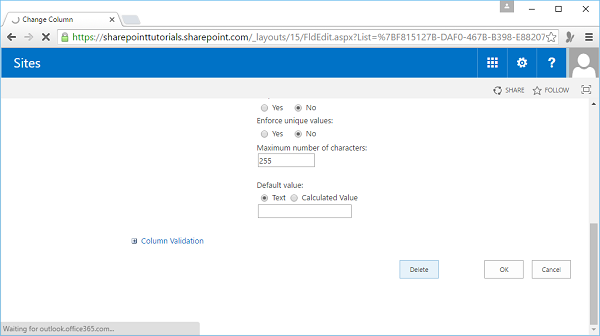
Step 17 − When you click Title, a new page will open. Scroll down to the bottom of the page. There is no option to delete the page.
Note − We cannot delete this page because this column is associated with the ellipse link. however, we can rename it.
Step 18 − Rename the column. We will use this column to represent the Author Name and click OK.
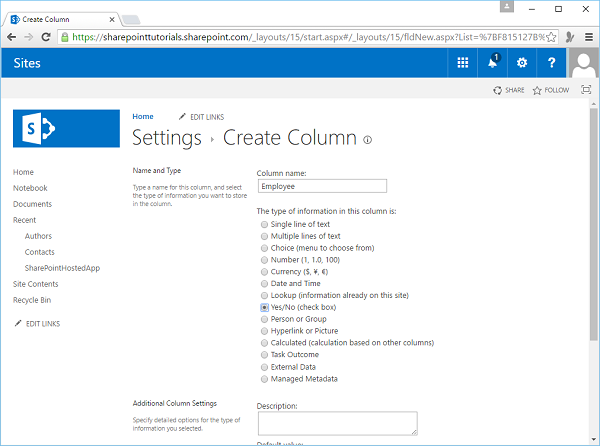
Step 19 − Next, add another column to represent whether the author is an employee or is a contributor. Click Create Column.
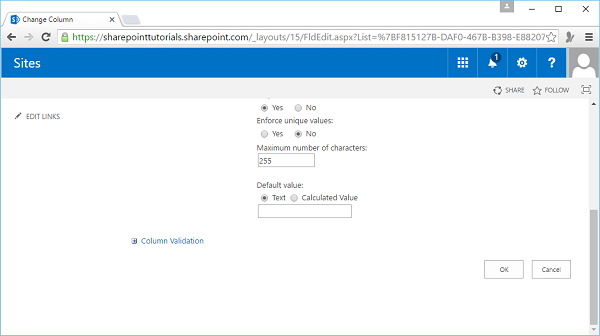
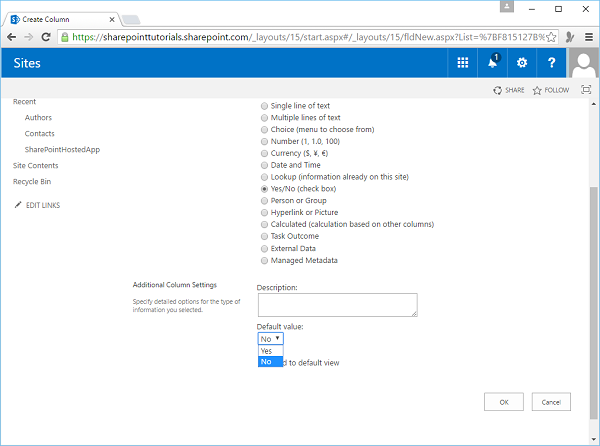
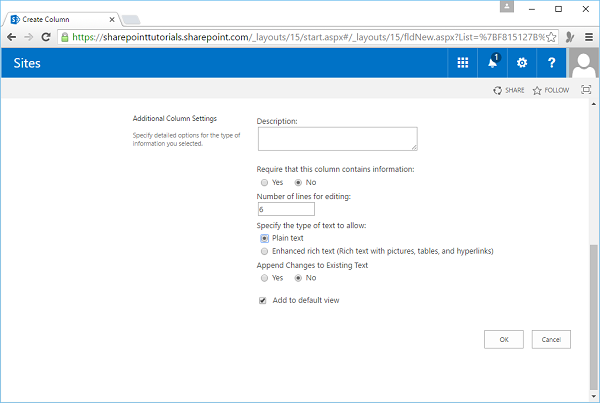
Step 20 − Set the column name to Employee and select the Yes/No field types. Once we have selected the field type that we wanted, scroll down to the bottom of the page and you can see Additional Column Settings.
Note − Several different field types are available. The available field types are different in SharePoint Foundation, SharePoint Server SharePoint Online.
In addition, the kind of site that you are building i.e. a collaboration site or a publishing site will also have an effect on which field types are available.
Step 21 − Set the Default value to No instead of Yes and click OK.
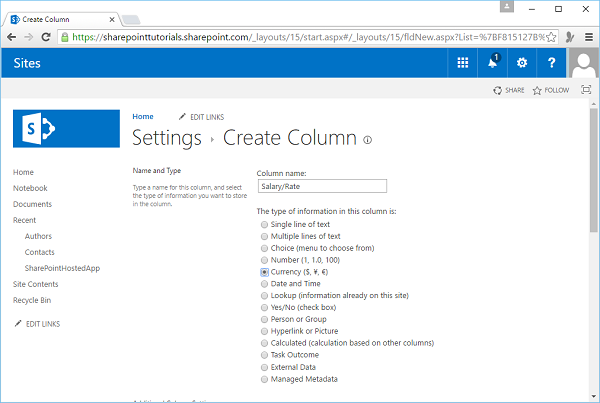
Step 22 − Now let us create another column, by clicking on Create Column. This column will represent either, the salary for our employees or the rate for contributors.
Step 23 − We will call it Salary/Rate and set this to the Currency field.
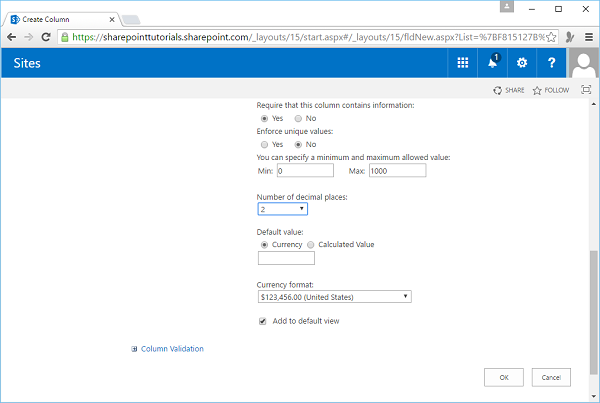
Step 24 − Scroll down and make this a required field and set the Minimum to 0 and the Maximum to 1000. Enter 2 for display of currency upto two decimal places.
Step 25 − Let us add one more column, which will be the biography. We will just call it Bio and set the type to multiple lines of text.

Step 26 − Enter 6 as six lines for editing is fine. We just want plain text in this case and click OK.
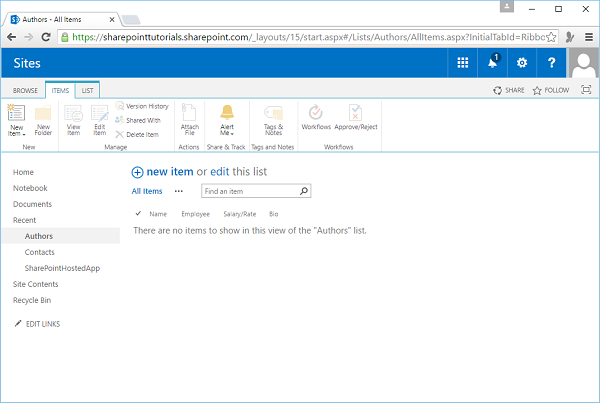
Step 27 − We have the schema for our Authors list. Now that our schema is complete, let us add some data. Click Authors under Recent.
Let us delete the two rows we had previously created by clicking on the little check beside each of them. Next, go to Items on the ribbon and click Delete Item.
Step 28 − Add the first item by clicking New Item.
Step 29 − Enter some more data as shown in the screenshot below.
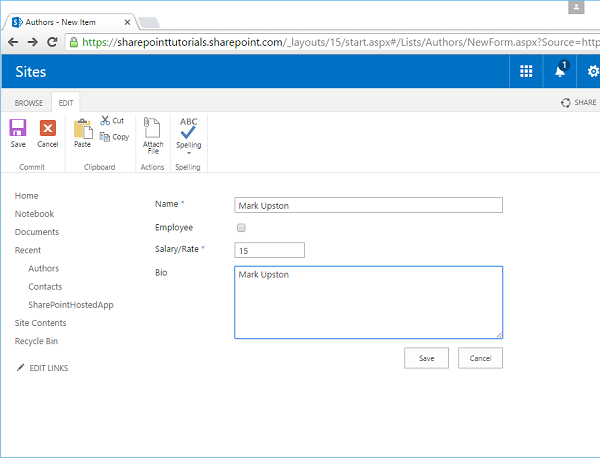
You will see all the data listed.

