- Salesforce - Home
- Salesforce - Overview
- Salesforce - Architecture
- Salesforce - Environment
- Salesforce - Sales Cloud
- Salesforce - Service Cloud
- Salesforce - Navigating Setup
- Salesforce - Standard Objects
- Salesforce - Custom Objects
- Salesforce - Master Detail
- Salesforce - Lookup Relationship
- Salesforce - Schema Builder
- Data Security
- Salesforce - Control Access Org
- Salesforce - Control Access Objects
- Salesforce - Control Access Fields
- Salesforce - Control Access Records
- Salesforce - Create a Role Hierarchy
- Salesforce - Define Sharing Rules
- Process Builder
- Automate Business Processes
- Salesforce - Importing Data
- Salesforce - Exporting Data
- Salesforce - Reports
- Salesforce - Dashboards
- Salesforce - Using Formula Fields
- Visualforce
- Salesforce - Visualforce Pages
- Salesforce - Variables & Formulas
- Salesforce - Standard Controllers
- Salesforce - Records, Fields & Tables
- Salesforce - Using Forms
- Salesforce - List Controllers
- Salesforce - Static Resources
- Salesforce Useful Resources
- Salesforce - Quick Guide
- Salesforce - Useful Resources
- Salesforce - Discussion
Salesforce - Reports
Creating reports in Salesforce is not a very complicated process. The reports are created on top of one or more Salesforce objects. It has the flexibility of applying filters and joining data sets to create sophisticated reports. The interface is called the Report builder.
Go to the Reports icon in the left bar menu of the Lightning Experience Home Page. Follow the steps below to create a report.
Step 1
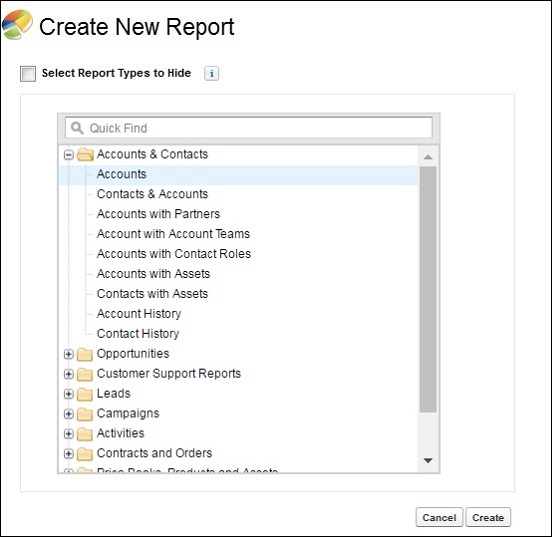
Click on Create New Report. Upon clicking, the following screen appears. We choose Accounts and click Create.
Step 2
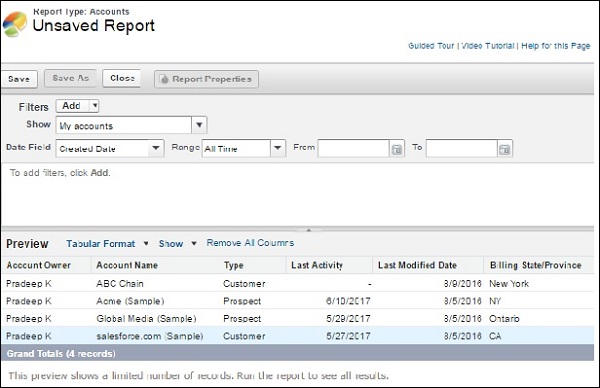
In this step ,we define certain settings for the report and get the resulting rows. We choose "My Accounts" from the dropdown Show. It brings all the records owned by the creator of the report. Next we choose the created date filter as All Time as shown below. We proceed by saving the report with the name - Accounts report.
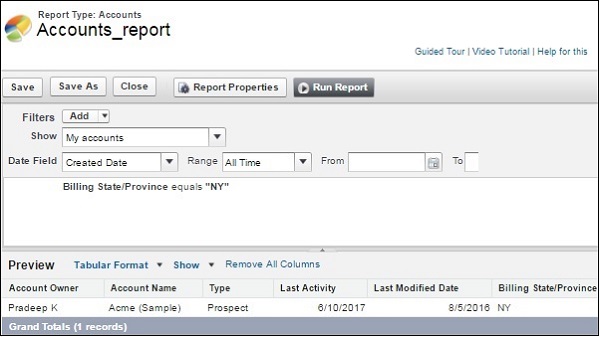
Step 3
Now, we will apply a filter to the above report. Click on the Add filter option in the white space just below the date filed filter. Choose the field Billing State/Provinces. Choose the equal to operator and type the value NY in the next text box. This filters out the row for NY as shown below.