- MS Expression Web - Home
- MS Expression Web - Overview
- Environment Setup
- MS Expression Web - New Website
- Blank Web Page
- Webpage Layout
- MS Expression Web - HTML Layout
- Horizontal Navigation
- Vertical Navigation
- MS Expression Web - Validate Pages
- Dynamic Web Template
- MS Expression Web - Search Page
- MS Expression Web - Images
- MS Expression Web - Hyperlinks
- MS Expression Web - Video
- SQL Datasource
- MS Expression Web - MS Word
- MS Expression Web - Gridview
- MS Expression Web - Master Pages
- MS Expression Web - Data Table
- MS Expression Web - Publish
- Backup Website
- MS Expression Web - Add-Ins
Microsoft Expression Web - Images
Images are used heavily in webpages to make them look interesting and provide a better user experience. In this chapter, we will learn how to add images to the website. As usual, lets go step by step and learn the process in detail.
Step 1 − To start adding images, lets create a new one-page site and change the name of default.html file to index.html.

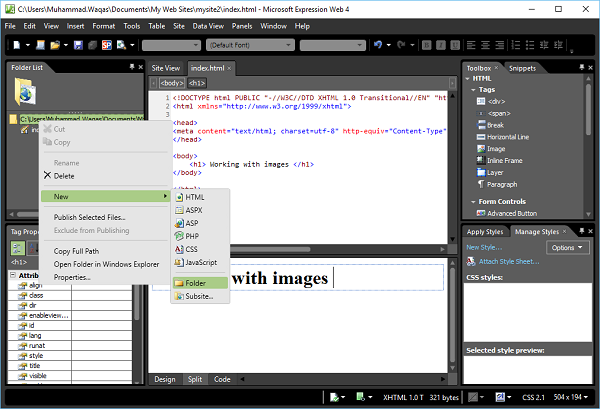
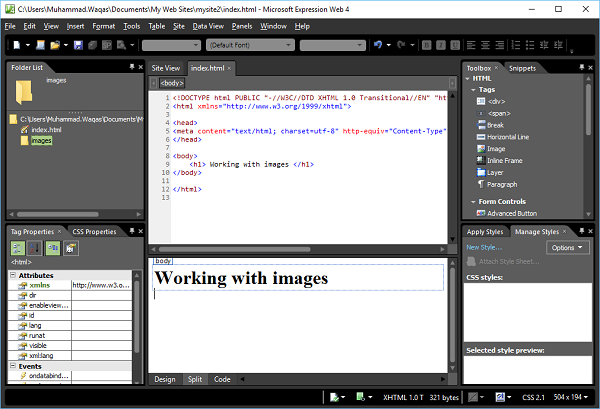
Step 2 − Now we need to include images to the website so that we can use those images in the webpage. Lets create a new folder. In the folder list, right-click on the website name.
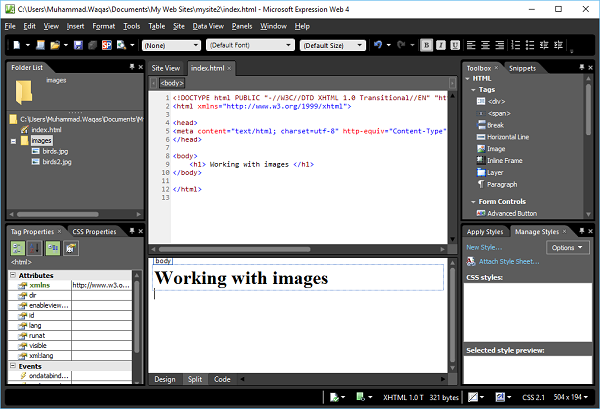
Step 3 − Currently, there are no images in this folder. To add images in this folder, simply select and drag images from your hard drive and drop them over the images folder.
You will see that the images are added to the website images folder, as shown in the following screenshot.
Step 4 − Now these images are included in your website but none of these are used in a webpage. A simple way to add an image to in the webpage is to drag the image from the images folder and drop in the code view where you want to add the image in the webpage.
Suppose we want to add an image below the heading. When your drop the image and release the mouse button, it will display the following dialog box.
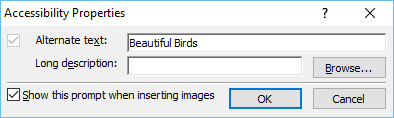
Here you can specify the alternate text and long description. Then click OK and save the webpage. Now you can see that <img> tag is added with the alternate name and source of the image.
Step 5 − Follow the same process and add the second image along with its alternate name and source.
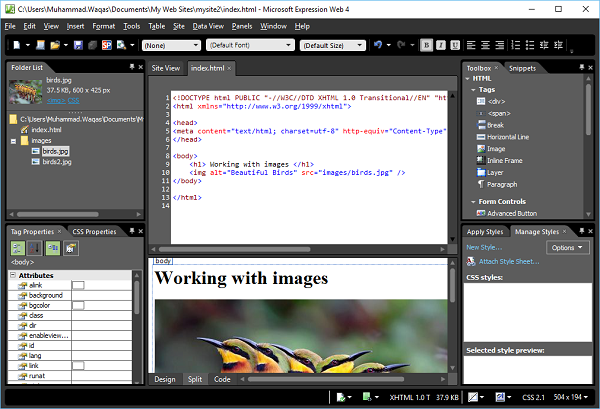
Now the index.html file will appear as follows −
<!DOCTYPE html PUBLIC "-//W3C//DTD XHTML 1.0 Transitional//EN"
"http://www.w3.org/TR/xhtml1/DTD/xhtml1-transitional.dtd">
<html xmlns = "http://www.w3.org/1999/xhtml">
<head>
<meta content = "text/html; charset = utf-8" http-equiv = "Content-Type" />
</head>
<body>
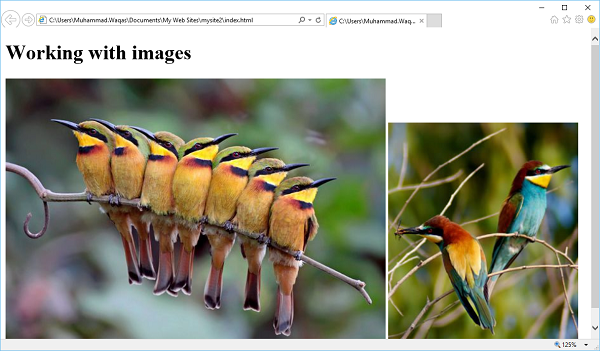
<h1> Working with images </h1>
<img alt = "Beautiful Birds" src = "images/birds.jpg" />
<img alt = "Other Birds" src = "images/birds2.jpg" />
</body>
</html>
Step 6 − The Picture Properties dialog box gives you access to the most commonly used picture attributes. When you double-click an image, it will display the Picture Properties box.
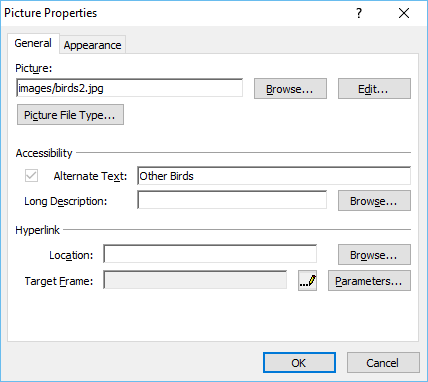
In Expression Web, Picture Properties dialog has two tabs, General and Appearance.
Following are the options available on the General tab.
Picture − It contains the folder/file name of the graphic image.
Alternate Text − Type the text you want to be displayed for pictures when the graphic is downloading, when it can't be found, or when a site visitor moves the pointer over it. This text will also be used by a screen reader if your viewer is using one.
Long Description − There are times a few words may not be enough to describe your image. Charts and graphs are examples. Click Browse to select a file that contains a longer description of the picture.
Location − If you want to link your image to a webpage or larger image, you insert the hyperlink here.
Target Frame − If the current page is a frames page, this option indicates which frame the link should be displayed in OR you can choose to have the image or page open in a new window.
Following options are available on the Appearance tab.
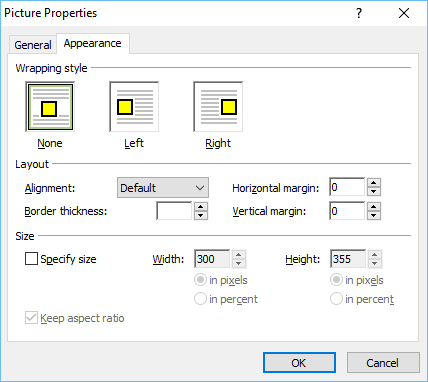
Wrapping Style − Specify how the picture floats in the page, such as None, Left, or Right.
Layout − In this section, you can set the alignment, border thickness, horizontal and vertical margins.
Size − Expression Web automatically sets the width and height properties for the image based on the actual dimensions of the picture. Rather than resizing your image by changing these dimensions, resize the image using your graphic editor.
Step 7 − Now, lets preview the webpage in the browser; it will display the following output.