- MS Expression Web - Home
- MS Expression Web - Overview
- Environment Setup
- MS Expression Web - New Website
- Blank Web Page
- Webpage Layout
- MS Expression Web - HTML Layout
- Horizontal Navigation
- Vertical Navigation
- MS Expression Web - Validate Pages
- Dynamic Web Template
- MS Expression Web - Search Page
- MS Expression Web - Images
- MS Expression Web - Hyperlinks
- MS Expression Web - Video
- SQL Datasource
- MS Expression Web - MS Word
- MS Expression Web - Gridview
- MS Expression Web - Master Pages
- MS Expression Web - Data Table
- MS Expression Web - Publish
- Backup Website
- MS Expression Web - Add-Ins
Microsoft Expression Web - Add-Ins
In this chapter, we will learn how to install Add-ins in Expression Web. An Expression Web Add-in, is an external software package that provides additional or enhanced functionality within Expression Web.
Add-ins can be downloaded from the following location MS Add-Ins. For instance, lets download AddFeed add-in.
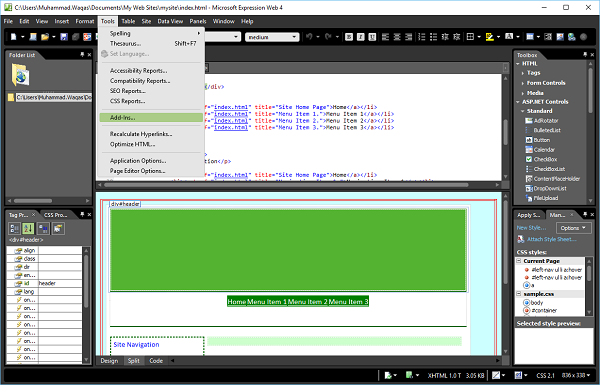
Step 1 − Lets open Expression Web and go to the Tools menu. Click the Add-Insmenu option.
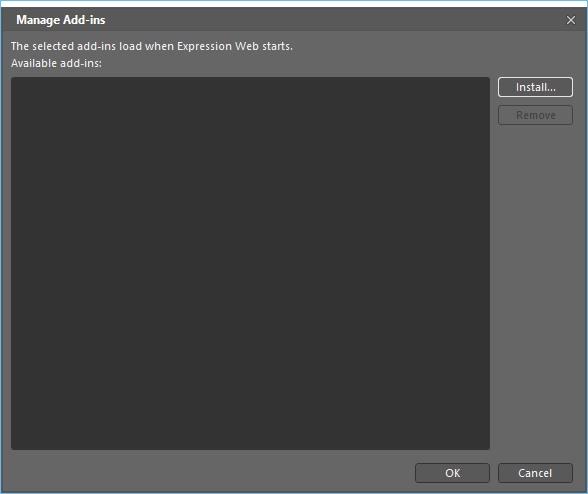
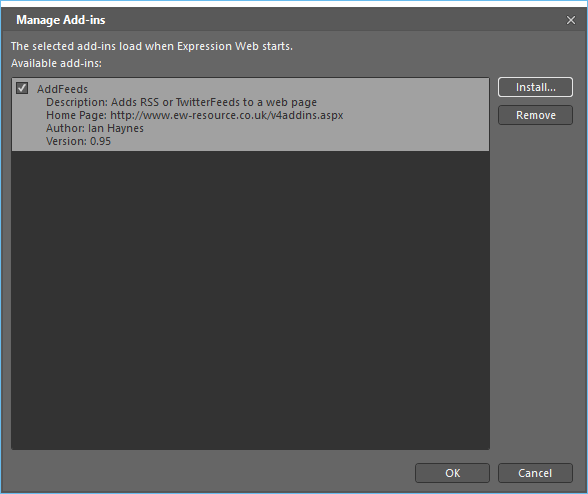
Step 2 − If this is the first time an Add-in is being installed, then there will be an empty list in the Manage Add-ins dialog box. Lets click the Install button.
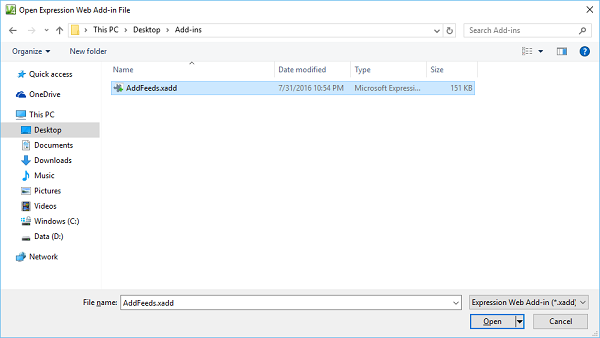
Step 3 − Select the AddFeeds.xadd file and click the Open button.
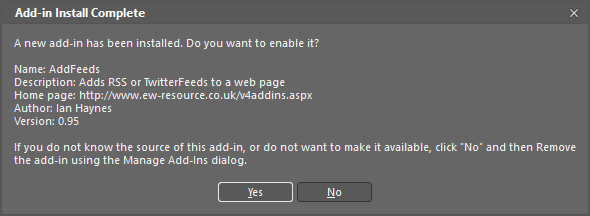
Step 4 − Once installed, it will show you the following screen. It will ask if we want to enable the add-in. The screen will give all the information on the particular add-in being installed. Click Yes.
Step 5 − Depending on the add-ins installed, they will be available at a number of locations.
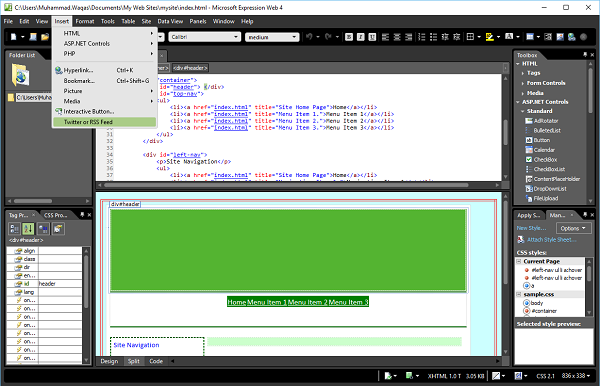
Step 6 − Next, go to Insert menu. You will see the Twitter or RSS Feed option which is now added after installing the add-in.
You can follow the same steps to install more add-ins as per requirements.
