
Article Categories
- All Categories
-
 Data Structure
-
 Networking
-
 RDBMS
RDBMS
-
 Operating System
-
 Java
Java
-
 MS Excel
-
 iOS
iOS
-
 HTML
HTML
-
 CSS
CSS
-
 Android
-
 Python
-
 C Programming
-
 C++
C++
-
 C#
C#
-
 MongoDB
-
 MySQL
MySQL
-
 Javascript
-
 PHP
PHP
-
 Economics & Finance
How to Use Community Tab in YouTube Editor?
What is a YouTube Community Tab?
The YouTube Community Tab is the best feature of the YouTube where the creators may interact with their audience in ways other than through the videos they post to their channel. Polls, text-based posts, and visual postings are all examples of community posts. Moreover, the community posts are displayed on your subscriber?s subscription feeds.
How You Enable the Community Tab?
You need 1000 subscribers to access the YouTube Community Tab. It often takes one or two weeks after you exceed the criteria for the community tab to appear on your YouTube channel.
Benefits of Community Tab
With the help of the community tab, you can?
- Share personal images and more about your personal life than in your videos.
- Promote your YouTube videos by sharing the YouTube Thumbnail and the link.
- Provide announcements and behind the scenes material.
- Ask your audience for their suggestions.
- Do audience research and find what they like.
- Create a poll that can be published a couple of hours before the video.
How to Create Community Post on YouTube
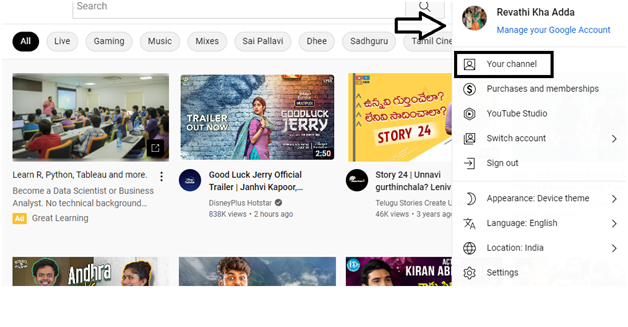
- Step 1 ? Go to YouTube.com website and sign into your account. Click on the profile icon and drop-down menu appears and click on Your Channel.
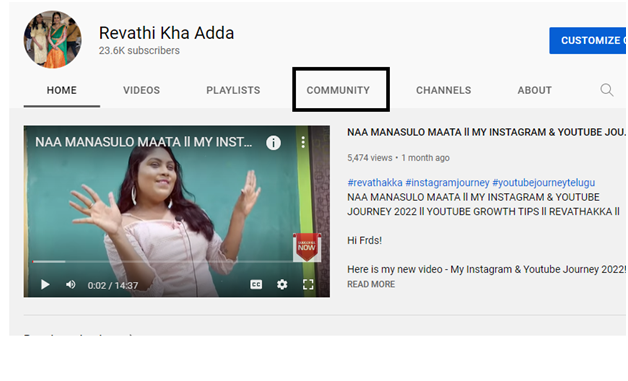
- Step 2 ? Your YouTube Home page will appear(as shown below). Here you will find different tabs. Click on the Community Tab.
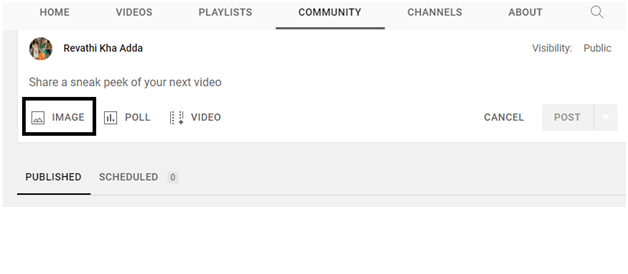
- Step 3 ? When you click on the Community Tab, the page appears (as shown below). Click on the Image option.
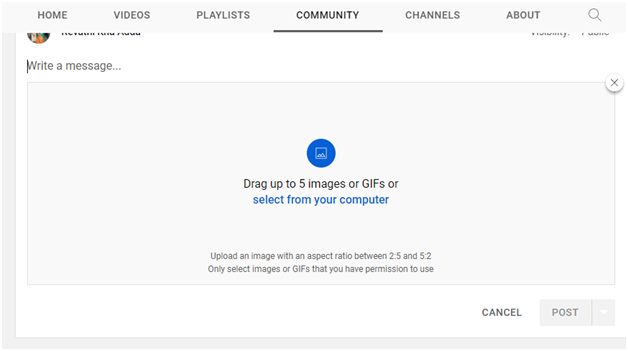
- Step 4 ? Once you click on the Image option, a pop-up window will be displayed. It says you can drag up to 5 images or GIFs. (as shown below).
- Step 5 ? Here I?m importing 2 images (as shown below) and you can write any text you want and you can even share the YouTube link (It can be your?s or some others).

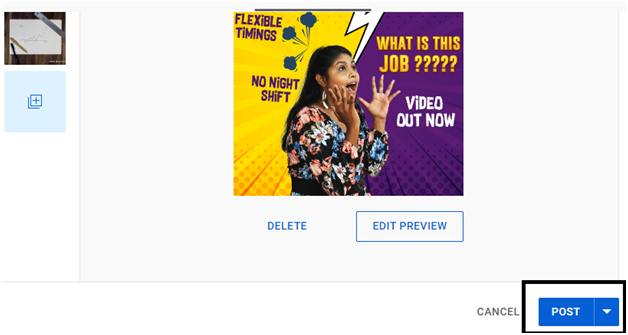
- Step 6 ? You can delete the image or edit the preview of the image (as shown below).

- Step 7 ? Click on the POST button to publish your post to your audience (as shown below).
- Step 8 ? You can even schedule the post by clicking on the down arrow that is present on the POST button.
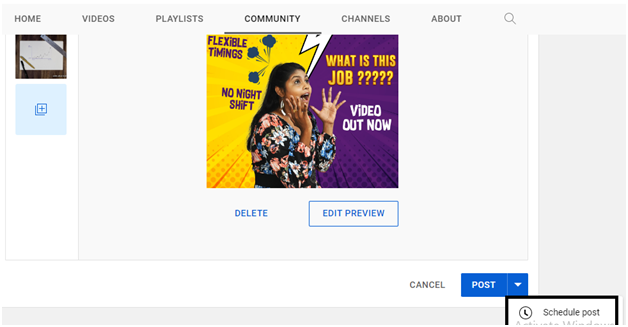
- Step 9 ? You will find the Schedule post. Click on the Schedule post. You will be displayed with this post (as shown below).
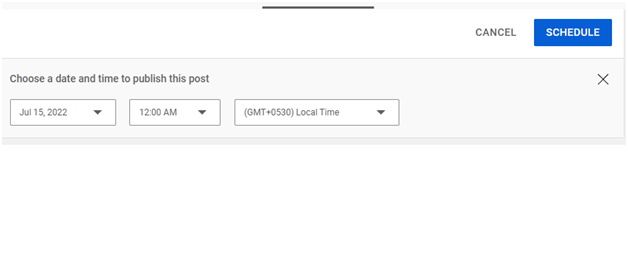
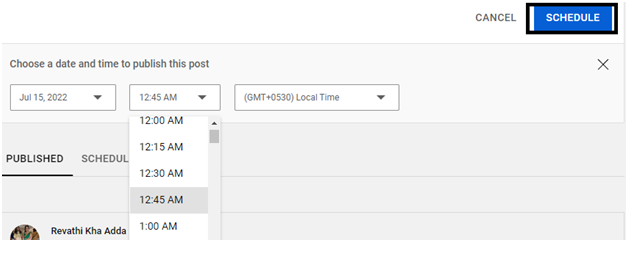
- Step 10 ? In the Schedule post, you can select the time and date to publish the post. On the date button, click on the down arrow, you will be displayed with a calendar. You can select your specified date.
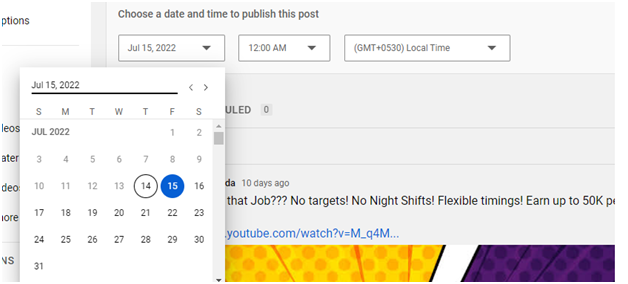
- Step 11 ? In the same schedule post, you can select the time from the drop-down menu. Select your specified time and click on the SCHEDULE and the post will be scheduled to your specified date and time.
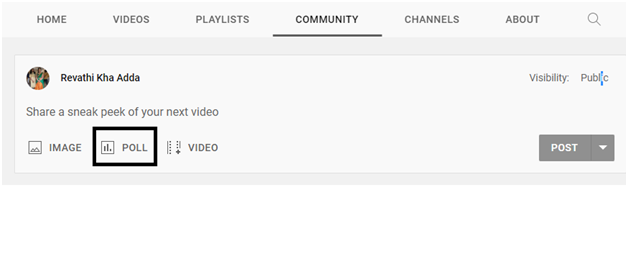
- Step 12 ? In the Community tab, you can even create a Poll. Go to Community tab and click on the POLL option.
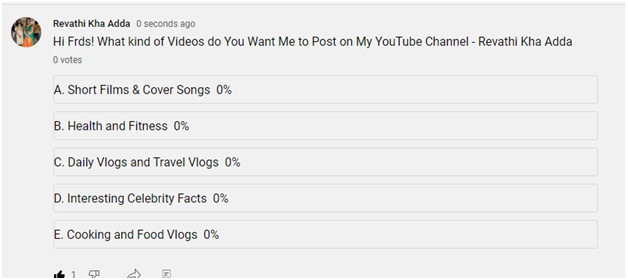
- Step 13 ? You will be displayed (as shown below). You can type anything here. Here I?m typing - what kind of videos do you want me to post on my YouTube Channel.
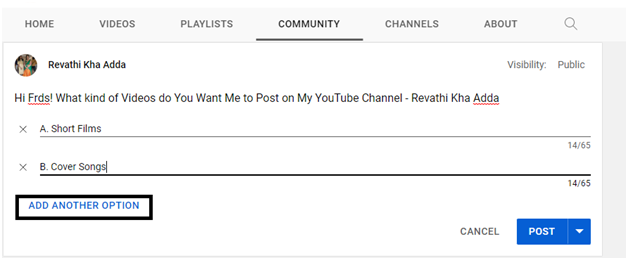
- Step 14 ? By default, they have provided 2 options but you can add another 3 options. Total, in a poll button, YouTube provides 5 options. Fill the content and click on the POST button. You have an option to schedule the created poll.
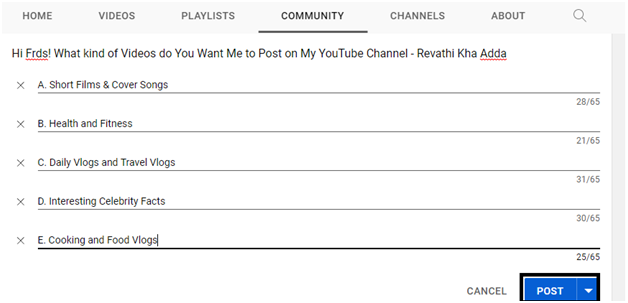
- Step 15 ? Once the poll is created and it is posted, it will appear as shown below. Take a look.
Conclusion
If your YouTube channel is fortunate enough to have a community tab, start utilizing it! For the next three to six months, set a challenge for yourself to post something every day. This might be a poll, an animated GIF, or anything else that will help you connect with your audience.

927 Views
