
Article Categories
- All Categories
-
 Data Structure
-
 Networking
-
 RDBMS
RDBMS
-
 Operating System
-
 Java
Java
-
 MS Excel
-
 iOS
iOS
-
 HTML
HTML
-
 CSS
CSS
-
 Android
-
 Python
-
 C Programming
-
 C++
C++
-
 C#
C#
-
 MongoDB
-
 MySQL
MySQL
-
 Javascript
-
 PHP
PHP
-
 Economics & Finance
How to Remove Non-Highlighted Cells in Excel?
You can encounter circumstances where you wish to concentrate exclusively on particular cells that are highlighted or have particular formatting applied to them if you frequently work with enormous datasets or intricate spreadsheets. You can improve readability, speed data analysis, and organise your Excel spreadsheet by removing the non-highlighted cells.
In this article, we'll examine the simplest method for getting the job done. We'll examine an illustration of how to use the Filter to complete the assignment. This step-by-step tutorial will show you how to use Excel's built-in tools and functions to filter and get rid of cells that aren't highlighted. This course will help you manage your data effectively and create more visually appealing spreadsheets, whether you are a novice or seasoned Excel user. So lets get started on how you can remove Non-highlighted cells in Excel.
Remove Non-Highlighted Cells
Here we will first filter the range of cells, then select the filtered cells, and finally delete the cells. So let us see a simple process to learn how you can remove non-highlighted cells in Excel.
Step 1
Consider an Excel sheet where you have a range of cells with some highlighted cells, similar to the below image.
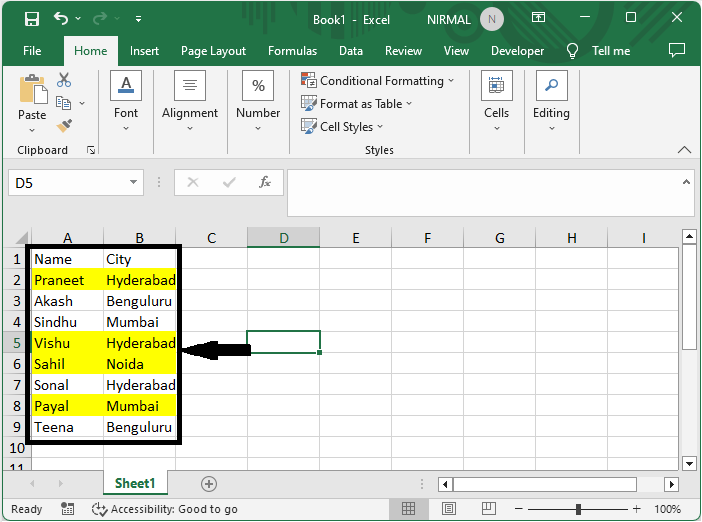
First, select the range of cells, then click on filter under data.
Select Cells > Data > Filter.
Step 2
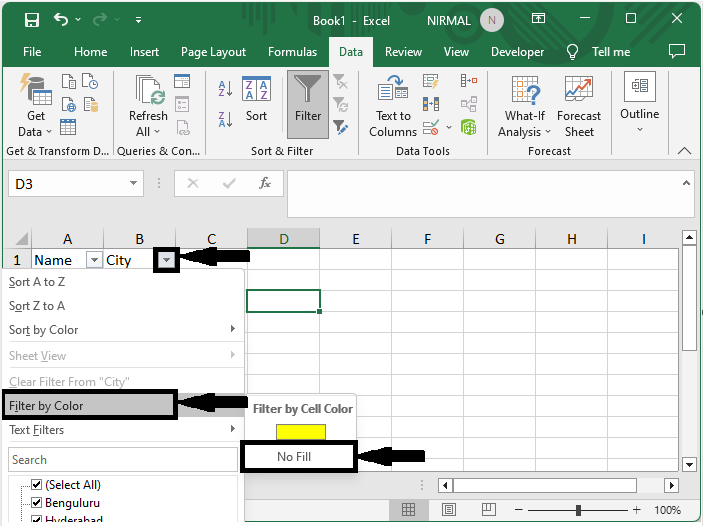
Then click on the arrow mark, then click on filter by colour, and select No Filter.
Arrow > Filter By Colour > No Fill
Step 3
Then select the range of cells and click Delete and Unfilter to complete the task.
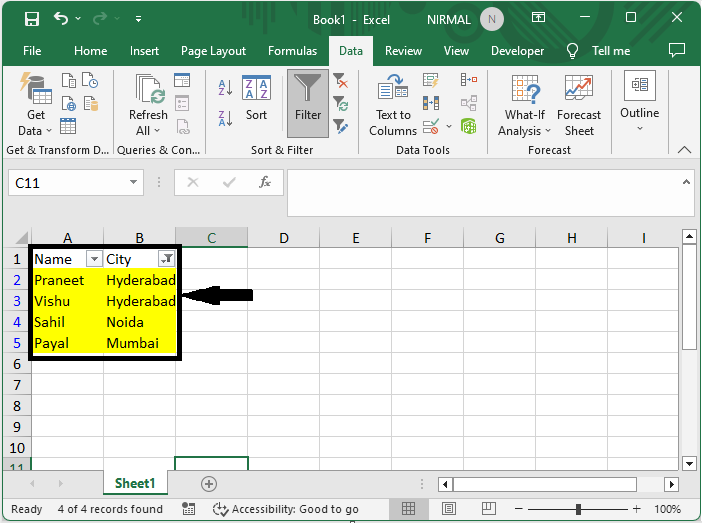
This is how you can remove non-highlighted cells in Excel.
Conclusion
In this tutorial, we have used a simple example to demonstrate how you can remove non-highlighted cells in Excel to highlight a particular set of data.

8K+ Views
