 Data Structure
 Networking
 RDBMS
RDBMS Operating System
 Java
Java MS Excel
 iOS
iOS HTML
HTML CSS
CSS Android
 Python
 C Programming
 C++
C++ C#
C# MongoDB
 MySQL
MySQL Javascript
 PHP
PHP
- Selected Reading
- UPSC IAS Exams Notes
- Developer's Best Practices
- Questions and Answers
- Effective Resume Writing
- HR Interview Questions
- Computer Glossary
- Who is Who
How to mask an image in OpenCV Python?
We can apply a mask to an image by computing the cv2.bitwise_and() between the mask and the image. To track a color, we define a mask in HSV color space using cv2.inRange() passing lower and upper limits of color values in HSV.
Also Read: Color Identification in Images using Python and OpenCV
To track a part of the image we can define a mask using np.zeros() and slicing the entries with white (255) for the region in the input image to examine. Follow the given steps to mask an image ?
The first step is to import required libraries. The required Python libraries are OpenCV, and NumPy. Make sure you have already installed them.
Next read the input image using cv2.imread() method. Convert the image BGR to HSV to track a color in the input image. To track a part of the image leave the image in BGR format.
Define a mask using cv2.inRange() to track a particular color in the image. Pass the lower and upper limits of color in HSV format. If you want to track the rectangular part of the input image, define a rectangular image (mask) with cv2.zeros(). Fill the entries of the mask with 255 to track the area in the original image.
Apply bitwise AND operation between the mask and the input image using cv2.bitwise_and().
Now display the mask and masked image.
We will use this image as the Input File in the following examples ?

Example
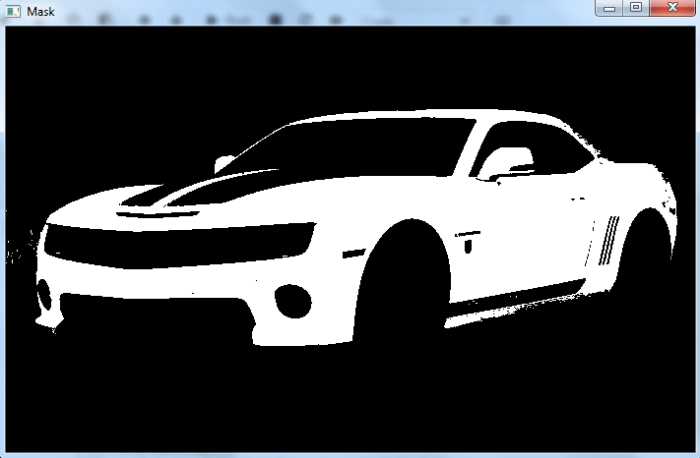
In this Python program, we create a color mask to track yellow color in the input image. In this example we use HSV color space to get a color mask.
# import required libraries
import cv2
import numpy as np

# read input image
img = cv2.imread('car.jpg')

# Convert BGR to HSV
hsv = cv2.cvtColor(img, cv2.COLOR_BGR2HSV)

# define range of blue color in HSV
lower_yellow = np.array([15,50,180])
upper_yellow = np.array([40,255,255])

# Create a mask. Threshold the HSV image to get only yellow colors
mask = cv2.inRange(hsv, lower_yellow, upper_yellow)

# Bitwise-AND mask and original image
result = cv2.bitwise_and(img,img, mask= mask)

# display the mask and masked image
cv2.imshow('Mask',mask)
cv2.waitKey(0)
cv2.imshow('Masked Image',result)
cv2.waitKey(0)
cv2.destroyAllWindows()
Output
When we run the above code two windows named 'Mask' and 'Masked Image' will open. 'Mask' shows the mask to track the yellow color. 'Masked Image' shows the tracked yellow color in the input image.


Example
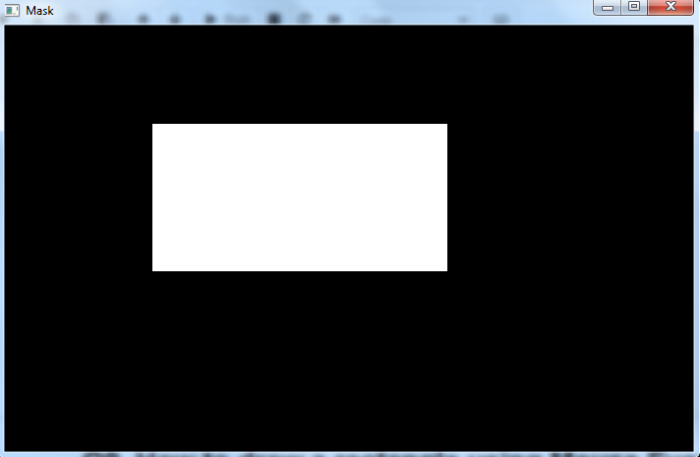
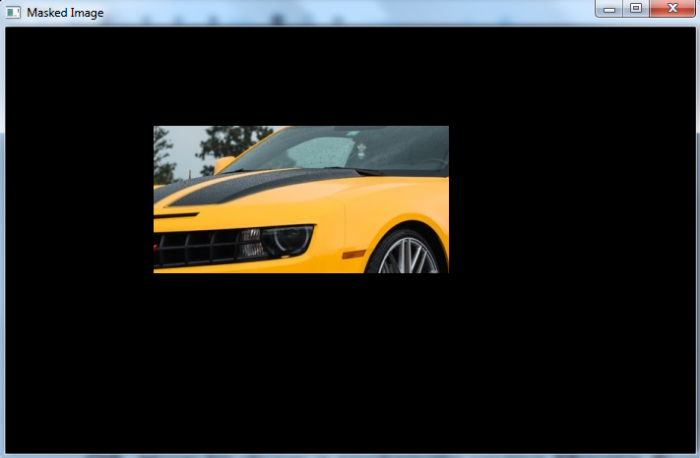
In this Python program, we create a rectangular region as a mask. We want to track this rectangular part of the input image.
# import required libraries
import cv2
import numpy as np

# Read an input image as a gray image
img = cv2.imread('car.jpg')

# create a mask
mask = np.zeros(img.shape[:2], np.uint8)
mask[100:250, 150:450] = 255

# compute the bitwise AND using the mask
masked_img = cv2.bitwise_and(img,img,mask = mask)

# display the mask, and the output image
cv2.imshow('Mask',mask)
cv2.waitKey(0)
cv2.imshow('Masked Image',masked_img)
cv2.waitKey(0)
cv2.destroyAllWindows()
Output
When we run the above code two windows named 'Mask' and 'Masked Image' will open. 'Mask' shows the mask (rectangular region). 'Masked Image' shows the tracked part in the input image.


Learn
Python with our Python Tutorial.

