 Data Structure
 Networking
 RDBMS
RDBMS Operating System
 Java
Java MS Excel
 iOS
iOS HTML
HTML CSS
CSS Android
 Python
 C Programming
 C++
C++ C#
C# MongoDB
 MySQL
MySQL Javascript
 PHP
PHP
- Selected Reading
- UPSC IAS Exams Notes
- Developer's Best Practices
- Questions and Answers
- Effective Resume Writing
- HR Interview Questions
- Computer Glossary
- Who is Who
How to apply Affine Transformation on an image in OpenCV Python?
In Affine Transformation, all parallel lines in the original image will still be parallel in the output image. To apply affine transformation on an image, we need three points on the input image and corresponding point on the output image. So first, we define these points and pass to the function cv2.getAffineTransform(). It will create a 2Ã3 matrix, we term it a transformation matrix M.
We can find the transformation matrix M using the following syntax ?
M = cv2.getAffineTransform(pts1,pts2)
Where pts1 is an array of three points on the input image and pts2 is an array of the corresponding three points on the output image. The translation matrix M is a numpy array of type np.float64.
We pass M to the cv2.warpAffine() function as an argument. See the syntax given below ?
cv2.warpAffine(img,M,(cols,rows))
where,
img ? The image to be affine transformed.
M ? Affine transformation matrix defined above.
(cols, rows) ? Width and height of the image after affine transformation.
Steps
To perform an image affine transformation, you can follow the steps given below ?
Import the required library. In all the following Python examples, the required Python library is OpenCV. Make sure you have already installed it.
import cv2
Read the input image using cv2.imread() function. Pass the full path of the input image.
img = cv2.imread('lines.jpg')
Define pts1 and pts2. We need three points from the input image and their corresponding locations in the output image.
pts1 = np.float32([[50,50],[200,50],[50,200]])
pts2 = np.float32([[10,100],[200,50],[100,250]])
Compute the affine transform matrix M using cv2.getAffineTransform(pts1, pts2) function.
M = cv2.getAffineTransform(pts1, pts2)
Transform the image using cv2.warpAffine() method. cols and rows are the desired width and height of the image after transformation.
dst = cv2.warpAffine(img,M,(cols,rows))
Display the affine transformed image.
cv2.imshow("Affine Transform", dst)
cv2.waitKey(0)
cv2.destroyAllWindows()
Let's look at some examples for a clear understanding of how to apply Affine Transformation on an image
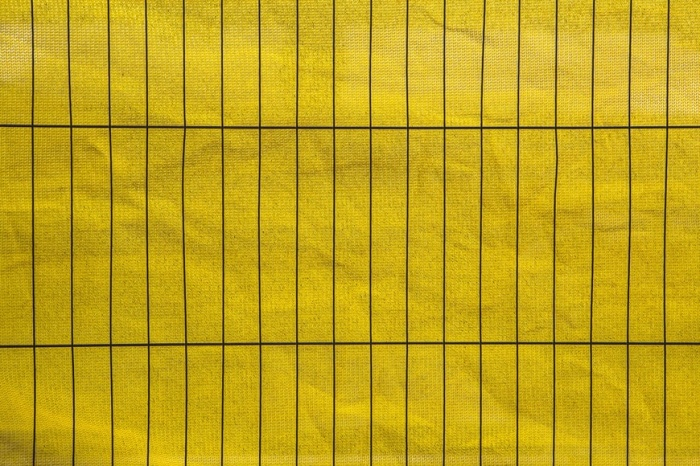
Input Image
We will use the following image as the input file in the examples below ?

Example 1
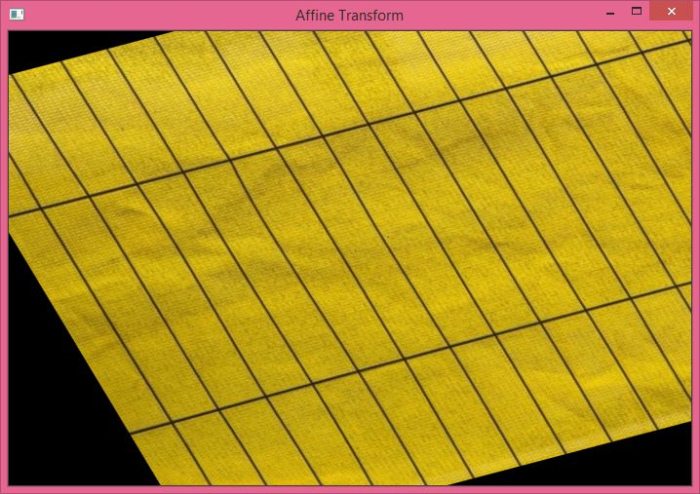
In this program, we will see how perform Affine Transformation on the input image.
# import required libraries
import cv2
import numpy as np

# read the input image
img = cv2.imread('lines.jpg')

# access the image height and width
rows,cols,_ = img.shape

# define at three point on input image
pts1 = np.float32([[50,50],[200,50],[50,200]])

# define three points corresponding location to output image
pts2 = np.float32([[10,100],[200,50],[100,250]])

# get the affine transformation Matrix
M = cv2.getAffineTransform(pts1,pts2)

# apply affine transformation on the input image
dst = cv2.warpAffine(img,M,(cols,rows))
cv2.imshow("Affine Transform", dst)
cv2.waitKey(0)
cv2.destroyAllWindows()
Output
The above Python program will produce the following output window ?

Example 2
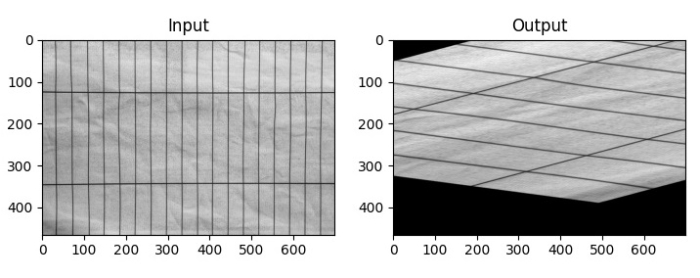
In this Python program, we load an image as grayscale, define two points corresponding to input and output images, get the transformation matrix, and finally apply the warpAffine() method to perform affine transformation on the input image.
import cv2
import numpy as np
import matplotlib.pyplot as plt

img = cv2.imread('lines.jpg', 0)
rows,cols = img.shape

pts1 = np.float32([[150,50],[200,50],[50,200]])
pts2 = np.float32([[10,100],[200,50],[10,250]])

M = cv2.getAffineTransform(pts1,pts2)
dst = cv2.warpAffine(img,M,(cols,rows))

plt.subplot(121), plt.imshow(img, cmap='gray' ), plt.title('Input')
plt.subplot(122), plt.imshow(dst, cmap='gray'), plt.title('Output')
plt.show()
Output
On execution, it will produce the following output window ?


