- DirectX - Home
- 3D MATHS
- 3D Maths - Vector Algebra
- 3D Maths - Matrix Algebra
- 3D Maths - Transformations
- 3D Maths - DirectX Math
- DIRECTX
- DirectX - Overview
- DirectX - Installation
- DirectX - Components
- DirectX - Tools
- DirectX - Creating App
- DirectX - Window Events
- DirectX - App Lifecycle
- DirectX - Direct3D Initialization
- DirectX - First HLSL
- DirectX - Graphics Pipeline
- DirectX - Buffers
- DirectX - 3D Transformation
- DirectX - Drawing
- DirectX - Rendering
- DirectX - Modeling
- DirectX - Lighting
- DirectX - Texturing
- DirectX - Multi Texturing
- DirectX - Blending
- DirectX - Picking
- DirectX - Stenciling
- DirectX - First Shader
- DirectX - Pixel Shader
- DirectX - Geometry Shaders
- DirectX - Compute Shaders
- DirectX - Shader Effects
- DirectX - Quaternion
- DirectX Resources
- DirectX - Quick Guide
- DirectX - Useful Resources
- DirectX - Discussion
DirectX - Creating App
This chapter involves the process of creating new application with DirectX using Visual Studio Code Editor. Following steps should be followed for creating an app in DirectX −
Here we will start by constructing a DirectX project with a walk through of the basic steps to get a working application.
Step 1
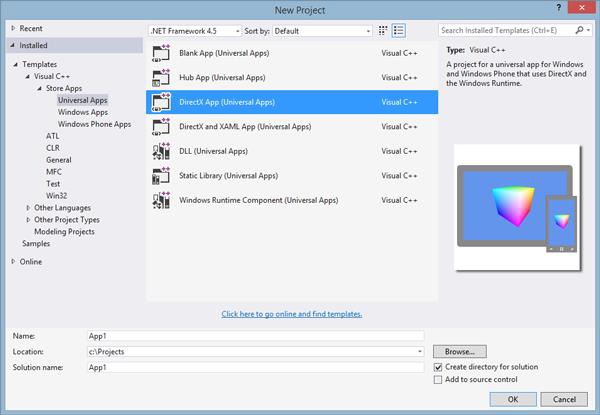
To create a DirectX non-desktop application, a special type of project called a DirectX App is used. This step involves opening a Visual Studio 2013, select File → New Project and select as DirectX App which comes under category of Visual C++, Store App, Universal App.
Step 2
Once the project is created, you will see a lot of files being populated. This is clearly visible in snapshot mentioned below −
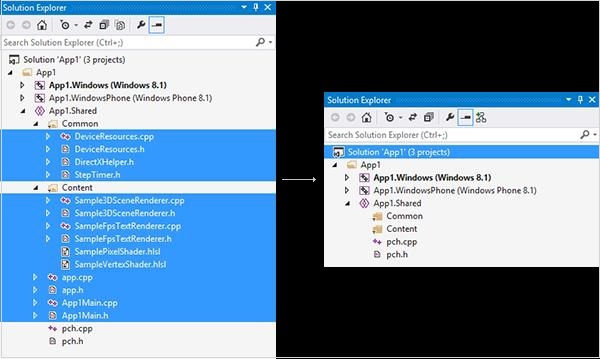
Step 3
User can delete various files to make up a sample app and explore the features to see how a fully-functioning DirectX app is set up as per the attributes required.
As mentioned in the snapshot above, a file is created named App.cpp.
#include <stdio.h> // include the standard input/output header file
int main(void) { // our program starts here
   printf("Hello World!"); // print "Hello World!" into the console
   return 0; // return 0 to windows
}
Explanation
The function main() marks the start of the application and works with Windows Operating System.
main() function should be included where the program usually starts.
Windows can feed the required parameters to get things done smoothly.
There are specific parameters which can be included usually considered as secondary parameters.
