
Article Categories
- All Categories
-
 Data Structure
-
 Networking
-
 RDBMS
RDBMS
-
 Operating System
-
 Java
Java
-
 MS Excel
-
 iOS
iOS
-
 HTML
HTML
-
 CSS
CSS
-
 Android
-
 Python
-
 C Programming
-
 C++
C++
-
 C#
C#
-
 MongoDB
-
 MySQL
MySQL
-
 Javascript
-
 PHP
PHP
-
 Economics & Finance
Configure and send emails in WordPress
Looking at the popularity and significance of a website one may has now decided to create his own 5-7 page business website. With that we shall need web pages for our business location map as well as a contact page and an official email id. There are various ways through which we can create a contact-us form so that it’s easier for clients to directly contact us through visiting our website page.
For that first we need to setup our official email-id with our WordPress website. After that configuring that email-id will take us further in sending and receiving an email. Here, we shall explore how to easily configure email on our WordPress website. With that we will also see how to successfully send a test email.
Terminologies
We should get some idea of the technologies and terminologies we are going to use further in this article.
Content Management System (CMS) − A CMS has a central interface that is used to publish, edit, modify, and maintain content. Some well know CMS include, WordPress, Drupal, and Joomla.
WordPress − It is an open source content management system founded by Matt Mullenweg and Mike Little. It was initially released in the year 2003 and its current version is WordPress 4.4.
Plugin − It extends and expands functionality of WordPress. It has features so that users can easily add features to the website.
Simple Mail Transfer Protocol (SMTP) − In simple terms, SMTP is an Internet standard for email transmission.
Easy WP SMTP plugin − A plugin that allows configuring and sending emails via a SMTP server.
Let us start
For demo purpose, we consider a website with official email contact@jainplastics.in. And assume it is basic 5-7 page website and enabled its email settings also. My aim is to show the working on a live website. Therefore, for demo we will consider the same email-id.
Here are the steps to set and configure email-id −
Step 1
Install WP-SMTP Plugin
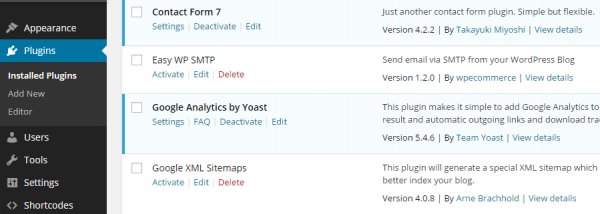
Step 2
After installation, activate the plugin as in the following screenshot −
Step 3
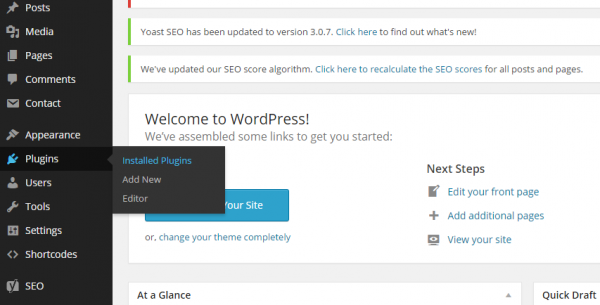
After activation, we can see the plugin adds a new option under Settings tab. Here’s the screenshot −
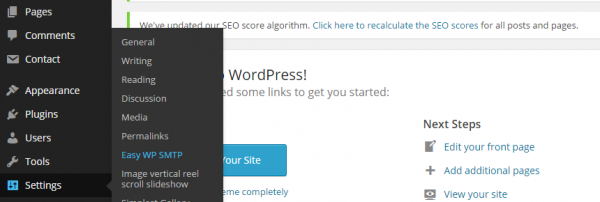
Step 4
Now comes the key part, click Settings and click Easy WP SMTP as shown in the above screenshot.
Step 5
Now we can see the General Settings of Easy WP SMTP plugin. Enter the values as in the following screenshot.
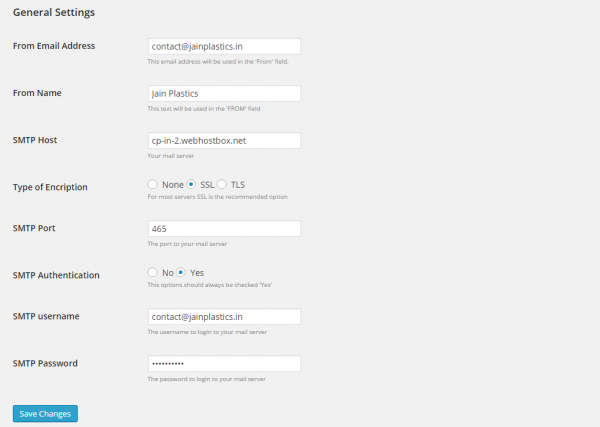
The description for the values entered is explained below. Here, For the first two values −
| Field No. |
Field |
Value |
Description |
|---|---|---|---|
| Field 1 |
From Email Address |
contact@jainplastics.in |
Enter the official email-id. |
| Field 2 |
From Name |
Jain Plastics |
Enter the name we want users to see when they receive email from our official business email-id. |
For the rest of the fields i.e. Field 3 to Field 8, please read further.
Entering values from cPanel Manual Email Settings
We shall now learn entering values from cPanel Manual Email Settings to Easy WP SMTP General Settings.
Step 6
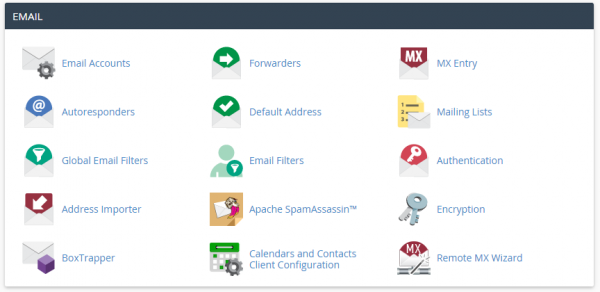
Login to cPanel and then click Email Accounts as in the following screenshot −
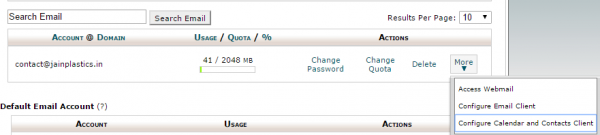
Step 7
Now we can see the following window that shows our official domain specific email id contact@jainplastics.in. Now click on Configure Email Client as in the following screenshot −
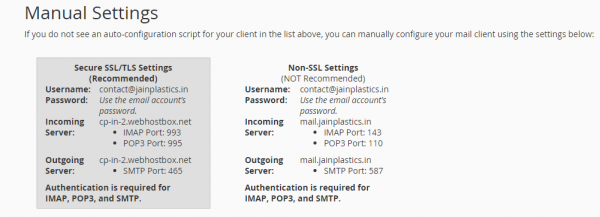
Now we see “Mail Client Configuration for contact@jainplastics.in” window will open. Under Manual Settings, select the Secure SSL/TLS Settings. Here’s the screenshot showing the details −
We will consider SSL settings as in the following screenshot −
Step 8
In Step 6, we looked into the first two fields. Here are the details for the rest of the fields from Field 3 to Field 8,
|
Field No. |
Field |
Value |
Description |
|---|---|---|---|
| Field 3 |
SMTP Host |
cp-in-2.webhostbox.net |
Server that will send email |
| Field 4 |
Type of Encryption |
SSL |
Secure Sockets Layer – provides a secure connection between server and client. |
| Field 5 |
SMTP Port |
465 |
For communication between mail server. |
| Field 6 |
SMTP Authentication |
Yes |
Secure Authentication |
| Field 7 |
SMTP Username |
contact@jainlastics.in |
The email to login to mail server |
| Field 8 |
SMTP Password |
Enter password |
The password to login to mail server. |
Enter the above values in the Easy WP SMTP General Settings (Figure 4).
Step 9
After entering all the values from the cPanel Email Manual Settings to Easy WP SMTP General Settings, press Save Changes.
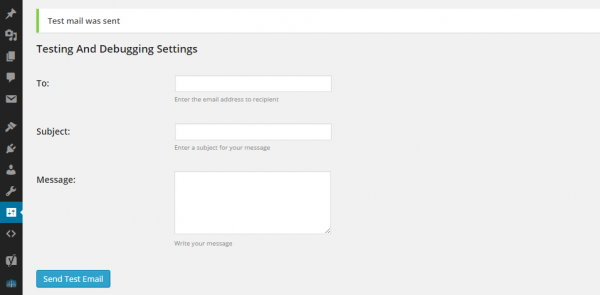
Just below, we can find the Testing And Debugging Settings. This section is provided by the plugin to test email sending and receiving. The following screenshot shows the same, just enter the values and click Send Test Email −
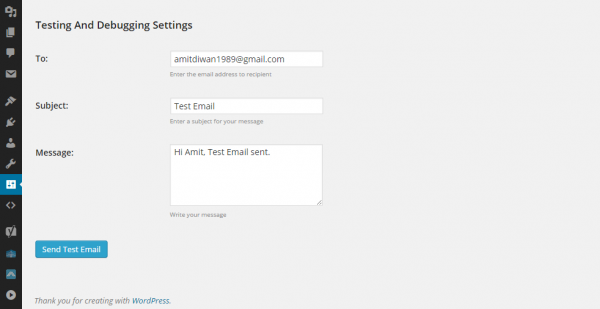
After clicking Send Test Email, the message “Test mail was sent” will be visible −
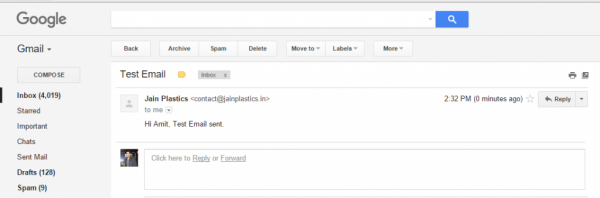
Now, we can check the email account and see that we have received an email from: contact@jainplastics with name Jain Plastics which we set in Step 5 before. Here’s the screenshot showing email received in my Gmail account from the official domain specific email-id.
Conclusion
So, this was an article to easily configure and send email in WordPress. Through this tutorial we have explored −
- Understanding Email Settings in hosting account cPanel.
- Working with Easy WP SMTP Plugin.
- Configuring email in WordPress.
- Successfully sending a Test Email
If you have any questions, then please mention in the comments section.

1K+ Views
