- Advanced Android - Home
- Advanced Android - Material Design
- Advanced Android - Sliding Menu
- Advanced Android - Tabs
- Advanced Android - Sliders
- Advanced Android - Floating Labels
- Advanced Android - ViewPager
- Material Login & Registration
- Advanced Android - Snackbar
- Expandable List View
- Search Functionality
- Count Down Functionality
- Draw Spritesheet
- Advanced Android - Linkify Class
- Advanced Android - ViewFlipper
- Advanced Android - loader
- Advanced Android - Slider Menu
- SwipeRefreshLayout
- Shake to Refresh
- Advanced Android - Color Palette
- Crumbling Layout
- Advanced Android - Page Flip
- Ken Burns effect
- Advanced Android - Parallax Header
- Borderless Dialog
- Advanced Android - Holder View
- Scrolling TextView by Ticker
- Floating Action Menu
- Spinner Data from Database
- Advanced Android - Flexbox Layout
- Advanced Android - YouTube API
- Video Streaming
- Cardview & Recycleview
Advanced Android - ViewPager
ViewPager in Android allows the user to flip left and right through pages of data
Example
This example demostrate about how to integrate Android ViewPager.
Step 1 − Create a new project in Android Studio, go to File ⇒ New Project and fill all required details to create a new project.
Step 2 − Add the following code to res/layout/activity_main.xml.
<?xml version = "a1.0" encoding = "utf-8"?>
<RelativeLayout xmlns:android = "http://schemas.android.com/apk/res/android"
   xmlns:tools = "http://schemas.android.com/tools"
   android:layout_width = "match_parent"
   android:layout_height = "match_parent"
   tools:context = ".MainActivity">
   <android.support.v4.view.ViewPager
      android:id = "@+id/viewpager"
      android:layout_width = "match_parent"
      android:layout_height = "match_parent"/>
</RelativeLayout>
Step 3 − Add the following code to src/MainActivity.java
package myapplication.example.com.myapplication;

import android.os.Bundle;
import android.support.v4.view.ViewPager;
import android.support.v7.app.AppCompatActivity;

public class MainActivity extends AppCompatActivity {
   @Override
   protected void onCreate(Bundle savedInstanceState) {
      super.onCreate(savedInstanceState);
      setContentView(R.layout.activity_main);

      ViewPager viewPager = (ViewPager) findViewById(R.id.viewpager);
      viewPager.setAdapter(new CustomPagerAdapter(this));
   }
}
Step 4 − Add the following code to src/ModelObject.java
package myapplication.example.com.myapplication;

public enum ModelObject {
   RED(R.string.red, R.layout.view_red),
      BLUE(R.string.blue, R.layout.view_blue),
      GREEN(R.string.green, R.layout.view_green);

   private int mTitleResId;
   private int mLayoutResId;

   ModelObject(int titleResId, int layoutResId) {
      mTitleResId = titleResId;
      mLayoutResId = layoutResId;
   }
   public int getTitleResId() {
      return mTitleResId;
   }
   public int getLayoutResId() {
      return mLayoutResId;
   }
}
Step 5 − Add the following code to res/layout/view_blue.xml.
<?xml version = "1.0" encoding = "utf-8"?>
<RelativeLayout xmlns:android = "http://schemas.android.com/apk/res/android"
   android:orientation = "vertical" android:layout_width = "match_parent"
   android:background = "@android:color/holo_blue_bright"
   android:layout_height = "match_parent">
</RelativeLayout>
Step 6 − Add the following code to res/layout/view_green.xml.
<?xml version = "1.0" encoding = "utf-8"?>
<RelativeLayout xmlns:android = "http://schemas.android.com/apk/res/android"
   android:orientation = "vertical" android:layout_width = "match_parent"
   android:background = "@android:color/holo_green_dark"
   android:layout_height = "match_parent">
</RelativeLayout>
Step 7 − Add the following code to res/layout/view_red.xml.
<?xml version = "1.0" encoding = "utf-8"?>
<RelativeLayout xmlns:android = "http://schemas.android.com/apk/res/android"
   android:orientation = "vertical" android:layout_width = "match_parent"
   android:background = "@android:color/holo_red_dark"
   android:layout_height = "match_parent">
</RelativeLayout>
Step 8 − Add the following code to src/CustomPagerAdapter.java
package myapplication.example.com.myapplication;

import android.content.Context;
import android.support.v4.view.PagerAdapter;
import android.view.LayoutInflater;
import android.view.View;
import android.view.ViewGroup;

public class CustomPagerAdapter extends PagerAdapter {
   private Context mContext;
   public CustomPagerAdapter(Context context) {
      mContext = context;
   }

   @Override
   public Object instantiateItem(ViewGroup collection, int position) {
      ModelObject modelObject = ModelObject.values()[position];
      LayoutInflater inflater = LayoutInflater.from(mContext);
      ViewGroup layout = (ViewGroup) inflater.inflate(
         modelObject.getLayoutResId(), collection, false);
      collection.addView(layout);
      return layout;
   }

   @Override
   public void destroyItem(ViewGroup collection, int position, Object view) {
      collection.removeView((View) view);
   }

   @Override
   public int getCount() {
      return ModelObject.values().length;
   }

   @Override
   public boolean isViewFromObject(View view, Object object) {
      return view == object;
   }

   @Override
   public CharSequence getPageTitle(int position) {
      ModelObject customPagerEnum = ModelObject.values()[position];
      return mContext.getString(customPagerEnum.getTitleResId());
   }
}
Step 9 − Add the following code to value/strings.xml
<resources>
   <string name = "app_name">My Application</string>
   <string name = "red">red</string>
   <string name = "blue">blue</string>
   <string name = "green">green</string>
</resources>
Step 10 − No need to change manifest.xml
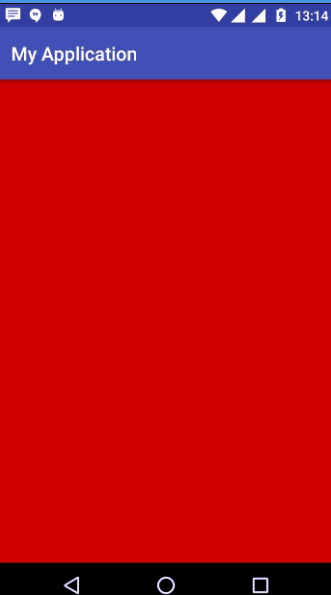
Let's try to run your application. I assume you have connected your actual Android Mobile device with your computer. To run the app from android studio, open one of your project's activity files and click Run  icon from the toolbar. Select your mobile device as an option and then check your mobile device which will display your default screen −