- Advanced Android - Home
- Advanced Android - Material Design
- Advanced Android - Sliding Menu
- Advanced Android - Tabs
- Advanced Android - Sliders
- Advanced Android - Floating Labels
- Advanced Android - ViewPager
- Material Login & Registration
- Advanced Android - Snackbar
- Expandable List View
- Search Functionality
- Count Down Functionality
- Draw Spritesheet
- Advanced Android - Linkify Class
- Advanced Android - ViewFlipper
- Advanced Android - loader
- Advanced Android - Slider Menu
- SwipeRefreshLayout
- Shake to Refresh
- Advanced Android - Color Palette
- Crumbling Layout
- Advanced Android - Page Flip
- Ken Burns effect
- Advanced Android - Parallax Header
- Borderless Dialog
- Advanced Android - Holder View
- Scrolling TextView by Ticker
- Floating Action Menu
- Spinner Data from Database
- Advanced Android - Flexbox Layout
- Advanced Android - YouTube API
- Video Streaming
- Cardview & Recycleview
Advanced Android - Quick Guide
Advanced Android - Material Design
What is Material Design?
According to Wikipedia, Material Design is a design language developed in 2014 by Google. Expanding upon the "card" motifs that debuted in Google Now, Material Design makes more liberal use of grid-based layouts, responsive animations and transitions, padding, and depth effects such as lighting and shadows
Some of its salient features are as follows −
In-built responsive designing.
Includes new versions of common user interface controls such as buttons, check boxes, and text fields which are adapted to follow Material Design concepts.
Includes enhanced and specialized features like cards, column layouts, sliders, spinners, tabs, typography, and so on.
Free to use.
Creating Material Design Theme
Open Android studio and go to File ⇒ New Project and fill all basic information required to create a new project. When it prompts to select a default activity, select Blank Activity and click finish button.
Open colors.xml under res ⇒ values folder in android studio directory and add the following code as shown below −
<?xml version = "1.0" encoding = "utf-8"?>
<resources>
   <color name = "colorPrimary">#F50057</color>
   <color name = "colorPrimaryDark">#C51162</color>
   <color name = "textColorPrimary">#FFFFFF</color>
   <color name = "windowBackground">#FFFFFF</color>
   <color name = "navigationBarColor">#000000</color>
   <color name = "colorAccent">#FF80AB</color>
</resources>
Open styles.xml under res ⇒ values and add the following code −
<resources>
   <style name = "MyMaterialTheme" parent = "MyMaterialTheme.Base"></style>

   <style name = "MyMaterialTheme.Base" parent = "Theme.AppCompat.Light.DarkActionBar">
      <item name = "windowNoTitle">true</item>
      <item name = "windowActionBar">false</item>
      <item name = "colorPrimary">@color/colorPrimary</item>
      <item name = "colorPrimaryDark">@color/colorPrimaryDark</item>
      <item name = "colorAccent">@color/colorAccent</item>
   </style>

</resources>
At finally, Add your theme in Android Manifest.xml file as shown below −
<?xml version = "1.0" encoding = "utf-8"?>
<manifest xmlns:android = "http://schemas.android.com/apk/res/android"
   package = "myapplication.example.com.card_recycle">

   <application
      android:allowBackup = "true"
      android:icon = "@mipmap/ic_launcher"
      android:label = "@string/app_name"
      android:supportsRtl = "true">
      <android:theme = "@style/MyMaterialTheme">

      <activity android:name = ".MainActivity">
         <intent-filter>
            <action android:name = "android.intent.action.MAIN"/>
            <category android:name = "android.intent.category.LAUNCHER"/>
         </intent-filter>
      </activity>
   </application>

</manifest>
Let's try to run your application. I assume you have connected your actual Android Mobile device with your computer. To run the app from android studio, open one of your project's activity files and click Run  icon from the toolbar. The sample output should be like below −
Adding the Toolbar to Material Design Theme
Create an xml file named toolbar.xml under res ⇒ layout and add the following code.
<?xml version = "1.0" encoding = "utf-8"?>
<android.support.v7.widget.Toolbar xmlns:android =
   "http://schemas.android.com/apk/res/android"

   xmlns:local = "http://schemas.android.com/apk/res-auto"
   android:id =" @+id/toolbar"
   android:layout_width = "match_parent"
   android:layout_height = "wrap_content"
   android:minHeight = "?attr/actionBarSize"
   android:background = "?attr/colorPrimary"
   local:theme = "@style/ThemeOverlay.AppCompat.Dark.ActionBar"
   local:popupTheme = "@style/ThemeOverlay.AppCompat.Light"/>
Open the layout file of your main activity and include the following code −
<include android:id = "@+id/toolbar" layout = "@layout/toolbar" />
Let's try to run your application. I assume you have connected your actual Android Mobile device with your computer. To run the app from android studio, open one of your project's activity files and click Run icon from the toolbar. The sample output should be like below −
Adding a Toolbar Title
To create Asset folder, right click on res ⇒ New ⇒ Image Asset. It will show you a popup window to import the resource.

Now it will open Configure image asset pop up as shown below −
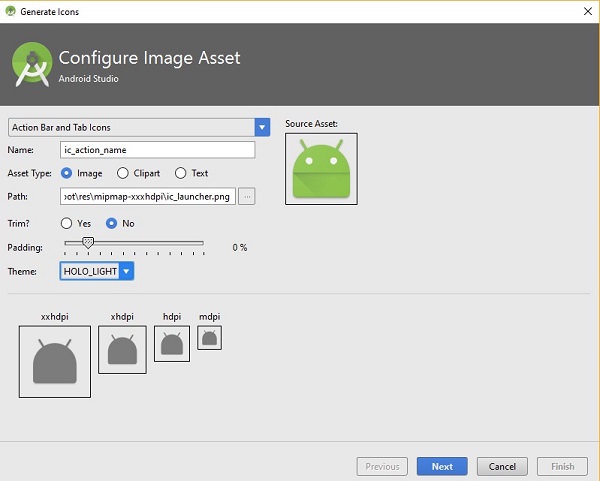
Set Configuration according to your project specifications and click on finish button.
Now open your main activity file. It should extends the activity from AppCompatActivity. Add the following code in onCreate() as shown below −
Toolbar mToolbar = (Toolbar) findViewById(R.id.toolbar);
setSupportActionBar(mToolbar);
getSupportActionBar().setDisplayShowHomeEnabled(true);
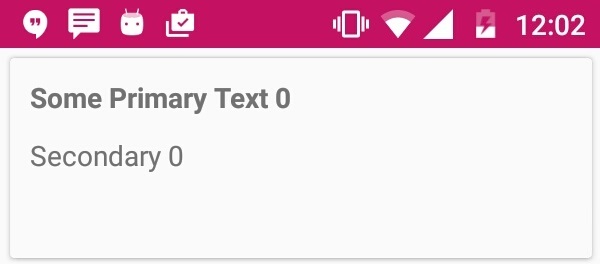
Let's try to run your application. I assume you have connected your actual Android Mobile device with your computer. To run the app from android studio, open one of your project's activity files and click Run icon from the toolbar. The sample output should be like below −
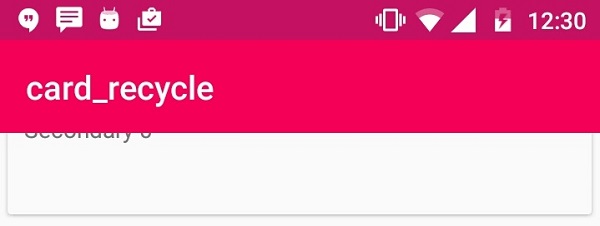
In the above image, It shows Application name on Tool Bar
Advanced Android - Sliding Menu
The Android Navigation Drawer is a sliding panel on the whole determined on the left fringe of the main screen in which you've got your apps predominant navigation menu or options.
Example
This example demostrate about how to integrate Android Sliding Menu using Navigation Drawer.
Create a project with Android Studio Navigation Drawer Template as shown below −
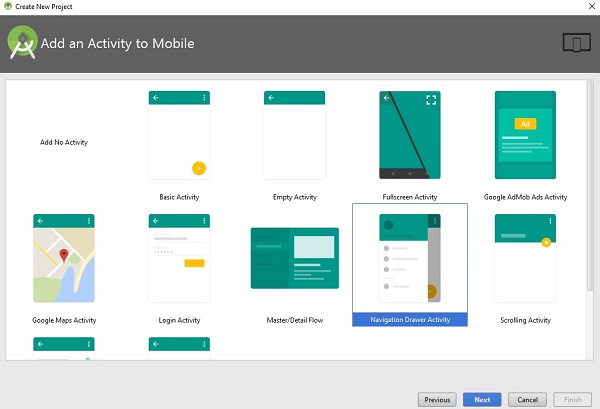
The above template creates the basic skeleton app with few navigation menu items

Adding Items to Drawer
To add an item to drawer,open res ⇒ values ⇒ String.xml file. The sample file os String.xml as shown below −
<?xml version = "1.0" encoding = "utf-8"?>
<menu xmlns:android = "http://schemas.android.com/apk/res/android">

   <group android:checkableBehavior = "single">
      <item
         android:id = "@+id/nav_camera"
         android:icon = "@drawable/ic_menu_camera"
         android:title = "Import" />
      <item
         android:id = "@+id/nav_gallery"
         android:icon = "@drawable/ic_menu_gallery"
         android:title = "Gallery" />
      <item
         android:id = "@+id/nav_slideshow"
         android:icon = "@drawable/ic_menu_slideshow"
         android:title = "Slideshow" />
      <item
         android:id = "@+id/nav_manage"
         android:icon = "@drawable/ic_menu_manage"
         android:title = "Tools" />
   </group>

   <item android:title = "Communicate">
      <menu>
         <item
            android:id = "@+id/nav_share"
            android:icon = "@drawable/ic_menu_share"
            android:title = "Share" />
         <item
            android:id = "@+id/nav_send"
            android:icon = "@drawable/ic_menu_send"
            android:title = "Send" />
      </menu>
   </item>

</menu>
After add an item to group. The code should be like this −
<?xml version = "1.0" encoding = "utf-8"?>
<menu xmlns:android = "http://schemas.android.com/apk/res/android">

   <group android:checkableBehavior = "single">
      <item
         android:id = "@+id/nav_camera"
         android:icon = "@drawable/ic_menu_camera"
         android:title = "Import" />
      <item
         android:id = "@+id/nav_gallery"
         android:icon = "@drawable/ic_menu_gallery"
         android:title = "Gallery" />
      <item
         android:id = "@+id/nav_slideshow"
         android:icon = "@drawable/ic_menu_slideshow"
         android:title = "Slideshow" />
      <item
         android:id = "@+id/nav_manage"
         android:icon = "@drawable/ic_menu_manage"
         android:title = "Tools" />
      <item
         android:id = "@+id/example"
            android:icon = "@drawable/side_nav_bar"
            android:title = "example"/>
   </group>

   <item android:title = "Communicate">
      <menu>
         <item
            android:id = "@+id/nav_share"
            android:icon = "@drawable/ic_menu_share"
            android:title = "Share" />
         <item
            android:id = "@+id/nav_send"
            android:icon = "@drawable/ic_menu_send"
            android:title = "Send" />
      </menu>
   </item>

</menu>
Following is the content of the modified main activity file src/MainActivity.java.
package myapplication.example.com.myapplication;

import android.os.Bundle;
import android.support.design.widget.FloatingActionButton;
import android.support.design.widget.Snackbar;
import android.view.View;

import android.support.design.widget.NavigationView;
import android.support.v4.view.GravityCompat;
import android.support.v4.widget.DrawerLayout;
import android.support.v7.app.ActionBarDrawerToggle;
import android.support.v7.app.AppCompatActivity;
import android.support.v7.widget.Toolbar;

import android.view.Menu;
import android.view.MenuItem;
import android.widget.Toast;

public class MainActivity extends AppCompatActivity
implements NavigationView.OnNavigationItemSelectedListener {
   @Override
   protected void onCreate(Bundle savedInstanceState) {
      super.onCreate(savedInstanceState);
      setContentView(R.layout.activity_main);
      Toolbar toolbar = (Toolbar) findViewById(R.id.toolbar);

      setSupportActionBar(toolbar);
      FloatingActionButton fab = (FloatingActionButton) findViewById(R.id.fab);

      fab.setOnClickListener(new View.OnClickListener() {
         @Override
         public void onClick(View view) {
            Snackbar.make(view, "Replace with your own action", Snackbar.LENGTH_LONG)
               .setAction("Action", null).show();
         }
      });

      DrawerLayout drawer = (DrawerLayout) findViewById(R.id.drawer_layout);
      ActionBarDrawerToggle toggle = new ActionBarDrawerToggle(
         this, drawer, toolbar, R.string.navigation_drawer_open,
         R.string.navigation_drawer_close);

      drawer.setDrawerListener(toggle);
      toggle.syncState();
      NavigationView navigationView = (NavigationView) findViewById(R.id.nav_view);
      navigationView.setNavigationItemSelectedListener(this);
   }

   @Override
   public void onBackPressed() {
      DrawerLayout drawer = (DrawerLayout) findViewById(R.id.drawer_layout);
      if (drawer.isDrawerOpen(GravityCompat.START)) {
         drawer.closeDrawer(GravityCompat.START);
      } else {
         super.onBackPressed();
      }
   }

   @Override
   public boolean onCreateOptionsMenu(Menu menu) {
      // Inflate the menu; this adds items to the action bar if it is present.
      getMenuInflater().inflate(R.menu.main, menu);
      return true;
   }

   @Override
   public boolean onOptionsItemSelected(MenuItem item) {
      // Handle action bar item clicks here. The action bar will
      // automatically handle clicks on the Home/Up button, so long
      // as you specify a parent activity in AndroidManifest.xml.
      int id = item.getItemId();

      //noinspection SimplifiableIfStatement
      if (id == R.id.action_settings) {
         return true;
      }
      return super.onOptionsItemSelected(item);
   }

   @SuppressWarnings("StatementWithEmptyBody")
   @Override
   public boolean onNavigationItemSelected(MenuItem item) {
      // Handle navigation view item clicks here.
      int id = item.getItemId();

      if (id == R.id.nav_camera) {
         // Handle the camera action
      } else if (id == R.id.nav_gallery) {
      } else if (id == R.id.nav_slideshow) {
      } else if (id == R.id.nav_manage) {
      } else if (id == R.id.nav_share) {
      } else if (id == R.id.nav_send) {
      } else if(id == R.id.example) {
         Toast.makeText(this,"This is sample",Toast.LENGTH_LONG).show();
      }
      DrawerLayout drawer = (DrawerLayout) findViewById(R.id.drawer_layout);
      drawer.closeDrawer(GravityCompat.START);
      return true;
   }
}
Don't change content of activity_main.xml and manifest.xml file.
Let's try to run your application. I assume you have connected your actual Android Mobile device with your computer. To run the app from android studio, open one of your project's activity files and click Run icon from the toolbar. Select your mobile device as an option and then check your mobile device which will display your default screen −
Advanced Android - Tabs
Switching between different views in your app via tabs is not a new concept to material design and they are equally at home as a top level navigation pattern
Example
This example demostrate about how to integrate Android tabs.
Step 1 − Create a new project in Android Studio, go to File ⇒ New Project and fill all required details to create a new project.
Step 2 − Add the following code in build.gradle.
dependencies {
   compile fileTree(dir: 'libs', include: ['*.jar'])
   testCompile 'junit:junit:4.12'
   compile 'com.android.support:appcompat-v7:24.2.0'
   compile 'com.android.support:design:23.2.0'
}
Step 3 − Add the following code to res/layout/activity_main.xml.
<?xml version = "1.0" encoding = "utf-8"?>
<android.support.design.widget.CoordinatorLayout xmlns:android = "
   http://schemas.android.com/apk/res/android"
   xmlns:app = "http://schemas.android.com/apk/res-auto"
   android:layout_width = "match_parent"
   android:layout_height = "match_parent">
   <android.support.design.widget.AppBarLayout
      android:layout_width = "match_parent"
      android:layout_height = "wrap_content"
      android:theme = "@style/ThemeOverlay.AppCompat.Dark.ActionBar">
      <android.support.v7.widget.Toolbar
         android:id = "@+id/toolbar"
         android:layout_width = "match_parent"
         android:layout_height = "?attr/actionBarSize"
         android:background = "?attr/colorPrimary"
         app:layout_scrollFlags = "scroll|enterAlways"
         app:popupTheme = "@style/ThemeOverlay.AppCompat.Light" />
      <android.support.design.widget.TabLayout
         android:id = "@+id/tabs"
         android:layout_width = "match_parent"
         android:layout_height = "wrap_content"
         app:tabMode = "fixed"
         app:tabGravity = "fill"/>
   </android.support.design.widget.AppBarLayout>
   <android.support.v4.view.ViewPager
      android:id = "@+id/viewpager"
      android:layout_width = "match_parent"
      android:layout_height = "match_parent"
      app:layout_behavior = "@string/appbar_scrolling_view_behavior" />
</android.support.design.widget.CoordinatorLayout>
Step 4 − Add the following code to src/MainActivity.java
package myapplication.example.com.myapplication;

import android.os.Bundle;
import android.support.design.widget.TabLayout;
import android.support.v4.app.Fragment;
import android.support.v4.app.FragmentManager;
import android.support.v4.app.FragmentPagerAdapter;
import android.support.v4.view.ViewPager;
import android.support.v7.app.AppCompatActivity;
import android.support.v7.widget.Toolbar;

import java.util.ArrayList;
import java.util.List;

public class MainActivity extends AppCompatActivity {
   private Toolbar toolbar;
   private TabLayout tabLayout;
   private ViewPager viewPager;

   @Override
   protected void onCreate(Bundle savedInstanceState) {
      super.onCreate(savedInstanceState);
      setContentView(R.layout.activity_main);
      toolbar = (Toolbar) findViewById(R.id.toolbar);

      setSupportActionBar(toolbar);
      getSupportActionBar().setDisplayHomeAsUpEnabled(true);

      viewPager = (ViewPager) findViewById(R.id.viewpager);
      setupViewPager(viewPager);

      tabLayout = (TabLayout) findViewById(R.id.tabs);
      tabLayout.setupWithViewPager(viewPager);
   }

   private void setupViewPager(ViewPager viewPager) {
      ViewPagerAdapter adapter = new ViewPagerAdapter(getSupportFragmentManager());
      adapter.addFragment(new OneFragment(), "ONE");
      adapter.addFragment(new TwoFragment(), "TWO");
      adapter.addFragment(new ThreeFragment(), "THREE");
      viewPager.setAdapter(adapter);
   }

   class ViewPagerAdapter extends FragmentPagerAdapter {
      private final List<Fragment> mFragmentList = new ArrayList<>();
      private final List<String> mFragmentTitleList = new ArrayList<>();

      public ViewPagerAdapter(FragmentManager manager) {
         super(manager);
      }

      @Override
      public Fragment getItem(int position) {
         return mFragmentList.get(position);
      }

      @Override
      public int getCount() {
         return mFragmentList.size();
      }

      public void addFragment(Fragment fragment, String title) {
         mFragmentList.add(fragment);
         mFragmentTitleList.add(title);
      }

      @Override
      public CharSequence getPageTitle(int position) {
         return mFragmentTitleList.get(position);
      }
   }
}
Step 5 − Add the following code to src/OneFragment.java
package myapplication.example.com.myapplication;

import android.os.Bundle;
import android.support.v4.app.Fragment;
import android.view.LayoutInflater;
import android.view.View;
import android.view.ViewGroup;

public class OneFragment extends Fragment {
   public OneFragment() {
      // Required empty public constructor
   }

   @Override
   public void onCreate(Bundle savedInstanceState) {
      super.onCreate(savedInstanceState);
   }

   @Override
   public View onCreateView(LayoutInflater inflater, ViewGroup container,
      Bundle savedInstanceState) {

      // Inflate the layout for this fragment
      return inflater.inflate(R.layout.fragment_one, container, false);
   }
}
Step 6 − Add the following code to res/layout/fragment_one.xml.
<?xml version = "1.0" encoding = "utf-8"?>
<LinearLayout xmlns:android = "http://schemas.android.com/apk/res/android"
   android:orientation = "vertical" android:layout_width = "match_parent"
   android:layout_height = "match_parent">
   <TextView
      android:layout_width = "wrap_content"
      android:layout_height = "wrap_content"
      android:text = "First Fragment"
      android:textSize = "40dp"
      android:textStyle = "bold"
      android:layout_centerInParent = "true"/>
</LinearLayout>
Step 7 − Add the following code to src/TwoFragment.java
package myapplication.example.com.myapplication;

import android.os.Bundle;
import android.support.v4.app.Fragment;
import android.view.LayoutInflater;
import android.view.View;
import android.view.ViewGroup;

public class TwoFragment extends Fragment {
   public TwoFragment() {
      // Required empty public constructor
   }

   @Override
   public void onCreate(Bundle savedInstanceState) {
      super.onCreate(savedInstanceState);
   }

   @Override
   public View onCreateView(LayoutInflater inflater, ViewGroup container,
      Bundle savedInstanceState) {

      // Inflate the layout for this fragment
      return inflater.inflate(R.layout.fragment_two, container, false);
   }
}
Step 8 − Add the following code to res/layout/fragment_two.xml.
<?xml version = "1.0" encoding = "utf-8"?>
<LinearLayout xmlns:android = "http://schemas.android.com/apk/res/android"
   android:orientation = "vertical" android:layout_width = "match_parent"
   android:layout_height = "match_parent">
   <TextView
      android:layout_width = "wrap_content"
      android:layout_height = "wrap_content"
      android:text = "Second Fragment"
      android:textSize = "40dp"
      android:textStyle = "bold"
      android:layout_centerInParent = "true"/>
</LinearLayout>
Step 9 − Add the following code to src/ThreeFragment.java
package myapplication.example.com.myapplication;

import android.os.Bundle;
import android.support.v4.app.Fragment;
import android.view.LayoutInflater;
import android.view.View;
import android.view.ViewGroup;

public class ThreeFragment extends Fragment {
   public ThreeFragment() {
      // Required empty public constructor
   }

   @Override
   public void onCreate(Bundle savedInstanceState) {
      super.onCreate(savedInstanceState);
   }

   @Override
   public View onCreateView(LayoutInflater inflater, ViewGroup container,
      Bundle savedInstanceState) {

      // Inflate the layout for this fragment
      return inflater.inflate(R.layout.fragment_three, container, false);
   }
}
Step 10 − Add the following code to res/layout/fragment_three.xml.
<?xml version = "1.0" encoding = "utf-8"?>
<LinearLayout xmlns:android = "http://schemas.android.com/apk/res/android"
   android:orientation = "vertical" android:layout_width = "match_parent"
   android:layout_height = "match_parent">
   <TextView
      android:layout_width = "wrap_content"
      android:layout_height = "wrap_content"
      android:text = "Third Fragment"
      android:textSize = "40dp"
      android:textStyle = "bold"
      android:layout_centerInParent = "true"/>
</LinearLayout>
Step 11 − Add the following code to styles.xml.
<resources>
   <style name = "MyMaterialTheme" parent = "MyMaterialTheme.Base"></style>

   <style name = "MyMaterialTheme.Base" parent = "Theme.AppCompat.Light.DarkActionBar">
      <item name = "windowNoTitle">true</item>
      <item name = "windowActionBar">false</item>
      <item name = "colorPrimary">@color/colorPrimary</item>
      <item name = "colorPrimaryDark">@color/colorPrimaryDark</item>
      <item name = "colorAccent">@color/colorAccent</item>
   </style>

</resources>
Step 12 − Add the following code to AndroidManifest.xml.
<?xml version = "1.0" encoding = "utf-8"?>
<manifest xmlns:android = "http://schemas.android.com/apk/res/android"
   package = "myapplication.example.com.myapplication">

   <application
      android:allowBackup = "true"
      android:icon = "@mipmap/ic_launcher"
      android:label = "@string/app_name"
      android:supportsRtl = "true"
      android:theme = "@style/MyMaterialTheme">
      <activity android:name = ".MainActivity">
         <intent-filter>
            <action android:name = "android.intent.action.MAIN" />
            <category android:name = "android.intent.category.LAUNCHER" />
         </intent-filter>
      </activity>
   </application>

</manifest>
Let's try to run your application. I assume you have connected your actual Android Mobile device with your computer. To run the app from android studio, open one of your project's activity files and click Run icon from the toolbar. Select your mobile device as an option and then check your mobile device which will display your default screen −
Advanced Android - Sliders
Adding Welcome / Intro slider screens in your app is a great way of showcasing the major features of the app. It is a small replacement of Splash Screen
Example
This example demostrate about how to integrate Android Intro Sliders.
Step 1 − Create a new project in Android Studio,go to File ⇒ New Project and fill all required details to create a new project.
Step 2 − Open colors.xml located under res ⇒ values Add the following Code.
<?xml version = "1.0" encoding = "utf-8"?>
<resources>
   <color name = "colorPrimary">#3F51B5</color>
   <color name = "colorPrimaryDark">#303F9F</color>
   <color name = "colorAccent">#FF4081</color>

   <!-- Screens background color-->
   <color name = "bg_screen1">#f64c73</color>
   <color name = "bg_screen2">#20d2bb</color>
   <color name = "bg_screen3">#3395ff</color>
   <color name = "bg_screen4">#c873f4</color>

   <!-- dots inactive colors -->
   <color name = "dot_dark_screen1">#d1395c</color>
   <color name = "dot_dark_screen2">#14a895</color>
   <color name = "dot_dark_screen3">#2278d4</color>
   <color name = "dot_dark_screen4">#a854d4</color>

   <!-- dots active colors -->
   <color name = "dot_light_screen1">#f98da5</color>
   <color name = "dot_light_screen2">#8cf9eb</color>
   <color name = "dot_light_screen3">#93c6fd</color>
   <color name = "dot_light_screen4">#e4b5fc</color>

   <array name = "array_dot_active">
      <item>@color/dot_light_screen1</item>
      <item>@color/dot_light_screen2</item>
      <item>@color/dot_light_screen3</item>
      <item>@color/dot_light_screen4</item>
   </array>

   <array name = "array_dot_inactive">
      <item>@color/dot_dark_screen1</item>
      <item>@color/dot_dark_screen2</item>
      <item>@color/dot_dark_screen3</item>
      <item>@color/dot_dark_screen4</item>
   </array>
</resources>
Step 3 − Add the following code to res/layout/activity_main.xml.
<?xml version = "1.0" encoding = "utf-8"?>
<RelativeLayout xmlns:android =" http://schemas.android.com/apk/res/android"
   xmlns:app = "http://schemas.android.com/apk/res-auto"
   xmlns:tools = "http://schemas.android.com/tools"
   android:layout_width = "match_parent"
   android:layout_height = "match_parent">
   <android.support.v4.view.ViewPager
      android:id = "@+id/view_pager"
      android:layout_width = "match_parent"
      android:layout_height = "match_parent" />
   <LinearLayout
      android:id = "@+id/layoutDots"
      android:layout_width = "match_parent"
      android:layout_alignParentBottom = "true"
      android:gravity = "center"
      android:orientation = "horizontal"
      android:layout_height = "match_parent"></LinearLayout>
   <View
      android:layout_width = "match_parent"
      android:layout_height = "1dp"
      android:alpha = ".5"
      android:layout_above = "@id/layoutDots"
      android:background = "@android:color/white" />
   <Button
      android:id = "@+id/btn_next"
      android:layout_width = "wrap_content"
      android:layout_height = "wrap_content"
      android:layout_alignParentBottom = "true"
      android:layout_alignParentRight = "true"
      android:background = "@null"
      android:text = "next"
      android:textColor = "@android:color/white" />
   <Button
      android:id = "@+id/btn_skip"
      android:layout_width = "wrap_content"
      android:layout_height = "wrap_content"
      android:layout_alignParentBottom = "true"
      android:layout_alignParentLeft = "true"
      android:background = "@null"
      android:text = "skip"
      android:textColor = "@android:color/white" />
</RelativeLayout>
Step 4 − Add the following code to src/MainActivity.java
package myapplication.example.com.myapplication;

import android.support.v7.app.AppCompatActivity;
import android.os.Bundle;
import android.content.Context;
import android.content.Intent;
import android.graphics.Color;

import android.os.Build;
import android.support.v4.view.PagerAdapter;
import android.support.v4.view.ViewPager;
import android.text.Html;

import android.view.LayoutInflater;
import android.view.View;
import android.view.ViewGroup;
import android.view.Window;
import android.view.WindowManager;

import android.widget.Button;
import android.widget.LinearLayout;
import android.widget.TextView;

public class MainActivity extends AppCompatActivity {
   private ViewPager viewPager;
   private MyViewPagerAdapter myViewPagerAdapter;
   private LinearLayout dotsLayout;
   private TextView[] dots;
   private int[] layouts;
   private Button btnSkip, btnNext;
   private PrefManager prefManager;

   @Override
   protected void onCreate(Bundle savedInstanceState) {
      super.onCreate(savedInstanceState);

      // Checking for first time launch - before calling setContentView()
      prefManager = new PrefManager(this);
      if (!prefManager.isFirstTimeLaunch()) {
         launchHomeScreen();
         finish();
      }
      // Making notification bar transparent
      if (Build.VERSION.SDK_INT >= 21) {
         getWindow().getDecorView().setSystemUiVisibility(
            View.SYSTEM_UI_FLAG_LAYOUT_STABLE | View.SYSTEM_UI_FLAG_LAYOUT_FULLSCREEN);
      }
      setContentView(R.layout.activity_main);
      viewPager = (ViewPager) findViewById(R.id.view_pager);
      dotsLayout = (LinearLayout) findViewById(R.id.layoutDots);
      btnSkip = (Button) findViewById(R.id.btn_skip);
      btnNext = (Button) findViewById(R.id.btn_next);

      // layouts of all welcome sliders
      // add few more layouts if you want
      layouts = new int[]{
         R.layout.welcome_slide1,
         R.layout.welcome_slide2,
         R.layout.welcome_slide3,
      };

      // adding bottom dots
      addBottomDots(0);

      // making notification bar transparent
      changeStatusBarColor();

      myViewPagerAdapter = new MyViewPagerAdapter();
      viewPager.setAdapter(myViewPagerAdapter);
      viewPager.addOnPageChangeListener(viewPagerPageChangeListener);

      btnSkip.setOnClickListener(new View.OnClickListener() {
         @Override
         public void onClick(View v) {
            launchHomeScreen();
         }
      });

      btnNext.setOnClickListener(new View.OnClickListener() {
         @Override
         public void onClick(View v) {
            // checking for last page
            // if last page home screen will be launched
            int current = getItem(+1);
            if (current < layouts.length) {
               // move to next screen
               viewPager.setCurrentItem(current);
            } else {
               launchHomeScreen();
            }
         }
      });
   }

   private void addBottomDots(int currentPage) {
      dots = new TextView[layouts.length];

      int[] colorsActive = getResources().getIntArray(R.array.array_dot_active);
      int[] colorsInactive = getResources().getIntArray(R.array.array_dot_inactive);

      dotsLayout.removeAllViews();
      for (int i = 0; i < dots.length; i++) {
         dots[i] = new TextView(this);
         dots[i].setText(Html.fromHtml("•"));
         dots[i].setTextSize(35);
         dots[i].setTextColor(colorsInactive[currentPage]);
         dotsLayout.addView(dots[i]);
      }
      if (dots.length > 0) dots[currentPage].setTextColor(colorsActive[currentPage]);
   }
   private int getItem(int i) {
      return viewPager.getCurrentItem() + i;
   }

   private void launchHomeScreen() {
      prefManager.setFirstTimeLaunch(false);
      startActivity(new Intent(MainActivity.this, Main2Activity.class));
      finish();
   }

   //  viewpager change listener
   ViewPager.OnPageChangeListener viewPagerPageChangeListener = new
      ViewPager.OnPageChangeListener() {

      @Override
      public void onPageSelected(int position) {
         addBottomDots(position);

         // changing the next button text 'NEXT' / 'GOT IT'
         if (position == layouts.length - 1) {

            // last page. make button text to GOT IT
            btnNext.setText(getString(R.string.start));
            btnSkip.setVisibility(View.GONE);
         } else {

            // still pages are left
            btnNext.setText(getString(R.string.next));
            btnSkip.setVisibility(View.VISIBLE);
         }
      }

      @Override
      public void onPageScrolled(int arg0, float arg1, int arg2) {
      }

      @Override
      public void onPageScrollStateChanged(int arg0) {
      }
   };

   /**
   * Making notification bar transparent
   */
   private void changeStatusBarColor() {
      if (Build.VERSION.SDK_INT >= Build.VERSION_CODES.LOLLIPOP) {
         Window window = getWindow();
         window.addFlags(WindowManager.LayoutParams.FLAG_DRAWS_SYSTEM_BAR_BACKGROUNDS);
         window.setStatusBarColor(Color.TRANSPARENT);
      }
   }

   /**
   * View pager adapter
   */
   public class MyViewPagerAdapter extends PagerAdapter {
      private LayoutInflater layoutInflater;
      public MyViewPagerAdapter() {
      }
      @Override
      public Object instantiateItem(ViewGroup container, int position) {
         layoutInflater = (LayoutInflater) getSystemService(
         Context.LAYOUT_INFLATER_SERVICE);

         View view = layoutInflater.inflate(layouts[position], container, false);
         container.addView(view);
         return view;
      }

      @Override
      public int getCount() {
         return layouts.length;
      }

      @Override
      public boolean isViewFromObject(View view, Object obj) {
         return view == obj;
      }

      @Override
      public void destroyItem(ViewGroup container, int position, Object object) {
         View view = (View) object;
         container.removeView(view);
      }
   }
}
Step 5 − Add the following code to res/layout/welcome_slide1.xml
<?xml version = "1.0" encoding = "utf-8"?>
<RelativeLayout xmlns:android = "http://schemas.android.com/apk/res/android"
   android:layout_width = "match_parent"
   android:layout_height = "match_parent"
   android:background = "@color/bg_screen1">
   <LinearLayout
      android:layout_width = "wrap_content"
      android:layout_height = "wrap_content"
      android:layout_centerInParent = "true"
      android:gravity = "center_horizontal"
      android:orientation = "vertical">
      <ImageView
         android:layout_width = "match_parent"
         android:layout_height = "match_parent"/>
      <TextView
         android:layout_width = "wrap_content"
         android:layout_height = "wrap_content"
         android:text = "Tutorialspoint"
         android:textColor = "@android:color/white"
         android:textStyle = "bold" />
      <TextView
         android:layout_width = "wrap_content"
         android:layout_height = "wrap_content"
         android:layout_marginTop = "20dp"
         android:text = "Tutorials Library"
         android:textAlignment = "center"
         android:textColor = "@android:color/white" />
   </LinearLayout>
</RelativeLayout>
Step 6 − Add the following code to res/layout/welcome_slide2.xml
<?xml version = "1.0" encoding = "utf-8"?>
<RelativeLayout xmlns:android = "http://schemas.android.com/apk/res/android"
   android:layout_width = "match_parent"
   android:layout_height = "match_parent"
   android:background = "@color/bg_screen2">
   <LinearLayout
      android:layout_width = "wrap_content"
      android:layout_height = "wrap_content"
      android:layout_centerInParent = "true"
      android:gravity = "center_horizontal"
      android:orientation = "vertical">
      <ImageView
         android:layout_width = "match_parent"
         android:layout_height = "match_parent"/>
      <TextView
         android:layout_width = "wrap_content"
         android:layout_height = "wrap_content"
         android:text = "Tutor Connect"
         android:textColor = "@android:color/white"
         android:textStyle = "bold" />
      <TextView
         android:layout_width = "wrap_content"
         android:layout_height = "wrap_content"
         android:layout_marginTop = "20dp"
         android:text = "It is a Tutor Connect Site"
         android:textAlignment = "center"
         android:textColor = "@android:color/white" />
   </LinearLayout>
</RelativeLayout>
Step 7 − Add the following code to res/layout/welcome_slide3.xml
<?xml version = "1.0" encoding = "utf-8"?>
<RelativeLayout xmlns:android = "http://schemas.android.com/apk/res/android"
   android:layout_width = "match_parent"
   android:layout_height = "match_parent"
   android:background = "@color/bg_screen3">
   <LinearLayout
      android:layout_width = "wrap_content"
      android:layout_height = "wrap_content"
      android:layout_centerInParent = "true"
      android:gravity = "center_horizontal"
      android:orientation = "vertical">
      <ImageView
         android:layout_width = "match_parent"
         android:layout_height = "match_parent"/>
      <TextView
         android:layout_width = "wrap_content"
         android:layout_height = "wrap_content"
         android:text = "Sairamkrishna"
         android:textColor = "@android:color/white"
         android:textStyle = "bold" />
      <TextView
         android:layout_width = "wrap_content"
         android:layout_height = "wrap_content"
         android:layout_marginTop = "20dp"
         android:text = "Developer"
         android:textAlignment = "center"
         android:textColor = "@android:color/white" />
   </LinearLayout>
</RelativeLayout>
Step 8 − Add the following code to res/layout/activity_main2.xml.
<?xml version = "1.0" encoding = "utf-8"?>
<RelativeLayout xmlns:android = "http://schemas.android.com/apk/res/android"
   xmlns:tools = "http://schemas.android.com/tools"
   android:layout_width = "match_parent"
   android:layout_height = "match_parent"
   android:paddingBottom = "@dimen/activity_vertical_margin"
   android:paddingLeft = "@dimen/activity_horizontal_margin"
   android:paddingRight = "@dimen/activity_horizontal_margin"
   android:paddingTop = "@dimen/activity_vertical_margin"
   tools:context = "myapplication.example.com.myapplication.Main2Activity">
   <TextView
      android:layout_width = "wrap_content"
      android:layout_height = "wrap_content"
      android:text = "Home Screen"
      android:textColor = "@android:color/black"
      android:textStyle = "bold" />
</RelativeLayout>
Step 9 − Add the following code to src/Main2Activity.java
package myapplication.example.com.myapplication;

import android.support.v7.app.AppCompatActivity;
import android.os.Bundle;

public class Main2Activity extends AppCompatActivity {
   @Override
   protected void onCreate(Bundle savedInstanceState) {
      super.onCreate(savedInstanceState);
      setContentView(R.layout.activity_main2);
   }
}
Step 10 − Add the following code to src/PrefManager.java.
package myapplication.example.com.myapplication;

import android.content.Context;
import android.content.SharedPreferences;

public class PrefManager {
   SharedPreferences pref;
   SharedPreferences.Editor editor;
   Context _context;

   // shared pref mode
   int PRIVATE_MODE = 0;

   // Shared preferences file name
   private static final String PREF_NAME = "Tutorialspoint-welcome";
   private static final String IS_FIRST_TIME_LAUNCH = "IsFirstTimeLaunch";

   public PrefManager(Context context) {
      this._context = context;
      pref = _context.getSharedPreferences(PREF_NAME, PRIVATE_MODE);
      editor = pref.edit();
   }
   public void setFirstTimeLaunch(boolean isFirstTime) {
      editor.putBoolean(IS_FIRST_TIME_LAUNCH, isFirstTime);
      editor.commit();
   }
   public boolean isFirstTimeLaunch() {
      return pref.getBoolean(IS_FIRST_TIME_LAUNCH, true);
   }
}
Step 11 − Add the following code to styles.xml.
<resources>
   <!-- Base application theme. -->
   <style name = "AppTheme" parent = "Theme.AppCompat.Light.DarkActionBar">
      <!-- Customize your theme here. -->
      <item name = "colorPrimary">@color/colorPrimary</item>
      <item name = "colorPrimaryDark">@color/colorPrimaryDark</item>
      <item name = "colorAccent">@color/colorAccent</item>
      <item name = "windowActionBar">false</item>
      <item name = "windowNoTitle">true</item>
   </style>
</resources>
Step 12 − Add the following code to Strings.xml.
<resources>
   <string name = "app_name">My Application</string>
   <string name = "next">NEXT</string>
   <string name = "skip">SKIP</string>
   <string name = "start">GOT IT</string>
</resources>
Step 13 − Add the following code to AndroidManifest.xml.
<?xml version = "1.0" encoding = "utf-8"?>
<manifest xmlns:android = "http://schemas.android.com/apk/res/android"
   package = "myapplication.example.com.myapplication">

   <application
      android:allowBackup = "true"
      android:icon = "@mipmap/ic_launcher"
      android:label = "@string/app_name"
      android:supportsRtl = "true"
      android:theme = "@style/AppTheme">
      <activity android:name = ".MainActivity">
         <intent-filter>
            <action android:name = "android.intent.action.MAIN" />
            <category android:name = "android.intent.category.LAUNCHER" />
         </intent-filter>
      </activity>
      <activity android:name = ".Main2Activity"></activity>
   </application>

</manifest>
Let's try to run your application. I assume you have connected your actual Android Mobile device with your computer. To run the app from android studio, open one of your project's activity files and click Run icon from the toolbar. Select your mobile device as an option and then check your mobile device which will display your default screen −
Advanced Android - Floating Labels
Android floating labels were introduced in android design support library to display a floating labels
Example
This example demostrate about how to integrate Android Floating Labels to Edit Text.
Step 1 − Create a new project in Android Studio,go to File ⇒ New Project and fill all required details to create a new project.
Step 2 − Open build.gradle and add design support library dependency.
dependencies {
   compile fileTree(dir: 'libs', include: ['*.jar'])
   testCompile 'junit:junit:4.12'
   compile 'com.android.support:appcompat-v7:24.2.0'
   compile 'com.android.support:design:24.2.1'
}
Step 3 − Add the following code to res/layout/activity_main.xml.
<?xml version = "1.0" encoding = "utf-8"?>
<android.support.design.widget.CoordinatorLayout xmlns:android =
   "http://schemas.android.com/apk/res/android"
   xmlns:app = "http://schemas.android.com/apk/res-auto"
   android:layout_width = "match_parent"
   android:layout_height = "match_parent">
   <android.support.design.widget.AppBarLayout
      android:layout_width = "match_parent"
      android:layout_height = "wrap_content"
      android:theme = "@style/ThemeOverlay.AppCompat.Dark.ActionBar">
   </android.support.design.widget.AppBarLayout>
   <LinearLayout
      android:layout_width = "fill_parent"
      android:layout_height = "match_parent"
      android:layout_marginTop = "?attr/actionBarSize"
      android:orientation = "vertical"
      android:paddingLeft = "20dp"
      android:paddingRight = "20dp"
      android:paddingTop = "60dp">
      <android.support.design.widget.TextInputLayout
         android:id = "@+id/input_layout_name"
         android:layout_width = "match_parent"
         android:layout_height = "wrap_content">
         <EditText
            android:id = "@+id/input_name"
            android:layout_width = "match_parent"
            android:layout_height = "wrap_content"
            android:singleLine = "true"
            android:hint = "Name" />
      </android.support.design.widget.TextInputLayout>
      <android.support.design.widget.TextInputLayout
         android:id = "@+id/input_layout_email"
         android:layout_width = "match_parent"
         android:layout_height = "wrap_content">
         <EditText
            android:id = "@+id/input_email"
            android:layout_width = "match_parent"
            android:layout_height = "wrap_content"
            android:inputType = "textEmailAddress"
            android:hint = "Email Hint" />
      </android.support.design.widget.TextInputLayout>
      <android.support.design.widget.TextInputLayout
         android:id = "@+id/input_layout_password"
         android:layout_width = "match_parent"
         android:layout_height = "wrap_content">
         <EditText
            android:id = "@+id/input_password"
            android:layout_width = "match_parent"
            android:layout_height = "wrap_content"
            android:inputType = "textPassword"
            android:hint = "Password Hint" />
      </android.support.design.widget.TextInputLayout>
      <Button android:id = "@+id/btn_signup"
         android:layout_width = "fill_parent"
         android:layout_height = "wrap_content"
         android:text = "Sign Up"
         android:background = "@color/colorPrimary"
         android:layout_marginTop = "40dp"
         android:textColor = "@android:color/white"/>
   </LinearLayout>
</android.support.design.widget.CoordinatorLayout>
Step 4 − Add the following code to src/MainActivity.java
package myapplication.example.com.myapplication;

import android.os.Bundle;
import android.support.design.widget.TextInputLayout;
import android.support.v7.app.AppCompatActivity;
import android.text.Editable;
import android.text.TextUtils;
import android.text.TextWatcher;

import android.view.View;
import android.view.WindowManager;
import android.widget.Button;
import android.widget.EditText;
import android.widget.Toast;

public class MainActivity extends AppCompatActivity {
   private EditText inputName, inputEmail, inputPassword;
   private TextInputLayout inputLayoutName, inputLayoutEmail, inputLayoutPassword;
   private Button btnSignUp;

   @Override
   protected void onCreate(Bundle savedInstanceState) {
      super.onCreate(savedInstanceState);
      setContentView(R.layout.activity_main);

      inputLayoutName = (TextInputLayout) findViewById(R.id.input_layout_name);
      inputLayoutEmail = (TextInputLayout) findViewById(R.id.input_layout_email);
      inputLayoutPassword = (TextInputLayout) findViewById(R.id.input_layout_password);
      inputName = (EditText) findViewById(R.id.input_name);
      inputEmail = (EditText) findViewById(R.id.input_email);
      inputPassword = (EditText) findViewById(R.id.input_password);

      btnSignUp = (Button) findViewById(R.id.btn_signup);
      inputName.addTextChangedListener(new MyTextWatcher(inputName));
      inputEmail.addTextChangedListener(new MyTextWatcher(inputEmail));
      inputPassword.addTextChangedListener(new MyTextWatcher(inputPassword));

      btnSignUp.setOnClickListener(new View.OnClickListener() {
         @Override
         public void onClick(View view) {
            submitForm();
         }
      });
   }
   /**
   * Validating form
   */
   private void submitForm() {
      if (!validateName()) {
         return;
      }
      if (!validateEmail()) {
         return;
      }
      if (!validatePassword()) {
         return;
      }
      Toast.makeText(getApplicationContext(), "Thank You!", Toast.LENGTH_SHORT).show();
   }
   private boolean validateName() {
      if (inputName.getText().toString().trim().isEmpty()) {
         inputLayoutName.setError(getString(R.string.err_msg_name));
         requestFocus(inputName);
         return false;
      } else {
         inputLayoutName.setErrorEnabled(false);
      }
      return true;
   }
   private boolean validateEmail() {
      String email = inputEmail.getText().toString().trim();
      if (email.isEmpty() || !isValidEmail(email)) {
         inputLayoutEmail.setError(getString(R.string.err_msg_email));
         requestFocus(inputEmail);
         return false;
      } else {
         inputLayoutEmail.setErrorEnabled(false);
      }
      return true;
   }
   private boolean validatePassword() {
      if (inputPassword.getText().toString().trim().isEmpty()) {
         inputLayoutPassword.setError(getString(R.string.err_msg_password));
         requestFocus(inputPassword);
         return false;
      } else {
         inputLayoutPassword.setErrorEnabled(false);
      }
      return true;
   }
   private static boolean isValidEmail(String email) {
      return !TextUtils.isEmpty(email) &&
         android.util.Patterns.EMAIL_ADDRESS.matcher(email).matches();
   }
   private void requestFocus(View view) {
      if (view.requestFocus()) {
         getWindow().setSoftInputMode(WindowManager.LayoutParams.SOFT_INPUT_STATE_ALWAYS_VISIBLE);
      }
   }
   private class MyTextWatcher implements TextWatcher {
      private View view;
      private MyTextWatcher(View view) {
         this.view = view;
      }
      public void beforeTextChanged(CharSequence charSequence, int i, int i1, int i2) {
      }
      public void onTextChanged(CharSequence charSequence, int i, int i1, int i2) {
      }
      public void afterTextChanged(Editable editable) {
         switch (view.getId()) {
            case R.id.input_name:
               validateName();
               break;
            case R.id.input_email:
               validateEmail();
               break;
            case R.id.input_password:
               validatePassword();
               break;
         }
      }
   }
}
Step 5 − Add the following code to manifest.xml
<?xml version = "1.0" encoding = "utf-8"?>
<manifest xmlns:android = "http://schemas.android.com/apk/res/android"
   package = "myapplication.example.com.myapplication">

   <application
      android:allowBackup = "true"
      android:icon = "@mipmap/ic_launcher"
      android:label = "@string/app_name"
      android:supportsRtl = "true"
      android:theme = "@style/AppTheme">
      <activity android:name = ".MainActivity">
         <intent-filter>
            <action android:name="android.intent.action.MAIN" />
            <category android:name="android.intent.category.LAUNCHER" />
         </intent-filter>
      </activity>
   </application>

</manifest>
Step 6 − Add the following code to Strings.xml
<resources>
   <string name = "app_name">My Application</string>
   <string name = "err_msg_name">Enter your full name</string>
   <string name = "err_msg_email">Enter valid email address</string>
   <string name = "err_msg_password">Enter the password</string>
</resources>
Let's try to run your application. I assume you have connected your actual Android Mobile device with your computer. To run the app from android studio, open one of your project's activity files and click Run icon from the toolbar. Select your mobile device as an option and then check your mobile device which will display your default screen −
Advanced Android - ViewPager
ViewPager in Android allows the user to flip left and right through pages of data
Example
This example demostrate about how to integrate Android ViewPager.
Step 1 − Create a new project in Android Studio, go to File ⇒ New Project and fill all required details to create a new project.
Step 2 − Add the following code to res/layout/activity_main.xml.
<?xml version = "a1.0" encoding = "utf-8"?>
<RelativeLayout xmlns:android = "http://schemas.android.com/apk/res/android"
   xmlns:tools = "http://schemas.android.com/tools"
   android:layout_width = "match_parent"
   android:layout_height = "match_parent"
   tools:context = ".MainActivity">
   <android.support.v4.view.ViewPager
      android:id = "@+id/viewpager"
      android:layout_width = "match_parent"
      android:layout_height = "match_parent"/>
</RelativeLayout>
Step 3 − Add the following code to src/MainActivity.java
package myapplication.example.com.myapplication;

import android.os.Bundle;
import android.support.v4.view.ViewPager;
import android.support.v7.app.AppCompatActivity;

public class MainActivity extends AppCompatActivity {
   @Override
   protected void onCreate(Bundle savedInstanceState) {
      super.onCreate(savedInstanceState);
      setContentView(R.layout.activity_main);

      ViewPager viewPager = (ViewPager) findViewById(R.id.viewpager);
      viewPager.setAdapter(new CustomPagerAdapter(this));
   }
}
Step 4 − Add the following code to src/ModelObject.java
package myapplication.example.com.myapplication;

public enum ModelObject {
   RED(R.string.red, R.layout.view_red),
      BLUE(R.string.blue, R.layout.view_blue),
      GREEN(R.string.green, R.layout.view_green);

   private int mTitleResId;
   private int mLayoutResId;

   ModelObject(int titleResId, int layoutResId) {
      mTitleResId = titleResId;
      mLayoutResId = layoutResId;
   }
   public int getTitleResId() {
      return mTitleResId;
   }
   public int getLayoutResId() {
      return mLayoutResId;
   }
}
Step 5 − Add the following code to res/layout/view_blue.xml.
<?xml version = "1.0" encoding = "utf-8"?>
<RelativeLayout xmlns:android = "http://schemas.android.com/apk/res/android"
   android:orientation = "vertical" android:layout_width = "match_parent"
   android:background = "@android:color/holo_blue_bright"
   android:layout_height = "match_parent">
</RelativeLayout>
Step 6 − Add the following code to res/layout/view_green.xml.
<?xml version = "1.0" encoding = "utf-8"?>
<RelativeLayout xmlns:android = "http://schemas.android.com/apk/res/android"
   android:orientation = "vertical" android:layout_width = "match_parent"
   android:background = "@android:color/holo_green_dark"
   android:layout_height = "match_parent">
</RelativeLayout>
Step 7 − Add the following code to res/layout/view_red.xml.
<?xml version = "1.0" encoding = "utf-8"?>
<RelativeLayout xmlns:android = "http://schemas.android.com/apk/res/android"
   android:orientation = "vertical" android:layout_width = "match_parent"
   android:background = "@android:color/holo_red_dark"
   android:layout_height = "match_parent">
</RelativeLayout>
Step 8 − Add the following code to src/CustomPagerAdapter.java
package myapplication.example.com.myapplication;

import android.content.Context;
import android.support.v4.view.PagerAdapter;
import android.view.LayoutInflater;
import android.view.View;
import android.view.ViewGroup;

public class CustomPagerAdapter extends PagerAdapter {
   private Context mContext;
   public CustomPagerAdapter(Context context) {
      mContext = context;
   }

   @Override
   public Object instantiateItem(ViewGroup collection, int position) {
      ModelObject modelObject = ModelObject.values()[position];
      LayoutInflater inflater = LayoutInflater.from(mContext);
      ViewGroup layout = (ViewGroup) inflater.inflate(
         modelObject.getLayoutResId(), collection, false);
      collection.addView(layout);
      return layout;
   }

   @Override
   public void destroyItem(ViewGroup collection, int position, Object view) {
      collection.removeView((View) view);
   }

   @Override
   public int getCount() {
      return ModelObject.values().length;
   }

   @Override
   public boolean isViewFromObject(View view, Object object) {
      return view == object;
   }

   @Override
   public CharSequence getPageTitle(int position) {
      ModelObject customPagerEnum = ModelObject.values()[position];
      return mContext.getString(customPagerEnum.getTitleResId());
   }
}
Step 9 − Add the following code to value/strings.xml
<resources>
   <string name = "app_name">My Application</string>
   <string name = "red">red</string>
   <string name = "blue">blue</string>
   <string name = "green">green</string>
</resources>
Step 10 − No need to change manifest.xml
Let's try to run your application. I assume you have connected your actual Android Mobile device with your computer. To run the app from android studio, open one of your project's activity files and click Run icon from the toolbar. Select your mobile device as an option and then check your mobile device which will display your default screen −
Material Login and Registration Form
A login application is the screen asking your credentials to login to some particular application. You might have seen it when logging into facebook, twitter e.t.c
Example
This example demostrate about how to integrate Android Login and register form.
Step 1 − Create a new project in Android Studio, go to File ⇒ New Project and fill all required details to create a new project.
Step 2 − Add the following code to res/layout/login.xml.
<?xml version = "1.0" encoding = "utf-8"?>
<ScrollView
   xmlns:android = "http://schemas.android.com/apk/res/android"
   android:layout_width = "fill_parent"
   android:layout_height = "fill_parent"
   android:fillViewport = "true">
   <RelativeLayout
      android:layout_width = "fill_parent"
      android:layout_height = "wrap_content" android:background = "#ffffff">
      <LinearLayout android:id = "@+id/header"
         android:layout_width = "fill_parent"
         android:layout_height = "wrap_content"
         android:background = "@layout/header_gradient"
         android:paddingTop = "5dip"
         android:paddingBottom = "5dip">
         <ImageView android:src = "@drawable/abc"
            android:layout_width = "wrap_content"
            android:layout_height = "wrap_content"
            android:layout_marginLeft = "10dip"/>
      </LinearLayout>
      <LinearLayout android:id = "@+id/footer"
         android:layout_width = "fill_parent"
         android:layout_height = "90dip"
         android:background = "@layout/footer_repeat"
         android:layout_alignParentBottom = "true"
         android:orientation = "vertical">
      </LinearLayout>
      <LinearLayout
         xmlns:android = "http://schemas.android.com/apk/res/android"
         android:orientation = "vertical"
         android:layout_width = "match_parent"
         android:layout_height = "wrap_content"
         android:padding = "10dip"
         android:layout_below = "@id/header">
         <TextView android:layout_width = "fill_parent"
            android:layout_height = "wrap_content"
            android:textColor = "#372c24"
            android:text = "Email"/>
         <EditText android:layout_width = "fill_parent"
            android:layout_height = "wrap_content"
            android:layout_marginTop = "5dip"
            android:layout_marginBottom = "20dip"
            android:singleLine = "true"/>
         <TextView android:layout_width = "fill_parent"
            android:layout_height = "wrap_content"
            android:textColor = "#372c24"
            android:text = "Password"/>
         <EditText android:layout_width = "fill_parent"
            android:layout_height = "wrap_content"
            android:layout_marginTop = "5dip"
            android:singleLine = "true"
            android:password = "true"/>
         <Button android:id = "@+id/btnLogin"
            android:layout_width = "fill_parent"
            android:layout_height = "wrap_content"
            android:layout_marginTop = "10dip"
            android:text = "Login"/>
         <TextView android:id = "@+id/link_to_register"
            android:layout_width = "fill_parent"
            android:layout_height = "wrap_content"
            android:layout_marginTop = "40dip"
            android:layout_marginBottom = "40dip"
            android:text = "New to User? Register here"
            android:gravity = "center"
            android:textSize = "20dip"
            android:textColor = "#0b84aa"/>
      </LinearLayout>

   </RelativeLayout>
</ScrollView>
Step 3 − Add the following code to src/MainActivity.java
package myapplication.example.com.myapplication;

import android.app.Activity;
import android.content.Intent;
import android.os.Bundle;
import android.view.View;
import android.widget.TextView;

public class MainActivity extends Activity {
   @Override
   public void onCreate(Bundle savedInstanceState) {
      super.onCreate(savedInstanceState);
      setContentView(R.layout.login);
      TextView registerScreen = (TextView) findViewById(R.id.link_to_register);

      registerScreen.setOnClickListener(new View.OnClickListener() {
         public void onClick(View v) {
            // Switching to Register screen
            Intent i = new Intent(getApplicationContext(), RegisterActivity.class);
            startActivity(i);
         }
      });
   }
}
Step 4 − Add the following code to src/register.java
<?xml version = "1.0" encoding = "utf-8"?>
<ScrollView
   xmlns:android = "http://schemas.android.com/apk/res/android"
   android:layout_width = "fill_parent"
   android:layout_height = "fill_parent"
   android:fillViewport = "true">
   <RelativeLayout
      android:layout_width = "fill_parent"
      android:layout_height = "wrap_content" android:background = "#fff">
      <LinearLayout android:id = "@+id/header"
         android:layout_width = "fill_parent"
         android:layout_height = "wrap_content"
         android:background = "@layout/header_gradient"
         android:paddingTop = "5dip"
         android:paddingBottom = "5dip">
         <ImageView android:src = "@drawable/abc"
            android:layout_width = "wrap_content"
            android:layout_height = "wrap_content"
            android:layout_marginLeft = "10dip"/>
      </LinearLayout>
      <LinearLayout android:id = "@+id/footer"
         android:layout_width = "fill_parent"
         android:layout_height = "90dip"
         android:background = "@layout/footer_repeat"
         android:layout_alignParentBottom = "true"
         android:orientation = "vertical">
      </LinearLayout>
      <LinearLayout
         xmlns:android = "http://schemas.android.com/apk/res/android"
         android:orientation = "vertical"
         android:layout_width = "match_parent"
         android:layout_height = "wrap_content"
         android:padding = "10dip"
         android:layout_below = "@id/header">
         <TextView android:layout_width = "fill_parent"
            android:layout_height = "wrap_content"
            android:textColor = "#372c24"
            android:text = "Full Name"/>
         <EditText android:id = "@+id/reg_fullname"
            android:layout_width = "fill_parent"
            android:layout_height = "wrap_content"
            android:layout_marginTop = "5dip"
            android:singleLine = "true"
            android:layout_marginBottom = "20dip"/>
         <TextView android:layout_width = "fill_parent"
            android:layout_height = "wrap_content"
            android:textColor = "#372c24"
            android:text = "Email"/>
         <EditText android:id = "@+id/reg_email"
            android:layout_width = "fill_parent"
            android:layout_height = "wrap_content"
            android:layout_marginTop = "5dip"
            android:singleLine = "true"
            android:layout_marginBottom = "20dip"/>
         <TextView android:layout_width = "fill_parent"
            android:layout_height = "wrap_content"
            android:textColor = "#372c24"
            android:text = "Password"/>
         <EditText android:id = "@+id/reg_password"
            android:layout_width = "fill_parent"
            android:layout_height = "wrap_content"
            android:password = "true"
            android:singleLine = "true"
            android:layout_marginTop = "5dip"/>
         <Button android:id = "@+id/btnRegister"
            android:layout_width = "fill_parent"
            android:layout_height = "wrap_content"
            android:layout_marginTop = "10dip"
            android:text = "Register New Account"/>
         <TextView android:id = "@+id/link_to_login"
            android:layout_width = "fill_parent"
            android:layout_height = "wrap_content"
            android:layout_marginTop = "40dip"
            android:layout_marginBottom = "40dip"
            android:text = "Already has account! Login here"
            android:gravity = "center"
            android:textSize = "20dip"
            android:textColor = "#025f7c"/>
      </LinearLayout>
      <!-- Registration Form Ends -->

   </RelativeLayout>
</ScrollView>
Step 5 − Add the following code to res/layout/footer_repeat.xml.
<?xml version = "1.0" encoding = "utf-8"?>
<bitmap xmlns:android = "http://schemas.android.com/apk/res/android"
   android:src = "@drawable/abc"
   android:tileMode = "repeat"
   android:layout_width = "fill_parent"
   android:layout_height = "fill_parent"
   />
Step 6 − Add the following code to header_gradient.xml
<?xml version = "1.0" encoding = "utf-8"?>
<shape xmlns:android = "http://schemas.android.com/apk/res/android"
   android:layout_width = "fill_parent"
   android:layout_height = "fill_parent">
   <gradient
      android:startColor = "#24b2eb"
      android:centerColor = "#4ccbff"
      android:endColor = "#24b2eb"
      android:angle = "270"/>
   <corners android:radius = "5dp" />
</shape>
Step 7 − Add the following code to src/RegisterActivity.java
package myapplication.example.com.myapplication;

import android.app.Activity;
import android.os.Bundle;
import android.view.View;
import android.widget.TextView;

public class RegisterActivity extends Activity {
   @Override
   public void onCreate(Bundle savedInstanceState) {
      super.onCreate(savedInstanceState);
      setContentView(R.layout.register);
      TextView loginScreen = (TextView) findViewById(R.id.link_to_login);

      loginScreen.setOnClickListener(new View.OnClickListener() {
         public void onClick(View arg0) {
            finish();
         }
      });
   }
}
Step 8 − Add the following code to manifest.java
<?xml version = "1.0" encoding = "utf-8"?>
<manifest xmlns:android = "http://schemas.android.com/apk/res/android"
   package = "myapplication.example.com.myapplication">

   <application
      android:allowBackup = "true"
      android:icon = "@mipmap/ic_launcher"
      android:label = "@string/app_name"
      android:supportsRtl = "true"
      android:theme = "@style/AppTheme">
      <activity android:name = ".MainActivity">
         <intent-filter>
            <action android:name = "android.intent.action.MAIN" />
            <category android:name="android.intent.category.LAUNCHER" />
         </intent-filter>
      </activity>
      <activity android:name = ".RegisterActivity"
         android:label = "Register New Account"></activity>
   </application>
</manifest>
Let's try to run your application. I assume you have connected your actual Android Mobile device with your computer. To run the app from android studio, open one of your project's activity files and click Run icon from the toolbar. Select your mobile device as an option and then check your mobile device which will display your default screen −
Advanced Android - Snackbar
Snackbars are just like Toast messages except they provide action to interact with. Snackbar will be displayed at the bottom of the screen
Example
This example demostrate about how to integrate Android Snackbar.
Step 1 − Create a new project in Android Studio, go to File ⇒ New Project and fill all required details to create a new project.
Step 2 − Open build.gradle and add design support library dependency.
dependencies {
   compile fileTree(dir: 'libs', include: ['*.jar'])
   testCompile 'junit:junit:4.12'
   compile 'com.android.support:appcompat-v7:24.2.0'
   compile 'com.android.support:design:24.2.1'
}
Step 3 − Add the following code to res/layout/activity_main.xml.
<?xml version = "1.0" encoding = "utf-8"?>
<android.support.design.widget.CoordinatorLayout xmlns:android = "
   http://schemas.android.com/apk/res/android"

   xmlns:app = "http://schemas.android.com/apk/res-auto"
   xmlns:tools = "http://schemas.android.com/tools"
   android:id = "@+id/coordinatorLayout"
   android:layout_width = "match_parent"
   android:layout_height = "match_parent"
   tools:context = ".MainActivity">

   <android.support.design.widget.AppBarLayout
      android:layout_width = "match_parent"
      android:layout_height = "wrap_content"
      android:theme = "@style/ThemeOverlay.AppCompat.Dark.ActionBar">
      <android.support.v7.widget.Toolbar
         android:id = "@+id/toolbar"
         android:layout_width = "match_parent"
         android:layout_height = "?attr/actionBarSize"
         android:background = "?attr/colorPrimary"
         app:layout_scrollFlags = "scroll|enterAlways"
         app:popupTheme = "@style/ThemeOverlay.AppCompat.Light" />
   </android.support.design.widget.AppBarLayout>

   <LinearLayout
      android:layout_width = "fill_parent"
      android:layout_height = "wrap_content"
      android:orientation = "vertical"
      android:paddingLeft = "20dp"
      android:paddingRight = "20dp"
      app:layout_behavior = "@string/appbar_scrolling_view_behavior">
      <Button
         android:id = "@+id/btnSimpleSnackbar"
         android:layout_width = "fill_parent"
         android:layout_height = "wrap_content"
         android:layout_marginTop = "30dp"
         android:text = "Simple Snackbar" />
      <Button
         android:id = "@+id/btnActionCallback"
         android:layout_width = "fill_parent"
         android:layout_height = "wrap_content"
         android:layout_marginTop = "10dp"
         android:text = "With Action Callback" />
      <Button
         android:id = "@+id/btnCustomSnackbar"
         android:layout_width = "fill_parent"
         android:layout_height = "wrap_content"
         android:layout_marginTop = "10dp"
         android:text = "Custom Color" />
   </LinearLayout>

   <android.support.design.widget.FloatingActionButton
      android:id = "@+id/fab"
      android:layout_width = "wrap_content"
      android:layout_height = "wrap_content"
      android:layout_gravity = "end|bottom"
      android:layout_margin = "16dp"
      android:src = "@android:drawable/ic_dialog_email" />
</android.support.design.widget.CoordinatorLayout>
Step 4 − Add the following code to src/MainActivity.java
package myapplication.example.com.myapplication;

import android.graphics.Color;
import android.os.Bundle;

import android.support.design.widget.CoordinatorLayout;
import android.support.design.widget.FloatingActionButton;
import android.support.design.widget.Snackbar;
import android.support.v7.app.AppCompatActivity;
import android.support.v7.widget.Toolbar;

import android.view.View;
import android.widget.Button;
import android.widget.TextView;

public class MainActivity extends AppCompatActivity {
   private Toolbar mToolbar;
   private CoordinatorLayout coordinatorLayout;
   private Button btnSimpleSnackbar, btnActionCallback, btnCustomView;
   private FloatingActionButton fab;

   @Override
   protected void onCreate(Bundle savedInstanceState) {
      super.onCreate(savedInstanceState);
      setContentView(R.layout.activity_main);
      coordinatorLayout = (CoordinatorLayout) findViewById(R.id.coordinatorLayout);
      fab = (FloatingActionButton) findViewById(R.id.fab);

      btnSimpleSnackbar = (Button) findViewById(R.id.btnSimpleSnackbar);
      btnActionCallback = (Button) findViewById(R.id.btnActionCallback);
      btnCustomView = (Button) findViewById(R.id.btnCustomSnackbar);
      btnSimpleSnackbar.setOnClickListener(new View.OnClickListener() {
         @Override
         public void onClick(View view) {
            Snackbar snackbar = Snackbar .make(coordinatorLayout,
               "Welcome to Tutorialspoint.com", Snackbar.LENGTH_LONG);
            snackbar.show();
         }
      });

      btnActionCallback.setOnClickListener(new View.OnClickListener() {
         @Override
         public void onClick(View view) {
            Snackbar snackbar = Snackbar .make(coordinatorLayout, "Message is deleted",
               Snackbar.LENGTH_LONG) .setAction("UNDO", new View.OnClickListener() {

               @Override
               public void onClick(View view) {
                  Snackbar snackbar1 = Snackbar.make(coordinatorLayout,
                  "Message is restored!", Snackbar.LENGTH_SHORT);

                  snackbar1.show();
               }
            });
            snackbar.show();
         }
      });

      btnCustomView.setOnClickListener(new View.OnClickListener() {
         @Override
         public void onClick(View view) {
            Snackbar snackbar = Snackbar
               .make(coordinatorLayout, "No internet connection!", Snackbar.LENGTH_LONG)
               .setAction("RETRY", new View.OnClickListener() {

               @Override
               public void onClick(View view) {
               }
            });
            // Changing message text color
            snackbar.setActionTextColor(Color.RED);

            // Changing action button text color
            View sbView = snackbar.getView();
            TextView textView = (TextView) sbView.findViewById(
               android.support.design.R.id.snackbar_text);

            textView.setTextColor(Color.YELLOW);
            snackbar.show();
         }
      });
   }
}
Step 5 − Add the following code to manifest.xml
<?xml version = "1.0" encoding = "utf-8"?>
<manifest xmlns:android = "http://schemas.android.com/apk/res/android"
   package = "myapplication.example.com.myapplication">

   <application
      android:allowBackup = "true"
      android:icon = "@mipmap/ic_launcher"
      android:label = "@string/app_name"
      android:supportsRtl = "true"
      android:theme = "@style/AppTheme">
      <activity android:name = ".MainActivity">
         <intent-filter>
            <action android:name = "android.intent.action.MAIN" />
            <category android:name = "android.intent.category.LAUNCHER" />
         </intent-filter>
      </activity>
   </application>

</manifest>
Let's try to run your application. I assume you have connected your actual Android Mobile device with your computer. To run the app from android studio, open one of your project's activity files and click Run icon from the toolbar. Select your mobile device as an option and then check your mobile device which will display your default screen −

Advanced Android - Expandable List View
Expandable list view is used to group list data by categories. It has the capability of expanding and collapsing the groups when user touches header.
Example
This example demostrate about how to integrate Android Expandable list view
Step 1 − Create a new project in Android Studio, go to File ⇒ New Project and fill all required details to create a new project.
Step 2 − Add the following code to res/layout/activity_main.xml.
<?xml version = "1.0" encoding = "utf-8"?>
<LinearLayout xmlns:android = "http://schemas.android.com/apk/res/android"
   android:layout_width = "fill_parent"
   android:layout_height = "fill_parent"
   android:orientation = "vertical"
   android:background = "#f4f4f4">
   <ExpandableListView
      android:id = "@+id/lvExp"
      android:layout_height = "match_parent"
      android:layout_width = "match_parent"/>
</LinearLayout>
Step 3 − Add the following code to src/MainActivity.java
package myapplication.example.com.myapplication;

import java.util.ArrayList;
import java.util.HashMap;
import java.util.List;

import android.app.Activity;
import android.os.Bundle;
import android.widget.ExpandableListView;

public class MainActivity extends Activity {
   ExpandableListAdapter listAdapter;
   ExpandableListView expListView;
   List<String> listDataHeader;
   HashMap<String, List<String>> listDataChild;

   @Override
   protected void onCreate(Bundle savedInstanceState) {
      super.onCreate(savedInstanceState);
      setContentView(R.layout.activity_main);
      expListView = (ExpandableListView) findViewById(R.id.lvExp);

      prepareListData();
      listAdapter = new ExpandableListAdapter(this, listDataHeader, listDataChild);
      expListView.setAdapter(listAdapter);
   }

   private void prepareListData() {
      listDataHeader = new ArrayList<String>();
      listDataChild = new HashMap<String, List<String>>();
      listDataHeader.add("Top 250");
      listDataHeader.add("Now Showing");
      listDataHeader.add("Coming Soon..");
      List<String> top250 = new ArrayList<String>();

      top250.add("The Shawshank Redemption");
      top250.add("The Godfather");
      top250.add("The Godfather: Part II");
      top250.add("Pulp Fiction");
      top250.add("The Good, the Bad and the Ugly");
      top250.add("The Dark Knight");
      top250.add("12 Angry Men");

      List<String> nowShowing = new ArrayList<String>();
      nowShowing.add("The Conjuring");
      nowShowing.add("Despicable Me 2");
      nowShowing.add("Turbo");
      nowShowing.add("Grown Ups 2");
      nowShowing.add("Red 2");
      nowShowing.add("The Wolverine");

      List<String> comingSoon = new ArrayList<String>();
      comingSoon.add("2 Guns");
      comingSoon.add("The Smurfs 2");
      comingSoon.add("The Spectacular Now");
      comingSoon.add("The Canyons");
      comingSoon.add("Europa Report");

      listDataChild.put(listDataHeader.get(0), top250); // Header, Child data
      listDataChild.put(listDataHeader.get(1), nowShowing);
      listDataChild.put(listDataHeader.get(2), comingSoon);
   }
}
Step 4 − Add the following code to src/ExpandableListAdapter.java
package myapplication.example.com.myapplication;

import java.util.HashMap;
import java.util.List;

import android.content.Context;
import android.graphics.Typeface;
import android.view.LayoutInflater;
import android.view.View;
import android.view.ViewGroup;
import android.widget.BaseExpandableListAdapter;
import android.widget.TextView;

public class ExpandableListAdapter extends BaseExpandableListAdapter {
   private Context _context;
   private List<String> _listDataHeader; // header titles

   // child data in format of header title, child title
   private HashMap<String, List<String>> _listDataChild;

   public ExpandableListAdapter(Context context, List<String> listDataHeader,
      HashMap<String, List<String>> listChildData) {

      this._context = context;
      this._listDataHeader = listDataHeader;
      this._listDataChild = listChildData;
   }

   @Override
   public Object getChild(int groupPosition, int childPosititon) {
      return this._listDataChild.get(this._listDataHeader.get(groupPosition))
      .get(childPosititon);
   }

   @Override
   public long getChildId(int groupPosition, int childPosition) {
      return childPosition;
   }

   @Override
   public View getChildView(int groupPosition, final int childPosition,
      boolean isLastChild, View convertView, ViewGroup parent) {

      final String childText = (String) getChild(groupPosition, childPosition);
      if (convertView == null) {
         LayoutInflater infalInflater = (LayoutInflater) this._context
            .getSystemService(Context.LAYOUT_INFLATER_SERVICE);
         convertView = infalInflater.inflate(R.layout.list_item, null);
      }
      TextView txtListChild = (TextView) convertView .findViewById(R.id.lblListItem);
      txtListChild.setText(childText);
      return convertView;
   }

   @Override
   public int getChildrenCount(int groupPosition) {
      return this._listDataChild.get(this._listDataHeader.get(groupPosition)) .size();
   }

   @Override
   public Object getGroup(int groupPosition) {
      return this._listDataHeader.get(groupPosition);
   }

   @Override
   public int getGroupCount() {
      return this._listDataHeader.size();
   }

   @Override
   public long getGroupId(int groupPosition) {
      return groupPosition;
   }

   @Override
   public View getGroupView(int groupPosition, boolean isExpanded, View convertView,
      ViewGroup parent) {

      String headerTitle = (String) getGroup(groupPosition);
      if (convertView == null) {
      LayoutInflater infalInflater = (LayoutInflater) this._context
         .getSystemService(Context.LAYOUT_INFLATER_SERVICE);
         convertView = infalInflater.inflate(R.layout.list_group, null);
      }
      TextView lblListHeader = (TextView) convertView .findViewById(R.id.lblListHeader);
      lblListHeader.setTypeface(null, Typeface.BOLD);
      lblListHeader.setText(headerTitle);
      return convertView;
   }

   @Override
   public boolean hasStableIds() {
      return false;
   }

   @Override
   public boolean isChildSelectable(int groupPosition, int childPosition) {
      return true;
   }
}
Step 5 − Add the following code to res/layout/list_group.xml.
<?xml version = "1.0" encoding = "utf-8"?>
<LinearLayout xmlns:android = "http://schemas.android.com/apk/res/android"
   android:layout_width = "fill_parent"
   android:layout_height = "wrap_content"
   android:orientation = "vertical"
   android:padding = "8dp"
   android:background = "#000000">
   <TextView
      android:id = "@+id/lblListHeader"
      android:layout_width = "fill_parent"
      android:layout_height = "wrap_content"
      android:paddingLeft = "?android:attr/expandableListPreferredItemPaddingLeft"
      android:textSize = "17dp"
      android:textColor = "#f9f93d" />
</LinearLayout>
Step 6 − Add the following code to res/layout/list_item.xml
<?xml version = "1.0" encoding = "utf-8"?>
<LinearLayout xmlns:android = "http://schemas.android.com/apk/res/android"
   android:layout_width = "match_parent"
   android:layout_height = "55dip"
   android:orientation = "vertical" >
   <TextView
      android:id = "@+id/lblListItem"
      android:layout_width = "fill_parent"
      android:layout_height = "wrap_content"
      android:textSize = "17dip"
      android:paddingTop = "5dp"
      android:paddingBottom = "5dp"
      android:paddingLeft = "?android:attr/expandableListPreferredChildPaddingLeft" />
</LinearLayout>
Step 7 − No need to change of manifest.xml file
Let's try to run your application. I assume you have connected your actual Android Mobile device with your computer. To run the app from android studio, open one of your project's activity files and click Run icon from the toolbar. Select your mobile device as an option and then check your mobile device which will display your default screen −
Advanced Android - Search Functionality
Adding search functionality to listview will filters the list data with a matching string, hence provides user an easy way to find the information
Example
This example demostrate about how to integrate Android Search Functionality.
Step 1 − Create a new project in Android Studio, go to File ⇒ New Project and fill all required details to create a new project.
Step 2 − Add the following code to res/layout/activity_main.xml.
<?xml version = "1.0" encoding = "utf-8"?>
<LinearLayout xmlns:android = "http://schemas.android.com/apk/res/android"
   android:layout_width = "fill_parent"
   android:layout_height = "fill_parent"
   android:orientation = "vertical" >
   <EditText android:id = "@+id/inputSearch"
      android:layout_width = "fill_parent"
      android:layout_height = "wrap_content"
      android:hint = "Search products.."
      android:inputType = "textVisiblePassword"/>
   <ListView
      android:id = "@+id/list_view"
      android:layout_width = "fill_parent"
      android:layout_height = "wrap_content" />
</LinearLayout>
Step 3 − Add the following code to src/MainActivity.java
package myapplication.example.com.myapplication;

import java.util.ArrayList;
import java.util.HashMap;

import android.app.Activity;
import android.os.Bundle;
import android.text.Editable;
import android.text.TextWatcher;
import android.widget.ArrayAdapter;
import android.widget.EditText;
import android.widget.ListView;

public class MainActivity extends Activity {
   // List view
   private ListView lv;

   ArrayAdapter<String> adapter;
   EditText inputSearch;
   ArrayList<HashMap<String, String>> productList;

   @Override
   public void onCreate(Bundle savedInstanceState) {
      super.onCreate(savedInstanceState);
      setContentView(R.layout.activity_main);
      String products[] = {
         "Dell Inspiron",
         "HTC One X",
         "HTC Wildfire S",
         "HTC Sense",
         "HTC Sensation XE",
         "iPhone 5S",
         "iPhone 6S",
         "iPhone 7S",
         "Samsung Galaxy Note 5",
         "Samsung Galaxy S7",
         "MacBook Air",
         "Mac Mini",
         "MacBook Pro"
      };

      lv = (ListView) findViewById(R.id.list_view);
      inputSearch = (EditText) findViewById(R.id.inputSearch);
      adapter = new ArrayAdapter<String>(
         this, R.layout.list_item, R.id.product_name, products);

      lv.setAdapter(adapter);
      inputSearch.addTextChangedListener(new TextWatcher() {
         @Override
         public void onTextChanged(CharSequence cs, int arg1, int arg2, int arg3) {
            MainActivity.this.adapter.getFilter().filter(cs);
         }

         @Override
         public void beforeTextChanged(CharSequence arg0, int arg1, int arg2, int arg3) {
         }

         @Override
         public void afterTextChanged(Editable arg0) {
         }
      });
   }
}
Step 4 − Add the following code to res/layout/list_item.xml
<?xml version = "1.0" encoding = "utf-8"?>
<LinearLayout xmlns:android="http://schemas.android.com/apk/res/android"
   android:layout_width = "match_parent"
   android:layout_height = "match_parent"
   android:orientation = "vertical" >
   <TextView android:id = "@+id/product_name"
      android:layout_width = "fill_parent"
      android:layout_height = "wrap_content"
      android:padding = "10dip"
      android:textSize = "16dip"
      android:textStyle = "bold"/>
</LinearLayout>
Step 5 − Add the following code to manifest.xml
<?xml version = "1.0" encoding = "utf-8"?>
<manifest xmlns:android = "http://schemas.android.com/apk/res/android"
   package = "myapplication.example.com.myapplication">
   <application
      android:allowBackup = "true"
      android:icon = "@mipmap/ic_launcher"
      android:label = "@string/app_name"
      android:supportsRtl = "true"
      android:theme = "@style/AppTheme">
      <activity android:name = ".MainActivity"
         android:windowSoftInputMode = "stateHidden">
         <intent-filter>
            <action android:name = "android.intent.action.MAIN" />
            <category android:name = "android.intent.category.LAUNCHER" />
         </intent-filter>
      </activity>
   </application>

</manifest>
Let's try to run your application. I assume you have connected your actual Android Mobile device with your computer. To run the app from android studio, open one of your project's activity files and click Run icon from the toolbar. Select your mobile device as an option and then check your mobile device which will display your default screen −
Count Down Functionality
Count Down is an act of counting numerals in reverse order to zero, especially before the launching of a rocket or missile.
Example
This example demostrate about how to integrate Android Count Down.
Step 1 − Create a new project in Android Studio, go to File ⇒ New Project and fill all required details to create a new project.
Step 2 − Add the following code to res/layout/activity_main.xml.
<LinearLayout xmlns:android = "http://schemas.android.com/apk/res/android"
   xmlns:tools = "http://schemas.android.com/tools"
   android:layout_width = "match_parent"
   android:layout_height = "match_parent"
   android:orientation = "vertical" >
   <Button
      android:id = "@+id/startbutton"
      android:layout_width = "fill_parent"
      android:layout_height = "wrap_content"
      android:text = "Start"
      android:textAlignment = "center" >
   </Button>
   <TableLayout
      android:layout_width = "wrap_content"
      android:layout_height = "wrap_content"
      android:gravity = "center"
      android:padding = "10dp">
      <TableRow>
         <TextView
            android:id = "@+id/timer"
            android:layout_width = "wrap_content"
            android:layout_height = "wrap_content"
            android:paddingRight = "10dp"
            android:text = "Time: "
            android:textSize = "20dp" />
      </TableRow>
   </TableLayout>
   <TextView
      android:id = "@+id/timeElapsed"
      android:layout_width = "wrap_content"
      android:layout_height = "wrap_content"
      android:paddingLeft = "10dp"
      android:paddingRight = "10dp"
      android:text = "Time elapsed: "
      android:textSize = "20dp" />
</LinearLayout>
Step 3 − Add the following code to src/MainActivity.java
package myapplication.example.com.myapplication;

import android.os.Bundle;
import android.os.CountDownTimer;
import android.app.Activity;
import android.view.View;
import android.view.View.OnClickListener;
import android.widget.Button;
import android.widget.TextView;

public class MainActivity extends Activity implements OnClickListener {
   private santimer timer;
   private Boolean timer_flag = false;
   private final long startTime = 50000;
   private final long interval = 1000;
   private Button start;
   private TextView text,time_eplapsed;
   private long timeElapsed;

   @Override
   protected void onCreate(Bundle savedInstanceState) {
      super.onCreate(savedInstanceState);
      setContentView(R.layout.activity_main);
      start = (Button) findViewById(R.id.startbutton);
      start.setOnClickListener(this);
      text = (TextView) findViewById(R.id.timer);
      time_eplapsed = (TextView) findViewById(R.id.timeElapsed);
      timer = new santimer(startTime, interval);
      text.setText(text.getText() + String.valueOf(startTime));
   }

   @Override
   public void onClick(View v) {
      // TODO Auto-generated method stub
      if (!timer_flag) {
         timer.start();
         timer_flag = true;
         start.setText("Start");
      } else {
         timer.cancel();
         timer_flag = false;
         start.setText("Reset");
      }
   }

   private class santimer extends CountDownTimer {
      public santimer(long millisInFuture, long countDownInterval) {
         super(millisInFuture, countDownInterval);
         // TODO Auto-generated constructor stub
      }

      @Override
      public void onFinish() {
         // TODO Auto-generated method stub
         text.setText("Time's up!");
         time_eplapsed.setText("Time Elapsed: " + String.valueOf(startTime));
      }

      @Override
      public void onTick(long millisUntilFinished) {
         // TODO Auto-generated method stub
         text.setText("Time remain:" + millisUntilFinished);
         timeElapsed = startTime - millisUntilFinished;
         time_eplapsed.setText("Time Elapsed: " + String.valueOf(timeElapsed));
      }
   }
}
Step 4 − No need to changemanifest.java
Let's try to run your application. I assume you have connected your actual Android Mobile device with your computer. To run the app from android studio, open one of your project's activity files and click Run icon from the toolbar. Select your mobile device as an option and then check your mobile device which will display your default screen −
Advanced Android - Draw a Spritesheet
The below example shows Android Program to Draw a Spritesheet on a Canvas
Example
This example demostrate about how to integrate Android Draw a Spritesheet on a Canvas.
Step 1 − Create a new project in Android Studio, go to File ⇒ New Project and fill all required details to create a new project.
Step 2 − Add the following code to res/layout/activity_main.xml.
<LinearLayout xmlns:android = "http://schemas.android.com/apk/res/android"
   xmlns:tools = "http://schemas.android.com/tools"
   android:layout_width = "match_parent"
   android:layout_height = "match_parent"
   android:orientation = "vertical" >
   <Button
      android:id = "@+id/startbutton"
      android:layout_width = "fill_parent"
      android:layout_height = "wrap_content"
      android:text = "Start"
      android:textAlignment = "center" >
   </Button>
   <TableLayout
      android:layout_width = "wrap_content"
      android:layout_height = "wrap_content"
      android:gravity = "center"
      android:padding = "10dp" >
      <TableRow>
         <TextView
            android:id = "@+id/timer"
            android:layout_width = "wrap_content"
            android:layout_height = "wrap_content"
            android:paddingRight = "10dp"
            android:text = "Time: "
            android:textSize = "20dp" />
      </TableRow>
   </TableLayout>
   <TextView
      android:id = "@+id/timeElapsed"
      android:layout_width = "wrap_content"
      android:layout_height = "wrap_content"
      android:paddingLeft = "10dp"
      android:paddingRight = "10dp"
      android:text = "Time elapsed: "
      android:textSize = "20dp" />

</LinearLayout>
Step 3 − Add the following code to src/MainActivity.java
package myapplication.example.com.myapplication;

import android.annotation.SuppressLint;
import android.app.Activity;
import android.content.Context;
import android.graphics.Bitmap;
import android.graphics.BitmapFactory;
import android.graphics.Canvas;
import android.os.Bundle;

import android.view.MotionEvent;
import android.view.SurfaceHolder;
import android.view.SurfaceView;
import android.view.View;
import android.view.View.OnTouchListener;

public class MainActivity extends Activity implements OnTouchListener{
   Ourview v;
   Bitmap bm , bitmap1;
   float x,y;

   @Override
   protected void onCreate(Bundle savedInstanceState) {
      // TODO Auto-generated method stub
      super.onCreate(savedInstanceState);
      v = new Ourview(this);
      v.setOnTouchListener(this);
      bm = BitmapFactory.decodeResource(getResources(), R.drawable.abc);
      bitmap1 = BitmapFactory.decodeResource(getResources(), R.drawable.abc);
      x = 0;y = 0;
      setContentView(v);
   }

   @Override
   protected void onPause() {
      // TODO Auto-generated method stub
      super.onPause();
      v.pause();
   }

   @Override
   protected void onResume() {
      // TODO Auto-generated method stub
      super.onResume();
      v.resume();
   }

   // surface view is going to be a thread now
   class Ourview extends SurfaceView implements Runnable {
      Thread th = null;
      SurfaceHolder holder;
      boolean var = false;
      sprite sprite_object;
      boolean sprite_loaded = false;
      public Ourview(Context context) {
         super(context);
         // TODO Auto-generated constructor stub
         holder = getHolder();
      }

      @Override
      public void run() {
         // TODO Auto-generated method stub
         while (var = true) {
            // do stuff
            if (!holder.getSurface().isValid()) {
               continue;
            }
            if(!sprite_loaded){
               sprite_object = new sprite(this,bitmap1);
               sprite_loaded = true;
            }

            Canvas c = holder.lockCanvas();// while drawing on a canvas we
            // lock it and after drawing on
            // it we unlock it
            OnDraw(c);
            holder.unlockCanvasAndPost(c);
         }
      }

      @SuppressLint("WrongCall")
      void OnDraw(Canvas c){
         c.drawARGB(255, 250, 150, 20);//rgb values
         c.drawBitmap(bm, x -(bm.getWidth()/2), y -(bm.getHeight()/2), null );
         sprite_object.onDraw(c);
      }

      public void pause() {
         var = false;
         while (true) {
            try {
               th.join();// would pause the currently executing thread till
               // the user finishes its job
            } catch (InterruptedException e) {
               // TODO Auto-generated catch block
               e.printStackTrace();
            }
            break;
         }
         th = null;
      }
      public void resume() {
         var = true;
         th = new Thread(this);
         th.start();
      }
   }

   @Override
   public boolean onTouch(View v, MotionEvent me) {
      // TODO Auto-generated method stub
      //x = me.getX();//ontouch listener
      //y = me.getY();
      try {
         Thread.sleep(80);
      } catch (InterruptedException e) {
         // TODO Auto-generated catch block
         e.printStackTrace();
      }
      switch (me.getAction()) {
         case MotionEvent.ACTION_DOWN:
            x = me.getX();
            y = me.getY();
            break;
         case MotionEvent.ACTION_UP:
            x = me.getX();
            y = me.getY();
            break;
         case MotionEvent.ACTION_MOVE:
            x = me.getX();
            y = me.getY();
            break;
         default:
            break;
      }
      return true;
   }
}
Step 4 − Add the following code to src/Sprite.java
package myapplication.example.com.myapplication;

import android.graphics.Bitmap;
import android.graphics.Canvas;
import android.graphics.Rect;

import myapplication.example.com.myapplication.MainActivity.Ourview;

public class sprite {
   int x,y,xspeed,yspeed,height,width;
   Bitmap b;
   Ourview our_view;

   public sprite(Ourview ourview, Bitmap bitmap1) {
      // TODO Auto-generated constructor stub
      b = bitmap1;
      our_view = ourview;
      height = b.getHeight();
      width = b.getWidth();
      x = y = 0;
      xspeed = 5;
      yspeed = 0;
   }

   public void onDraw(Canvas c) {
      // TODO Auto-generated method stub
      update();
      Rect src = new Rect(0, 0, width, height);
      Rect dst = new Rect(x,y,x+width,y+height);
      c.drawBitmap(b,src, dst, null);
   }

   private void update() {
      // TODO Auto-generated method stub
      x+ = xspeed;
      y+ = yspeed;
   }
}
Step 5 − No need to change manifest.xml
Let's try to run your application. I assume you have connected your actual Android Mobile device with your computer. To run the app from android studio, open one of your project's activity files and click Run icon from the toolbar. Select your mobile device as an option and then check your mobile device which will display your default screen −
Advanced Android - Linkify Class
Linkify is a helper class that creates hyperlinks within Text View classes through RegExpattern matching.
Example
This example demostrate about how to integrate Linkify Class.
Step 1 − Create a new project in Android Studio, go to File ⇒ New Project and fill all required details to create a new project.
Step 2 − Add the following code to res/layout/activity_main.xml.
<RelativeLayout xmlns:android = "http://schemas.android.com/apk/res/android"
   xmlns:tools = "http://schemas.android.com/tools"
   android:layout_width = "match_parent"
   android:layout_height = "match_parent"
   android:paddingBottom = "@dimen/activity_vertical_margin"
   android:paddingLeft = "@dimen/activity_horizontal_margin"
   android:paddingRight = "@dimen/activity_horizontal_margin"
   android:paddingTop = "@dimen/activity_vertical_margin"
   tools:context = ".MainActivity" >
   <TextView
      android:id = "@+id/textview1"
      android:layout_width = "fill_parent"
      android:layout_height = "wrap_content"
      android:layout_alignParentLeft = "true"
      android:layout_alignParentTop = "true"
      android:layout_marginTop = "95dp"
      android:text = "hello"
      android:textSize = "30dp" />
   <TextView
      android:id = "@+id/textview2"
      android:layout_width = "fill_parent"
      android:layout_height = "wrap_content"
      android:layout_alignParentTop = "true"
      android:layout_centerHorizontal = "true"
      android:layout_marginTop = "186dp"
      android:text = "sanfoundry"
      android:textSize = "30dp" />
   <TextView
      android:id = "@+id/textView3"
      android:layout_width = "wrap_content"
      android:layout_height = "wrap_content"
      android:layout_alignLeft = "@+id/textview2"
      android:layout_alignParentRight = "true"
      android:layout_below = "@+id/textview2"
      android:layout_marginTop = "88dp"
      android:text = "Large Text"
      android:textAppearance = "?android:attr/textAppearanceLarge" />
</RelativeLayout>
Step 3 − Add the following code to src/MainActivity.java
package myapplication.example.com.myapplication;

import android.app.Activity;
import android.os.Bundle;
import android.text.util.Linkify;
import android.widget.TextView;

import java.util.regex.Pattern;

public class MainActivity extends Activity {
   @Override
   protected void onCreate(Bundle savedInstanceState) {
      super.onCreate(savedInstanceState);
      setContentView(R.layout.activity_main);

      TextView WebSiteone = (TextView) findViewById(R.id.textview1);
      WebSiteone.setText("Go to : send18.com");
      Linkify.addLinks(WebSiteone, Linkify.WEB_URLS);

      TextView WebSitetwo = (TextView) findViewById(R.id.textview2);
      WebSitetwo.setText("Go to : Tutorialspoint.com");
      Linkify.addLinks(WebSitetwo, Linkify.WEB_URLS);

      TextView myCustomLink = (TextView) findViewById(R.id.textView3);
      Pattern p1 = Pattern.compile("\\bAndroid+\\b");
      myCustomLink.setText("Click on Android " + "to search it on google");
      Linkify.addLinks(myCustomLink, p1, "http://www.google.ie/search?q=");
   }
}
Step 4 − Add the following code to manifest.xml
<?xml version = "1.0" encoding = "utf-8"?>
<manifest xmlns:android="http://schemas.android.com/apk/res/android"
   package = "myapplication.example.com.myapplication">
   <uses-permission android:name = "android.permission.INTERNET"/>
   <application
      android:allowBackup = "true"
      android:icon = "@mipmap/ic_launcher"
      android:label = "@string/app_name"
      android:supportsRtl = "true"
      android:theme = "@style/AppTheme">
      <activity android:name = ".MainActivity">
         <intent-filter>
            <action android:name = "android.intent.action.MAIN" />
            <category android:name = "android.intent.category.LAUNCHER" />
         </intent-filter>
      </activity>

   </application>
</manifest>
Let's try to run your application. I assume you have connected your actual Android Mobile device with your computer. To run the app from android studio, open one of your project's activity files and click Run icon from the toolbar. Select your mobile device as an option and then check your mobile device which will display your default screen −
Advanced Android - ViewFlipper
ViewFlipper is an extension class of ViewAnimator, which animates between two or more views that have been added to it. Specfically, only one child is shown at a time
Example
This example demostrate about how to integrate Android ViewFlipper.
Step 1 − Create a new project in Android Studio,go to File New Project and fill all required details to create a new project.
Step 2 − Add the following code to res/layout/activity_main.xml.
<?xml version="1.0" encoding="utf-8"?>
<LinearLayout xmlns:android = "http://schemas.android.com/apk/res/android"
   android:orientation = "vertical"
   android:layout_width = "fill_parent"
   android:layout_height = "fill_parent" >
   <Button android:id = "@+id/flip_me"
      android:layout_width = "fill_parent"
      android:layout_height = "wrap_content"
      android:text = "Flip Me!" />
   <ViewFlipper android:id = "@+id/details"
      android:layout_width = "fill_parent"
      android:layout_height = "fill_parent" >
      <ImageView
         android:id = "@+id/imageView1"
         android:layout_width = "wrap_content"
         android:layout_height = "wrap_content"
         android:src = "@drawable/abc" />
      <TextView
         android:layout_width = "fill_parent"
         android:layout_height = "wrap_content"
         android:textStyle = "bold"
         android:textColor = "#FFFF0000"
         android:text = "This is the second panel" />
      <TextView
         android:layout_width = "fill_parent"
         android:layout_height = "wrap_content"
         android:textStyle = "bold"
         android:textColor = "#FFFFFF00"
         android:text = "This is the third panel" />
    </ViewFlipper>
</LinearLayout>
Step 3 − Add the following code to src/MainActivity.java
package myapplication.example.com.myapplication;

import android.app.Activity;
import android.os.Bundle;
import android.view.View;
import android.widget.Button;
import android.widget.ViewFlipper;

public class MainActivity extends Activity {
   ViewFlipper flipper;
   @Override
   public void onCreate(Bundle icicle) {
      super.onCreate(icicle);
      setContentView(R.layout.activity_main);
      flipper = (ViewFlipper)findViewById(R.id.details);
      Button btn=(Button)findViewById(R.id.flip_me);
      btn.setOnClickListener(new View.OnClickListener() {
         public void onClick(View view) {
            flipper.showNext();
         }
      });
   }
}
Step 4 − No need to change manifest.xml
Let's try to run your application. I assume you have connected your actual Android Mobile device with your computer. To run the app from android studio, open one of your project's activity files and click Run icon from the toolbar. Select your mobile device as an option and then check your mobile device which will display your default screen −
Advanced Android - loader
Getting data from server may take few seconds during which we can show loader/progress to the user instead of blank activity/page
Example
This example demostrate about how to integrate Android loader.
Step 1 − Create a new project in Android Studio, go to File ⇒ New Project and fill all required details to create a new project.
Step 2 − Add the following code to res/layout/activity_main.xml.
<?xml version = "1.0" encoding = "utf-8"?>
<RelativeLayout xmlns:android = "http://schemas.android.com/apk/res/android"
   xmlns:app = "http://schemas.android.com/apk/res-auto"
   android:layout_width = "match_parent"
   android:layout_height = "match_parent"
   android:orientation = "vertical"
   android:padding = "16dp">
   <RelativeLayout
      android:id = "@+id/first_row"
      android:layout_width = "match_parent"
      android:layout_height = "wrap_content"
      android:orientation = "horizontal"
      android:padding = "20dp">
      <com.wang.avi.AVLoadingIndicatorView
         android:id = "@+id/material_design_ball_pulse_loader_progress"
         android:layout_width = "wrap_content"
         android:layout_height = "wrap_content"
         android:visibility = "visible"
         app:indicator = "BallPulse"
         app:indicator_color = "#ff00" />
      <com.wang.avi.AVLoadingIndicatorView
         android:id = "@+id/material_design_ball_clip_rotate_multiple_loader"
         android:layout_width = "wrap_content"
         android:layout_height = "wrap_content"
         android:layout_alignParentRight = "true"
         android:visibility = "visible"
         app:indicator = "BallClipRotateMultiple"
         app:indicator_color = "#ff00" />
   </RelativeLayout>
   <RelativeLayout
      android:id = "@+id/second_row"
      android:layout_width = "match_parent"
      android:layout_height = "wrap_content"
      android:layout_below = "@+id/first_row"
      android:layout_marginTop = "20dp"
      android:orientation = "horizontal"
      android:padding = "20dp">
      <com.wang.avi.AVLoadingIndicatorView
         android:id = "@+id/material_design_linear_scale_progress_loader"
         android:layout_width = "wrap_content"
         android:layout_height = "wrap_content"
         android:layout_centerInParent = "true"
         android:visibility = "visible"
         app:indicator = "LineScale"
         app:indicator_color = "#ff00" />
   </RelativeLayout>
   <RelativeLayout
      android:id = "@+id/third_row"
      android:layout_width = "match_parent"
      android:layout_height = "wrap_content"
      android:layout_below = "@+id/second_row"
      android:layout_marginTop = "20dp"
      android:orientation = "horizontal"
      android:padding = "20dp">
      <com.wang.avi.AVLoadingIndicatorView
         android:id = "@+id/material_design_ball_rotate_loader"
         android:layout_width = "wrap_content"
         android:layout_height = "wrap_content"
         android:visibility = "visible"
         app:indicator = "BallRotate"
         app:indicator_color = "#ff00" />
      <com.wang.avi.AVLoadingIndicatorView
         android:id = "@+id/material_design_linear_spin_fade_loader"
         android:layout_width = "wrap_content"
         android:layout_height = "wrap_content"
         android:layout_alignParentRight = "true"
         android:visibility = "visible"
         app:indicator = "LineSpinFadeLoader"
         app:indicator_color = "#ff00" />
   </RelativeLayout>
   <com.wang.avi.AVLoadingIndicatorView
      android:id = "@+id/material_design_ball_grid_beat_loader"
      android:layout_width = "wrap_content"
      android:layout_height = "wrap_content"
      android:layout_below = "@+id/third_row"
      android:layout_centerInParent = "true"
      android:layout_gravity = "center_horizontal"
      android:layout_marginTop = "20dp"
      android:visibility = "visible"
      app:indicator = "BallGridBeat"
      app:indicator_color = "#ff00" />
   <com.wang.avi.AVLoadingIndicatorView
      android:id = "@+id/material_design_ball_spin_fade_loader"
      android:layout_width = "wrap_content"
      android:layout_height = "wrap_content"
      android:layout_below = "@+id/material_design_ball_grid_beat_loader"
      android:layout_marginTop = "20dp"
      android:visibility = "visible"
      app:indicator = "BallSpinFadeLoader"
      app:indicator_color = "#ff00" />
   <com.wang.avi.AVLoadingIndicatorView
      android:id = "@+id/material_design_ball_scale_ripple_loader"
      android:layout_width = "wrap_content"
      android:layout_height = "wrap_content"
      android:layout_alignParentRight = "true"
      android:layout_below = "@+id/material_design_ball_grid_beat_loader"
      android:layout_marginTop = "20dp"
      android:visibility = "visible"
      app:indicator = "BallScaleRipple"
      app:indicator_color = "#ff00" />
</RelativeLayout>
Step 3 − Add the following code to src/MainActivity.java
package myapplication.example.com.myapplication;

import android.os.Bundle;
import android.support.v7.app.AppCompatActivity;
import android.view.View;

public class MainActivity extends AppCompatActivity {
   @Override
   protected void onCreate(Bundle savedInstanceState) {
      super.onCreate(savedInstanceState);
      setContentView(R.layout.activity_main);

      ballPulseAnimLoader();
      ballClipRotateMultipleAnimateLoader();
      lineScaleLoaderExample();
      ballRotateLoaderAndroidExample();
      lineSpinFadeLoaderLoader();
      androidBallGridBeatLoaderBar();
      androidBallSpinFadeLoaderProgressBar();
      ballScaleRippleProgressLoaderExample();
   }
   void ballPulseAnimLoader() {
      findViewById(R.id.material_design_ball_pulse_loader_progress).setVisibility(View.VISIBLE);
   }
   void ballClipRotateMultipleAnimateLoader() {
      findViewById(R.id.material_design_ball_clip_rotate_multiple_loader).setVisibility(View.VISIBLE);
   }
   void lineScaleLoaderExample() {
      findViewById(R.id.material_design_linear_scale_progress_loader).setVisibility(View.VISIBLE);
   }
   void ballRotateLoaderAndroidExample() {
      findViewById(R.id.material_design_ball_rotate_loader).setVisibility(View.VISIBLE);
   }
   void lineSpinFadeLoaderLoader() {
      findViewById(R.id.material_design_linear_spin_fade_loader).setVisibility(View.VISIBLE);
   }
   void androidBallGridBeatLoaderBar() {
      findViewById(R.id.material_design_ball_grid_beat_loader).setVisibility(View.VISIBLE);
   }
   void androidBallSpinFadeLoaderProgressBar() {
      findViewById(R.id.material_design_ball_spin_fade_loader).setVisibility(View.VISIBLE);
   }
   void ballScaleRippleProgressLoaderExample() {
      findViewById(R.id.material_design_ball_scale_ripple_loader).setVisibility(View.VISIBLE);
   }
}
Step 4 − Add the following code to build.gradle
dependencies {
   compile fileTree(include: ['*.jar'], dir: 'libs')
   testCompile 'junit:junit:4.12'
   compile 'com.android.support:appcompat-v7:24.2.1'
   compile 'com.android.support:design:23.1.0'
   compile 'com.wang.avi:library:1.0.3'
   compile 'com.nineoldandroids:library:2.4.0'
}
Step 5 − No need to change manifest.xml
Let's try to run your application. I assume you have connected your actual Android Mobile device with your computer. To run the app from android studio, open one of your project's activity files and click Run icon from the toolbar. Select your mobile device as an option and then check your mobile device which will display your default screen −
Advanced Android - Slider Menu
Snackbars are just like Toast messages except they provide action to interact with. Snackbar will be displayed at the bottom of the screen
Example
This example demostrate about how to integrate Android Snackbar.
Step 1 − Create a new project in Android Studio, go to File ⇒ New Project and fill all required details to create a new project.
Step 2 − Open build.gradle and add design support library dependency.
dependencies {
   compile fileTree(dir: 'libs', include: ['*.jar'])
   testCompile 'junit:junit:4.12'
   compile 'com.android.support:appcompat-v7:24.2.0'
   compile 'com.android.support:design:24.2.1'
}
Step 3 − Add the following code to res/layout/activity_main.xml.
<?xml version = "1.0" encoding = "utf-8"?>
<android.support.design.widget.CoordinatorLayout xmlns:android = "
   http://schemas.android.com/apk/res/android"
   xmlns:app = "http://schemas.android.com/apk/res-auto"
   xmlns:tools = "http://schemas.android.com/tools"
   android:id = "@+id/coordinatorLayout"
   android:layout_width = "match_parent"
   android:layout_height = "match_parent"
   tools:context = ".MainActivity">
   <android.support.design.widget.AppBarLayout
      android:layout_width = "match_parent"
      android:layout_height = "wrap_content"
      android:theme = "@style/ThemeOverlay.AppCompat.Dark.ActionBar">
      <android.support.v7.widget.Toolbar
         android:id = "@+id/toolbar"
         android:layout_width = "match_parent"
         android:layout_height = "?attr/actionBarSize"
         android:background = "?attr/colorPrimary"
         app:layout_scrollFlags = "scroll|enterAlways"
         app:popupTheme = "@style/ThemeOverlay.AppCompat.Light" />
   </android.support.design.widget.AppBarLayout>
   <LinearLayout
      android:layout_width = "fill_parent"
      android:layout_height = "wrap_content"
      android:orientation = "vertical"
      android:paddingLeft = "20dp"
      android:paddingRight = "20dp"
      app:layout_behavior = "@string/appbar_scrolling_view_behavior">
      <Button
         android:id = "@+id/btnSimpleSnackbar"
         android:layout_width = "fill_parent"
         android:layout_height = "wrap_content"
         android:layout_marginTop = "30dp"
         android:text = "Simple Snackbar" />
      <Button
         android:id = "@+id/btnActionCallback"
         android:layout_width = "fill_parent"
         android:layout_height = "wrap_content"
         android:layout_marginTop = "10dp"
         android:text = "With Action Callback" />
      <Button
         android:id = "@+id/btnCustomSnackbar"
         android:layout_width = "fill_parent"
         android:layout_height = "wrap_content"
         android:layout_marginTop = "10dp"
         android:text = "Custom Color" />
   </LinearLayout>
   <android.support.design.widget.FloatingActionButton
      android:id = "@+id/fab"
      android:layout_width = "wrap_content"
      android:layout_height = "wrap_content"
      android:layout_gravity = "end|bottom"
      android:layout_margin = "16dp"
      android:src = "@android:drawable/ic_dialog_email" />
</android.support.design.widget.CoordinatorLayout>
Step 4 − Add the following code to src/MainActivity.java
package myapplication.example.com.myapplication;

import android.graphics.Color;
import android.os.Bundle;

import android.support.design.widget.CoordinatorLayout;
import android.support.design.widget.FloatingActionButton;
import android.support.design.widget.Snackbar;
import android.support.v7.app.AppCompatActivity;
import android.support.v7.widget.Toolbar;

import android.view.View;
import android.widget.Button;
import android.widget.TextView;

public class MainActivity extends AppCompatActivity {
   private Toolbar mToolbar;
   private CoordinatorLayout coordinatorLayout;
   private Button btnSimpleSnackbar, btnActionCallback, btnCustomView;
   private FloatingActionButton fab;

   @Override
   protected void onCreate(Bundle savedInstanceState) {
      super.onCreate(savedInstanceState);
      setContentView(R.layout.activity_main);
      coordinatorLayout = (CoordinatorLayout) findViewById(R.id.coordinatorLayout);
      fab = (FloatingActionButton) findViewById(R.id.fab);

      btnSimpleSnackbar = (Button) findViewById(R.id.btnSimpleSnackbar);
      btnActionCallback = (Button) findViewById(R.id.btnActionCallback);
      btnCustomView = (Button) findViewById(R.id.btnCustomSnackbar);
      btnSimpleSnackbar.setOnClickListener(new View.OnClickListener() {
         @Override
         public void onClick(View view) {
            Snackbar snackbar = Snackbar .make(coordinatorLayout,
               "Welcome to Tutorialspoint.com", Snackbar.LENGTH_LONG);

            snackbar.show();
         }
      });
      btnActionCallback.setOnClickListener(new View.OnClickListener() {
         @Override
         public void onClick(View view) {
            Snackbar snackbar = Snackbar .make(coordinatorLayout,
               "Message is deleted", Snackbar.LENGTH_LONG)
               .setAction("UNDO", new View.OnClickListener() {

               @Override
               public void onClick(View view) {
                  Snackbar snackbar1 = Snackbar.make(coordinatorLayout,
                     "Message is restored!", Snackbar.LENGTH_SHORT);
                     snackbar1.show();
               }
            });
            snackbar.show();
         }
      });
      btnCustomView.setOnClickListener(new View.OnClickListener() {
         @Override
         public void onClick(View view) {
            Snackbar snackbar = Snackbar .make(coordinatorLayout, "No internet
               connection!", Snackbar.LENGTH_LONG) .setAction(
               "RETRY", new View.OnClickListener() {

               @Override
               public void onClick(View view) {
               }
            });
            // Changing message text color
            snackbar.setActionTextColor(Color.RED);

            // Changing action button text color
            View sbView = snackbar.getView();
            TextView textView = (TextView)
               sbView.findViewById(android.support.design.R.id.snackbar_text);

            textView.setTextColor(Color.YELLOW);
            snackbar.show();
         }
      });
   }
}
Step 5 − Add the following code to manifest.xml
<?xml version = "1.0" encoding = "utf-8"?>
<manifest xmlns:android = "http://schemas.android.com/apk/res/android"
   package = "myapplication.example.com.myapplication">
   <application
      android:allowBackup = "true"
      android:icon = "@mipmap/ic_launcher"
      android:label = "@string/app_name"
      android:supportsRtl = "true"
      android:theme = "@style/AppTheme">
      <activity android:name = ".MainActivity">
         <intent-filter>
            <action android:name = "android.intent.action.MAIN" />
            <category android:name="android.intent.category.LAUNCHER" />
         </intent-filter>
      </activity>

   </application>
</manifest>
Let's try to run your application. I assume you have connected your actual Android Mobile device with your computer. To run the app from android studio, open one of your project's activity files and click Run icon from the toolbar. Select your mobile device as an option and then check your mobile device which will display your default screen −
Advanced Android - SwipeRefreshLayout
This Android Material Design UI pattern is very commonly seen in many applications like Gmail, Facebook, Twitter and implemented using Android SwipeRefreshLayout.
Example
This example demostrate about how to integrate Android SwipeRefreshLayout.
Step 1 − Create a new project in Android Studio, go to File ⇒ New Project and fill all required details to create a new project.
Step 2 − Add the following code to res/layout/activity_main.xml.
<?xml version = "1.0" encoding = "utf-8"?>
<RelativeLayout xmlns:android = "http://schemas.android.com/apk/res/android"
   xmlns:tools = "http://schemas.android.com/tools"
   android:layout_width = "match_parent"
   android:layout_height = "match_parent"
   android:paddingBottom = "@dimen/activity_vertical_margin"
   android:paddingLeft = "@dimen/activity_horizontal_margin"
   android:paddingRight = "@dimen/activity_horizontal_margin"
   android:paddingTop = "@dimen/activity_vertical_margin">
   <android.support.v4.widget.SwipeRefreshLayout
      android:id = "@+id/swipeToRefresh"
      android:layout_width = "match_parent"
      android:layout_height = "wrap_content">
      <ListView
         android:id = "@+id/listView"
         android:layout_width = "match_parent"
         android:layout_height = "match_parent" >
      </ListView>
   </android.support.v4.widget.SwipeRefreshLayout>

</RelativeLayout>
Step 3 − Add the following code to src/MainActivity.java
package myapplication.example.com.myapplication;

import android.app.Activity;
import android.os.Bundle;
import android.support.v4.widget.SwipeRefreshLayout;
import android.widget.ArrayAdapter;
import android.widget.ListView;

import java.util.ArrayList;
import java.util.Collections;
import java.util.Random;

public class MainActivity extends Activity {
   ArrayList arrayList = new ArrayList();
   SwipeRefreshLayout mSwipeRefreshLayout;
   ListView mListView;

   @Override
   protected void onCreate(Bundle savedInstanceState) {
      super.onCreate(savedInstanceState);
      setContentView(R.layout.activity_main);

      mSwipeRefreshLayout = (SwipeRefreshLayout) findViewById(R.id.swipeToRefresh);
      mListView = (ListView) findViewById(R.id.listView);

      mSwipeRefreshLayout.setColorSchemeResources(R.color.colorAccent);
      arrayList.add("First Element");
      arrayList.add("Second Element");
      arrayList.add("Third Element");
      arrayList.add("Fourth Element");
      arrayList.add("Fifth Element");

      ArrayAdapter adapter = new ArrayAdapter(
         this, android.R.layout.simple_list_item_1, arrayList);

      mListView.setAdapter(adapter);
      mSwipeRefreshLayout.setOnRefreshListener(
         new SwipeRefreshLayout.OnRefreshListener() {

         @Override
         public void onRefresh() {
            shuffle();
            mSwipeRefreshLayout.setRefreshing(false);
         }
      });
   }
   public void shuffle(){
      Collections.shuffle(arrayList, new Random(System.currentTimeMillis()));
      ArrayAdapter adapter = new ArrayAdapter(
         this, android.R.layout.simple_list_item_1, arrayList);

      mListView.setAdapter(adapter);
   }
}
Step 4 − Add the following code to build.gradle
dependencies {
   compile fileTree(dir: 'libs', include: ['*.jar'])
   testCompile 'junit:junit:4.12'
   compile 'com.android.support:appcompat-v7:24.2.1'
   compile 'com.android.support:support-v4:21.0.+'
}
Step 5 − No need to change manifest.xml file
Let's try to run your application. I assume you have connected your actual Android Mobile device with your computer. To run the app from android studio, open one of your project's activity files and click Run icon from the toolbar. Select your mobile device as an option and then check your mobile device which will display your default screen −
Advanced Android - Shake to Refresh
Android Shake to refresh is used in instead of pulling down our finger, we shake our smartphone to refresh the UI.
Example
This example demostrate about how to integrate Android Shake to Refresh.
Step 1 − Create a new project in Android Studio, go to File ⇒ New Project and fill all required details to create a new project.
Step 2 − Add the following code to res/layout/activity_main.xml.
<?xml version = "1.0" encoding = "utf-8"?>
<RelativeLayout xmlns:android = "http://schemas.android.com/apk/res/android"
   xmlns:tools = "http://schemas.android.com/tools"
   android:layout_width = "match_parent"
   android:layout_height = "match_parent"
   android:paddingLeft = "@dimen/activity_horizontal_margin"
   android:paddingRight = "@dimen/activity_horizontal_margin"
   android:paddingTop = "@dimen/activity_vertical_margin"
   android:paddingBottom = "@dimen/activity_vertical_margin">
   <TextView
      android:text = "@string/app_name"
      android:layout_width = "wrap_content"
      android:layout_height = "wrap_content"
      android:layout_centerHorizontal = "true"
      android:id = "@+id/txt"/>
   <ListView
      android:layout_width = "wrap_content"
      android:layout_height = "wrap_content"
      android:id = "@+id/list"
      android:layout_below = "@id/txt"
      android:layout_marginTop = "15dp"/>
</RelativeLayout>
Step 3 − Add the following code to src/MainActivity.java
package myapplication.example.com.myapplication;

import android.app.Activity;
import android.os.Bundle;
import android.view.Menu;
import android.view.MenuItem;
import android.widget.ArrayAdapter;
import android.widget.ListView;
import android.widget.Toast;

public class MainActivity extends Activity implements ShakeEventManager.ShakeListener {
   private String[] dataList;
   private ArrayAdapter<String> adpt;
   private ListView listView;
   private ShakeEventManager sd;

   @Override
   protected void onCreate(Bundle savedInstanceState) {
      super.onCreate(savedInstanceState);
      setContentView(R.layout.activity_main);
      createData();
      adpt = new ArrayAdapter<String>(
         this, android.R.layout.simple_list_item_1, dataList);

      listView = (ListView) findViewById(R.id.list);
      listView.setAdapter(adpt);
      sd = new ShakeEventManager();
      sd.setListener(this);
      sd.init(this);
   }

   @Override
   public boolean onCreateOptionsMenu(Menu menu) {
      // Inflate the menu; this adds items to the action bar if it is present.
      return true;
   }

   @Override
   public boolean onOptionsItemSelected(MenuItem item) {
      return super.onOptionsItemSelected(item);
   }
   private void createData() {
      int start = (int) (Math.random() * 10);
      dataList = new String[15];

      for (int i=0; i < dataList.length; i++)dataList[i] = "Item_" + (start + i);
   }

   @Override
   public void onShake() {
      createData();
      adpt = new ArrayAdapter<String>(
         this, android.R.layout.simple_list_item_1, dataList);

      Toast.makeText(this, "Refresh data...", Toast.LENGTH_SHORT).show();
      listView.setAdapter(adpt);
   }

   @Override
   protected void onResume() {
      super.onResume();
      sd.register();
   }

   @Override
   protected void onPause() {
      super.onPause();
      sd.deregister();
   }
}
Step 4 − Add the following code to src/ShakeEventManager.java
package myapplication.example.com.myapplication;

import android.content.Context;
import android.hardware.Sensor;
import android.hardware.SensorEvent;
import android.hardware.SensorEventListener;
import android.hardware.SensorManager;
import android.util.Log;

public class ShakeEventManager implements SensorEventListener {
   private SensorManager sManager;
   private Sensor s;

   private static final int MOV_COUNTS = 2;
   private static final int MOV_THRESHOLD = 4;
   private static final float ALPHA = 0.8F;
   private static final int SHAKE_WINDOW_TIME_INTERVAL = 500; // milliseconds

   // Gravity force on x,y,z axis
   private float gravity[] = new float[3];

   private int counter;
   private long firstMovTime;
   private ShakeListener listener;
   public ShakeEventManager() {
   }
   public void setListener(ShakeListener listener) {
      this.listener = listener;
   }
   public void init(Context ctx) {
      sManager = (SensorManager)  ctx.getSystemService(Context.SENSOR_SERVICE);
      s = sManager.getDefaultSensor(Sensor.TYPE_ACCELEROMETER);
      register();
   }
   public void register() {
      sManager.registerListener(this, s, SensorManager.SENSOR_DELAY_NORMAL);
   }

   @Override
   public void onSensorChanged(SensorEvent sensorEvent) {
      float maxAcc = calcMaxAcceleration(sensorEvent);
      Log.d("SwA", "Max Acc ["+maxAcc+"]");

      if (maxAcc >= MOV_THRESHOLD) {
         if (counter == 0) {
            counter++;
            firstMovTime = System.currentTimeMillis();
            Log.d("SwA", "First mov..");
         } else {
            long now = System.currentTimeMillis();
            if ((now - firstMovTime) < SHAKE_WINDOW_TIME_INTERVAL)counter++;
            else {
               resetAllData();
               counter++;
               return;
            }
            Log.d("SwA", "Mov counter ["+counter+"]");
            if (counter >= MOV_COUNTS)
            if (listener != null)
            listener.onShake();
         }
      }
   }
   @Override
   public void onAccuracyChanged(Sensor sensor, int i) {
   }
   public void deregister()  {
      sManager.unregisterListener(this);
   }
   private float calcMaxAcceleration(SensorEvent event) {
      gravity[0] = calcGravityForce(event.values[0], 0);
      gravity[1] = calcGravityForce(event.values[1], 1);
      gravity[2] = calcGravityForce(event.values[2], 2);

      float accX = event.values[0] - gravity[0];
      float accY = event.values[1] - gravity[1];
      float accZ = event.values[2] - gravity[2];

      float max1 = Math.max(accX, accY);
      return Math.max(max1, accZ);
   }
   // Low pass filter
   private float calcGravityForce(float currentVal, int index) {
      return  ALPHA * gravity[index] + (1 - ALPHA) * currentVal;
   }

   private void resetAllData() {
      Log.d("SwA", "Reset all data");
      counter = 0;
      firstMovTime = System.currentTimeMillis();
   }
   public static interface ShakeListener {
      public void onShake();
   }
}
Step 5 − No need to change manifest.xml.
Let's try to run your application. I assume you have connected your actual Android Mobile device with your computer. To run the app from android studio, open one of your project's activity files and click Run icon from the toolbar. Select your mobile device as an option and then check your mobile device which will display your default screen −
Advanced Android - Color Palette
Color Palette which can help you to pick colors from an image dynamically
Example
This example demostrate about how to integrate Color Palette.
Step 1 − Create a new project in Android Studio, go to File ⇒ New Project and fill all required details to create a new project.
Step 2 − Add the following code to res/layout/activity_main.xml.
<?xml version = "1.0" encoding = "utf-8"?>
<LinearLayout xmlns:android = "http://schemas.android.com/apk/res/android"
   xmlns:tools = "http://schemas.android.com/tools"
   android:layout_width = "match_parent"
   android:orientation = "vertical"
   android:layout_height = "match_parent"
   android:paddingBottom = "@dimen/activity_vertical_margin"
   android:paddingLeft = "@dimen/activity_horizontal_margin"
   android:paddingRight = "@dimen/activity_horizontal_margin"
   android:paddingTop = "@dimen/activity_vertical_margin">
   <ImageView
      android:src = "@drawable/abcd"
      android:layout_width = "match_parent"
      android:layout_height = "300dp"
      android:scaleType = "fitXY"
      android:text = "Hello World!" />
   <ListView
      android:layout_marginTop = "@dimen/activity_horizontal_margin"
      android:id = "@+id/list_color"
      android:layout_width = "match_parent"
      android:layout_height = "wrap_content"/>
</LinearLayout>
Step 3 − Add the following code to src/MainActivity.java
package myapplication.example.com.myapplication;

import android.graphics.Bitmap;
import android.graphics.BitmapFactory;
import android.support.v7.app.AppCompatActivity;
import android.os.Bundle;
import android.support.v7.graphics.Palette;
import android.widget.ListView;

public class MainActivity extends AppCompatActivity {
   private ListView listView;
   private SwatchesAdapter swatchesAdapter;

   @Override
   protected void onCreate(Bundle savedInstanceState) {
      super.onCreate(savedInstanceState);
      setContentView(R.layout.activity_main);
      listView = (ListView) findViewById(R.id.list_color);

      swatchesAdapter = new SwatchesAdapter(this);
      listView.setAdapter(swatchesAdapter);

      //get bitmap from drawable resource
      Bitmap bitmap = BitmapFactory.decodeResource(getResources(), R.drawable.abcd);

      //generating Palette from this bitmap
      Palette.from(bitmap).generate(new Palette.PaletteAsyncListener() {
         @Override
         public void onGenerated(Palette palette) {
            for (Palette.Swatch swatch : palette.getSwatches()) {
               swatchesAdapter.add(swatch);
            }
            swatchesAdapter.sortSwatches();
            swatchesAdapter.notifyDataSetChanged();
         }
      });
   }
}
Step 4 − Add the following code to src/SwatchesAdapter.java
package myapplication.example.com.myapplication;

import android.content.Context;
import android.support.v7.graphics.Palette;
import android.view.LayoutInflater;
import android.view.View;
import android.view.ViewGroup;
import android.widget.ArrayAdapter;
import android.widget.TextView;

import java.util.Comparator;

public class SwatchesAdapter extends ArrayAdapter<Palette.Swatch> {
   public SwatchesAdapter(Context context) {
      super(context, 0);
   }

   @Override
   public View getView(int position, View convertView, ViewGroup parent) {
      ViewHolder holder;
      if (convertView == null) {
         holder = new ViewHolder();
         convertView = LayoutInflater.from(
            getContext()).inflate(R.layout.color_item, parent, false);

         holder.view = (TextView) convertView.findViewById(R.id.view);
         convertView.setTag(holder);
      } else {
         holder = (ViewHolder) convertView.getTag();
      }
      holder.view.setBackgroundColor(getItem(position).getRgb());
      holder.view.setTextColor(getItem(position).getBodyTextColor());
      holder.view.setText(String.format(
         "Population: %d", getItem(position).getPopulation()));

      return convertView;
   }
   public void sortSwatches() {
      sort(new Comparator<Palette.Swatch>() {
         @Override
         public int compare(Palette.Swatch lhs, Palette.Swatch rhs) {
            return rhs.getPopulation() - lhs.getPopulation();
         }
      });
   }
   public class ViewHolder {
      TextView view;
   }
}
Step 5 − Add the following code to res/layout/color_item.xml.
<?xml version = "1.0" encoding = "utf-8"?>
<TextView xmlns:android = "http://schemas.android.com/apk/res/android"
   android:id = "@+id/view"
   android:layout_width = "match_parent"
   android:layout_height="wrap_content"
   android:text = "Text"/>
Step 6 − Add the following code to build.gradle
dependencies {
   compile fileTree(dir: 'libs', include: ['*.jar'])
   testCompile 'junit:junit:4.12'
   compile 'com.android.support:appcompat-v7:24.2.1'
   compile 'com.android.support:palette-v7:24.1.1'
}
Step 7 − No need to change manifest.xml
Let's try to run your application. I assume you have connected your actual Android Mobile device with your computer. To run the app from android studio, open one of your project's activity files and click Run icon from the toolbar. Select your mobile device as an option and then check your mobile device which will display your default screen −
Advanced Android - Crumbling Layout
This is an official widget to make swipe view in Android is ViewPager
Example
This example demostrate about how to integrate Crumbling Layout.
Step 1 − Create a new project in Android Studio, go to File ⇒ New Project and fill all required details to create a new project.
Step 2 − Add the following code to res/layout/activity_main.xml.
<?xml version = "1.0" encoding = "utf-8"?>
<RelativeLayout xmlns:android = "http://schemas.android.com/apk/res/android"
   xmlns:app = "http://schemas.android.com/apk/res-auto"
   android:layout_width = "match_parent"
   android:layout_height = "match_parent"
   android:background = "#fddc9b"
   android:padding = "@dimen/activity_horizontal_margin">
   <TextView
      android:layout_width = "match_parent"
      android:layout_height = "wrap_content"
      android:layout_centerHorizontal = "true"
      android:gravity = "center"
      android:text = "Tutorialspoint"
      android:textStyle = "bold" />
   <android.support.v4.view.ViewPager
      android:id = "@+id/pager"
      android:layout_width = "match_parent"
      android:layout_height = "match_parent" />
   <com.cleveroad.splittransformation.SquareViewPagerIndicator
      android:id = "@+id/indicator"
      android:layout_width = "match_parent"
      android:layout_height = "wrap_content"
      android:layout_alignParentBottom = "true"
      android:layout_marginTop = "@dimen/activity_horizontal_margin"
      app:trans_debugItemsCount = "4" />
</RelativeLayout>
Step 3 − Add the following code to src/MainActivity.java
package myapplication.example.com.myapplication;

import android.support.v4.app.Fragment;
import android.support.v4.app.FragmentManager;
import android.support.v4.app.FragmentStatePagerAdapter;
import android.support.v4.view.ViewPager;
import android.support.v7.app.AppCompatActivity;
import android.os.Bundle;

import com.cleveroad.splittransformation.SquareViewPagerIndicator;
import com.cleveroad.splittransformation.TransformationAdapterWrapper;

public class MainActivity extends AppCompatActivity {
   private ViewPager viewPager;
   private SquareViewPagerIndicator indicator;

   @Override
   protected void onCreate(Bundle savedInstanceState) {
      super.onCreate(savedInstanceState);
      setContentView(R.layout.activity_main);
      viewPager = (ViewPager) findViewById(R.id.pager);
      indicator = (SquareViewPagerIndicator) findViewById(R.id.indicator);

      //Initializing an adapter and wrap it to TransformationAdapterWrapper
      SimplePagerAdapter adapter = new SimplePagerAdapter(getSupportFragmentManager());
      TransformationAdapterWrapper wrapper = TransformationAdapterWrapper
         .wrap(this, adapter) //wrap existing page adapter
         .rows(10) //number of rows to split image.
         .columns(7) // number of columns to split image
         .marginTop(getResources().getDimensionPixelSize(
         R.dimen.activity_horizontal_margin))
         .build(); //initializing

      viewPager.setAdapter(wrapper);
      viewPager.setPageTransformer(false, wrapper); //never forget this important line!
      indicator.initializeWith(viewPager); //attaching indicator with ViewPager
   }
   private static class SimplePagerAdapter extends FragmentStatePagerAdapter {
      public SimplePagerAdapter(FragmentManager fm) {
         super(fm);
      }

      @Override
      public Fragment getItem(int position) {
         return ViewPagerFragment.getInstances(position);
      }

      @Override
      public int getCount() {
         return 7;
      }
   }
}
Step 4 − Add the following code to src/ViewPagerFragment.java
package myapplication.example.com.myapplication;

import android.os.Bundle;
import android.support.annotation.Nullable;
import android.support.v4.app.Fragment;

import android.view.LayoutInflater;
import android.view.View;
import android.view.ViewGroup;
import android.widget.ImageView;
import android.widget.TextView;

public class ViewPagerFragment extends Fragment {
   private ImageView imageView;
   private TextView textView;
   private static String[] phoneTypes = {
      "tutorialspoint",
      "tutorialspoint",
      "tutorialspoint",
      "tutorialspoint",
      "tutorialspoint",
      "tutorialspoint",
      "tutorialspoint"
   };
   private static int[] drawables = {
      R.drawable.abc,
      R.drawable.abc,
      R.drawable.abc,
      R.drawable.abc,
      R.drawable.abc,
      R.drawable.abc,
      R.drawable.abc
   };
   public static ViewPagerFragment getInstances(int position) {
      ViewPagerFragment fragment = new ViewPagerFragment();
      Bundle args = new Bundle();
      args.putInt("position", position);
      fragment.setArguments(args);
      return fragment;
   }
   @Nullable

   @Override
   public View onCreateView(LayoutInflater inflater, @Nullable ViewGroup container,
      @Nullable Bundle savedInstanceState) {

      return inflater.inflate(R.layout.fragment_layout, container, false);
   }

   @Override
   public void onViewCreated(View view, @Nullable Bundle savedInstanceState) {
      super.onViewCreated(view, savedInstanceState);
      int position = getArguments().getInt("position");
      imageView = (ImageView) view.findViewById(R.id.image);
      textView = (TextView) view.findViewById(R.id.text_view);

      imageView.setImageResource(drawables[position]);
      textView.setText(phoneTypes[position]);
   }
}
Step 5 − Add the following code to res/layout/fragment_layout.xml.
<?xml version = "1.0" encoding = "utf-8"?>
<RelativeLayout xmlns:android = "http://schemas.android.com/apk/res/android"
   android:layout_width = "match_parent"
   android:layout_height = "match_parent">
   <ImageView
      android:id = "@+id/image"
      android:layout_width = "250dp"
      android:layout_height = "250dp"
      android:layout_centerInParent = "true" />
   <TextView
      android:id = "@+id/text_view"
      android:layout_width = "match_parent"
      android:layout_height = "wrap_content"
      android:layout_below = "@id/image"
      android:layout_marginTop = "@dimen/activity_horizontal_margin"
      android:gravity = "center"
      android:text = "dsfsdfdsf"
      android:textColor = "@android:color/holo_green_dark"
      android:textStyle = "bold" />
</RelativeLayout>
Step 6 − Add the following code to build.gradle
dependencies {
   compile fileTree(dir: 'libs', include: ['*.jar'])
   testCompile 'junit:junit:4.12'
   compile 'com.android.support:appcompat-v7:24.2.1'
   compile 'com.cleveroad:splittransformation:0.9.0'
}
Step 7 − No need to change manifest.xml
Let's try to run your application. I assume you have connected your actual Android Mobile device with your computer. To run the app from android studio, open one of your project's activity files and click Run icon from the toolbar. Select your mobile device as an option and then check your mobile device which will display your default screen −
Advanced Android - Page Flip
Aphid FlipView is a UI component to accomplish the flipping animation like Flipboard does.
Example
This example demostrate about how to integrate Page Flip.
Step 1 − Create a new project in Android Studio, go to File ⇒ New Project and fill all required details to create a new project.
Step 2 − Add the following code to res/layout/activity_main.xml.
<?xml version = "1.0" encoding = "utf-8"?>
<LinearLayout xmlns:android = "http://schemas.android.com/apk/res/android"
   xmlns:flip = "http://schemas.android.com/apk/res-auto"
   android:layout_width = "match_parent"
   android:layout_height = "match_parent"
   android:orientation = "vertical">
   <TextView
      android:layout_width = "match_parent"
      android:layout_height = "wrap_content"
      android:background = "@android:color/darker_gray"
      android:paddingLeft = "10dp"
      android:text = "@string/header"
      android:textAppearance = "@android:style/TextAppearance.Large" />
   <com.aphidmobile.flip.FlipViewController
      android:id = "@+id/flip_view"
      android:layout_width = "match_parent"
      android:layout_height = "0dp"
      android:layout_weight = "1"
      flip:orientation = "vertical" />
   <TextView
      android:layout_width = "match_parent"
      android:layout_height = "wrap_content"
      android:background = "@android:color/darker_gray"
      android:paddingLeft = "10dp"
      android:text = "@string/footer"
      android:textAppearance = "@android:style/TextAppearance.Large" />
</LinearLayout>
Step 3 − Add the following code to src/MainActivity.java
package info.devexchanges.pageflip;

import android.os.Bundle;
import android.support.v7.app.AppCompatActivity;
import android.view.Menu;

import com.aphidmobile.flip.FlipViewController;

import java.io.BufferedReader;
import java.io.IOException;
import java.io.InputStreamReader;
import java.util.ArrayList;

public class MainActivity extends AppCompatActivity {
   private FlipViewController flipViewController;
   private FlipperAdapter adapter;
   private ArrayList<String> stringArrayList;

   @Override
   protected void onCreate(Bundle savedInstanceState) {
      super.onCreate(savedInstanceState);
      setContentView(R.layout.activity_main);

      flipViewController = (FlipViewController)findViewById(R.id.flip_view);
      stringArrayList = new ArrayList<>();
      readDataFromAssets();

      //create and attach adapter to flipper view
      adapter = new FlipperAdapter(this, stringArrayList);
      flipViewController.setAdapter(adapter);
   }
   private void readDataFromAssets() {
      BufferedReader reader = null;
      try {
         reader = new BufferedReader(new InputStreamReader(
            getAssets().open("loremipsum.txt")));

         String line;
         while ((line = reader.readLine()) != null) {
            stringArrayList.add(line);
         }
      } catch (IOException e) {
         e.printStackTrace();
      } finally {
         if (reader != null) {
            try {
               reader.close();
            } catch (IOException e) {
               e.printStackTrace();
            }
         }
      }
   }
}
Step 4 − Add the following code to src/FlipViewAdapter.java
package info.devexchanges.pageflip;

import android.app.Activity;
import android.support.v7.app.AppCompatActivity;
import android.view.LayoutInflater;
import android.view.View;
import android.view.ViewGroup;
import android.widget.BaseAdapter;
import android.widget.ImageView;
import android.widget.TextView;

import java.util.List;

public class FlipperAdapter extends BaseAdapter {
   private AppCompatActivity appCompatActivity;
   private List<String> strings;
   private int[] drawableIds = {
      R.mipmap.black_cat,
      R.mipmap.cat,
      R.mipmap.cat_2,
      R.mipmap.cat_3,
      R.mipmap.cute_kittens,
      R.mipmap.cute_white_kitten,
      R.mipmap.explorer_cat,
      R.mipmap.funny_cat,
      R.mipmap.happy_caturday
   };
   public FlipperAdapter(AppCompatActivity appCompatActivity, List<String> strings) {
      super();
      this.strings = strings;
      this.appCompatActivity = appCompatActivity;
   }

   @Override
   public int getCount() {
      return strings.size();
   }

   @Override
   public String getItem(int position) {
      return strings.get(position);
   }

   @Override
   public long getItemId(int position) {
      return strings.indexOf(getItem(position));
   }

   @Override
   public View getView(int position, View convertView, ViewGroup parent) {
      ViewHolder holder;
      LayoutInflater inflater = (LayoutInflater)
         appCompatActivity.getSystemService(Activity.LAYOUT_INFLATER_SERVICE);

      // If holder not exist then locate all view from UI file.
      if (convertView == null) {
         // inflate UI from XML file
         convertView = inflater.inflate(R.layout.item_page, parent, false);

         // get all UI view
         holder = new ViewHolder(convertView);

         // set tag for holder
         convertView.setTag(holder);
      } else {
         // if holder created, get tag from view
         holder = (ViewHolder) convertView.getTag();
      }
      holder.textView.setText(getItem(position));
      holder.imageView.setImageResource(drawableIds[position]);

      return convertView;
   }
   private static class ViewHolder {
      private TextView textView;
      private ImageView imageView;

      public ViewHolder(View v) {
         imageView = (ImageView)v.findViewById(R.id.image);
         textView = (TextView) v.findViewById(R.id.text);
      }
   }
}
Step 5 − Add the following code to res/layout/item_page.xml.xml.
<ScrollView
   xmlns:android =" http://schemas.android.com/apk/res/android"
   android:layout_width = "match_parent"
   android:layout_height = "match_parent">
   <LinearLayout
      android:layout_width = "match_parent"
      android:layout_height = "wrap_content"
      android:orientation = "vertical">
      <ImageView
         android:id = "@+id/image"
         android:layout_width = "200dp"
         android:layout_height = "200dp"
         android:layout_gravity = "center"
         android:layout_marginTop = "10dp"
         android:contentDescription = "@string/app_name"
         android:scaleType = "centerCrop" />
      <TextView
         android:id = "@+id/text"
         android:padding = "10dp"
         android:layout_width = "match_parent"
         android:layout_height = "wrap_content"
         android:textAppearance = "?android:attr/textAppearanceMediumInverse"
         android:textColor = "@android:color/black" />
   </LinearLayout>
</ScrollView>
Step 6 − Add the following code to manifest.xml
<?xml version = "1.0" encoding = "utf-8"?>
<manifest xmlns:android = "http://schemas.android.com/apk/res/android"
   package = "myapplication.example.com.myapplication">
   <uses-permission android:name = "android.permission.INTERNET" ></uses-permission>
   <application
      android:allowBackup = "true"
      android:icon = "@mipmap/ic_launcher"
      android:label = "@string/app_name"
      android:supportsRtl = "true"
      android:theme = "@style/AppTheme">
      <activity android:name = ".MainActivity">
         <intent-filter>
            <action android:name = "android.intent.action.MAIN" />
            <category android:name = "android.intent.category.LAUNCHER"/>
         </intent-filter>
      </activity>
      <activity android:name = ".VideoViewActivity" />

   </application>
</manifest>
Step 7 − Add the following code to build.gradle
apply plugin: 'com.android.application'

android {
   compileSdkVersion 23
   buildToolsVersion "23.0.1"

   defaultConfig {
      applicationId "info.devexchanges.pageflip"
      minSdkVersion 14
      targetSdkVersion 23
      versionCode 1
      versionName "1.0"
   }
   buildTypes {
      release {
         minifyEnabled false
         proguardFiles getDefaultProguardFile('proguard-android.txt'),
         'proguard-rules.pro'
      }
   }
}
dependencies {
   compile fileTree(dir: 'libs', include: ['*.jar'])
   testCompile 'junit:junit:4.12'
   compile 'com.android.support:appcompat-v7:23.1.0'
   compile project(':aphidFlipViewLibrary')
}
Let's try to run your application. I assume you have connected your actual Android Mobile device with your computer. To run the app from android studio, open one of your project's activity files and click Run icon from the toolbar. Select your mobile device as an option and then check your mobile device which will display your default screen −
Download source code here
Advanced Android - Ken Burns effect
when you watching TV programs like documentary films, you notice that in some scenes, a photo was zooming carefully. This technology is called Ken Burns effect
Example
This example demostrate about how to integrate Android Ken Burns effect.
Step 1 − Create a new project in Android Studio, go to File ⇒ New Project and fill all required details to create a new project.
Step 2 − Add the following code to res/layout/activity_main.xml.
<?xml version = "1.0" encoding = "utf-8"?>
<RelativeLayout xmlns:android = "http://schemas.android.com/apk/res/android"
   xmlns:tools = "http://schemas.android.com/tools"
   android:layout_width = "match_parent"
   android:layout_height = "match_parent"
   android:paddingBottom = "@dimen/activity_vertical_margin"
   android:paddingLeft = "@dimen/activity_horizontal_margin"
   android:paddingRight = "@dimen/activity_horizontal_margin"
   android:paddingTop = "@dimen/activity_vertical_margin"
   tools:context = ".MainActivity">
   <com.flaviofaria.kenburnsview.KenBurnsView
      android:id = "@+id/image"
      android:layout_width = "match_parent"
      android:layout_height = "wrap_content"
      android:src = "@drawable/abcd" />
</RelativeLayout>
Step 3 − Add the following code to src/MainActivity.java
package myapplication.example.com.myapplication;

import android.os.Bundle;
import android.support.v7.app.AppCompatActivity;
import android.view.Menu;
import android.view.MenuInflater;
import android.view.MenuItem;
import android.view.animation.AccelerateDecelerateInterpolator;
import android.widget.Toast;

import com.flaviofaria.kenburnsview.KenBurnsView;
import com.flaviofaria.kenburnsview.RandomTransitionGenerator;
import com.flaviofaria.kenburnsview.Transition;


public class MainActivity extends AppCompatActivity {
   private KenBurnsView kenBurnsView;
   private boolean isPlay = true;

   @Override
   protected void onCreate(Bundle savedInstanceState) {
      super.onCreate(savedInstanceState);
      setContentView(R.layout.activity_main);
      kenBurnsView = (KenBurnsView) findViewById(R.id.image);

      AccelerateDecelerateInterpolator ACCELERATE_DECELERATE = new
         AccelerateDecelerateInterpolator();

      RandomTransitionGenerator generator = new
         RandomTransitionGenerator(5000, ACCELERATE_DECELERATE);

      kenBurnsView.setTransitionGenerator(generator);
      //set new transition on kenburns view

      kenBurnsView.setTransitionListener(onTransittionListener());
   }

   private KenBurnsView.TransitionListener onTransittionListener() {
      return new KenBurnsView.TransitionListener() {
         @Override
         public void onTransitionStart(Transition transition) {
            Toast.makeText(MainActivity.this, "start", Toast.LENGTH_SHORT).show();
         }
         @Override
         public void onTransitionEnd(Transition transition) {
            Toast.makeText(MainActivity.this, "end", Toast.LENGTH_SHORT).show();
         }
      };
   }

   @Override
   public boolean onCreateOptionsMenu(Menu menu) {
      MenuInflater inflater=getMenuInflater();
      inflater.inflate(R.menu.menu_main, menu);
      return true;
   }

   @Override
   public boolean onOptionsItemSelected(MenuItem item) {
      if (item.getItemId() == R.id.play) {
         if (isPlay) {
            kenBurnsView.pause();
            isPlay = false;
         } else {
            kenBurnsView.resume();
            isPlay = true;
         }
      }
      return super.onOptionsItemSelected(item);
   }
}
Step 4 − Add the following code to menu_main.xml
<?xml version = "1.0" encoding = "utf-8"?>
<menu xmlns:android = "http://schemas.android.com/apk/res/android"
   xmlns:app = "http://schemas.android.com/apk/res-auto">
   <item
      android:id = "@+id/play"
      android:title = "@string/app_name"
      app:showAsAction = "always" />
</menu>
Step 5 − Add the following code to build.gradle.
dependencies {
   compile fileTree(dir: 'libs', include: ['*.jar'])
   testCompile 'junit:junit:4.12'
   compile 'com.android.support:appcompat-v7:24.2.1'
   compile 'com.flaviofaria:kenburnsview:1.0.6'
}
Step 6 − No need to change manifest.xml
Let's try to run your application. I assume you have connected your actual Android Mobile device with your computer. To run the app from android studio, open one of your project's activity files and click Run icon from the toolbar. Select your mobile device as an option and then check your mobile device which will display your default screen −

Advanced Android - Parallax Header
This library will provide you to have Parallax effect on list View
Example
This example demostrate about how to integrate Android Parallax Header.
Step 1 − Create a new project in Android Studio, go to File ⇒ New Project and fill all required details to create a new project.
Step 2 − Add the following code to res/layout/activity_main.xml.
<?xml version = "1.0" encoding = "utf-8"?>
<FrameLayout xmlns:android = "http://schemas.android.com/apk/res/android"
   android:layout_width = "match_parent"
   android:layout_height = "match_parent">
   <ImageView
      android:id = "@+id/header_image_view"
      android:layout_width = "match_parent"
      android:layout_height = "200dp"
      android:background = "@drawable/abcd"
      android:scaleType = "fitCenter" />
   <ListView
      android:id = "@+id/list_view"
      android:layout_width = "match_parent"
      android:layout_height = "wrap_content"
      android:scrollbars = "none"/>
   <TextView
      android:id = "@+id/header_text"
      android:layout_width = "match_parent"
      android:layout_height = "40dp"
      android:background = "#009900"
      android:gravity = "center_vertical"
      android:padding = "10dp"
      android:text = "header"
      android:textColor = "@android:color/white"
      android:textStyle = "bold" />
</FrameLayout>
Step 3 − Add the following code to src/MainActivity.java
package myapplication.example.com.myapplication;

import android.annotation.SuppressLint;
import android.content.Context;
import android.os.Bundle;
import android.support.v7.app.AppCompatActivity;
import android.view.LayoutInflater;
import android.view.View;

import android.widget.AbsListView;
import android.widget.ArrayAdapter;
import android.widget.ListView;
import android.widget.TextView;

import java.util.ArrayList;
import java.util.List;

public class MainActivity extends AppCompatActivity {
   private TextView headerText;
   private ListView listView;
   private View headerView;
   private View headerSpace;

   @Override
   protected void onCreate(Bundle savedInstanceState) {
      super.onCreate(savedInstanceState);
      setContentView(R.layout.activity_main);

      listView = (ListView) findViewById(R.id.list_view);
      headerView = findViewById(R.id.header_image_view);
      headerText = (TextView) findViewById(R.id.header_text);

      setListViewHeader();
      setListViewData();

      // Handle list View scroll events
      listView.setOnScrollListener(onScrollListener());
   }

   private void setListViewHeader() {
      LayoutInflater inflater = (LayoutInflater) getSystemService(
         Context.LAYOUT_INFLATER_SERVICE);

      @SuppressLint("InflateParams") View listHeader = inflater.inflate(
         R.layout.listview_header, null, false);

      headerSpace = listHeader.findViewById(R.id.header_space);
      listView.addHeaderView(listHeader);
   }

   private void setListViewData() {
      List<String> modelList = new ArrayList<>();
      for (int i = 0; i < 20; i++) {
         modelList.add("Item " + (i+1));
      }
      ArrayAdapter<String> adapter = new ArrayAdapter<>(
         this, R.layout.item_listview, R.id.item, modelList);

      listView.setAdapter(adapter);
   }

   private AbsListView.OnScrollListener onScrollListener () {
      return new AbsListView.OnScrollListener() {
         @Override
         public void onScrollStateChanged(AbsListView view, int scrollState) {
         }

         @Override
         public void onScroll(AbsListView view, int firstVisibleItem,
            int visibleItemCount, int totalItemCount) {

            // Check if the first item is already reached to top
            if (listView.getFirstVisiblePosition() == 0) {
               View firstChild = listView.getChildAt(0);
               int topY = 0;

               if (firstChild != null) {
                  topY = firstChild.getTop();
               }
               int headerTopY = headerSpace.getTop();
               headerText.setY(Math.max(0, headerTopY + topY));

               // Set the image to scroll half of the amount that of ListView
               headerView.setY(topY * 0.5f);
            }
         }
      };
   }
}
Step 4 − Add the following code to res/layout/item_listview.xml
<?xml version = "1.0" encoding = "utf-8"?>
<LinearLayout xmlns:android = "http://schemas.android.com/apk/res/android"
   android:layout_width = "match_parent"
   android:layout_height = "wrap_content">
   <TextView
      android:id = "@+id/item"
      android:layout_width = "match_parent"
      android:layout_height = "wrap_content"
      android:background = "@android:color/white"
      android:gravity = "center_vertical"
      android:padding = "8dp" />
</LinearLayout>
Step 5 − Add the following code to res/layout/listview_header.xml.
<?xml version = "1.0" encoding = "utf-8"?>
<LinearLayout xmlns:android = "http://schemas.android.com/apk/res/android"
   android:layout_width = "match_parent"
   android:layout_height = "match_parent"
   android:orientation = "vertical">
   <Space
      android:layout_width = "match_parent"
      android:layout_height = "200dp" />
   <Space
      android:id = "@+id/header_space"
      android:layout_width = "match_parent"
      android:layout_height = "40dp" />
</LinearLayout>
Step 6 − No need to changemanifest.xml
Let's try to run your application. I assume you have connected your actual Android Mobile device with your computer. To run the app from android studio, open one of your project's activity files and click Run icon from the toolbar. Select your mobile device as an option and then check your mobile device which will display your default screen −
Advanced Android - Borderless Dialog
This example implements the way to make this dialog style through using DialogFragment
Example
This example demostrate about how to integrate Borderless Dialog.
Step 1 − Create a new project in Android Studio, go to File ⇒ New Project and fill all required details to create a new project.
Step 2 − Add the following code to res/layout/activity_main.xml.
<?xml version = "1.0" encoding = "utf-8"?>
<RelativeLayout xmlns:android = "http://schemas.android.com/apk/res/android"
   xmlns:tools = "http://schemas.android.com/tools"
   android:layout_width = "match_parent"
   android:layout_height = "match_parent"
   android:paddingBottom = "@dimen/activity_vertical_margin"
   android:paddingLeft = "@dimen/activity_horizontal_margin"
   android:paddingRight = "@dimen/activity_horizontal_margin"
   android:paddingTop = "@dimen/activity_vertical_margin"
   tools:context = ".MainActivity">
   <Button
      android:id = "@+id/btn_dialog"
      android:text = "show Borderless Dialog"
      android:layout_centerInParent = "true"
      android:layout_width = "match_parent"
      android:layout_height = "wrap_content" />
</RelativeLayout>
Step 3 − Add the following code to src/MainActivity.java
package myapplication.example.com.myapplication;

import android.support.v7.app.AppCompatActivity;
import android.os.Bundle;
import android.view.View;
import android.widget.Button;

public class MainActivity extends AppCompatActivity {
   @Override
   protected void onCreate(Bundle savedInstanceState) {
      super.onCreate(savedInstanceState);
      setContentView(R.layout.activity_main);

      Button button = (Button) findViewById(R.id.btn_dialog);
      button.setOnClickListener(new View.OnClickListener() {
         @Override
         public void onClick(View view) {
            BorderlessDialogFragment dFragment = new BorderlessDialogFragment();
            dFragment.setCancelable(false); //don't close when touch outside
            dFragment.show(getSupportFragmentManager(), "Dialog Fragment");
         }
      });
   }
}
Step 4 − Add the following code to src/BorderlessDialogFragment.java
package myapplication.example.com.myapplication;

import android.os.Bundle;
import android.support.v4.app.DialogFragment;
import android.view.LayoutInflater;
import android.view.View;
import android.view.ViewGroup;
import android.widget.ImageView;
import android.widget.Toast;

public class BorderlessDialogFragment extends DialogFragment {
   @Override
   public void onCreate(Bundle savedInstanceState) {
      super.onCreate(savedInstanceState);
      setStyle(DialogFragment.STYLE_NO_TITLE, 0);
   }

   @Override
   public View onCreateView(LayoutInflater inflater, ViewGroup container,
      Bundle savedInstanceState) {

      return inflater.inflate(R.layout.layout_dialog, container);
   }

   @Override
   public void onViewCreated(View view, Bundle savedInstanceState) {
      super.onViewCreated(view, savedInstanceState);

      ImageView btnPlus = (ImageView)view.findViewById(R.id.btn_plus);
      ImageView btnOK = (ImageView)view.findViewById(R.id.btn_ok);
      ImageView btnClose = (ImageView)view.findViewById(R.id.btn_close);

      btnOK.setOnClickListener(onClickListener("Button OK clicked!"));
      btnPlus.setOnClickListener(onClickListener("Button Plus Clicked!"));
      btnClose.setOnClickListener(onCloseClickListener());
   }

   private View.OnClickListener onCloseClickListener() {
      return new View.OnClickListener() {
         @Override
         public void onClick(View v) {
            BorderlessDialogFragment.this.dismiss();
         }
      };
   }

   private View.OnClickListener onClickListener(final String msg) {
      return new View.OnClickListener() {
         @Override
         public void onClick(View v) {
            Toast.makeText(getActivity(), msg, Toast.LENGTH_SHORT).show();
         }
      };
   }
}
Step 5 − Add the following code to res/layout/layout_dialog.xml.
<?xml version = "1.0" encoding =" utf-8"?>
<FrameLayout xmlns:android = "http://schemas.android.com/apk/res/android"
   android:layout_width = "match_parent"
   android:layout_height = "wrap_content">
   <FrameLayout
      android:id = "@+id/fr_1"
      android:layout_width = "wrap_content"
      android:layout_height = "wrap_content">
      <ImageView
         android:layout_width = "270dp"
         android:layout_height = "400dp"
         android:background = "@drawable/abcd"
         android:contentDescription = "@string/app_name"
         android:scaleType = "centerCrop" />
      <ImageView
         android:id = "@+id/btn_close"
         android:layout_width = "wrap_content"
         android:layout_height = "wrap_content"
         android:layout_gravity = "end"
         android:contentDescription = "@string/app_name"
         android:src = "@drawable/abcde" />
   </FrameLayout>
   <FrameLayout
      android:layout_width = "270dp"
      android:layout_height = "60dp"
      android:layout_gravity = "bottom"
      android:background = "#f2f2f2">
      <ImageView
         android:id = "@+id/btn_ok"
         android:layout_width = "wrap_content"
         android:layout_height = "wrap_content"
         android:layout_gravity = "center_vertical|start"
         android:layout_marginLeft = "50dp"
         android:layout_marginStart = "50dp"
         android:contentDescription = "@string/app_name"
         android:src = "@drawable/abc" />
      <ImageView
         android:id = "@+id/btn_plus"
         android:layout_width = "wrap_content"
         android:layout_height = "wrap_content"
         android:layout_gravity = "center_vertical|end"
         android:layout_marginEnd = "50dp"
         android:layout_marginRight = "50dp"
         android:contentDescription = "@string/app_name"
         android:src = "@drawable/abc" />
   </FrameLayout>
</FrameLayout>
Step 6 − No need to change manifest.xml
Let's try to run your application. I assume you have connected your actual Android Mobile device with your computer. To run the app from android studio, open one of your project's activity files and click Run icon from the toolbar. Select your mobile device as an option and then check your mobile device which will display your default screen −
Advanced Android - Holder View
A way around repeated use of findViewById() is to use the "view holder" design pattern. A ViewHolder object stores each of the component views inside the tag field of the Layout, so you can immediately access them without the need to look them up repeatedly.
Example
This example demostrate about how to integrate Android Snackbar.
Step 1 − Create a new project in Android Studio, go to File ⇒ New Project and fill all required details to create a new project.
Step 2 − Add the following code to res/layout/activity_main.xml.
<?xml version = "1.0" encoding = "utf-8"?>
<RelativeLayout xmlns:android = "http://schemas.android.com/apk/res/android"
   xmlns:tools = "http://schemas.android.com/tools"
   android:layout_width = "match_parent"
   android:layout_height = "match_parent"
   android:paddingBottom = "@dimen/activity_vertical_margin"
   android:paddingLeft = "@dimen/activity_horizontal_margin"
   android:paddingRight = "@dimen/activity_horizontal_margin"
   android:paddingTop = "@dimen/activity_vertical_margin">
   <ListView
      android:id = "@+id/list_view"
      android:layout_width = "match_parent"
      android:layout_height = "wrap_content"
      android:scrollbars = "none" />
</RelativeLayout>
Step 3 − Add the following code to src/MainActivity.java
package myapplication.example.com.myapplication;

import android.os.Bundle;
import android.os.Handler;
import android.support.v7.app.AppCompatActivity;
import android.util.Log;
import android.view.Menu;
import android.view.MenuItem;
import android.widget.ArrayAdapter;
import android.widget.ListView;

import org.json.JSONArray;
import org.json.JSONException;
import org.json.JSONObject;

import java.util.ArrayList;

public class MainActivity extends AppCompatActivity {
   private ListView listView;
   private ArrayList<String> strings;
   private ArrayAdapter<String> adapter;

   @Override
   protected void onCreate(Bundle savedInstanceState) {
      super.onCreate(savedInstanceState);
      setContentView(R.layout.activity_main);

      listView = (ListView)findViewById(R.id.list_view);
      strings = new ArrayList<>();

      for (int i = 0; i < 5; i++) {
         strings.add("");
      }
      adapter = new ListViewAdapter(this, R.layout.item_listview, strings, false);
      listView.setAdapter(adapter);
   }

   private void loadJSONDataFromURL() {
      final Handler handler = new Handler();
      handler.postDelayed(new Runnable() {
         @Override
         public void run() {
            new GetJSONTask(MainActivity.this).execute();
         }
      }, 1000);
      Log.i("Main", "load data");
   }

   //parsing json after getting from Internet
   public void parseJsonResponse(String result) {
      strings.clear();
      try {
         JSONObject json = new JSONObject(result);
         JSONArray jArray = new JSONArray(json.getString("message"));
         for (int i = 0; i < jArray.length(); i++) {
            JSONObject jObject = jArray.getJSONObject(i);
            strings.add(jObject.getString("name"));
         }
         adapter.notifyDataSetChanged();
         Log.i("Main", "finish load data");
      } catch (JSONException e) {
         e.printStackTrace();
      }
   }

   @Override
   public boolean onCreateOptionsMenu(Menu menu) {
      getMenuInflater().inflate(R.menu.main, menu);
      return true;
   }

   @Override
   public boolean onOptionsItemSelected(MenuItem item) {
      if (item.getItemId() == R.id.load) {
         adapter = new ListViewAdapter(this, R.layout.item_listview, strings, true);
         listView.setAdapter(adapter);
         loadJSONDataFromURL();
      }
      return super.onOptionsItemSelected(item);
   }
}
Step 4 − Add the following code to src/ListViewAdapter.java
package myapplication.example.com.myapplication;

import android.app.Activity;
import android.view.LayoutInflater;
import android.view.View;
import android.view.ViewGroup;
import android.widget.ArrayAdapter;
import android.widget.ImageView;
import android.widget.TextView;

import com.squareup.picasso.Picasso;

import java.util.ArrayList;

public class ListViewAdapter extends ArrayAdapter<String> {
   private Activity activity;
   private boolean isLoadImage;
   private final static String IMAGE_URL = "
      https://www.tutorialspoint.com/green/images/logo.png";

   public ListViewAdapter(Activity context, int resource,
      ArrayList<String> objects, boolean isLoadImage) {

      super(context, resource, objects);
      this.activity = context;
      this.isLoadImage = isLoadImage;
   }

   @Override
   public View getView(int position, View convertView, ViewGroup parent) {
      ViewHolder holder;
      LayoutInflater inflater = (LayoutInflater)
         activity.getSystemService(Activity.LAYOUT_INFLATER_SERVICE);

      // If holder not exist then locate all view from UI file.
      if (convertView == null) {
         // inflate UI from XML file
         convertView = inflater.inflate(R.layout.item_listview, parent, false);

         // get all UI view
         holder = new ViewHolder(convertView);

         // set tag for holder
         convertView.setTag(holder);
      }  else {
         // if holder created, get tag from view
         holder = (ViewHolder) convertView.getTag();
      }
      if (!getItem(position).equals("")) {
         holder.countryName.setText(getItem(position));
      }
      if (isLoadImage) {
         Picasso.with(activity).load(IMAGE_URL).into(holder.imageView);
      }
      return convertView;
   }

   private class ViewHolder{
      private ImageView imageView;
      private TextView countryName;

      public ViewHolder (View view) {
         imageView = (ImageView)view.findViewById(R.id.image_view);
         countryName = (TextView)view.findViewById(R.id.text_view);
      }
   }
}
Step 5 − Add the following code to res/layout/item_listview.xml.
<?xml version = "1.0" encoding = "utf-8"?>
<RelativeLayout xmlns:android = "http://schemas.android.com/apk/res/android"
   android:layout_width = "match_parent"
   android:layout_height = "wrap_content"
   android:orientation = "horizontal"
   android:paddingBottom = "@dimen/activity_horizontal_margin">
   <com.elyeproj.loaderviewlibrary.LoaderImageView
      android:id = "@+id/image_view"
      android:layout_width = "100dp"
      android:layout_height = "100dp"
      android:layout_centerVertical = "true" />
   <com.elyeproj.loaderviewlibrary.LoaderTextView
      android:id = "@+id/text_view"
      android:layout_width = "match_parent"
      android:layout_height = "wrap_content"
      android:layout_centerInParent = "true"
      android:layout_marginLeft = "@dimen/activity_horizontal_margin"
      android:layout_toRightOf = "@id/image_view"
      android:gravity = "left"
      android:maxHeight = "120dp" />
</RelativeLayout>
Step 6 − Add the following code to src/ListViewAdapter.java
package myapplication.example.com.myapplication;

import android.os.AsyncTask;
import android.util.Log;

import java.io.BufferedInputStream;
import java.io.BufferedReader;
import java.io.InputStream;
import java.io.InputStreamReader;
import java.net.HttpURLConnection;
import java.net.URL;

public class GetJSONTask extends AsyncTask<Void, Void, String> {
   private HttpURLConnection urlConnection;
   private final String JSON_URL = "https://gist.githubusercontent.com/DevExchanges/57430306b4a060eee19a4d845b07a478/raw/e8c05e8ed7e83e7cc3d00d840cca0558c125330d/example.json";
   private MainActivity activity;
   public GetJSONTask(MainActivity activity) {
      this.activity = activity;
   }

   @Override
   protected String doInBackground(Void... params) {
      Log.i("Async", "doInBackground");
      StringBuilder result = new StringBuilder();
      try {
         URL url = new URL(JSON_URL);
         urlConnection = (HttpURLConnection) url.openConnection();
         InputStream in = new BufferedInputStream(urlConnection.getInputStream());

         BufferedReader reader = new BufferedReader(new InputStreamReader(in));
         String line;
         while ((line = reader.readLine()) != null) {
            result.append(line);
         }
      } catch (Exception e) {
         e.printStackTrace();
      } finally {
         urlConnection.disconnect();
      }
      return result.toString();
   }

   @Override
   protected void onPostExecute(String result) {
      Log.i("Async", "onPostExecute");
      activity.parseJsonResponse(result);
   }
}
Step 7 − Add the following code to manifest.xml
<?xml version = "1.0" encoding = "utf-8"?>
<manifest xmlns:android="http://schemas.android.com/apk/res/android"
   package = "myapplication.example.com.myapplication">
   <uses-permission android:name = "android.permission.INTERNET"/>
   <application
      android:allowBackup = "true"
      android:icon = "@mipmap/ic_launcher"
      android:label = "@string/app_name"
      android:supportsRtl = "true"
      android:theme = "@style/AppTheme">
      <activity android:name = ".MainActivity">
         <intent-filter>
            <action android:name = "android.intent.action.MAIN" />
            <category android:name = "android.intent.category.LAUNCHER" />
         </intent-filter>
      </activity>

   </application>
</manifest>
Step 8 − Add the following code to build.gradle
dependencies {
   compile fileTree(dir: 'libs', include: ['*.jar'])
   testCompile 'junit:junit:4.12'
   compile 'com.android.support:appcompat-v7:24.2.1'
   compile 'com.elyeproj.libraries:loaderviewlibrary:1.0.3'
   compile 'com.squareup.picasso:picasso:2.5.2'
}
Let's try to run your application. I assume you have connected your actual Android Mobile device with your computer. To run the app from android studio, open one of your project's activity files and click Run icon from the toolbar. Select your mobile device as an option and then check your mobile device which will display your default screen −
Scrolling TextView by Ticker
Robinhood team had written a library to drawing sparkline in Android applicatio
Example
This example demostrate about how to integrate Android Scrolling TextView by Ticker.
Step 1 − Create a new project in Android Studio, go to File ⇒ New Project and fill all required details to create a new project.
Step 2 − Add the following code to res/layout/activity_main.xml.
<?xml version = "1.0" encoding = "utf-8"?>
<RelativeLayout xmlns:android = "http://schemas.android.com/apk/res/android"
   xmlns:app = "http://schemas.android.com/apk/res-auto"
   xmlns:tools = "http://schemas.android.com/tools"
   android:layout_width = "match_parent"
   android:layout_height = "match_parent"
   tools:context = "info.devexchanges.scrollingtextview.MainActivity">
   <com.robinhood.ticker.TickerView
      android:id = "@+id/ticker_usd"
      android:layout_width = "wrap_content"
      android:layout_height = "wrap_content"
      android:layout_centerInParent = "true"
      android:layout_marginTop = "@dimen/activity_vertical_margin"
      android:background = "#243D99"
      android:padding = "@dimen/activity_horizontal_margin"
      app:ticker_textColor = "@android:color/white"
      app:ticker_textSize = "20sp" />
   <com.robinhood.ticker.TickerView
      android:id = "@+id/ticker_number"
      android:layout_width = "wrap_content"
      android:layout_height = "wrap_content"
      android:layout_above = "@+id/ticker_usd"
      android:layout_centerInParent = "true"
      android:background = "@color/colorPrimary"
      android:padding = "@dimen/activity_horizontal_margin"
      app:ticker_textColor = "@android:color/white"
      app:ticker_textSize = "20sp" />
   <com.robinhood.ticker.TickerView
      android:id = "@+id/ticker_text"
      android:layout_width = "wrap_content"
      android:layout_height = "wrap_content"
      android:layout_below = "@id/ticker_usd"
      android:layout_centerInParent = "true"
      android:layout_marginTop = "@dimen/activity_vertical_margin"
      android:background = "#0099ff"
      android:padding = "@dimen/activity_horizontal_margin"
      app:ticker_textColor = "@android:color/white"
      app:ticker_textSize = "20sp" />
</RelativeLayout>
Step 3 − Add the following code to src/MainActivity.java
package myapplication.example.com.myapplication;

import android.os.Handler;
import android.support.v7.app.AppCompatActivity;
import android.os.Bundle;

import com.robinhood.ticker.TickerUtils;
import com.robinhood.ticker.TickerView;

import java.text.DecimalFormat;
import java.text.NumberFormat;
import java.util.Random;

public class MainActivity extends AppCompatActivity {
   private TickerView tickerView, tickerUSD, tickerText;
   private char[] alphabetlist;

   @Override
   protected void onCreate(Bundle savedInstanceState) {
      super.onCreate(savedInstanceState);
      setContentView(R.layout.activity_main);

      tickerView = (TickerView) findViewById(R.id.ticker_number);
      tickerUSD = (TickerView) findViewById(R.id.ticker_usd);
      tickerText = (TickerView) findViewById(R.id.ticker_text);

      alphabetlist = new char[53];
      alphabetlist[0] = TickerUtils.EMPTY_CHAR;
      for (int i = 0; i < 2; i++) {
         for (int j = 0; j < 26; j++) {
            // Add all lowercase characters first, then add the uppercase characters.
            alphabetlist[1 + i * 26 + j] = (char) ((i == 0) ? j + 97 : j + 65);
         }
      }
      tickerView.setCharacterList(TickerUtils.getDefaultNumberList());
      tickerUSD.setCharacterList(TickerUtils.getDefaultListForUSCurrency());
      tickerText.setCharacterList(alphabetlist);

      tickerView.setText("2000");
      tickerUSD.setText("$5,200");
      setRandomText();
      setRandomCurrency();
   }
   public void setRandomText() {
      final Handler handler = new Handler();
      handler.postDelayed(new Runnable() {
         public void run() {
            runOnUiThread(new Runnable() {
               @Override
               public void run() {
                  Random r = new Random();
                  int low = 1000;
                  int high = 10000;
                  final int result = r.nextInt(high - low) + low;
                  tickerView.setText("" + result);
                  handler.postDelayed(this, 1500);
               }
            });
         }
      }, 2000);
   }

   public void setRandomCurrency() {
      final Handler handler = new Handler();
      handler.postDelayed(new Runnable() {
         public void run() {
            runOnUiThread(new Runnable() {
               @Override
               public void run() {
                  Random r = new Random();
                  int low = 1000;
                  int high = 10000;
                  final int result = r.nextInt(high - low) + low;
                  NumberFormat formatter = new DecimalFormat("#,###,###");
                  String usdString = formatter.format(Integer.parseInt(
                     String.valueOf(result)));

                  tickerUSD.setText("$" + usdString);
                  tickerText.setText(generateChars(r, alphabetlist, 6));
                  handler.postDelayed(this, 1500);
               }
            });
         }
      }, 2000);
   }

   private String generateChars(Random random, char[] list, int numDigits) {
      final char[] result = new char[numDigits];
      for (int i = 0; i < numDigits; i++) {
         result[i] = list[random.nextInt(list.length)];
      }
      return new String(result);
   }
}
Step 4 − Add the following code to build.gradle
dependencies {
   compile fileTree(dir: 'libs', include: ['*.jar'])
   testCompile 'junit:junit:4.12'
   compile 'com.android.support:appcompat-v7:24.2.1'
   compile 'com.robinhood.ticker:ticker:1.0.0'
}
Step 5 − No need to changemanifest.xml
Let's try to run your application. I assume you have connected your actual Android Mobile device with your computer. To run the app from android studio, open one of your project's activity files and click Run icon from the toolbar. Select your mobile device as an option and then check your mobile device which will display your default screen −
Advanced Android - Floating Action Menu
Floating action menu is new concept which is used in mobile apps and websites. Nowadays some popular sites and apps have used floating action menu including inbox
Example
This example demostrate about how to integrate Android Floating Action Menu.
Step 1 − Create a new project in Android Studio, go to File ⇒ New Project and fill all required details to create a new project.
Step 2 − Add the following code to res/layout/activity_main.xml.
<?xml version = "1.0" encoding = "utf-8"?>
<RelativeLayout xmlns:android = "http://schemas.android.com/apk/res/android"
   xmlns:fab = "http://schemas.android.com/apk/res-auto"
   android:layout_width = "match_parent"
   android:layout_height = "match_parent"
   android:orientation = "vertical">
   <TextView
      android:layout_width = "match_parent"
      android:layout_height = "wrap_content"
      android:padding = "@dimen/activity_horizontal_margin"
      android:text = "tutorialspoint" />
   <com.github.clans.fab.FloatingActionMenu
      android:id = "@+id/fab_menu"
      android:layout_width = "match_parent"
      android:layout_height = "match_parent"
      android:layout_alignParentBottom = "true"
      android:layout_alignParentRight = "true"
      android:paddingBottom = "@dimen/activity_horizontal_margin"
      android:paddingRight = "@dimen/activity_horizontal_margin"
      fab:menu_backgroundColor = "#ccffffff"
      fab:menu_fab_label = "Choose an action"
      fab:fab_colorNormal = "#DA4336"
      fab:fab_colorPressed = "#E75043"
      fab:fab_colorRipple = "#99FFFFFF"
      fab:fab_showShadow = "true"
      fab:menu_labels_colorNormal = "#333333"
      fab:menu_labels_colorPressed = "#444444"
      fab:menu_labels_colorRipple = "#66FFFFFF"
      fab:menu_labels_showShadow = "true"
      fab:menu_labels_maxLines = "-1"
      fab:menu_labels_position = "left"
      fab:menu_openDirection = "up"
      fab:fab_shadowColor = "#66000000"
      fab:menu_labels_ellipsize = "end"
      fab:menu_labels_singleLine = "true">
      <com.github.clans.fab.FloatingActionButton
         android:id = "@+id/fab1"
         android:layout_width = "wrap_content"
         android:layout_height = "wrap_content"
         android:src = "@android:drawable/ic_menu_edit"
         fab:fab_label = "Edit an item"
         fab:fab_size = "mini" />
      <com.github.clans.fab.FloatingActionButton
         android:id = "@+id/fab2"
         android:layout_width = "wrap_content"
         android:layout_height = "wrap_content"
         android:src = "@android:drawable/ic_menu_add"
         fab:fab_label = "Menu item 2"
         fab:fab_size = "mini" />
      <com.github.clans.fab.FloatingActionButton
         android:id = "@+id/fab3"
         android:layout_width = "wrap_content"
         android:layout_height = "wrap_content"
         android:src = "@android:drawable/ic_menu_delete"
         fab:fab_label = "tutorialspoint"
         fab:fab_size = "mini" />
   </com.github.clans.fab.FloatingActionMenu>
</RelativeLayout>
Step 3 − Add the following code to src/MainActivity.java
package myapplication.example.com.myapplication;

import android.support.v7.app.AppCompatActivity;
import android.os.Bundle;
import android.view.View;
import android.widget.Toast;

import com.github.clans.fab.FloatingActionButton;
import com.github.clans.fab.FloatingActionMenu;

public class MainActivity extends AppCompatActivity {
   private FloatingActionMenu fam;
   private FloatingActionButton fabEdit, fabDelete, fabAdd;

   @Override
   protected void onCreate(Bundle savedInstanceState) {
      super.onCreate(savedInstanceState);
      setContentView(R.layout.activity_main);

      fabAdd = (FloatingActionButton) findViewById(R.id.fab2);
      fabDelete = (FloatingActionButton) findViewById(R.id.fab3);
      fabEdit = (FloatingActionButton) findViewById(R.id.fab1);
      fam = (FloatingActionMenu) findViewById(R.id.fab_menu);

      fam.setOnMenuToggleListener(new FloatingActionMenu.OnMenuToggleListener() {
         @Override
         public void onMenuToggle(boolean opened) {
            if (opened) {
               showToast("Menu is opened");
            } else {
               showToast("Menu is closed");
            }
         }
      });

      //handling each floating action button clicked
      fabDelete.setOnClickListener(onButtonClick());
      fabEdit.setOnClickListener(onButtonClick());
      fabAdd.setOnClickListener(onButtonClick());

      fam.setOnClickListener(new View.OnClickListener() {
         @Override
         public void onClick(View view) {
            if (fam.isOpened()) {
               fam.close(true);
            }
         }
      });
   }

   private View.OnClickListener onButtonClick() {
      return new View.OnClickListener() {
         @Override
         public void onClick(View view) {
            if (view == fabAdd) {
               showToast("Button Add clicked");
            } else if (view == fabDelete) {
               ("Button Delete clicked");
            } else {
               showToast("Button Edit clicked");
            }
            fam.close(true);
         }
      };
   }

   private void showToast(String msg) {
      Toast.makeText(this, msg, Toast.LENGTH_SHORT).show();
   }
}
Step 4 − Add the following code to build.gradle
dependencies {
   compile fileTree(dir: 'libs', include: ['*.jar'])
   testCompile 'junit:junit:4.12'
   compile 'com.android.support:appcompat-v7:24.2.1'
   compile 'com.github.clans:fab:1.6.4'
}
Step 5 − No need to change manifest.xml
Let's try to run your application. I assume you have connected your actual Android Mobile device with your computer. To run the app from android studio, open one of your project's activity files and click Run icon from the toolbar. Select your mobile device as an option and then check your mobile device which will display your default screen −
Spinner Data from Database
This is an example of simple label management module is explained where you can insert new label into SQLite database and spinner will fetch with the set labels from database.
Example
This example demostrate about how to integrate Android Spinner Data from Database.
Step 1 − Create a new project in Android Studio, go to File ⇒ New Project and fill all required details to create a new project.
Step 2 − Add the following code to res/layout/activity_main.xml.
<?xml version = "1.0" encoding = "utf-8"?>
<LinearLayout xmlns:android = "http://schemas.android.com/apk/res/android"
   android:layout_width = "fill_parent"
   android:layout_height = "fill_parent"
   android:orientation = "vertical" >
   <TextView
      android:layout_width = "fill_parent"
      android:layout_height = "wrap_content"
      android:text = "Add New Label"
      android:padding = "8dip" />
   <EditText android:id = "@+id/input_label"
      android:layout_width = "fill_parent"
      android:layout_height = "wrap_content"
      android:layout_marginLeft = "8dip"
      android:layout_marginRight = "8dip"/>
   <Button android:id = "@+id/btn_add"
      android:layout_width = "wrap_content"
      android:layout_height = "wrap_content"
      android:text = "Add Label"
      android:layout_marginLeft = "8dip"
      android:layout_marginTop = "8dip"/>
   <TextView
      android:layout_width = "fill_parent"
      android:layout_height = "wrap_content"
      android:text = "Select Label"
      android:padding = "8dip" />
   <Spinner
      android:id = "@+id/spinner"
      android:layout_width = "fill_parent"
      android:layout_height = "wrap_content"
      android:layout_marginTop = "20dip"
      android:layout_marginLeft = "8dip"
      android:layout_marginRight = "8dip" />
</LinearLayout>
Step 3 − Add the following code to src/MainActivity.java
package myapplication.example.com.myapplication;

import java.util.List;

import android.app.Activity;
import android.content.Context;
import android.os.Bundle;
import android.view.View;
import android.view.inputmethod.InputMethodManager;
import android.widget.AdapterView;
import android.widget.AdapterView.OnItemSelectedListener;
import android.widget.ArrayAdapter;
import android.widget.Button;
import android.widget.EditText;
import android.widget.Spinner;
import android.widget.Toast;

public class MainActivity extends Activity implements OnItemSelectedListener {
   Spinner spinner;
   Button btnAdd;
   EditText inputLabel;

   @Override
   public void onCreate(Bundle savedInstanceState) {
      super.onCreate(savedInstanceState);
      setContentView(R.layout.activity_main);

      spinner = (Spinner) findViewById(R.id.spinner);
      btnAdd = (Button) findViewById(R.id.btn_add);
      inputLabel = (EditText) findViewById(R.id.input_label);
      spinner.setOnItemSelectedListener(this);
      loadSpinnerData();

      btnAdd.setOnClickListener(new View.OnClickListener() {
         @Override
         public void onClick(View arg0) {
            String label = inputLabel.getText().toString();

            if (label.trim().length() > 0) {
               DatabaseHandler db = new DatabaseHandler(getApplicationContext());
               db.insertLabel(label);
               inputLabel.setText("");
               InputMethodManager imm = (InputMethodManager) getSystemService(
                  Context.INPUT_METHOD_SERVICE);

               imm.hideSoftInputFromWindow(inputLabel.getWindowToken(), 0);
               loadSpinnerData();
            } else {
               Toast.makeText(getApplicationContext(), "Please enter label name",
                  Toast.LENGTH_SHORT).show();
            }
         }
      });
   }

   private void loadSpinnerData() {
      DatabaseHandler db = new DatabaseHandler(getApplicationContext());
      List<String> lables = db.getAllLabels();
      ArrayAdapter<String> dataAdapter = new ArrayAdapter<String>(this,
         android.R.layout.simple_spinner_item, lables);

      dataAdapter.setDropDownViewResource(android.R.layout.simple_spinner_dropdown_item);
      spinner.setAdapter(dataAdapter);
   }

   @Override
   public void onItemSelected(AdapterView<?> parent, View view, int position, long id) {
      String label = parent.getItemAtPosition(position).toString();
      Toast.makeText(parent.getContext(), "You selected: " + label,
         Toast.LENGTH_LONG).show();
   }

   @Override
   public void onNothingSelected(AdapterView<?> arg0) {
   }
}
Step 4 − Add the following code to src/DatabaseHandler.java
package myapplication.example.com.myapplication;

import java.util.ArrayList;
import java.util.List;

import android.content.ContentValues;
import android.content.Context;
import android.database.Cursor;
import android.database.sqlite.SQLiteDatabase;
import android.database.sqlite.SQLiteOpenHelper;

public class DatabaseHandler extends SQLiteOpenHelper {
   private static final int DATABASE_VERSION = 1;
   private static final String DATABASE_NAME = "spinnerExample";
   private static final String TABLE_LABELS = "labels";
   private static final String KEY_ID = "id";
   private static final String KEY_NAME = "name";

   public DatabaseHandler(Context context) {
      super(context, DATABASE_NAME, null, DATABASE_VERSION);
   }

   @Override
   public void onCreate(SQLiteDatabase db) {
      String CREATE_CATEGORIES_TABLE = "CREATE TABLE " + TABLE_LABELS + "("
         + KEY_ID + " INTEGER PRIMARY KEY," + KEY_NAME + " TEXT)";
         db.execSQL(CREATE_CATEGORIES_TABLE);
   }

   @Override
   public void onUpgrade(SQLiteDatabase db, int oldVersion, int newVersion) {
      db.execSQL("DROP TABLE IF EXISTS " + TABLE_LABELS);
      onCreate(db);
   }

   public void insertLabel(String label){
      SQLiteDatabase db = this.getWritableDatabase();
      ContentValues values = new ContentValues();
      values.put(KEY_NAME, label);
      db.insert(TABLE_LABELS, null, values);
      db.close(); // Closing database connection
   }

   public List<String> getAllLabels(){
      List<String> labels = new ArrayList<String>();
      String selectQuery = "SELECT  * FROM " + TABLE_LABELS;
      SQLiteDatabase db = this.getReadableDatabase();
      Cursor cursor = db.rawQuery(selectQuery, null);

      if (cursor.moveToFirst()) {
         do {
            labels.add(cursor.getString(1));
         } while (cursor.moveToNext());
      }
      cursor.close();
      db.close();
      return labels;
   }
}
Step 5 − Add the following code to manifest.xml
<?xml version = "1.0" encoding = "utf-8"?>
<manifest xmlns:android = "http://schemas.android.com/apk/res/android"
   package = "myapplication.example.com.myapplication">
   <application
      android:allowBackup = "true"
      android:icon = "@mipmap/ic_launcher"
      android:label = "@string/app_name"
      android:supportsRtl = "true"
      android:theme = "@style/AppTheme">
      <activity android:name = ".MainActivity">
         <intent-filter>
            <action android:name = "android.intent.action.MAIN" />
            <category android:name = "android.intent.category.LAUNCHER" />
         </intent-filter>
      </activity>

   </application>
</manifest>
Let's try to run your application. I assume you have connected your actual Android Mobile device with your computer. To run the app from android studio, open one of your project's activity files and click Run icon from the toolbar. Select your mobile device as an option and then check your mobile device which will display your default screen −
Advanced Android - Flexbox Layout
FlexboxLayout is an android layout manager which brings the similar capabilities to the CSS Flexible Box Layout Module
Example
This example demostrate about how to integrate Android Flexbox Layout.
Step 1 − Create a new project in Android Studio, go to File ⇒ New Project and fill all required details to create a new project.
Step 2 − Add the following code to res/layout/activity_main.xml.
<?xml version = "1.0" encoding = "utf-8"?>
<LinearLayout xmlns:android = "http://schemas.android.com/apk/res/android"
   android:layout_width = "match_parent"
   android:layout_height = "match_parent"
   android:layout_margin = "16dp"
   android:orientation = "vertical">
   <TextView
      android:layout_width = "match_parent"
      android:layout_height = "wrap_content"
      android:padding = "16dp"
      android:text = "Android Flexbox Layout Tutorial with Example" />
   <Button
      android:layout_width = "match_parent"
      android:layout_height = "wrap_content"
      android:onClick = "flexboxLayout1"
      android:text = "Flexbox Layout Example 1" />
</LinearLayout>
Step 3 − Add the following code to src/MainActivity.java
package myapplication.example.com.myapplication;

import android.content.Intent;
import android.os.Bundle;
import android.support.v7.app.AppCompatActivity;
import android.view.View;

public class MainActivity extends AppCompatActivity {
   @Override
   protected void onCreate(Bundle savedInstanceState) {
      super.onCreate(savedInstanceState);
      setContentView(R.layout.activity_main);
   }
   public void flexboxLayout1(View view) {
      Intent intent = new Intent(getApplicationContext(), FlexboxLayoutExampleOne.class);
      startActivity(intent);
   }
}
Step 4 − Add the following code to src/FlexboxLayoutExampleOne.java
package myapplication.example.com.myapplication;

import android.os.Bundle;
import android.support.v7.app.AppCompatActivity;

public class FlexboxLayoutExampleOne extends AppCompatActivity {
   @Override
   protected void onCreate(Bundle savedInstanceState) {
      super.onCreate(savedInstanceState);
      setContentView(R.layout.flexbox_layout1);
   }
}
Step 5 − Add the following code to res/layout/flexbox_layout1.xml.
<?xml version = "1.0" encoding = "utf-8"?>
<com.google.android.flexbox.FlexboxLayout xmlns:android = "
   http://schemas.android.com/apk/res/android"
   xmlns:app = "http://schemas.android.com/apk/res-auto"
   android:id = "@+id/flexboxLayout"
   android:layout_width = "match_parent"
   android:layout_height = "match_parent"
   app:alignContent = "stretch"
   app:alignItems = "stretch"
   app:flexWrap = "wrap">
   <TextView
      android:layout_width = "110dp"
      android:layout_height = "90dp"
      android:background = "#80da2804"
      android:gravity = "center"
      android:text = "1"
      android:textColor = "#fff"
      android:textSize = "30dp"
      android:textStyle = "bold"
      app:layout_flexBasisPercent = "50%" />
   <TextView
      android:layout_width = "90dp"
      android:layout_height = "90dp"
      android:layout_marginLeft = "20dp"
      android:background = "#80da2804"
      android:gravity = "center"
      android:text = "2"
      android:textColor = "#fff"
      android:textSize = "30dp"
      android:textStyle = "bold"
      app:layout_alignSelf = "center" />
   <TextView
      android:layout_width = "160dp"
      android:layout_height = "85dp"
      android:background = "#80da2804"
      android:gravity = "center"
      android:text = "3"
      android:textColor = "#fff"
      android:textSize = "30dp"
      android:textStyle = "bold"
      app:layout_alignSelf = "flex_end" />
</com.google.android.flexbox.FlexboxLayout>
Step 6 − Add the following code to manifest.xml
<?xml version = "1.0" encoding = "utf-8"?>
<manifest xmlns:android = "http://schemas.android.com/apk/res/android"
   package = "myapplication.example.com.myapplication">
   <uses-permission android:name = "android.permission.INTERNET"/>
   <application
      android:allowBackup = "true"
      android:icon = "@mipmap/ic_launcher"
      android:label = "@string/app_name"
      android:supportsRtl = "true"
      android:theme = "@style/AppTheme">
      <activity android:name = ".MainActivity">
         <intent-filter>
            <action android:name = "android.intent.action.MAIN" />
            <category android:name = "android.intent.category.LAUNCHER" />
         </intent-filter>
      </activity>
      <activity android:name=".FlexboxLayoutExampleOne"/>

   </application>
</manifest>
Let's try to run your application. I assume you have connected your actual Android Mobile device with your computer. To run the app from android studio, open one of your project's activity files and click Run icon from the toolbar. Select your mobile device as an option and then check your mobile device which will display your default screen −
Advanced Android - YouTube API
YouTube android API allows you to enable incorporate video playback functionality in your android application
Example
This example demostrate about how to integrate Android YouTube Android API.
Step 1 − Create a new project in Android Studio, go to File ⇒ New Project and fill all required details to create a new project.
Step 2 − Add the following code to res/layout/activity_main.xml.
<?xml version = "1.0" encoding = "utf-8"?>
<RelativeLayout xmlns:android = "http://schemas.android.com/apk/res/android"
   xmlns:tools = "http://schemas.android.com/tools"
   android:layout_width = "match_parent"
   android:layout_height = "match_parent"
   android:paddingBottom = "@dimen/activity_vertical_margin"
   android:paddingLeft = "@dimen/activity_horizontal_margin"
   android:paddingRight = "@dimen/activity_horizontal_margin"
   android:paddingTop = "@dimen/activity_vertical_margin">
   <Button
      android:id = "@+id/button_play_youtube_video"
      android:layout_width = "wrap_content"
      android:layout_height = "wrap_content"
      android:layout_centerHorizontal = "true"
      android:layout_centerVertical = "true"
      android:text = "Play YouTube Video" />
   <com.google.android.youtube.player.YouTubePlayerView
      android:id = "@+id/youtube_player_view"
      android:layout_width = "wrap_content"
      android:layout_height = "wrap_content"
      android:layout_above = "@+id/button_play_youtube_video"
      android:layout_alignParentEnd = "true"
      android:layout_alignParentLeft = "true"
      android:layout_alignParentRight = "true"
      android:layout_alignParentStart = "true"
      android:layout_alignParentTop = "true" />
</RelativeLayout>
Step 3 − Add the following code to src/MainActivity.java
package myapplication.example.com.myapplication;

import android.os.Bundle;
import android.view.View;
import android.widget.Button;

import com.google.android.youtube.player.YouTubeBaseActivity;
import com.google.android.youtube.player.YouTubeInitializationResult;
import com.google.android.youtube.player.YouTubePlayer;
import com.google.android.youtube.player.YouTubePlayerView;

public class MainActivity extends YouTubeBaseActivity {
   Button mbutton;
   private YouTubePlayerView myouTubePlayerView;
   private YouTubePlayer.OnInitializedListener monInitializedListener;

   @Override
   protected void onCreate(Bundle savedInstanceState) {
      super.onCreate(savedInstanceState);
      setContentView(R.layout.activity_main);

      myouTubePlayerView = (YouTubePlayerView) findViewById(R.id.youtube_player_view);
      monInitializedListener = new YouTubePlayer.OnInitializedListener() {
         @Override
         public void onInitializationSuccess(
            YouTubePlayer.Provider provider, YouTubePlayer youTubePlayer, boolean b) {

            youTubePlayer.loadVideo("MbYJjJL65hw");
         }

         @Override
         public void onInitializationFailure(YouTubePlayer.Provider provider,
            YouTubeInitializationResult youTubeInitializationResult) {
         }
      };
      mbutton = (Button) findViewById(R.id.button_play_youtube_video);
      mbutton.setOnClickListener(new View.OnClickListener() {
         @Override
         public void onClick(View view) {
            myouTubePlayerView.initialize("AIzaSyA_bMEqSJbYilFoPeVwrxtGhKfGWfs22_g",
               monInitializedListener);
         }
      });
   }
}
Step 4 − Add the following code to build.gradle
dependencies {
   compile fileTree(include: ['*.jar'], dir: 'libs')
   testCompile 'junit:junit:4.12'
   compile 'com.android.support:appcompat-v7:24.2.1'
   compile 'com.google.android:flexbox:0.1.3'
   compile files('libs/YouTubeAndroidPlayerApi.jar')
}
Step 5 − Add the jar file to lib.
Download the jar file at here
Step 6 − Add the following code to manifest.xml
<?xml version = "1.0" encoding = "utf-8"?>
<manifest xmlns:android = "http://schemas.android.com/apk/res/android"
   package = "myapplication.example.com.myapplication">
   <uses-permission android:name = "android.permission.INTERNET"/>
   <application
      android:allowBackup = "true"
      android:icon = "@mipmap/ic_launcher"
      android:label = "@string/app_name"
      android:supportsRtl = "true"
      android:theme = "@style/AppTheme">
      <activity android:name = ".MainActivity">
         <intent-filter>
            <action android:name = "android.intent.action.MAIN" />
            <category android:name = "android.intent.category.LAUNCHER" />
         </intent-filter>
      </activity>

   </application>
</manifest>
Let's try to run your application. I assume you have connected your actual Android Mobile device with your computer. To run the app from android studio, open one of your project's activity files and click Run icon from the toolbar. Select your mobile device as an option and then check your mobile device which will display your default screen −
Advanced Android - Video Streaming
Streaming media is multimedia that is constantly received by and presented to an end-user while being delivered by a provider
Example
This example demostrate about how to integrate Android Snackbar.
Step 1 − Create a new project in Android Studio, go to File ⇒ New Project and fill all required details to create a new project.
Step 2 − Add the following code to res/layout/activity_main.xml.
<?xml version = "1.0" encoding = "utf-8"?>
<RelativeLayout xmlns:android = "http://schemas.android.com/apk/res/android"
   xmlns:tools = "http://schemas.android.com/tools"
   android:layout_width = "match_parent"
   android:layout_height = "match_parent"
   android:paddingBottom = "@dimen/activity_vertical_margin"
   android:paddingLeft = "@dimen/activity_horizontal_margin"
   android:paddingRight = "@dimen/activity_horizontal_margin"
   android:paddingTop = "@dimen/activity_vertical_margin"
   tools:context = "myapplication.example.com.myapplication.MainActivity">
   <Button
      android:id = "@+id/MyButton"
      android:layout_width = "fill_parent"
      android:layout_height = "wrap_content"
      android:layout_centerHorizontal = "true"
      android:layout_centerVertical = "true"
      android:text = "button" />
</RelativeLayout>
Step 3 − Add the following code to src/MainActivity.java
package myapplication.example.com.myapplication;

import android.os.Bundle;
import android.view.View;
import android.view.View.OnClickListener;
import android.widget.Button;
import android.app.Activity;
import android.content.Intent;

public class MainActivity extends Activity {
   Button button;
   @Override
   protected void onCreate(Bundle savedInstanceState) {
      super.onCreate(savedInstanceState);
      // Get the layout from video_main.xml
      setContentView(R.layout.activity_main);

      // Locate the button in activity_main.xml
      button = (Button) findViewById(R.id.MyButton);

      // Capture button clicks
      button.setOnClickListener(new OnClickListener() {
         public void onClick(View arg0) {
            // Start NewActivity.class
            Intent myIntent = new Intent(MainActivity.this, VideoViewActivity.class);
            startActivity(myIntent);
         }
      });
   }
}
Step 4 − Add the following code to src/VideoViewActivity.java
package myapplication.example.com.myapplication;

import android.media.MediaPlayer;
import android.media.MediaPlayer.OnPreparedListener;
import android.net.Uri;
import android.os.Bundle;
import android.app.Activity;
import android.app.ProgressDialog;
import android.util.Log;
import android.widget.MediaController;
import android.widget.VideoView;

public class VideoViewActivity extends Activity {
   // Declare variables
   ProgressDialog pDialog;
   VideoView videoview;

   // Insert your Video URL
   String VideoURL = "http://dl.enjoypur.vc/upload_file/367/430/581/7567/7568/Raj%20Kapoor%20Funny%20Double%20Meaning%20Lalla%20%28PagalWorld.com%29.3gp";
   @Override
   protected void onCreate(Bundle savedInstanceState) {
      super.onCreate(savedInstanceState);
      // Get the layout from video_main.xml
      setContentView(R.layout.videoview_main);

      // Find your VideoView in your video_main.xml layout
      videoview = (VideoView) findViewById(R.id.VideoView);
      // Execute StreamVideo AsyncTask

      // Create a progressbar
      pDialog = new ProgressDialog(VideoViewActivity.this);

      // Set progressbar title
      pDialog.setTitle("Android Video Streaming Tutorial");

      // Set progressbar message
      pDialog.setMessage("Buffering...");

      pDialog.setIndeterminate(false);
      pDialog.setCancelable(false);

      // Show progressbar
      pDialog.show();
      try {
         // Start the MediaController
         MediaController mediacontroller = new MediaController(VideoViewActivity.this);
         mediacontroller.setAnchorView(videoview);

         // Get the URL from String VideoURL
         Uri video = Uri.parse(VideoURL);
         videoview.setMediaController(mediacontroller);
         videoview.setVideoURI(video);
      } catch (Exception e) {
         Log.e("Error", e.getMessage());
         e.printStackTrace();
      }
      videoview.requestFocus();
      videoview.setOnPreparedListener(new OnPreparedListener() {
         // Close the progress bar and play the video
         public void onPrepared(MediaPlayer mp) {
            pDialog.dismiss();
            videoview.start();
         }
      });
   }
}
Step 5 − Add the following code to res/layout/videoview_main.xml.
<?xml version = "1.0" encoding = "utf-8"?>
<LinearLayout xmlns:android = "http://schemas.android.com/apk/res/android"
   android:orientation = "vertical" android:layout_width = "match_parent"
   android:layout_height = "match_parent">
   <VideoView
      android:id = "@+id/VideoView"
      android:layout_width = "match_parent"
      android:layout_height = "match_parent"
      android:layout_centerHorizontal = "true"
      android:layout_centerVertical = "true" />
</LinearLayout>
Step 6 − Add the following code to manifest.xml
<?xml version = "1.0" encoding = "utf-8"?>
<manifest xmlns:android = "http://schemas.android.com/apk/res/android"
   package = "myapplication.example.com.myapplication">
   <uses-permission android:name = "android.permission.INTERNET" >
   </uses-permission>
   <application
      android:allowBackup = "true"
      android:icon = "@mipmap/ic_launcher"
      android:label = "@string/app_name"
      android:supportsRtl = "true"
      android:theme = "@style/AppTheme">
      <activity android:name = ".MainActivity">
         <intent-filter>
            <action android:name="android.intent.action.MAIN" />
            <category android:name = "android.intent.category.LAUNCHER" />
         </intent-filter>
      </activity>
      <activity android:name=".VideoViewActivity" />

   </application>
</manifest>
Let's try to run your application. I assume you have connected your actual Android Mobile device with your computer. To run the app from android studio, open one of your project's activity files and click Run icon from the toolbar. Select your mobile device as an option and then check your mobile device which will display your default screen −
Cardview & RecyclerView
Android CardView is a view which has all material design properties and shadows according the elevation. The best part about this view is that, it extends FrameLayout and it can be displayed on all the platforms of android since its available through the Support v7 library.
Example
This example demostrate about how to integrate CardView with RecyclerView by creating a beautiful music app that displays music albums with a cover image and title.
To use the CardView, you should add the library in build.gradle file as shown below −
dependencies {
   compile fileTree(dir: 'libs', include: ['*.jar'])
   testCompile 'junit:junit:4.12'
   compile 'com.android.support:appcompat-v7:24.2.0'
   compile 'com.android.support:cardview-v7:21.0.+'
   compile 'com.android.support:recyclerview-v7:21.0.+'
}
Following is the modified content of the xml res/layout/activity_main.xml.
<?xml version = "1.0" encoding = "utf-8"?>
<RelativeLayout xmlns:android = "http://schemas.android.com/apk/res/android"
   xmlns:tools = "http://schemas.android.com/tools"
   android:layout_width = "match_parent"
   android:layout_height = "match_parent"
   tools:context = ".MainActivity">
   <android.support.v7.widget.RecyclerView
      android:id = "@+id/my_recycler_view"
      android:layout_width = "match_parent"
      android:layout_height = "match_parent"
      android:scrollbars = "vertical"/>
</RelativeLayout>
Following is the content of the modified main activity file src/MainActivity.java.
package myapplication.example.com.card_recycle;

import android.os.Bundle;
import android.support.v7.app.AppCompatActivity;
import android.support.v7.widget.LinearLayoutManager;
import android.support.v7.widget.RecyclerView;
import android.util.Log;
import android.view.View;
import java.util.ArrayList;

public class MainActivity extends AppCompatActivity {
   private RecyclerView mRecyclerView;
   private RecyclerView.Adapter mAdapter;
   private RecyclerView.LayoutManager mLayoutManager;
   private static String LOG_TAG = "CardViewActivity";

   @Override
   protected void onCreate(Bundle savedInstanceState) {
      super.onCreate(savedInstanceState);
      setContentView(R.layout.activity_main);

      mRecyclerView = (RecyclerView) findViewById(R.id.my_recycler_view);
      mRecyclerView.setHasFixedSize(true);
      mLayoutManager = new LinearLayoutManager(this);
      mRecyclerView.setLayoutManager(mLayoutManager);
      mAdapter = new MyRecyclerViewAdapter(getDataSet());
      mRecyclerView.setAdapter(mAdapter);

      // Code to Add an item with default animation
      //((MyRecyclerViewAdapter) mAdapter).addItem(obj, index);
      // Code to remove an item with default animation
      //((MyRecyclerViewAdapter) mAdapter).deleteItem(index);
   }
   @Override
   protected void onResume() {
      super.onResume();
      ((MyRecyclerViewAdapter) mAdapter).setOnItemClickListener(new MyRecyclerViewAdapter
         .MyClickListener() {

         @Override
         public void onItemClick(int position, View v) {
            Log.i(LOG_TAG, " Clicked on Item " + position);
         }
      });
   }
   private ArrayList<DataObject> getDataSet() {
      ArrayList results = new ArrayList<DataObject>();
      for (int index = 0; index < 20; index++) {
         DataObject obj = new DataObject("Some Primary Text " + index,
            "Secondary " + index);
         results.add(index, obj);
      }
      return results;
   }
}
Following is the content of the modified file src/MyRecyclerViewAdapter.java.
package myapplication.example.com.card_recycle;

import android.support.v7.widget.RecyclerView;
import android.util.Log;
import android.view.LayoutInflater;
import android.view.View;
import android.view.ViewGroup;
import android.widget.TextView;
import android.widget.Toast;

import java.util.ArrayList;

public class MyRecyclerViewAdapter extends RecyclerView
      .Adapter<MyRecyclerViewAdapter
      .DataObjectHolder> {
   private static String LOG_TAG = "MyRecyclerViewAdapter";
   private ArrayList<DataObject> mDataset;
   private static MyClickListener myClickListener;
   public static class DataObjectHolder extends RecyclerView.ViewHolder implements View
      .OnClickListener {

      TextView label;
      TextView dateTime;

      public DataObjectHolder(View itemView) {
         super(itemView);
         label = (TextView) itemView.findViewById(R.id.textView);
         dateTime = (TextView) itemView.findViewById(R.id.textView2);
         Log.i(LOG_TAG, "Adding Listener");
         itemView.setOnClickListener(this);
      }
      @Override
      public void onClick(View v) {
         // myClickListener.onItemClick(getAdapterPosition(), v);
         // Toast.makeText(this,"This is card View",Toast.LENGTH_LONG).show();
      }
   }
   public void setOnItemClickListener(MyClickListener myClickListener) {
      this.myClickListener = myClickListener;
   }
   public MyRecyclerViewAdapter(ArrayList<DataObject> myDataset) {
      mDataset = myDataset;
   }
   @Override
   public DataObjectHolder onCreateViewHolder(ViewGroup parent, int viewType) {
      View view = LayoutInflater.from(parent.getContext())
      .inflate(R.layout.card_view_row, parent, false);

      DataObjectHolder dataObjectHolder = new DataObjectHolder(view);
      return dataObjectHolder;
   }

   @Override
   public void onBindViewHolder(DataObjectHolder holder, int position) {
      holder.label.setText(mDataset.get(position).getmText1());
      holder.dateTime.setText(mDataset.get(position).getmText2());
   }
   public void addItem(DataObject dataObj, int index) {
      mDataset.add(index, dataObj);
      notifyItemInserted(index);
   }
   public void deleteItem(int index) {
      mDataset.remove(index);
      notifyItemRemoved(index);
   }

   @Override
   public int getItemCount() {
      return mDataset.size();
   }
   public interface MyClickListener {
      public void onItemClick(int position, View v);
   }
}
Following is the modified content of the xml res/layout/card_view_row.xml.
<?xml version = "1.0" encoding = "utf-8"?>
<LinearLayout xmlns:android = "http://schemas.android.com/apk/res/android"
   xmlns:card_view = "http://schemas.android.com/apk/res-auto"
   android:orientation = "vertical"
   android:layout_width="match_parent"
   android:layout_height = "match_parent">
   <android.support.v7.widget.CardView
      android:id = "@+id/card_view"
      android:layout_gravity = "center"
      android:layout_width = "fill_parent"
      android:layout_height = "100dp"
      android:layout_margin = "5dp"
      card_view:cardCornerRadius = "2dp"
      card_view:contentPadding = "10dp">
      <RelativeLayout
         android:layout_width = "fill_parent"
         android:layout_height = "fill_parent">
         <TextView
            android:id = "@+id/textView"
            android:layout_width = "wrap_content"
            android:layout_height = "wrap_content"
            android:textStyle = "bold"
            android:layout_alignParentTop = "true"/>
         <TextView
            android:id = "@+id/textView2"
            android:layout_width = "wrap_content"
            android:layout_height = "wrap_content"
            android:layout_marginTop = "10dp"
            android:layout_below = "@+id/textView"/>
      </RelativeLayout>

   </android.support.v7.widget.CardView>
</LinearLayout>
Following is the content of the modified file src/DataObject.java.
package myapplication.example.com.card_recycle;

public class DataObject {
   private String mText1;
   private String mText2;

   DataObject (String text1, String text2){
      mText1 = text1;
      mText2 = text2;
   }
   public String getmText1() {
      return mText1;
   }
   public void setmText1(String mText1) {
      this.mText1 = mText1;
   }
   public String getmText2() {
      return mText2;
   }
   public void setmText2(String mText2) {
      this.mText2 = mText2;
   }
}
Following is the content of AndroidManifest.xml file.
<?xml version = "1.0" encoding = "utf-8"?>
<manifest xmlns:android = "http://schemas.android.com/apk/res/android"
   package = "myapplication.example.com.card_recycle">
   <application
      android:allowBackup = "true"
      android:icon = "@mipmap/ic_launcher"
      android:label = "@string/app_name"
      android:supportsRtl = "true"
      android:theme = "@style/AppTheme">
      <activity android:name = ".MainActivity">
         <intent-filter>
            <action android:name = "android.intent.action.MAIN" />
            <category android:name = "android.intent.category.LAUNCHER" />
         </intent-filter>
      </activity>

   </application>
</manifest>
Let's try to run your application. I assume you have connected your actual Android Mobile device with your computer. To run the app from android studio, open one of your project's activity files and click Run icon from the toolbar. Select your mobile device as an option and then check your mobile device which will display your default screen −