- Unity Tutorial
- Unity - Home
- Unity - Introduction
- Unity - Installation and Setting Up
- Unity - Creating Sprites
- Unity - Modifying Sprites
- Transforms and Object Parenting
- Unity - Internal Assets
- Unity - Saving and Loading Scenes
- Unity - Basic Movement Scripting
- Unity - Understanding Collisions
- Unity - Rigidbodies and Physics
- Unity - Custom Collision Boundaries
- Understanding Prefabs and Instantiation
- Unity - GameObject Destruction
- Unity - Coroutines
- Unity - The Console
- Unity - Introduction to Audio
- Unity - Starting with UI
- Unity - The Button
- Unity - Text Element
- Unity - The Slider
- Unity - Materials and Shaders
- Unity - The Particle System
- Unity - Using the Asset Store
- Unity Useful Resources
- Unity - Quick Guide
- Unity - Useful Resources
- Unity - Discussion
Unity - Custom Collision Boundaries
In this chapter, let us learn about custom collision boundaries. We will also learn how to adjust the size and shape of our colliders.
Let us start with our Box Collider. The Box Collider (2D) has 4 adjustable sides, and is shaped like a rectangle. In the Collider’s component, click on this box −
.jpg)
You will see 4 “handles” show up on the collider. You can drag these handles around to adjust their sizes.
For simple shapes, Unity detects the best possible fit for the collider’s shape as well, provided you pick the right one. For example, picking the circle collider on a circle sprite will match it to its radius.
For more complex shapes, Unity will try to create the simplest yet most elaborate collider shape. For that, you need to use the Polygon Collider 2D.
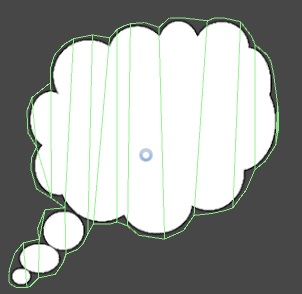
Try to click on the Edit Collider button and experiment on adjusting the colliders.