- Spring Security Tutorial
- Spring Security - Home
- Spring Security - Form Login with Database
- Spring Security - Form Login, Remember Me & Logout
- Spring Security - Taglib
- Spring Security - XML Configuration
- Spring Security - OAuth2
- Spring Security - JWT
- Spring Security Useful Resources
- Spring Security - Quick Guide
- Spring Security - Useful Resources
- Spring Security - Discussion
Spring Security - XML Configuration
Contents
- Fundamentals
- Getting started (Practical Guide)
Fundamentals
In this we are going to discuss how to configure Spring Security with XML configuration. We shall be developing a simple Spring application with Spring Security. While doing so, we will discuss in details about each component that we are using.
Authentication and Authorization
- Authentication − Authentication is ensuring the user or the client is who they claim to be. There are many ways in which Spring Security enables us to perform authentication. Spring Security supports Basic Authentication, LDAP authentication, JDBC authentication, etc.
- Authorization − Ensuring if the user has permission for the action. If our application is a complex one, with different kinds of users such as admins, regular users, other less privileged users, we need to maintain access control in our application. For example, a guest user should not be able to access admin content. So, to control access to various resources within our application, we need to check if a user has permission to access that resource.
The above topics are the two main components of Spring Security. Spring security provided us with various in-built features to implement authentication and authorization in our application. We can use these features with our changes to secure an application very quickly. In addition to this, Spring Security also allows plenty of customizations to the features mentioned before to implement our own complex authentications and authorizations.
Getting Started (Practical Guide)
Let’s look at a basic example using in-built Spring Security features. In this example, we shall be securing our application with options provided out-of-box by Spring security. This is will give us an idea of the various components of Spring Security and how we can use them for our application. We shall be using XML to configure our application’s Security features.
The tools we shall be using for our application will be Spring Tool Suite 4 and Apache Tomcat Server 9.0. They are both available for free download and use.
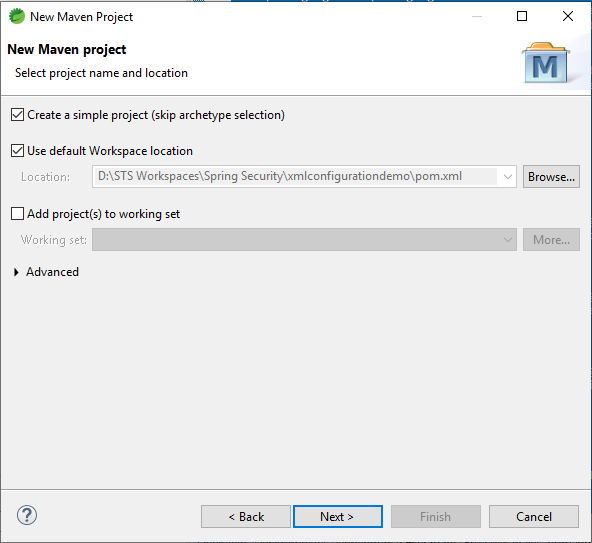
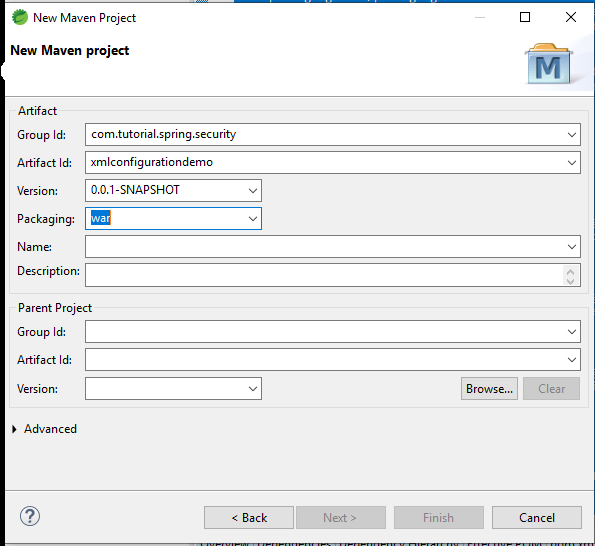
First, let’s start a new simple Maven Project in STS. We can choose group id, artifact id as per our choice. After that, we click on Finish. As a result, we have added our project to our workspace. Let’s give STS some time to build and validate our project.
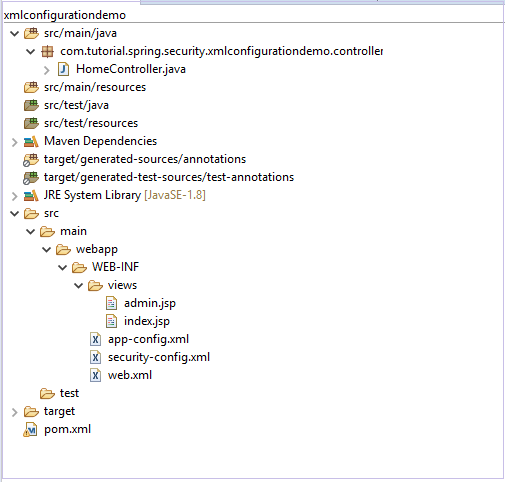
Our project structure would finally look similar to this.
Next, let’s add the dependencies. We are going to choose the following dependencies.
- Spring Web MVC
- Spring-Security-Web
- Spring-Security-Core
- Spring-Security-Config
- Javax Servlet API
pom.xml
With these dependencies added, we are ready to configure our project. Let’s take a look at our pom.xml file.
<project xmlns="http://maven.apache.org/POM/4.0.0"
   xmlns:xsi="http://www.w3.org/2001/XMLSchema-instance"
   xsi:schemaLocation="http://maven.apache.org/POM/4.0.0
   https://maven.apache.org/xsd/maven-4.0.0.xsd>
   <modelVersion>4.0.0</modelVersion>
   <groupId>com.tutorial.spring.security</groupId>
      <artifactId>xmlconfigurationdemo</artifactId>
      <version>0.0.1-SNAPSHOT</version>
      <packaging>war</packaging>
      <name>Spring Security with XML configuration</name> <description>Spring Security with XML configuration</description>
      <properties>
      <maven.compiler.target>1.8</maven.compiler.target> <maven.compiler.source>1.8</maven.compiler.source> </properties>
      <dependencies>
      <dependency>
         <groupId>org.springframework</groupId>
         <artifactId>spring-webmvc</artifactId>
         <version>5.0.2.RELEASE<version>
         </dependency> <dependency>
         <groupId>org.springframework.security</groupId>
         <artifactId>spring-security-web</artifactId>
         <version>5.0.0.RELEASE</version>
      </dependency>
      <dependency>
         <groupId>org.springframework.security</groupId>
         <artifactId>spring-security-core</artifactId>
         <version>5.0.0.RELEASE</version>
      </dependency>
      <dependency>
         <groupId>org.springframework.security</groupId>
         <artifactId>spring-security-config</artifactId>
         <version>5.0.0.RELEASE</version>
      </dependency>
      <dependency>
         <groupId>javax.servlet</groupId>
         <artifactId>javax.servlet-api</artifactId>
         <version>3.1.0</version>
         <scope>provided</scope>
      </dependency>
      </dependencies>
      <build>
         <plugins>
            <plugin>
            <groupId>org.apache.maven.plugins</groupId>
            <artifactId>maven-war-plugin</artifactId>
            <version>2.6</version>
            <configuration>
               <failOnMissingWebXml>false</failOnMissingWebXml>
            </configuration>
         </plugin>
      </plugins>
   </build>
</project>
Controller and views
First, We are going to create our controller. So, let’s create a package called controller and add our HomeController class to the package.
package com.tutorial.spring.security.xmlconfigurationdemo.controller;
import org.springframework.stereotype.Controller;
import org.springframework.web.bind.annotation.RequestMapping;
import org.springframework.web.bind.annotation.RequestMethod;
@Controller public class HomeController { @GetMapping("/")
public String index() { return "index"; }
@GetMapping("/admin")
public String admin() { return "admin"; } }
Here, we have two endpoints – “index” and “admin”. While the index page is will be accessible to all, we will protect our “admin” page.
Since, we have created the routes, let’s also add the pages.
In our /src/main/webapp folder, let’s create a folder called WEB-INF. Then inside it, we will create a folder called views where we will create our views.
Let’s create our first view−
<%@ page language="java" contentType="text/html;
charset=ISO-8859-1" pageEncoding="ISO-8859-1"%>
<!DOCTYPE html>
<html>
   <head>
      <meta charset="ISO-8859-1"> <title>Insert title here</title>
   </head>
   <body>
      <h2>Welcome to Spring Security!</h2>
   </body>
</html>
Then we create our admin view.
<%@ page language="java" contentType="text/html; charset=ISO-8859-1" pageEncoding="ISO-8859-1"%>
<DOCTYPE html>
<html>
<head>
<meta charset="ISO-8859-1"> <title>Insert title here</title>
</head>
<body>
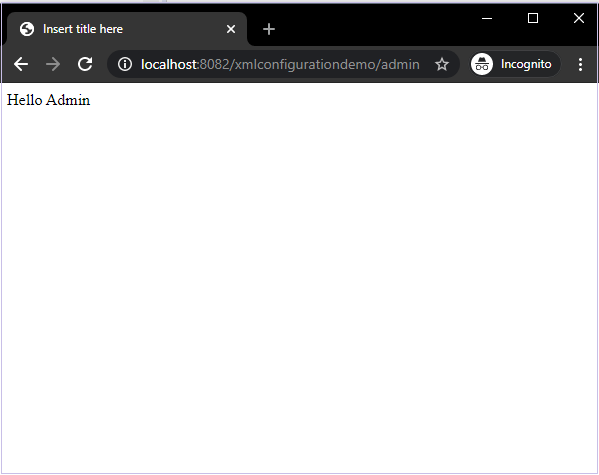
Hello Admin
</body>
</html>
Moving on, let’s configure our application.
Configurations.
web.xml
Now, let’s add our first xml file – the web.xml file.
<?xml version="1.0" encoding="UTF-8"?>
<!DOCTYPE xml>
<web-app xmlns="http://xmlns.jcp.org/xml/ns/javaee"
   xmlns:xsi="http://www.w3.org/2001/XMLSchema-instance"
   xsi:schemaLocation="http://xmlns.jcp.org/xml/ns/javaee
   http://xmlns.jcp.org/xml/ns/javaee/web-app_3_1.xsd" version="3.1"> <servlet>
   <servlet-name>spring</servlet-name>
   <servlet-class>org.springframework.web.servlet.DispatcherServlet</servlet-class>
   <init-param>
      <param-name>contextConfigLocation</param-name>
      <param-value>/WEB-INF/app-config.xml</param-value>
   </init-param>
   <load-on-startup>1</load-on-startup>
   </servlet>
   <servlet-mapping>
   <servlet-name>spring</servlet-name>
   <url-pattern>/</url-pattern>
   </servlet-mapping>
   <listener>
      <listener-class>org.springframework.web.context.ContextLoaderListener</listener-class>
   </listener>
   <context-param>
      <param-name>contextConfigLocation</param-name>
      <param-value> /WEB-INF/security-config.xml </param-value>
   </context-param>
   <filter>
      <filter-name>springSecurityFilterChain</filter-name>
      <filter-class>org.springframework.web.filter.DelegatingFilterProxy</filter-class>
   </filter>
   <filter-mapping>
      <filter-name>springSecurityFilterChain</filter-name>
      <url-pattern>/*</url-pattern>
   </filter-mapping>
</web-app>
Code breakdown
- Dispatcher Servlet − The first servlet we have declared here is the Dispatcher servlet. The dispatcher servlet is the entry point of any Spring MVC application and is at the core of the entire Spring MVC framework design. It intercepts all HTTP requests and dispatches them to registered handlers for processing a web request. It also provides convenient mapping and exception handling facilities. The order in which servlets are loaded depends on “load-on-startup” value. Servlets with a lower value of “load-on-startup” are loaded before the ones with a higher value.
- contextConfigLocation − It is a string that indicates where context(s) can be found. This string represents a path to a file where our configurations can be loaded.
- servlet-mapping − We use Servlet Mapping to tell Spring Container which request to route to which servlet. In our case, we are routing all our requests to our “spring” Dispatcher servlet.
- listener − The classes that listen to certain types of events, and trigger an appropriate functionality when that event occurs. Each listener is bound to an event. In our case, we will create a root web-application context for the web-application with the ContextLoaderListener. This is then put in the ServletContext that can be used to load and unload the spring-managed beans.
- filter − Spring uses Filters to process requests before handing them over to the Dispatcher Servlet and also used to process responses after they are dispatched. The DelegatingFilterProxy links the application context to the web.xml file. The requests that are coming to this application will pass through our filter which we named “spring SecurityFilterChain” before they reach their controllers. This is where Spring Security can take over the request and perform operations on it before passing it on to the next set of filters or handlers.
security-config.xml
Next we will create our security-config.xml file.
<?xml version="1.0" encoding="UTF-8"?>
<beans:beans xmlns="http://www.springframework.org/schema/security"
xmlns:beans="http://www.springframework.org/schema/beans"
xmlns:xsi="http://www.w3.org/2001/XMLSchema-instance"
xsi:schemaLocation="http://www.springframework.org/schema/beans
http://www.springframework.org/schema/beans/spring-beans.xsd
http://www.springframework.org/schema/security
http://www.springframework.org/schema/security/spring-security.xsd">
<http auto-config="true">
<intercept-url pattern="/admin"
access="hasRole('ROLE_ADMIN')" /> </http>
<authentication-manager>
<authentication-provider>
   <user-service>
   <user name="admin" password="{noop}1234" authorities="ROLE_ADMIN" />
   </user-service>
   </authentication-provider> </authentication-manager>
   <beans:bean id ="passwordEncoder"
      class = "org.springframework.security.crypto.password.NoOpPasswordEncoder"
      factory-method = "getInstance">
   </beans:bean>
</beans:beans>
Code breakdown
- http element − The parent of all web-related namespace functionality. Here, we can configure which URLs to intercept, what permissions are required, which type of login to use, and all such configuration.
- auto-config − Setting this attribute to true automatically sets up form-login, basic login, and logout functionalities. Spring Security generates them by using standard values and the features enabled.
- intercept-url − It sets the pattern of the URLs that we want to protecte, using the access attribute.
- access − It specifies which users are permitted to access the URL specified by the pattern attribute. It is done on the basis of the roles and permissions of a user. We can use SPEL with this attribute.
- authentication-manager − The <authentication-manager> is used to configure users, their passwords, and roles in the application. These users will be one who can access the protected parts of the application given they have the appropriate roles. A DaoAuthenticationProvider bean will be created by the <authentication-provider< and the <user-service< element will create an InMemoryDaoImpl. All authentication-provider elements will allow the users to be authenticated by providing the user information to the authentication-manager.
- password-encoder − This will register a password encoder bean. To keep things simple here we have used the NoOpPasswordEncoder.
Moving on we create out last configuration file – the app-config file. Here we are going to add our view resolver code and define our base package.
app-config.xml
<?xml version="1.0" encoding="UTF-8"?>
<beans xmlns="http://www.springframework.org/schema/beans"
   xmlns:xsi="http://www.w3.org/2001/XMLSchema-instance"
   xmlns:mvc="http://www.springframework.org/schema/mvc"
   xmlns:context="http://www.springframework.org/schema/context" xsi:schemaLocation="
   http://www.springframework.org/schema/mvc
   http://www.springframework.org/schema/mvc/spring-mvc.xsd
   http://www.springframework.org/schema/beans
   http://www.springframework.org/schema/beans/spring-beans.xsd
   http://www.springframework.org/schema/context
   http://www.springframework.org/schema/context/spring-context.xsd">
   <mvc:annotation-driven />
   <context:component-scan
      base-package="com.tutorial.spring.security.xmlconfigurationdemo.controller">
   </context:component-scan>
   <context:annotation-config>
   </context:annotation-config>
   <bean class="org.springframework.web.servlet.view.InternalResourceViewResolver">
      <property name="prefix" value="/WEB-INF/views/"></property>
      <property name="suffix" value=".jsp"></property>
   </bean>
</beans>
Here, as we can see we are registering our views that we created earlier. For this, we are using the InternalResourceViewResolver class which will map the provided URI to the actual URI.
For example, using the above configuration, if we request the URI “/admin“, DispatcherServlet will forward the request to the
prefix + viewname + suffix = /WEB-INF/views/admin.jsp view.
Running the application
With this simple configuration, we have our application ready to be served. We can right-click on the project and choose Run on Server. We can choose our Tomcat server. When the server starts, we can go to localhost:8080/xmlconfigurationdemo to interact with our application.
If, we enter the correct credentials we shall be able to login and see our desired content.