- Spring Security Tutorial
- Spring Security - Home
- Spring Security - Form Login with Database
- Spring Security - Form Login, Remember Me & Logout
- Spring Security - Taglib
- Spring Security - XML Configuration
- Spring Security - OAuth2
- Spring Security - JWT
- Spring Security Useful Resources
- Spring Security - Quick Guide
- Spring Security - Useful Resources
- Spring Security - Discussion
Spring Security - Taglib
Contents
- Introduction and Overview
- Spring Security Tags
- The authorize Tag
- The authentication tag
- The csrfInput Tag
- The csrfMetaTags Tag
- Getting Started (Practical Guide)
Introduction and Overview
In Spring MVC applications using JSP, we can use the Spring Security tags for applying security constraints as well as for accessing security information. Spring Security Tag library provides basic support for such operations. Using such tags, we can control the information displayed to the user based on his roles or permissions. Also, we can include CSRF protection features in our forms.
To use Spring security tags, we must have the security taglib declared in our JSP file.
<%@ taglib prefix="sec" uri="http://www.springframework.org/security/tags" %>
Now, we can use Spring Security tags with the “sec” prefix. Let’s now see the usage of the tags.
The authorize Tag
The first tag we will be discussing is the authorize tag. Let’s check out some usage examples.
<sec:authorize access="!isAuthenticated()"> Login </sec:authorize>
<sec:authorize access="isAuthenticated()"> Logout </sec:authorize>
<sec:authorize access="hasRole('ADMIN')"> Hello Admin. </sec:authorize>
As we can see, we can use this tag to hide or show sections of information based on access or roles. To evaluate roles or access we also use the following Spring Security Expressions −
hasRole(“ADMIN”) − evaluates to true if the current user has the admin role.
hasAnyRole(‘ADMIN’,’USER’) − evaluates to true if the current user has any of the listed roles
isAnonymous() − evaluates to true if the current user is an anonymous user
isRememberMe() − evaluates to true if the current user is a remember-me user
isFullyAuthenticated() − evaluates to true if the user is authenticated and is neither anonymous nor a remember-me user
As we can see, the access attribute is where the web-security expression is specified. Then, Spring Security evaluates the expression The evaluation is generally delegated to SecurityExpressionHandler<FilterInvocation>, which is defined in the application context. If it returns true, then the user can get access to the information given in that section.
If we use the authorize tag with Spring Security ‘s Permission Evaluator, we can also check user permissions as given below −
<sec:authorize access="hasPermission(#domain,'read') or hasPermission(#domain,'write')">
   This content is visible to users who have read or write permission.
</sec:authorize>
We can also allow or restrict the user from clicking on certain links within our content.
<sec:authorize url="/admin">
   This content will only be visible to users who are authorized to send requests to the "/admin" URL.
</sec:authorize>
The authentication tag
When we want access to the current Authentication object stored in the Spring Security Context, we can use the authentication tag. Then we can use it to render properties of the object directly in our JSP page. For example, if we want to render the principal property of the Authentication object in our page, we can do it as follows −
<sec:authentication property="principal.username" />
The csrfInput Tag
We can use the csrfInput tag to insert a hidden form field with the correct values for the CSRF protection token when CSRF protection is enabled. If CSRF protection is not enabled, this tag outputs nothing.
We can place the tag within the HTML <form></form> block along with other input fields. However, we must not place the tag within the <form:form></form:form> block as Spring Security automatically inserts a CSRF form field within those tags and also takes care of Spring forms automatically.
<form method="post" action="/do/something">
   <sec:csrfInput />
   Username:<br />
   <input type="text" username="username" />
   ...
</form>
The csrfMetaTags Tag
We can use this tag to insert meta tags which contain the CSRF protection token form field and header names and CSRF protection token value. These meta tags can be useful for employing CSRF protection within Javascript in our application. However, this tag only works when we have enabled CSRF protection in our application, otherwise, this tag outputs nothing.
<html>
   <head>
      <title>CSRF Protection in Javascript</title>
      <sec:csrfMetaTags />
      <script type="text/javascript" language="javascript">
         var csrfParam = $("meta[name='_csrf_param']").attr("content");
         var csrfToken = $("meta[name='_csrf']").attr("content");
      </script>
   </head>
   <body>
      ...
   </body>
</html>
Getting Started (Practical Guide)
Now that we have discussed the tags, let’s build an application to demonstrate the usage of the tags. We shall be using Spring Tool Suite 4 as our IDE. Additionally, we shall be using the Apache Tomcat server to serve our application. So, let’s get started.
Setting up the Application
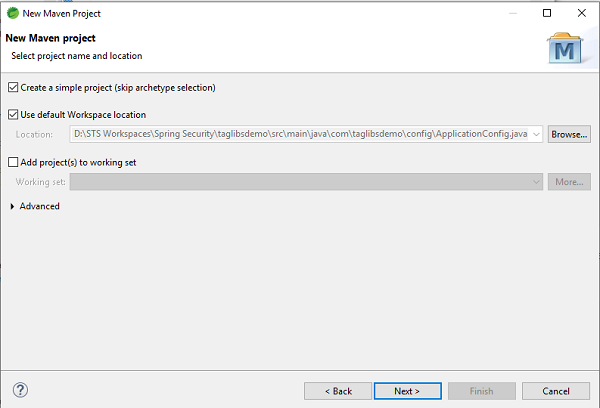
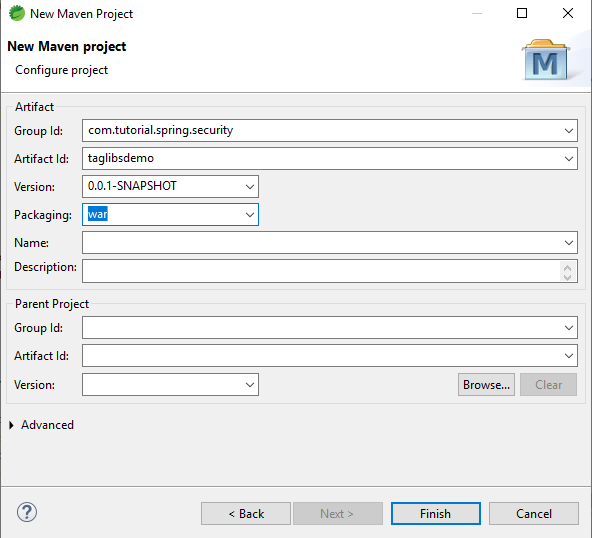
Let’s create a simple Maven Project in STS. We can name our application as taglibsdemo, and package it as a .war file.
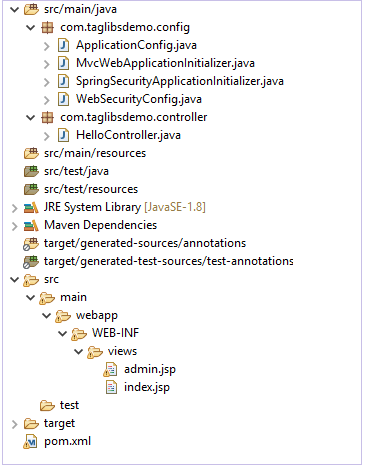
When we have finished setting up our application it should have a structure similar to this.
The pom.xml file
We shall add these following dependencies to our application −
- Spring Web MVC
- Spring-Security-Web
- Spring-Security-Core
- Spring-Security-Taglibs
- Spring-Security-Config
- Javax Servlet Api
- JSTL
After adding these dependencies, our pom.xml should look similar to this −
<project xmlns="http://maven.apache.org/POM/4.0.0"
   xmlns:xsi="http://www.w3.org/2001/XMLSchema-instance"
   xsi:schemaLocation="http://maven.apache.org/POM/4.0.0
   https://maven.apache.org/xsd/maven-4.0.0.xsd">
   <modelVersion>4.0.0</modelVersion>
   <groupId>com.tutorial.spring.security</groupId>
   <artifactId>taglibsdemo</artifactId>
   <version>0.0.1-SNAPSHOT</version>
   <packaging>war</packaging>
   <properties>
      <maven.compiler.target>1.8</maven.compiler.target>
      <maven.compiler.source>1.8</maven.compiler.source>
   </properties>
   <dependencies>
      <dependency>
         <groupId>org.springframework</groupId>
         <artifactId>spring-webmvc</artifactId>
         <version>5.0.2.RELEASE</version>
      </dependency>
      <dependency>
         <groupId>org.springframework.security</groupId>
         <artifactId>spring-security-web</artifactId>
         <version>5.0.0.RELEASE</version>
      </dependency>
      <dependency>
         <groupId>org.springframework.security</groupId>
         <artifactId>spring-security-core</artifactId>
         <version>5.0.4.RELEASE</version>
      </dependency>
      <dependency>
         <groupId>org.springframework.security</groupId>
         <artifactId>spring-security-taglibs</artifactId>
         <version>5.0.4.RELEASE</version>
      </dependency>
      <dependency>
         <groupId>org.springframework.security</groupId>
         <artifactId>spring-security-config</artifactId>
         <version>5.0.4.RELEASE</version>
      </dependency>
      <dependency>
         <groupId>javax.servlet</groupId>
         <artifactId>javax.servlet-api</artifactId>
         <version>3.1.0</version>
         <scope>provided</scope>
         </dependency> <dependency>
         <groupId>javax.servlet</groupId>
         <artifactId>jstl</artifactId>
         <version>1.2</version>
      </dependency>
   </dependencies>
   <build>
      <plugins>
         <plugin>
            <groupId>org.apache.maven.plugins</groupId>
            <artifactId>maven-war-plugin</artifactId>
            <version>2.6</version>
            <configuration>
            <failOnMissingWebXml>false</failOnMissingWebXml>
            </configuration>
         </plugin>
      </plugins>
   </build>
</project>
Let’s create our base package for the application. We can name it com.taglibsdemo. Within the package, let’s create another package for our configuration files. Since, it will be holding the configuration files, we can name it config.
ApplicationConfig.java
Let’s create our first configuration class ApplicationConfig.java.
package com.taglibsdemo.config;

import org.springframework.context.annotation.Bean;
import org.springframework.context.annotation.ComponentScan;
import org.springframework.context.annotation.Configuration;
import org.springframework.web.servlet.config.annotation.EnableWebMvc;
import org.springframework.web.servlet.view.InternalResourceViewResolver;
import org.springframework.web.servlet.view.JstlView;

@EnableWebMvc
@Configuration @ComponentScan({ "com.taglibsdemo.controller"} )
public class ApplicationConfig {
   @Bean
   public InternalResourceViewResolver viewResolver() {
      InternalResourceViewResolver
      viewResolver = new InternalResourceViewResolver();
      viewResolver.setViewClass(JstlView.class);
      viewResolver.setPrefix("/WEB-INF/views/");
      viewResolver.setSuffix(".jsp"); return viewResolver;
   }
}
Let’s break down the code here −
- @EnableWebMvc − We use @EnableWebMvc to enable Spring MVC. So, we add this annotation to an @Configuration class to import the Spring MVC configuration from WebMvcConfigurationSupport. WebMvcConfigurationSupport is the main class that provides the configuration for the MVC Java config. Not using this annotation may result in things like content-type and accept header, generally content negotiation not working. @EnableWebMvc registers a RequestMappingHandlerMapping, a RequestMappingHandlerAdapter, and an ExceptionHandlerExceptionResolver among others in support of processing requests with annotated controller methods using annotations such as @RequestMapping , @ExceptionHandler, and others.
- @Configuration − This annotation indicates that the class declares one or more @Bean methods and may be processed by the Spring IoC container to generate bean definitions and service requests for those beans at runtime. A @Configuration class is typically bootstrapped using either AnnotationConfigApplicationContext or its web-capable variant, AnnotationConfigWebApplicationContext.
- @ComponentScan − @ComponentScan annotation is used to tell Spring the packages to scan for annotated components. @ComponentScan also used to specify base packages and base package classes using thebasePackageClasses or basePackages attributes of @ComponentScan.
- InternalResourceViewResolver − To resolve the provided URI to the actual URI in the format prefix + viewname + suffix.
- setViewClass() − To set the view class that should be used to create views.
- setPrefix() − To set the prefix that gets prepended to view names when building a URL.
- setSuffix() − To set the suffix that gets appended to view names when building a URL.
WebSecurityConfig.java
Next we shall create our WebSecurityConfig class which will extend the familiar WebSecurityConfigurerAdapter class of Spring Security.
package com.taglibsdemo.config;

import org.springframework.context.annotation.Bean;
import org.springframework.context.annotation.ComponentScan;
import org.springframework.security.config.annotation.web.builders.HttpSecurity;
import org.springframework.security.config.annotation.web.configuration.EnableWebSecurity;
import org.springframework.security.config.annotation.web.configuration.WebSecurityConfigurerAdapter;
import org.springframework.security.core.userdetails.UserDetailsService;
import org.springframework.security.provisioning.InMemoryUserDetailsManager;
import org.springframework.security.web.util.matcher.AntPathRequestMatcher;
import org.springframework.security.core.userdetails.User;
import org.springframework.security.core.userdetails.User.UserBuilder;
@EnableWebSecurity @ComponentScan("com.taglibsdemo")
public class WebSecurityConfig extends WebSecurityConfigurerAdapter {
   @SuppressWarnings("deprecation") @Bean
   public UserDetailsService userdetailsService() {
      UserBuilder users = User.withDefaultPasswordEncoder();
      InMemoryUserDetailsManager manager = new InMemoryUserDetailsManager();
      manager.createUser(users.username("rony").password("rony123").roles("USER").build());
      manager.createUser(users.username("admin").password("admin123").roles("ADMIN").build());
      return manager;
   }
   @Override protected void configure(HttpSecurity http) throws Exception {
      http.authorizeRequests() .antMatchers("/index", "/").permitAll()
      .antMatchers("/admin", "/user").authenticated() .and() .formLogin()
      .and() .logout() .logoutRequestMatcher(
         new AntPathRequestMatcher("/logout")
      );
   }
}
Let’s break the code down here −
- WebSecurityConfigurerAdapter − The abstract class that implements WebSecurityConfigurer WebSecurityConfigurer and allows us to override methods for security configuration.
- @EnableWebSecurity − It enables Spring to automatically find and apply the @Configuration class to the global WebSecurity.
- We then create a UserDetailsService Bean using the method to create users using the InMemoryUserDetailsManager instance. We create two users – one with role “USER” and another with role “ADMIN” and add them to Spring Security.
- After that, we override the configure method with HttpSecurity as a parameter. We make our home page or index page accessible to all and admin page to be accessible when the user is authenticated. Next, we add Spring Security form login and logout.
So, with those steps our security configuration is complete. Now, we are ready to move on to the next step.
SpringSecurityApplicationInitializer.java
Moving on, now we shall create the SpringSecurityApplicationInitializer.java class which extends the AbstractSecurityWebApplicationInitializer class of Spring Security.
package com.taglibsdemo.config;
import org.springframework.security.web.context.AbstractSecurityWebApplicationInitializer;
public class SpringSecurityApplicationInitializer extends
AbstractSecurityWebApplicationInitializer { }
AbstractSecurityWebApplicationInitializer is an abstract class that implements Spring’s WebApplicationInitializer. So, SpringServletContainerInitializer will initialize the concrete implementations of this class if the classpath contains spring-web module.
MvcWebApplicationInitializer.java
package com.taglibsdemo.config;
import org.springframework.web.servlet.support.AbstractAnnotationConfigDispatcherServletInitializer;
public class MvcWebApplicationInitializer extends
AbstractAnnotationConfigDispatcherServletInitializer {
   @Override protected Class</?>[] getRootConfigClasses() {
      return new Class[] {WebSecurityConfig.class};
   }
   @Override protected Class</?>[] getServletConfigClasses() {
      return null;
   }
   @Override protected String[] getServletMappings() {
      return new String[] {"/"};
   }
}
- AbstractAnnotationConfigDispatcherServletInitializer − This class extends WebApplicationInitializer. We need this class as a base class for initializing a Spring application in Servlet container environment.As a result, the subclass of AbstractAnnotationConfigDispatcherServletInitializer will provide the classes annotated with @Configuration, Servlet config classes and DispatcherServlet mapping pattern.
- getRootConfigClasses() − This method must be implemented by the class extending AbstractAnnotationConfigDispatcherServletInitializer. It provides “root” application context configuration.
- getServletConfigClasses() − This method too, must be implemented to provide DispatcherServlet application context configuration.
- getServletMappings() − This method is used specify the servlet mapping(s) for the DispatcherServlet.
We have set up the configuration classes. Now , we shall create our controller to serve the JSP pages.
HelloController.java
package com.taglibsdemo.controller;
import org.springframework.stereotype.Controller;
import org.springframework.web.bind.annotation.GetMapping;
@Controller public class HelloController {
@GetMapping("/")
   public String index() { return "index"; }
   @GetMapping("/user")
   public String user() { return "admin"; }
   @GetMapping("/admin")
   public String admin() { return "admin"; }
}
Here, we have created three endpoints – “/”, “/user”, and “/admin”. As specified in our configuration previously, we will allow unauthorized access to the index page
“/”. On the other hand, the “/user” and “/admin” endpoints would be authorized only access.
Secure Content to serve
Moving on, we shall now create the JSP pages which are to be served on hitting the specific endpoints.
For this, inside our src/main folder we create a folder called webapp. Inside this folder, we create our WEB-INF folder and further as in ApplicationConfig.java class we add the views folder. Here, in this folder we shall be adding the views.
Let’s add our home page, i.e., index.jsp first.
<%@ page language="java" contentType="text/html;
   charset=ISO-8859-1" pageEncoding="ISO-8859-1"%>
<!DOCTYPE html>
<html>
   <head>
      <meta charset="ISO-8859-1">
      <title>Home Page</title>
   </head>
   <body>
      <a href="user">User</a>
      <a href="admin">Admin</a>
      <br>
      <br> Welcome to the Application!
   </body>
</html>
Then we shall create our admin.jsp file. Let’s add it.
<%@ page language="java" contentType="text/html;
   charset=ISO-8859-1" pageEncoding="ISO-8859-1"%>
<%@ taglib uri="http://www.springframework.org/security/tags" prefix="security"%>
<!DOCTYPE html>
<html>
   <head>
      <meta charset="ISO-8859-1">
      <meta http-equiv="Content-Type" content="text/html; charset=UTF-8">
      <title>Insert title here</title>
   </head>
   <body> Welcome to Admin Page! <a href="logout"> Logout </a>
      <br>
      <br>
      <security:authorize access="hasRole('ADMIN')"> Hello Admin!
      </security:authorize>
   </body>
</html>
here, we have added <%@ taglib uri="http://www.springframework.org/security/tags" prefix="security"%>. This is going to let us the Spring security tag libs as discussed before. As we can see, we have the added the “authorize” tag around the content. This content is will be only accessible by our admin. Any other user accessing this page will not be able to view this content.
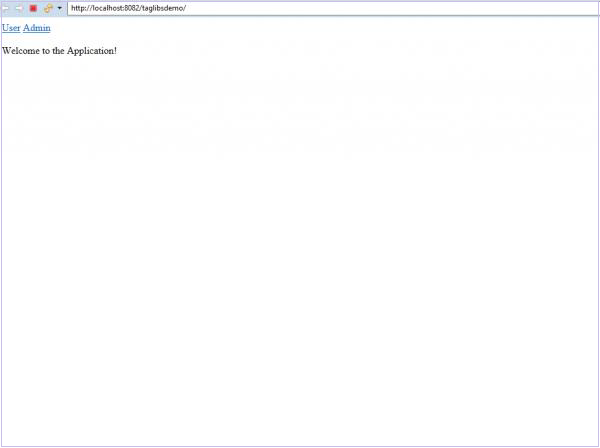
Running the application
We now right click on the project and choose Run On Server. When the server starts and our application is running we can go to localhost:8080/taglibsdemo/ on our browser to view the page.
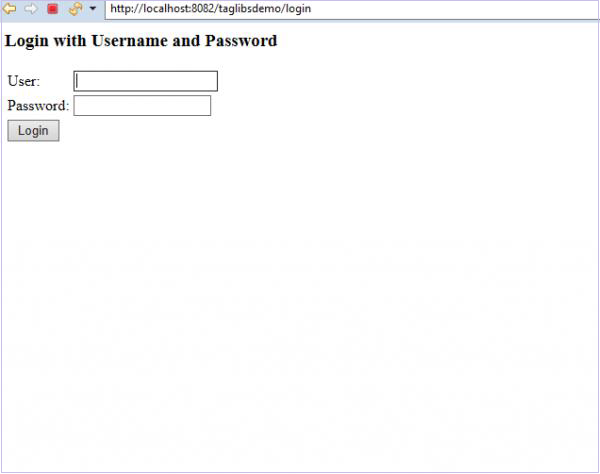
Login page
Now, if we click on the User link in our application, we shall be asked to log in.
Here, as we can see in our controller, we are serving the admin page for bothe the user and admin links. But our user, if he is not an admin cannot view the content which is protected by our “authorize”tag.
Let’s log in as the user first.

We can see that the “Hello Admin!” content is not visible to us. This is because the current user doesn’t have the admin role.
Let’s logout and log in as admin now.

We are now able to see the protected content “Hello Admin!” as the current user has the admin role.
Conclusion
We have learnt how we can use the Spring Security tag library to protect our content and get access to the current Authentication object in Our Spring Security Context.
To Continue Learning Please Login