- Ruby on Rails Tutorial
- Ruby on Rails - Home
- Ruby on Rails - Introduction
- Ruby on Rails - Installation
- Ruby on Rails - Framework
- Ruby on Rails - Directory Structure
- Ruby on Rails - Examples
- Ruby on Rails - Database Setup
- Ruby on Rails - Active Records
- Ruby on Rails - Migrations
- Ruby on Rails - Controllers
- Ruby on Rails - Routes
- Ruby on Rails - Views
- Ruby on Rails - Layouts
- Ruby on Rails - Scaffolding
- Ruby on Rails - AJAX
- Ruby on Rails - File Uploading
- Ruby on Rails - Send Emails
- Ruby on Rails Resources
- Ruby on Rails - References Guide
- Ruby on Rails - Quick Guide
- Ruby on Rails - Resources
- Ruby on Rails - Discussion
- Ruby Tutorial
- Ruby Tutorial
Ruby on Rails - Quick Guide
Ruby on Rails - Introduction
What is Ruby?
Before we ride on Rails, let us recapitulate a few points of Ruby, which is the base of Rails.
Ruby is the successful combination of −
- Smalltalk's conceptual elegance,
- Python's ease of use and learning, and
- Perl's pragmatism.
Ruby is −
- A high-level programming language.
- Interpreted like Perl, Python, Tcl/TK.
- Object-oriented like Smalltalk, Eiffel, Ada, Java.
Why Ruby?
Ruby originated in Japan and now it is gaining popularity in US and Europe as well. The following factors contribute towards its popularity −
- Easy to learn
- Open source (very liberal license)
- Rich libraries
- Very easy to extend
- Truly object-oriented
- Less coding with fewer bugs
- Helpful community
Although we have many reasons to use Ruby, there are a few drawbacks as well that you may have to consider before implementing Ruby −
Performance Issues − Although it rivals Perl and Python, it is still an interpreted language and we cannot compare it with high-level programming languages like C or C++.
Threading model − Ruby does not use native threads. Ruby threads are simulated in the VM rather than running as native OS threads.
Sample Ruby Code
Here is a sample Ruby code to print "Hello Ruby"
# The Hello Class
class Hello

   def initialize( name )
      @name = name.capitalize
   end

   def salute
      puts "Hello #{@name}!"
   end

end

# Create a new object
h = Hello.new("Ruby")

# Output "Hello Ruby!"
h.salute
Output − This will produce the following result −
Hello Ruby!
Embedded Ruby
Ruby provides a program called ERB (Embedded Ruby), written by Seki Masatoshi. ERB allows you to put Ruby codes inside an HTML file. ERB reads along, word for word, and then at a certain point, when it encounters a Ruby code embedded in the document, it starts executing the Ruby code.
You need to know only two things to prepare an ERB document −
If you want some Ruby code executed, enclose it between <% and %>.
If you want the result of the code execution to be printed out, as a part of the output, enclose the code between <%= and %>.
Here's an example. Save the code in erbdemo.rb file. Note that a Ruby file will have an extension .rb −
<% page_title = "Demonstration of ERB" %>
<% salutation = "Dear programmer," %>

<html>

   <head>
      <title><%= page_title %></title>
   </head>

   <body>
      <p><%= salutation %></p>
      <p>This is an example of how ERB fills out a template.</p>
   </body>

</html>
Now, run the program using the command-line utility erb.
tp> erb erbdemo.rb
This will produce the following result −
<html>

   <head>
      <title>Demonstration of ERb</title>
   </head>

   <body>
      <p>Dear programmer,</p>
      <p>This is an example  of how ERb fills out a template.</p>
   </body>

</html>
What is Rails?
An extremely productive web-application framework.
Written in Ruby by David Heinemeier Hansson.
You could develop a web application at least ten times faster with Rails than you could with a typical Java framework.
An open source Ruby framework for developing database-backed web applications.
Configure your code with Database Schema.
No compilation phase required.
Full Stack Framework
Includes everything needed to create a database-driven web application, using the Model-View-Controller pattern.
Being a full-stack framework means all the layers are built to work seamlessly together with less code.
Requires fewer lines of code than other frameworks.
Convention over Configuration
Rails shuns configuration files in favor of conventions, reflection, and dynamic runtime extensions.
Your application code and your running database already contain everything that Rails needs to know!
Rails Strengths
Rails is packed with features that make you more productive, with many of the following features building on one other.
Metaprogramming
Where other frameworks use extensive code generation from scratch, Rail framework uses Metaprogramming techniques to write programs. Ruby is one of the best languages for Metaprogramming, and Rails uses this capability well. Rails also uses code generation but relies much more on Metaprogramming for the heavy lifting.
Active Record
Rails introduces the Active Record framework, which saves objects into the database. The Rails version of the Active Record discovers the columns in a database schema and automatically attaches them to your domain objects using metaprogramming.
Convention over configuration
Most web development frameworks for .NET or Java force you to write pages of configuration code. If you follow the suggested naming conventions, Rails doesn't need much configuration.
Scaffolding
You often create temporary code in the early stages of development to help get an application up quickly and see how major components work together. Rails automatically creates much of the scaffolding you'll need.
Built-in testing
Rails creates simple automated tests you can then extend. Rails also provides supporting code called harnesses and fixtures that make test cases easier to write and run. Ruby can then execute all your automated tests with the rake utility.
Three environments
Rails gives you three default environments: development, testing, and production. Each behaves slightly differently, making your entire software development cycle easier. For example, Rails creates a fresh copy of the Test database for each test run.
Ruby on Rails - Installation
To develop a web application using Ruby on Rails Framework, you need to install the following software −
- Ruby
- The Rails Framework
- A Web Server
- A Database System
We assume that you already have installed a Web Server and a Database System on your computer. You can use the WEBrick Web Server, which comes with Ruby. Most websites however use Apache or lightTPD web servers in production.
Rails works with many database systems, including MySQL, PostgreSQL, SQLite, Oracle, DB2 and SQL Server. Please refer to a corresponding Database System Setup manual to set up your database.
Let's look at the installation instructions for Rails on Windows and Linux.
Rails Installation on Windows
Follow the steps given below for installing Ruby on Rails.
Step 1: Check Ruby Version
First, check if you already have Ruby installed. Open the command prompt and type ruby -v. If Ruby responds, and if it shows a version number at or above 2.2.2, then type gem --version. If you don't get an error, skip Install Ruby step. Otherwise, we'll install a fresh Ruby.
Step 2: Install Ruby
If Ruby is not installed, then download an installation package from rubyinstaller.org. Follow the download link, and run the resulting installer. This is an exe file rubyinstaller-2.2.2.x.exe and will be installed in a single click. It's a very small package, and you'll get RubyGems as well along with this package. Please check the Release Notes for more detail.
Step 3: Install Rails
Install Rails − With Rubygems loaded, you can install all of Rails and its dependencies using the following command through the command line −
C:\> gem install rails
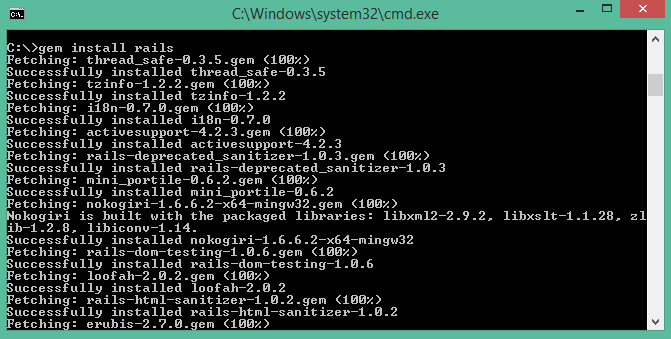
Note − The above command may take some time to install all dependencies. Make sure you are connected to the internet while installing gems dependencies.
Step 4: Check Rails Version
Use the following command to check the rails version.
C:\> rails -v
Output
Rails 4.2.4
Congratulations! You are now on Rails over Windows.
Rails Installation on Linux
We are installing Ruby On Rails on Linux using rbenv. It is a lightweight Ruby Version Management Tool. The rbenv provides an easy installation procedure to manage various versions of Ruby, and a solid environment for developing Ruby on Rails applications.
Follow the steps given below to install Ruby on Rails using rbenv tool.
Step 1: Install Prerequisite Dependencies
First of all, we have to install git - core and some ruby dependences that help to install Ruby on Rails. Use the following command for installing Rails dependencies using yum.
tp> sudo yum install -y git-core zlib zlib-devel gcc-c++ patch readline readline-devel libyaml-devel libffi-devel openssl-devel make bzip2 autoconf automake libtool bison curl sqlite-devel
Step 2: Install rbenv
Now we will install rbenv and set the appropriate environment variables. Use the following set of commands to get rbenv for git repository.
tp> git clone git://github.com/sstephenson/rbenv.git .rbenv
tp> echo 'export PATH="$HOME/.rbenv/bin:$PATH"' >> ~/.bash_profile
tp> echo 'eval "$(rbenv init -)"' >> ~/.bash_profile
tp> exec $SHELL

tp> git clone git://github.com/sstephenson/ruby-build.git ~/.rbenv/plugins/ruby-build
tp> echo 'export PATH="$HOME/.rbenv/plugins/ruby-build/bin:$PATH"' << ~/.bash_profile
tp> exec $SHELL
Step 3: Install Ruby
Before installing Ruby, determine which version of Ruby you want to install. We will install Ruby 2.2.3. Use the following command for installing Ruby.
tp> rbenv install -v 2.2.3
Use the following command for setting up the current Ruby version as default.
tp> rbenv global 2.2.3
Use the following command to verify the Ruby version.
tp> ruby -v
Output
ruby 2.2.3p173 (2015-08-18 revivion 51636) [X86_64-linux]
Ruby provides a keyword gem for installing the supported dependencies; we call them gems. If you don't want to install the documentation for Ruby-gems, then use the following command.
tp> echo "gem: --no-document" > ~/.gemrc
Thereafter, it is better to install the Bundler gem, because it helps to manage your application dependencies. Use the following command to install bundler gem.
tp> gem install bundler
Step 4: Install Rails
Use the following command for installing Rails version 4.2.4.
tp> install rails -v 4.2.4
Use the following command to make Rails executable available.
tp> rbenv rehash
Use the following command for checking the rails version.
tp> rails -v
Output
tp> Rails 4.2.4
Ruby on Rails framework requires JavaScript Runtime Environment (Node.js) to manage the features of Rails. Next, we will see how we can use Node.js to manage Asset Pipeline which is a Rails feature.
Step 5: Install JavaScript Runtime
Let us install Node.js from the Yum repository. We will take Node.js from EPEL yum repository. Use the following command to add the EPEL package to the yum repository.
tp> sudo yum -y install epel-release
Use the following command for installing the Node.js package.
tp> sudo yum install nodejs
Congratulations! You are now on Rails over Linux.
Step 6: Install Database
By default, Rails uses sqlite3, but you may want to install MySQL, PostgreSQL, or other RDBMS. This is optional; if you have the database installed, then you may skip this step and it is not mandatory that you have a database installed to start the rails server. For this tutorial, we are using PostgreSQL database. Therefore use the following commands to install PostgreSQL.
tp> sudo yum install postgresql-server postgresql-contrib
Accept the prompt, by responding with a y. Use the following command to create a PostgreSQl database cluster.
tp> sudo postgresql-setup initdb
Use the following command to start and enable PostgreSQL.
tp> sudo systemctl start postgresql
tp> sudo systemctl enable postgresql
Keeping Rails Up-to-Date
Assuming you have installed Rails using RubyGems, keeping it up-to-date is relatively easy. We can use the same command in both Windows and Linux platform. Use the following command −
tp> gem update rails
Output
The following screenshot shows a Windows command prompt. The Linux terminal also provides the same output.
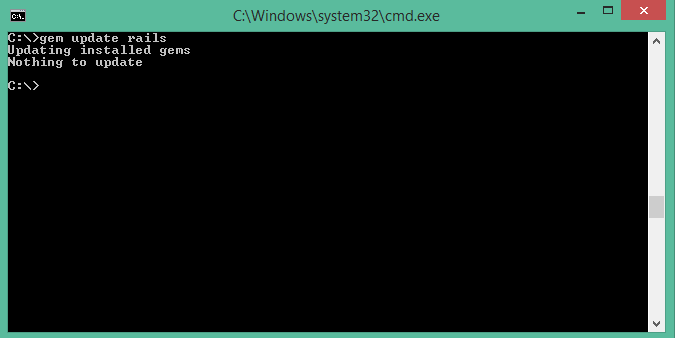
This will automatically update your Rails installation. The next time you restart your application, it will pick up this latest version of Rails. While using this command, make sure you are connected to the internet.
Installation Verification
You can verify if everything is set up according to your requirements or not. Use the following command to create a demo project.
tp> rails new demo
Output
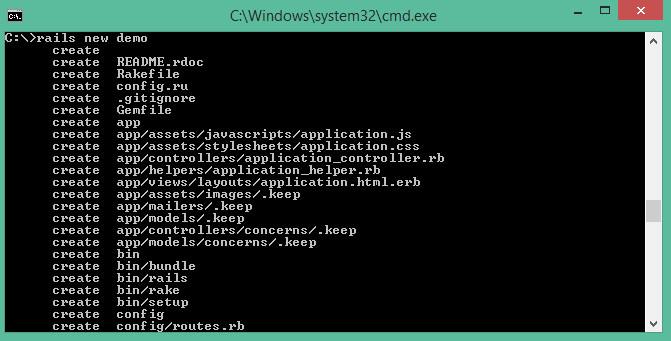
It will generate a demo rail project; we will discuss about it later. Currently we have to check if the environment is set up or not. Next, use the following command to run WEBrick web server on your machine.
tp> cd demo
tp> rails server
It will generate auto-code to start the server

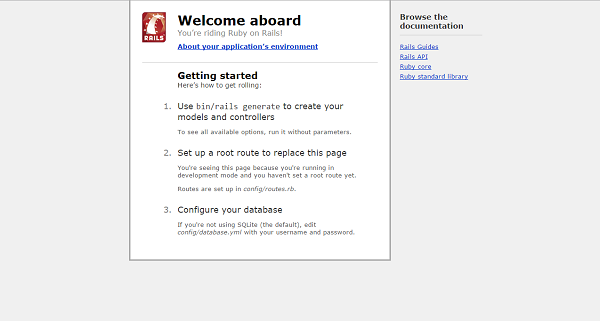
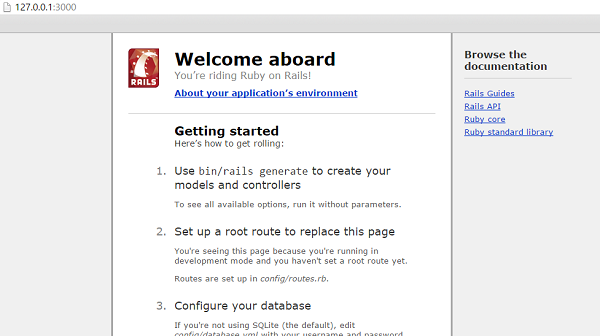
Now open your browser and type the following −
http://localhost:3000
It should display a message, something like, "Welcome aboard" or "Congratulations".
Ruby on Rails - Framework
A framework is a program, set of programs, and/or code library that writes most of your application for you. When you use a framework, your job is to write the parts of the application that make it do the specific things you want.
When you set out to write a Rails application, leaving aside the configuration and other housekeeping chores, you have to perform three primary tasks −
Describe and model your application's domain − The domain is the universe of your application. The domain may be a music store, a university, a dating service, an address book, or a hardware inventory. So here you have to figure out what's in it, what entities exist in this universe and how the items in it relate to each other. This is equivalent to modeling a database structure to keep the entities and their relationship.
Specify what can happen in this domain − The domain model is static; you have to make it dynamic. Addresses can be added to an address book. Musical scores can be purchased from music stores. Users can log in to a dating service. Students can register for classes at a university. You need to identify all the possible scenarios or actions that the elements of your domain can participate in.
Choose and design the publicly available views of the domain − At this point, you can start thinking in Web-browser terms. Once you've decided that your domain has students, and that they can register for classes, you can envision a welcome page, a registration page, and a confirmation page, etc. Each of these pages, or views, shows the user how things stand at a certain point.
Based on the above three tasks, Ruby on Rails deals with a Model/View/Controller (MVC) framework.
Ruby on Rails MVC Framework
The Model View Controller principle divides the work of an application into three separate but closely cooperative subsystems.
Model (ActiveRecord )
It maintains the relationship between the objects and the database and handles validation, association, transactions, and more.
This subsystem is implemented in ActiveRecord library, which provides an interface and binding between the tables in a relational database and the Ruby program code that manipulates database records. Ruby method names are automatically generated from the field names of database tables.
View ( ActionView )
It is a presentation of data in a particular format, triggered by a controller's decision to present the data. They are script-based template systems like JSP, ASP, PHP, and very easy to integrate with AJAX technology.
This subsystem is implemented in ActionView library, which is an Embedded Ruby (ERb) based system for defining presentation templates for data presentation. Every Web connection to a Rails application results in the displaying of a view.
Controller ( ActionController )
The facility within the application that directs traffic, on the one hand, querying the models for specific data, and on the other hand, organizing that data (searching, sorting, messaging it) into a form that fits the needs of a given view.
This subsystem is implemented in ActionController, which is a data broker sitting between ActiveRecord (the database interface) and ActionView (the presentation engine).
Pictorial Representation of MVC Framework
Given below is a pictorial representation of Ruby on Rails Framework −
Directory Representation of MVC Framework
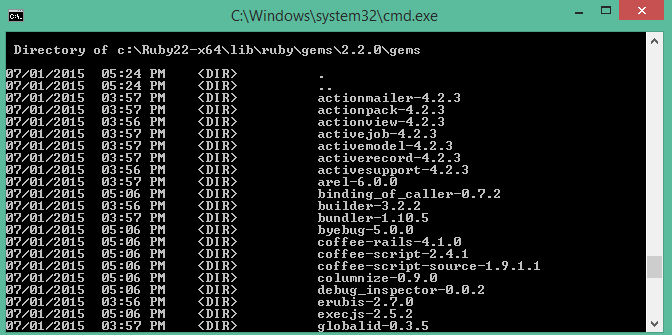
Assuming a standard, default installation over Linux, you can find them like this −
tp> cd /usr/local/lib/ruby/gems/2.2.0/gems
tp> ls
You will see subdirectories including (but not limited to) the following −
- actionpack-x.y.z
- activerecord-x.y.z
- rails-x.y.z
Over a windows installation, you can find them like this −
tp>cd ruby\lib\ruby\gems\2.2.0\gems
ruby\lib\ruby\gems\2.2.0\gems\>dir
You will see subdirectories including (but not limited to) the following −
ActionView and ActionController are bundled together under ActionPack.
ActiveRecord provides a range of programming techniques and shortcuts for manipulating data from an SQL database. ActionController and ActionView provides facilities for manipulating and displaying that data. Rails ties it all together.
Ruby on Rails - Directory Structure
When you use the Rails helper script to create your application, it creates the entire directory structure for the application. Rails knows where to find things it needs within this structure, so you don't have to provide any input.
Here is a top-level view of a directory tree created by the helper script at the time of application creation. Except for minor changes between releases, every Rails project will have the same structure, with the same naming conventions. This consistency gives you a tremendous advantage; you can quickly move between Rails projects without relearning the project's organization.
To understand this directory structure, let's use the demo application created in the Installation chapter. It can be created using a simple helper command rails demo.
Now, go into the demo application root directory as follows −
tp> cd demo
demo> dir
You will find a directory structure in Windows as follows −
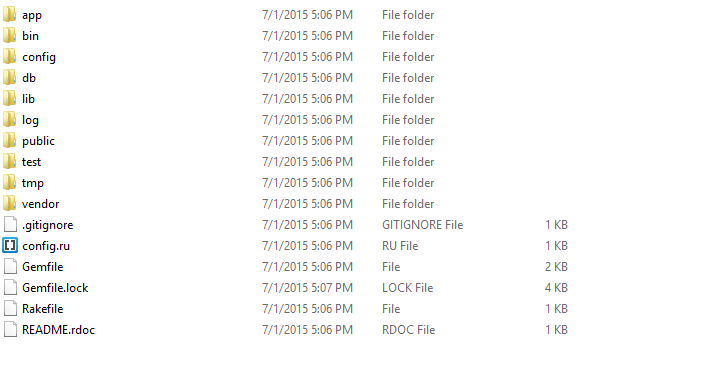
Now let's explain the purpose of each directory
app − It organizes your application components. It's got subdirectories that hold the view (views and helpers), controller (controllers), and the backend business logic (models).
app/controllers − The controllers subdirectory is where Rails looks to find the controller classes. A controller handles a web request from the user.
app/helpers − The helpers subdirectory holds any helper classes used to assist the model, view, and controller classes. This helps to keep the model, view, and controller code small, focused, and uncluttered.
app/models − The models subdirectory holds the classes that model and wrap the data stored in our application's database. In most frameworks, this part of the application can grow pretty messy, tedious, verbose, and error-prone. Rails makes it dead simple!
app/view − The views subdirectory holds the display templates to fill in with data from our application, convert to HTML, and return to the user's browser.
app/view/layouts − Holds the template files for layouts to be used with views. This models the common header/footer method of wrapping views. In your views, define a layout using the <tt>layout:default</tt> and create a file named default.html.erb. Inside default.html.erb, call <% yield %> to render the view using this layout.
components − This directory holds components, tiny self-contained applications that bundle model, view, and controller.
config − This directory contains the small amount of configuration code that your application will need, including your database configuration (in database.yml), your Rails environment structure (environment.rb), and routing of incoming web requests (routes.rb). You can also tailor the behavior of the three Rails environments for test, development, and deployment with files found in the environments directory.
db − Usually, your Rails application will have model objects that access relational database tables. You can manage the relational database with scripts you create and place in this directory.
doc − Ruby has a framework, called RubyDoc, that can automatically generate documentation for code you create. You can assist RubyDoc with comments in your code. This directory holds all the RubyDoc-generated Rails and application documentation.
lib − You'll put libraries here, unless they explicitly belong elsewhere (such as vendor libraries).
log − Error logs go here. Rails creates scripts that help you manage various error logs. You'll find separate logs for the server (server.log) and each Rails environment (development.log, test.log, and production.log).
public − Like the public directory for a web server, this directory has web files that don't change, such as JavaScript files (public/javascripts), graphics (public/images), stylesheets (public/stylesheets), and HTML files (public).
script − This directory holds scripts to launch and manage the various tools that you'll use with Rails. For example, there are scripts to generate code (generate) and launch the web server (server).
test − The tests you write and those that Rails creates for you, all goes here. You'll see a subdirectory for mocks (mocks), unit tests (unit), fixtures (fixtures), and functional tests (functional).
tmp − Rails uses this directory to hold temporary files for intermediate processing.
vendor − Libraries provided by third-party vendors (such as security libraries or database utilities beyond the basic Rails distribution) go here.
Apart from these directories, there will be two files available in demo directory.
README − This file contains a basic detail about Rail Application and description of the directory structure explained above.
Rakefile − This file is similar to Unix Makefile, which helps with building, packaging and testing the Rails code. This will be used by rake utility supplied along with the Ruby installation.
Ruby on Rails - Examples
In this chapter, we will create a simple but operational online library system for holding and managing the books.
This application has a basic architecture and will be built using two ActiveRecord models to describe the types of data that is stored −
- Books, which describes an actual listing.
- Subject, which is used to group books together.
Workflow for Creating Rails Applications
A recommended work flow for creating Rails Application is as follows −
Use the rails command to create the basic skeleton of the application.
Create a database on the PostgreSQL server to hold your data.
Configure the application to know where your database is located and the login credentials for it.
Create Rails Active Records (Models), because they are the business objects you'll be working with in your controllers.
Generate Migrations that simplify the creating and maintaining of database tables and columns.
Write Controller Code to put a life in your application.
Create Views to present your data through User Interface.
So, let us start with creating our library application.
Creating an Empty Rails Web Application
Rails is both a runtime web application framework and a set of helper scripts that automate many of the things you do when developing a web application. In this step, we will use one such helper script to create the entire directory structure and the initial set of files to start our Library System application.
Go into ruby installation directory to create your application.
Run the following command to create a skeleton for library application. It will create the directory structure in the current directory.
tp> rails new library
This will create a subdirectory for the library application containing a complete directory tree of folders and files for an empty Rails application. Check a complete directory structure of the application. Check Rails Directory Structure for more detail.
Most of our development work will be creating and editing files in the library/app subdirectories. Here's a quick run down of how to use them −
The controllers subdirectory is where Rails looks to find controller classes. A controller handles a web request from the user.
The views subdirectory holds the display templates to fill in with data from our application, convert to HTML, and return to the user's browser.
The models subdirectory holds the classes that model and wrap the data stored in our application's database. In most frameworks, this part of the application can grow pretty messy, tedious, verbose, and error-prone. Rails makes it dead simple.
The helpers subdirectory holds any helper classes used to assist the model, view, and controller classes. This helps to keep the model, view, and controller code small, focused, and uncluttered.
Starting Web Server
Rails web application can run under virtually any web server, but the most convenient way to develop a Rails web application is to use the built-in WEBrick web server. Let's start this web server and then browse to our empty library application −
This server will be started from the application directory as follows. It runs on port number 3000.
tp> cd ruby\library
tp\ruby\library\> Rails server
It generates the auto code to start the server as shown below −
This will start your WEBrick web server.
Now open your browser and browse to http://127.0.0.1:3000. If everything is gone fine, then you should see a greeting message from WEBrick, otherwise there is something wrong with your setting. If everything goes well it will generate the output as follows.
What is next?
The next chapter explains how to create databases for your application and what is the configuration required to access these created databases.
Further, we will see what Rails Migration is and how it is used to maintain database tables.
Ruby on Rails - Database Setup
Before starting with this chapter, make sure your database server is up and running. Ruby on Rails recommends to create three databases - a database each for development, testing, and production environment. According to convention, their names should be −
- library_development
- library_production
- library_test
You should initialize all three of them and create a user and password for them with full read and write privileges. We are using the root user ID for our application.
Database Setup for MySQL
In MySQL, we are using the root user ID for our application. The MySQL console session in which you do this looks something like −
mysql> create database library_development;
Query OK, 1 row affected (0.01 sec)

mysql> grant all privileges on library_development.*
to 'root'@'localhost' identified by 'password';
Query OK, 0 rows affected (0.00 sec)

mysql> FLUSH PRIVILEGES;
Query OK, 0 rows affected (0.00 sec)
You can do the same thing for two more databases library_production and library_test.
Configuring database.yml
At this point, you need to let Rails know about the user name and password for the databases. You do this in the file database.yml, available in the library\config subdirectory of Rails Application you created. This file has live configuration sections for MySQL databases. In each of the sections you use, you need to change the username and password lines to reflect the permissions on the databases you've created.
When you finish, it should look something like −
development:
   adapter: mysql
   database: library_development
   username: root
   password: [password]
   host: localhost

test:
   adapter: mysql
   database: library_test
   username: root
   password: [password]
   host: localhost

production:
   adapter: mysql
   database: library_production
   username: root
   password: [password]
   host: localhost
Database Setup for PostgreSQL
By default, PostgreSQL does not provide any users. We have to create new users. Use the following command to create a user with the name rubyuser.
tp> sudo -u postgres createuser rubyuser -s
If you want to create a password for the new user, then use the following command.
tp> sudo -u postgres psql

postgres=# \password rubyuser
Use the following command for creating a database library_development.
postgres=# CREATE DATABASE library_development OWNER rubyuser;

CREATE DATABASE
Use the following command for creating a database library_production.
postgres=# CREATE DATABASE library_production OWNER rubyuser;

CREATE DATABASE
Use the following command for creating a database library_test.
postgres=# CREATE DATABASE library_test OWNER rubyuser;

CREATE DATABASE
Press Ctrl+D to terminate PosgreSQL.
Configuring database.yml
At this point, you need to let Rails know the username and password for the databases. You do this in the file database.yml, available in the library\config subdirectory of Rails Application you created. This file has live configuration sections for PostgreSQL databases. In each of the sections, you need to change the username and password lines to reflect the permissions on the databases you've created.
When you finish, it should look as follows −
default: &default
   adapter: postgresql
   encoding: unicode

development:
   adapter: postgresql
   encoding: unicode
   database: library_development
   username: rubyuser
   password: <Password for rubyuser>

test:
   adapter: postgresql
   encoding: unicode
   database: library_test
   username: rubyuser
   password: <Password for rubyuser>

production:
   adapter: postgresql
   encoding: unicode
   database: library_production
   username: rubyuser
   password: <Password for rubyuser>
What is Next?
The next two chapters explain how to model your database tables and how to manage those using Rails Migrations.
Ruby on Rails - Active Records
Rails Active Record is the Object/Relational Mapping (ORM) layer supplied with Rails. It closely follows the standard ORM model, which is as follows −
- tables map to classes,
- rows map to objects and
- columns map to object attributes.
Rails Active Records provide an interface and binding between the tables in a relational database and the Ruby program code that manipulates database records. Ruby method names are automatically generated from the field names of database tables.
Each Active Record object has CRUD (Create, Read, Update, and Delete) methods for database access. This strategy allows simple designs and straight forward mappings between database tables and application objects.
Translating a Domain Model into SQL
Translating a domain model into SQL is generally straight forward, as long as you remember that you have to write Rails-friendly SQL. In practical terms, you have to follow certain rules −
Each entity (such as book) gets a table in the database named after it, but in the plural (books).
Each such entity-matching table has a field called id, which contains a unique integer for each record inserted into the table.
Given entity x and entity y, if entity y belongs to entity x, then table y has a field called x_id.
The bulk of the fields in any table store the values for that entity's simple properties (anything that's a number or a string).
Creating Active Record Files (Models)
To create the Active Record files for our entities for library application, introduced in the previous chapter, issue the following command from the top level of the application directory.
library\> ruby script/generate model Book
library\> ruby script/generate model Subject
Above rails generate model book commands generates the auto code as below −

You're telling the generator to create models called Book and Subject to store instances of books and subjects. Notice that you are capitalizing Book and Subject and using the singular form. This is a Rails paradigm that you should follow each time you create a model.
When you use the generate tool, Rails creates the actual model file that holds all the methods unique to the model and the business rules you define, a unit test file for performing test-driven development, a sample data file (called fixtures) to use with the unit tests, and a Rails migration that makes creating database tables and columns easy.
Apart from creating many other files and directories, this will create files named book.rb and subject.rb containing a skeleton definition in the app/models directory.
Content available in book.rb −
class Book < ActiveRecord::Base
end
Content available in subject.rb −
class Subject < ActiveRecord::Base
end
Creating Associations between Models
When you have more than one model in your rails application, you would need to create connection between those models. You can do this via associations. Active Record supports three types of associations −
one-to-one − A one-to-one relationship exists when one item has exactly one of another item. For example, a person has exactly one birthday or a dog has exactly one owner.
one-to-many − A one-to-many relationship exists when a single object can be a member of many other objects. For instance, one subject can have many books.
many-to-many − A many-to-many relationship exists when the first object is related to one or more of a second object, and the second object is related to one or many of the first object.
You indicate these associations by adding declarations to your models: has_one, has_many, belongs_to, and has_and_belongs_to_many.
Now, you need to tell Rails what relationships you want to establish within the library data system. To do so, modify book.rb and subject.rb to look like this −
class Book < ActiveRecord::Base
   belongs_to :subject
end
We have used a singular subject in the above example, because one Book can belong to a single Subject.
class Subject < ActiveRecord::Base
   has_many :books
end
We have used plural books here, because one subject can have multiple books.
Implementing Validations on Models
The implementation of validations is done in a Rails model. The data you are entering into the database is defined in the actual Rails model, so it only makes sense to define what valid data entails in the same location.
The validations are −
The value of title field should not be NULL.
The value of price field should be numeric.
Open book.rb in the app\model subdiractory and put the following validations −
class Book < ActiveRecord::Base
   belongs_to :subject
   validates_presence_of :title
   validates_numericality_of :price, :message=>"Error Message"
end
validates_presence_of − protects "NOT NULL" fields against missing user input.
validates_numericality_of − prevents the user, entering non numeric data.
Besides the validations mentioned above, there are other common validations. Check Rails Quick Guide.
What is Next?
In the next chapter, we will learn Rails Migration, which allows you to use Ruby to define changes to your database schema, making it possible to use a version control system to keep things synchronized with the actual code.
Ruby on Rails - Migrations
Rails Migration allows you to use Ruby to define changes to your database schema, making it possible to use a version control system to keep things synchronized with the actual code.
This has many uses, including −
Teams of developers − If one person makes a schema change, the other developers just need to update, and run "rake migrate".
Production servers − Run "rake migrate" when you roll out a new release to bring the database up to date as well.
Multiple machines − If you develop on both a desktop and a laptop, or in more than one location, migrations can help you keep them all synchronized.
What Can Rails Migration Do?
- create_table(name, options)
- drop_table(name)
- rename_table(old_name, new_name)
- add_column(table_name, column_name, type, options)
- rename_column(table_name, column_name, new_column_name)
- change_column(table_name, column_name, type, options)
- remove_column(table_name, column_name)
- add_index(table_name, column_name, index_type)
- remove_index(table_name, column_name)
Migrations support all the basic data types − The following is the list of data types that migration supports −
string − for small data types such as a title.
text − for longer pieces of textual data, such as the description.
integer − for whole numbers.
float − for decimals.
datetime and timestamp − store the date and time into a column.
date and time − store either the date only or time only.
binary − for storing data such as images, audio, or movies.
Boolean − for storing true or false values.
Valid column options are − The following is the list of valid column options.
limit ( :limit => “50” )
default (:default => “blah” )
null (:null => false implies NOT NULL)
NOTE − The activities done by Rails Migration can be done using any front-end GUI or directly on SQL prompt, but Rails Migration makes all those activities very easy.
See the Rails API for details on these.
Create the Migrations
Here is the generic syntax for creating a migration −
application_dir> rails generate migration table_name
This will create the file db/migrate/001_table_name.rb. A migration file contains the basic Ruby syntax that describes the data structure of a database table.
NOTE − Before running the migration generator, it is recommended to clean the existing migrations generated by model generators.
We will create two migrations corresponding to our three tables − books and subjects.
Books migration should be as follows −
tp> cd library
library> rails generate migration books
Above command generates the following code.

subject migration should be as follows −
tp> cd library
library> rails generate migration subjects
Above command generates the following code.
Notice that you are using lower case for book and subject and plural form while creating migrations. This is a Rails paradigm that you should follow each time you create a Migration.
Edit the Code
Go to db/migrate subdirectory of your application and edit each file one by one using any simple text editor.
Modify 001_books.rb as follows −
The ID column will be created automatically, so don't do it here as well.
class Books < ActiveRecord::Migration

   def self.up
      create_table :books do |t|
         t.column :title, :string, :limit => 32, :null => false
         t.column :price, :float
         t.column :subject_id, :integer
         t.column :description, :text
         t.column :created_at, :timestamp
      end
   end

   def self.down
      drop_table :books
   end
end
The method self.up is used when migrating to a new version, self.down is used to roll back any changes if needed. At this moment, the above script will be used to create books table.
Modify 002_subjects.rb as follows −
class Subjects < ActiveRecord::Migration
   def self.up

      create_table :subjects do |t|
         t.column :name, :string
      end

      Subject.create :name => "Physics"
      Subject.create :name => "Mathematics"
      Subject.create :name => "Chemistry"
      Subject.create :name => "Psychology"
      Subject.create :name => "Geography"
   end

   def self.down
      drop_table :subjects
   end
end
The above script will be used to create subjects table and will create five records in the subjects table.
Run the Migration
Now that you have created all the required migration files. It is time to execute them against the database. To do this, go to a command prompt and go to the library directory in which the application is located, and then type rake migrate as follows −
library> rake db:migrate
This will create a "schema_info" table if it doesn't exist, which tracks the current version of the database - each new migration will be a new version, and any new migrations will be run until your database is at the current version.
Rake is a Ruby build program similar to Unix make program that Rails takes advantage of, to simplify the execution of complex tasks such as updating a database's structure etc.
Running Migrations for Production and Test Databases
If you would like to specify what Rails environment to use for the migration, use the RAILS_ENV shell variable.
For example −
library> export RAILS_ENV = production
library> rake db:migrate
library> export RAILS_ENV = test
library> rake db:migrate
library> export RAILS_ENV = development
library> rake db:migrate
NOTE − In Windows, use "set RAILS_ENV = production" instead of export command.
What is Next?
Now we have our database and the required tables available. In the two subsequent chapters, we will explore two important components called Controller (ActionController) and View (ActionView).
Creating Controllers (Action Controller).
Creating Views (Action View).
Ruby on Rails - Controller
The Rails controller is the logical center of your application. It coordinates the interaction between the user, the views, and the model. The controller is also a home to a number of important ancillary services.
It is responsible for routing external requests to internal actions. It handles people-friendly URLs extremely well.
It manages caching, which can give applications orders-of-magnitude performance boosts.
It manages helper modules, which extend the capabilities of the view templates without bulking up their code.
It manages sessions, giving users the impression of an ongoing interaction with our applications.
The process for creating a controller is very easy, and it's similar to the process we've already used for creating a model. We will create just one controller here −
library\> rails generate controller Book
Notice that you are capitalizing Book and using the singular form. This is a Rails paradigm that you should follow each time you create a controller.
This command accomplishes several tasks, of which the following are relevant here −
It creates a file called app/controllers/book_controller.rb
If you look at book_controller.rb, you will find it as follows −
class BookController < ApplicationController
end
Controller classes inherit from ApplicationController, which is the other file in the controllers folder: application.rb.
The ApplicationController contains code that can be run in all your controllers and it inherits from Rails ActionController::Base class.
You don't need to worry with the ApplicationController as of yet, so let's just define a few method stubs in book_controller.rb. Based on your requirement, you could define any number of functions in this file.
Modify the file to look like the following and save your changes. Note that it is upto you what name you want to give to these methods, but better to give relevant names.
class BookController < ApplicationController
   def list
   end

   def show
   end

   def new
   end

   def create
   end

   def edit
   end

   def update
   end

   def delete
   end

end
Now let us implement all the methods one by one.
Implementing the list Method
The list method gives you a list of all the books in the database. This functionality will be achieved by the following lines of code. Edit the following lines in book_controller.rb file.
def list
   @books = Book.all
end
The @books = Book.all line in the list method tells Rails to search the books table and store each row it finds in the @books instance object.
Implementing the show Method
The show method displays only further details on a single book. This functionality will be achieved by the following lines of code.
def show
   @book = Book.find(params[:id])
end
The show method's @book = Book.find(params[:id]) line tells Rails to find only the book that has the id defined in params[:id].
The params object is a container that enables you to pass values between method calls. For example, when you're on the page called by the list method, you can click a link for a specific book, and it passes the id of that book via the params object so that show can find the specific book.
Implementing the new Method
The new method lets Rails know that you will create a new object. So just add the following code in this method.
def new
   @book = Book.new
   @subjects = Subject.all
end
The above method will be called when you will display a page to the user to take user input. Here second line grabs all the subjects from the database and puts them in an array called @subjects.
Implementing the create Method
Once you take user input using HTML form, it is time to create a record into the database. To achieve this, edit the create method in the book_controller.rb to match the following −
def create
   @book = Book.new(book_params)

   if @book.save
      redirect_to :action => 'list'
   else
      @subjects = Subject.all
      render :action => 'new'
   end

end

def book_params
   params.require(:books).permit(:title, :price, :subject_id, :description)
end
The first line creates a new instance variable called @book that holds a Book object built from the data, the user submitted. The book_params method is used to collect all the fields from object :books. The data was passed from the new method to create using the params object.
The next line is a conditional statement that redirects the user to the list method if the object saves correctly to the database. If it doesn't save, the user is sent back to the new method. The redirect_to method is similar to performing a meta refresh on a web page: it automatically forwards you to your destination without any user interaction.
Then @subjects = Subject.all is required in case it does not save data successfully and it becomes similar case as with new option.
Implementing the edit Method
The edit method looks nearly identical to the show method. Both methods are used to retrieve a single object based on its id and display it on a page. The only difference is that the show method is not editable.
def edit
   @book = Book.find(params[:id])
   @subjects = Subject.all
end
This method will be called to display data on the screen to be modified by the user. The second line grabs all the subjects from the database and puts them in an array called @subjects.
Implementing the update Method
This method will be called after the edit method, when the user modifies a data and wants to update the changes into the database. The update method is similar to the create method and will be used to update existing books in the database.
def update
   @book = Book.find(params[:id])

   if @book.update_attributes(book_param)
      redirect_to :action => 'show', :id => @book
   else
      @subjects = Subject.all
      render :action => 'edit'
   end

end

def book_param
   params.require(:book).permit(:title, :price, :subject_id, :description)
end
The update_attributes method is similar to the save method used by create but instead of creating a new row in the database, it overwrites the attributes of the existing row.
Then @subjects = Subject.all line is required in case it does not save the data successfully, then it becomes similar to edit option.
Implementing the delete Method
If you want to delete a record from the database then you will use this method. Implement this method as follows.
def delete
   Book.find(params[:id]).destroy
   redirect_to :action => 'list'
end
The first line finds the classified based on the parameter passed via the params object and then deletes it using the destroy method. The second line redirects the user to the list method using a redirect_to call.
Additional Methods to Display Subjects
Assume you want to give a facility to your users to browse all the books based on a given subject. So, you can create a method inside book_controller.rb to display all the subjects. Assume the method name is show_subjects −
def show_subjects
   @subject = Subject.find(params[:id])
end
Finally your book_controller.rb file will look as follows −
class BooksController < ApplicationController

   def list
      @books = Book.all
   end

   def show
      @book = Book.find(params[:id])
   end

   def new
      @book = Book.new
      @subjects = Subject.all
   end

   def book_params
      params.require(:books).permit(:title, :price, :subject_id, :description)
   end

   def create
      @book = Book.new(book_params)

      if @book.save
         redirect_to :action => 'list'
      else
         @subjects = Subject.all
         render :action => 'new'
      end
   end

   def edit
      @book = Book.find(params[:id])
      @subjects = Subject.all
   end

   def book_param
      params.require(:book).permit(:title, :price, :subject_id, :description)
   end

   def update
      @book = Book.find(params[:id])

      if @book.update_attributes(book_param)
         redirect_to :action => 'show', :id => @book
      else
         @subjects = Subject.all
         render :action => 'edit'
      end
   end

   def delete
      Book.find(params[:id]).destroy
      redirect_to :action => 'list'
   end

   def show_subjects
      @subject = Subject.find(params[:id])
   end

end
Now save your controller file.
What is Next?
You have created almost all the methods, which will work on backend. Next we will define routes (URLs) for actions.
Ruby on Rails - Routes
The routing module provides URL rewriting in native Ruby. It's a way to redirect incoming requests to controllers and actions. It replaces the mod_rewrite rules. Best of all, Rails' Routing works with any web server. Routes are defined in app/config/routes.rb.
Think of creating routes as drawing a map for your requests. The map tells them where to go based on some predefined pattern −
Rails.application.routes.draw do
   Pattern 1 tells some request to go to one place
   Pattern 2 tell them to go to another
   ...
end
Example
Let us consider our library management application contains a controller called BookController. We have to define the routes for those actions which are defined as methods in the BookController class.
Open routes.rb file in library/config/ directory and edit it with the following content.
Rails.application.routes.draw do
   get 'book/list'
   get 'book/new'
   post 'book/create'
   patch 'book/update'
   get 'book/list'
   get 'book/show'
   get 'book/edit'
   get 'book/delete'
   get 'book/update'
   get 'book/show_subjects'
end
The routes.rb file defines the actions available in the applications and the type of action such as get, post, and patch.
Use the following command to list all your defined routes, which are useful for tracking down routing problems in your application, or giving you a good overview of the URLs in an application you're trying to get familiar with.
library> rake routes
What is Next?
Next, we will create the code to generate screens to display data and to take input from the user.
Ruby on Rails - Views
A Rails View is an ERb program that shares data with controllers through mutually accessible variables.
If you look in the app/views directory of the library application, you will see one subdirectory for each of the controllers, we have created: book. Each of these subdirectories was created automatically when the same-named controller was created with the generate script.
Rails let's you know that you need to create the view file for each new method. Each method you define in the controller needs to have a corresponding erb file, with the same name as the method, to display the data that the method is collecting.
So let's create view files for all the methods we have defined in the book_controller.rb. While executing these views, simultaneously check these actions are applicable into the database or not.
Creating View File for list Method
Create a file called list.html.erb using your favourite text editor and save it to app/views/book. After creating and saving the file, refresh your web browser. You should see a blank page; if you don't, check the spelling of your file and make sure that it is exactly the same as your controller's method.
Now, display the actual content. Let us put the following code into list.html.erb.
<% if @books.blank? %>
<p>There are not any books currently in the system.</p>
<% else %>
<p>These are the current books in our system</p>

<ul id = "books">
   <% @books.each do |c| %>
   <li><%= link_to c.title, {:action => 'show', :id => c.id} -%></li>
   <% end %>
</ul>

<% end %>
<p><%= link_to "Add new Book", {:action => 'new' }%></p>
The code to be executed is to check whether the @books array has any objects in it. The .blank? method returns true if the array is empty, and false if it contains any objects. This @books object was created in controller inside the list method.
The code between the <%= %> tags is a link_to method call. The first parameter of link_to is the text to be displayed between the <a> tags. The second parameter is what action is called when the link is clicked. In this case, it is the show method. The final parameter is the id of the book that is passed via the params object.
Now, try refreshing your browser and you should get the following screen because we don't have any book in our library.
Creating View File for new Method
Till now, we don't have any book in our library. We have to create few books in the system. So, let us design a view corresponding to the new method defined in the book_controller.rb.
Create a file called new.html.erb using your favorite text editor and save it to app/views/book. Add the following code to the new.html.erb file.
<h1>Add new book</h1>

<%= form_tag :action => 'create' do %>
<p><label for = "book_title">Title</label>:

<%= text_field 'books', 'title' %></p>
<p><label for = "book_price">Price</label>:

<%= text_field 'books', 'price' %></p>
<p><label for = "book_subject_id">Subject</label>:

<%= collection_select(:books, :subject_id, @subjects, :id, :name, prompt: true) %></p>
<p><label for = "book_description">Description</label><br/>

<%= text_area 'books', 'description' %></p>
<%= submit_tag "Create" %>

<% end -%>
<%= link_to 'Back', {:action => 'list'} %>
Here form_tag method interprets the Ruby code into a regular HTML <form> tag using all the information supplied to it. This tag, for example, outputs the following HTML −
<form action = "/book/create" method = "post">
Next method is text_field that outputs an <input> text field. The parameters for text_field are object and field name. In this case, the object is book and the name is title.
Rails method called collection_select, creates an HTML select menu built from an array, such as the @books one. There are five parameters, which are as follows −
:book − The object you are manipulating. In this case, it's a book object.
:subject_id − The field that is populated when the book is saved.
@books − The array you are working with.
:id − The value that is stored in the database. In terms of HTML, this is the <option> tag's value parameter.
:name − The output that the user sees in the pull-down menu. This is the value between the <option> tags.
The next used is submit_tag, which outputs an <input> button that submits the form. Finally, there is the end method that simply translates into </form>.
Go to your browser and visit http://localhost:3000/book/new. This will give you the following screen.
Enter some data in this form and then click the Create button. Here i have added the following details into the fields −
Title: Advance Physics
Price: 390
Subject: Physics
Description: This is test to create new book
When you click the Create button, it will call the create method, which does not need any view because this method is using either list or new methods to view the results. So, when you click the Create button, the data should submit successfully and redirect you to the list page, in which you now have a single item listed as follows −
If you click the link, you should see another Template is missing error, since you haven't created the template file for show method yet.
Creating View File for show Method
This method will display the complete detail about any book available in the library. Create a show.html.erb file under app/views/book and populate it with the following code −
<h1><%= @book.title %></h1>

<p>
   <strong>Price: </strong> $<%= @book.price %><br />
   <strong>Subject :</strong> <%= @book.subject.name %><br />
   <strong>Created Date:</strong> <%= @book.created_at %><br />
</p>

<p><%= @book.description %></p>

<hr />

<%= link_to 'Back', {:action => 'list'} %>
This is the first time you have taken the full advantage of associations, which enable you to easily pull data from related objects.
The format used is @variable.relatedObject.column. In this instance, you can pull the subject's name value through the @book variable using the belongs_to associations. If click on any listed record then it will show you the following screen.
Creating View File for edit Method
Create a new file called edit.html.erb and save it in app/views/book. Populate it with the following code −
<h1>Edit Book Detail</h1>

<%= form_for @book, :url =>{:action => "update", :id =>@book} do |f| %>

<p>Title: <%= f.text_field 'title' %></p>
<p>Price: <%= f.text_field  'price' %></p>
<p>Subject: <%= f.collection_select :subject_id, Subject.all, :id, :name %></p>
<p>Description<br/>

<%= f.text_area 'description' %></p>
<%= f.submit "Save changes" %>
<% end %>

<%= link_to 'Back', {:action => 'list' } %>
This code is very similar to the new method except action to be updated instead of creating and defining an id.
In this scenario, we used form_for tag for the form action. It will perform better than form_tag. Why because it will create interaction with the Model easily. Therefore it is better to use form_for tag whenever you need interaction between the model and the form fields.
At this point, we need some modification in the list method's view file. Go to the <li></li> element and modify it to look like the following −
<li>
   <%= link_to c.title, {:action => "show", :id => c.id} -%>
   <b> <%= link_to 'Edit', {:action => "edit",
   :id => c.id} %></b>
</li>
Now, try to browse books using the http://localhost:3000/book/list. It will give you the listing of all the books along with Edit option. When you click the Edit option, then you will have next screen as follows −
Now, you edit this information and then click the Save Changes button. This will result in a call to update method available in the controller file and it will update all the changed attribute. Notice that the update method does not need any view file because it's using either show or edit methods to show its results.
Creating View File for delete Method
Removing information from a database using Ruby on Rails is almost too easy. You do not need to write any view code for the delete method because this method is using list method to display the result. So, let's just modify list.html.erb again and add a delete link.
Go to the <li></li> element and modify it to look like the following −
<li>
   <%= link_to c.title, {:action => 'show', :id => c.id} -%>
   <b> <%= link_to 'Edit', {:action => 'edit', :id => c.id} %></b>
   <b> <%= link_to "Delete", {:action => 'delete', :id => c.id},
   :confirm => "Are you sure you want to delete this item?" %></b>
</li>
The :confirm parameter presents a JavaScript confirmation box asking if you really want to perform the action. If the user clicks OK, the action proceeds, and the item is deleted.
Now, try browsing books using http://localhost:3000/book/list. It will give you listing of all the books along with Edit and Delete options as follows −

Now using the Delete option, you can delete any listed record.
Creating View File for show_subjects Method
Create a new file, show_subjects.html.erb, in the app/views/book directory and add the following code to it −
<h1><%= @subject.name -%></h1>

<ul>
   <% @subject.books.each do |c| %>
   <li><%= link_to c.title, :action => "show", :id => c.id -%></li>
   <% end %>
</ul>
You are taking advantage of associations by iterating through a single subject's many books listings.
Now modify the Subject: line of show.html.erb so that the subject listing shows a link.
<strong>Subject: </strong> <%= link_to @book.subject.name,
:action => "show_subjects", :id => @book.subject.id %><br />
This will output a list of subject on the index page, so that users can access them directly.
Modify list.html.erb to add the following to the top of the file −
<ul id = "subjects">
   <% Subject.find(:all).each do |c| %>
   <li><%= link_to c.name, :action => "show_subjects", :id => c.id %></li>
   <% end %>
</ul>
Now try browsing books using http://localhost:3000/book/list. It will display all subjects with links so that you can browse all the books related to that subject.
What is Next?
Hope now you are feeling comfortable with all the operations of Rails.
The next chapter explains how to use Layouts to put your data in a better way. We will show you how to use CSS in your Rails applications.
Ruby on Rails - Layouts
A layout defines the surroundings of an HTML page. It's the place to define a common look and feel of your final output. Layout files reside in app/views/layouts.
The process involves defining a layout template and then letting the controller know that it exists and to use it. First, let's create the template.
Add a new file called standard.html.erb to app/views/layouts. You let the controllers know what template to use by the name of the file, so following a same naming scheme is advised.
Add the following code to the new standard.html.erb file and save your changes −
<!DOCTYPE html PUBLIC "-//W3C//DTD XHTML 1.0 Transitional//EN" "http://www.w3.org/TR/xhtml1/DTD/xhtml1-transitional.dtd">
<html xmlns = "http://www.w3.org/1999/xhtml">

   <head>
      <meta http-equiv = "Content-Type" content = "text/html; charset = iso-8859-1" />
      <meta http-equiv = "Content-Language" content = "en-us" />
      <title>Library Info System</title>
      <%= stylesheet_link_tag "style" %>
   </head>

   <body id = "library">
      <div id = "container">

         <div id = "header">
            <h1>Library Info System</h1>
            <h3>Library powered by Ruby on Rails</h3>
         </div>

         <div id = "content">
            <%= yield -%>
         </div>

         <div id = "sidebar"></div>

      </div>
   </body>

</html>
Everything you just added were standard HTML elements except two lines. The stylesheet_link_tag helper method outputs a stylesheet <link>. In this instance, we are linking style.css style sheet. The yield command lets Rails know that it should put the html.erb for the method called here.
Now open book_controller.rb and add the following line just below the first line −
class BookController < ApplicationController
layout 'standard'
def list
@books = Book.all
end
...................
It instructs the controller that we want to use a layout available in the standard.html.erb file. Now try browsing books that will produce the following screen.
Adding Style Sheet
Till now, we have not created any style sheet, so Rails is using the default style sheet. Now let's create a new file called style.css and save it in /public/stylesheets. Add the following code to this file.
body {
   font-family: Helvetica, Geneva, Arial, sans-serif;
   font-size: small;
   font-color: #000;
   background-color: #fff;
}

a:link, a:active, a:visited {
   color: #CD0000;
}

input {
   margin-bottom: 5px;
}

p {
   line-height: 150%;
}

div#container {
   width: 760px;
   margin: 0 auto;
}

div#header {
   text-align: center;
   padding-bottom: 15px;
}

div#content {
   float: left;
   width: 450px;
   padding: 10px;
}

div#content h3 {
   margin-top: 15px;
}

ul#books {
   list-style-type: none;
}

ul#books li {
   line-height: 140%;
}

div#sidebar {
   width: 200px;
   margin-left: 480px;
}

ul#subjects {
   width: 700px;
   text-align: center;
   padding: 5px;
   background-color: #ececec;
   border: 1px solid #ccc;
   margin-bottom: 20px;
}

ul#subjects li {
   display: inline;
   padding-left: 5px;
}
Now refresh your browser and see the difference −
What is Next?
The next chapter explains how to develop applications using Rails Scaffolding to give user access to add, delete, and modify the records in any database.
Ruby on Rails - Scaffolding
While you're developing Rails applications, especially those which are mainly providing you with a simple interface to data in a database, it can often be useful to use the scaffold method.
Scaffolding provides more than cheap demo thrills. Here are some benefits −
You can quickly get code in front of your users for feedback.
You are motivated by faster success.
You can learn how Rails works by looking at the generated code.
You can use scaffolding as a foundation to jump start your development.
Scaffolding Example
To understand scaffolding, let's create a database called cookbook and a table called recipes.
Creating an Empty Rails Web Application
Open a command window and navigate to where you want to create this cookbook web application. So, run the following command to create a complete directory structure.
tp> rails new cookbook
Setting up the Database
Here is the way to create a database −
mysql> create database cookbook;
Query OK, 1 row affected (0.01 sec)

mysql> grant all privileges on cookbook.*
to 'root'@'localhost' identified by 'password';
Query OK, 0 rows affected (0.00 sec)

mysql> FLUSH PRIVILEGES;
Query OK, 0 rows affected (0.00 sec)
To instruct Rails how to find the database, edit the configuration file cookbook\config\database.yml and change the database name to cookbook. Leave the password empty. When you finish, it should look as follows −
development:
   adapter: mysql
   database: cookbook
   username: root
   password: [password]
   host: localhost

test:
   adapter: mysql
   database: cookbook
   username: root
   password: [password]
   host: localhost

production:
   adapter: mysql
   database: cookbook
   username: root
   password: [password]
   host: localhost
Rails lets you run in the development mode, test mode, or production mode, using different databases. This application uses the same database for each.
The Generated Scaffold Code
With the scaffold action, Rails generates all the code it needs dynamically. By running scaffold as a script, we can get all the code written to disk, where we can investigate it and then start tailoring it to our requirements.
So now, let's start once again to generate Scaffold code manually by using the scaffold helper script −
cookbook> rails generate scaffold recipe
It generates auto-files as shown below −
The Controller
Let's look at the code behind the controller. This code is generated by the scaffold generator. If you open app/controllers/recipes_controller.rb, then you will find something as follows −
class RecipesController < ApplicationController
   before_action :set_recipe, only: [:show, :edit, :update, :destroy]

   # GET /recipes
   # GET /recipes.json
   def index
      @recipes = Recipe.all
   end

   # GET /recipes/1
   # GET /recipes/1.json
   def show
   end

   # GET /recipes/new
   def new
      @recipe = Recipe.new
   end

   # GET /recipes/1/edit
   def edit
   end

   # POST /recipes
   # POST /recipes.json
   def create
      @recipe = Recipe.new(recipe_params)

      respond_to do |format|
         if @recipe.save
            format.html { redirect_to @recipe, notice: 'Recipe was successfully created.' }
            format.json { render :show, status: :created, location: @recipe }
         else
            format.html { render :new }
            format.json { render json: @recipe.errors, status: :unprocessable_entity }
         end
      end

   end

   # PATCH/PUT /recipes/1
   # PATCH/PUT /recipes/1.json
   def update
      respond_to do |format|
         if @recipe.update(recipe_params)
            format.html { redirect_to @recipe, notice: 'Recipe was successfully updated.' }
            format.json { render :show, status: :ok, location: @recipe }
         else
            format.html { render :edit }
            format.json { render json: @recipe.errors, status: :unprocessable_entity }
         end
      end

   end

   # DELETE /recipes/1
   # DELETE /recipes/1.json
   def destroy
      @recipe.destroy
         respond_to do |format|
         format.html { redirect_to recipes_url, notice: 'Recipe was successfully destroyed.' }
         format.json { head :no_content }
      end
   end

   private

   # Use callbacks to share common setup or constraints between actions.
   def set_recipe
      @recipe = Recipe.find(params[:id])
   end

   # Never trust parameters from the scary internet, only allow the white list through.
   def recipe_params
      params.require(:recipe).permit(:tittle, :instructions)
   end
end
When the user of a Rails application selects an action, e.g. "Show" - the controller will execute any code in the appropriate section - "def show" - and then by default will render a template of the same name - "show.html.erb". This default behavior can be overwritten.
The controller uses ActiveRecord methods such as find, find_all, new, save, update_attributes, and destroy to move data to and from the database tables. Note that you do not have to write any SQL statements, rails will take care of it automatically.
This single line of code will bring the database table to life. It will provide with a simple interface to your data, and ways of −
- Creating new entries
- Editing current entries
- Viewing current entries
- Destroying current entries
When creating or editing an entry, scaffold will do all the hard work like form generation and handling for you, and will even provide clever form generation, supporting the following types of inputs −
- Simple text strings
- Text areas (or large blocks of text)
- Date selectors
- Date-time selectors
You can use Rails Migrations to create and maintain tables.
rake db:migrate RAILS_ENV=development
Now, go to the cookbook directory and run the Web Server using the following command −
cookbook> rails server
Now, open a browser and navigate to http://127.0.0.1:3000/recipe/new. This will provide you a screen to create new entries in the recipes table. A screenshot is shown below −

Once you press the Create button to create a new recipe, your record is added into the recipes table and it shows the following result −
You can see the option to edit, show, and destroy the records. So, play around with these options.
You can also list down all the recipes available in the recipes table using the URL http://127.0.0.1:3000/recipe/list.
Enhancing the Model
Rails gives you a lot of error handling for free. To understand this, add some validation rules to the empty recipe model −
Modify app/models/recipe.rb as follows and then test your application −
class Recipe < ActiveRecord::Base
   validates_length_of :title, :within => 1..20
   validates_uniqueness_of :title, :message => "already exists"
end
These entries will give automatic checking.
validates_length_of − the field is not blank and not too long.
validates_uniqueness_of − duplicate values are trapped. Instead of the default Rails error message, we have given a custom message here.
Alternative Way to Create Scaffolding
Create an application as shown above and The Generated Scaffold Code as shown below
rails g scaffold Recipe tittle:string instructions:text
Above code generates the auto files with data base by using with sqlite3 with tittle and instruction column as shown below an image.
we need to migrate the data base by using below syntax.
$ rake db:migrate RAILS_ENV=development
Finally run the application by using the following command line −
rails server
It will generate the result as shown above output images.
The Views
All the views and corresponding all the controller methods are created by scaffold command and they are available in the app/views/recipes directory.
How Scaffolding is Different?
If you have gone through the previous chapters, then you must have seen that we had created methods to list, show, delete and create data etc., but scaffolding does that job automatically.
Ruby on Rails - AJAX
Ajax stands for Asynchronous JavaScript and XML. Ajax is not a single technology; it is a suite of several technologies. Ajax incorporates the following −
- XHTML for the markup of web pages
- CSS for the styling
- Dynamic display and interaction using the DOM
- Data manipulation and interchange using XML
- Data retrieval using XMLHttpRequest
- JavaScript as the glue that meshes all this together
Ajax enables you to retrieve data for a web page without having to refresh the contents of the entire page. In the basic web architecture, the user clicks a link or submits a form. The form is submitted to the server, which then sends back a response. The response is then displayed for the user on a new page.
When you interact with an Ajax-powered web page, it loads an Ajax engine in the background. The engine is written in JavaScript and its responsibility is to both communicate with the web server and display the results to the user. When you submit data using an Ajax-powered form, the server returns an HTML fragment that contains the server's response and displays only the data that is new or changed as opposed to refreshing the entire page.
For a complete detail on AJAX you can go through our AJAX Tutorial
How Rails Implements Ajax
Rails has a simple, consistent model for how it implements Ajax operations. Once the browser has rendered and displayed the initial web page, different user actions cause it to display a new web page (like any traditional web application) or trigger an Ajax operation −
Some trigger fires − This trigger could be the user clicking on a button or link, the user making changes to the data on a form or in a field, or just a periodic trigger (based on a timer).
The web client calls the server − A JavaScript method, XMLHttpRequest, sends data associated with the trigger to an action handler on the server. The data might be the ID of a checkbox, the text in an entry field, or a whole form.
The server does processing − The server-side action handler ( Rails controller action )-- does something with the data and returns an HTML fragment to the web client.
The client receives the response − The client-side JavaScript, which Rails creates automatically, receives the HTML fragment and uses it to update a specified part of the current page's HTML, often the content of a <div> tag.
These steps are the simplest way to use Ajax in a Rails application, but with a little extra work, you can have the server return any kind of data in response to an Ajax request, and you can create custom JavaScript in the browser to perform more involved interactions.
AJAX Example
This example works based on scaffold, Destroy concept works based on ajax.
In this example, we will provide, list, show and create operations on ponies table. If you did not understand the scaffold technology then we would suggest you to go through the previous chapters first and then continue with AJAX on Rails.
Creating An Application
Let us start with the creation of an application It will be done as follows −
rails new ponies
The above command creates an application, now we need to call the app directory using with cd command. It will enter in to an application directory then we need to call a scaffold command. It will be done as follows −
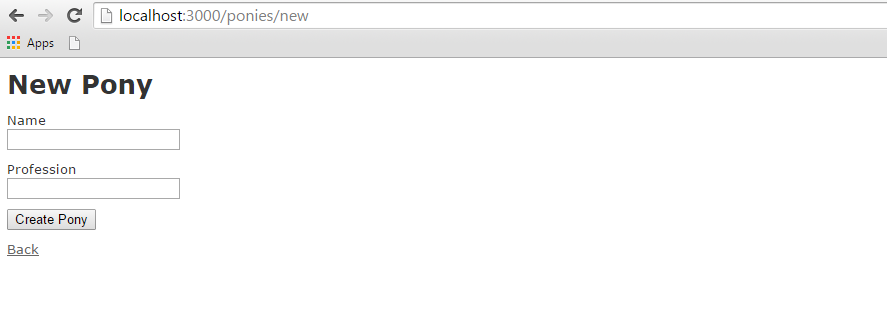
rails generate scaffold Pony name:string profession:string
Above command generates the scaffold with name and profession column. We need to migrate the data base as follows command
rake db:migrate
Now Run the Rails application as follows command
rails s
Now open the web browser and call a url as http://localhost:3000/ponies/new, The output will be as follows
Creating an Ajax
Now open app/views/ponies/index.html.erb with suitable text editors. Update your destroy line with :remote => true, :class => 'delete_pony'.At finally, it looks like as follows.
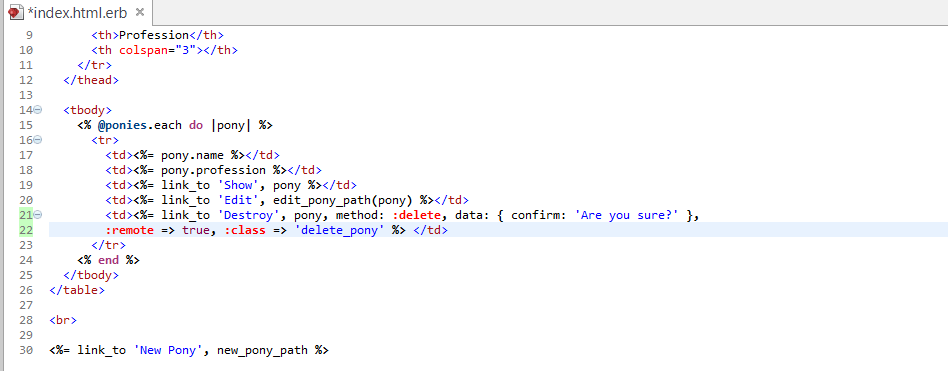
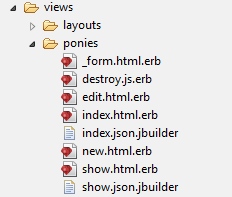
Create a file, destroy.js.erb, put it next to your other .erb files (under app/views/ponies). It should look like this −
Now enter the code as shown below in destroy.js.erb
$('.delete_pony').bind('ajax:success', function() {
   $(this).closest('tr').fadeOut();
});
Now Open your controller file which is placed at app/controllers/ponies_controller.rb and add the following code in destroy method as shown below −
# DELETE /ponies/1
# DELETE /ponies/1.json
def destroy
   @pony = Pony.find(params[:id])
   @pony.destroy

   respond_to do |format|
      format.html { redirect_to ponies_url }
      format.json { head :no_content }
      format.js   { render :layout => false }
   end

end
At finally controller page is as shown image.
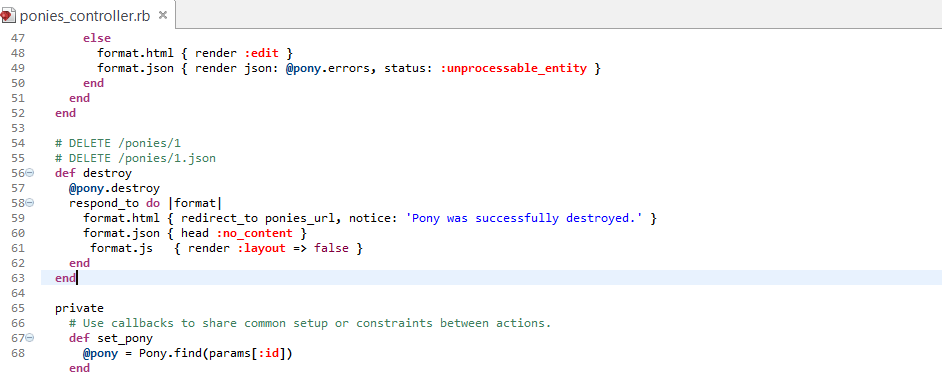
Now run an application, Output called from http://localhost:3000/ponies/new, it will looks like as following image
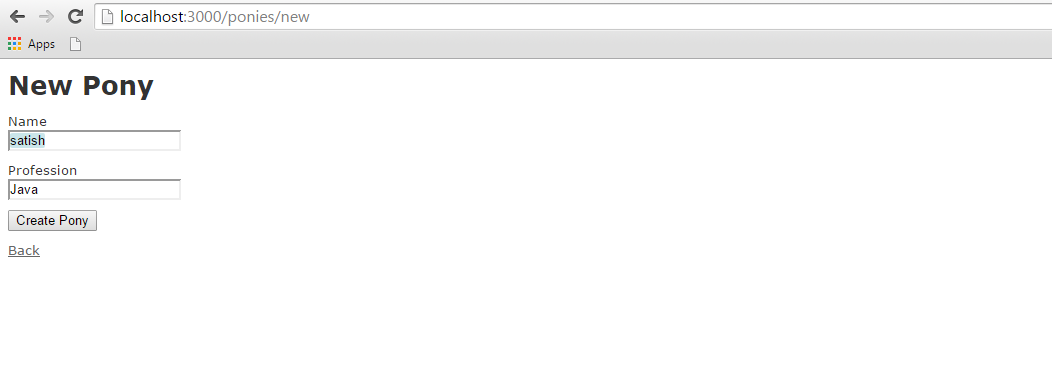
Press on create pony button, it will generate the result as follows
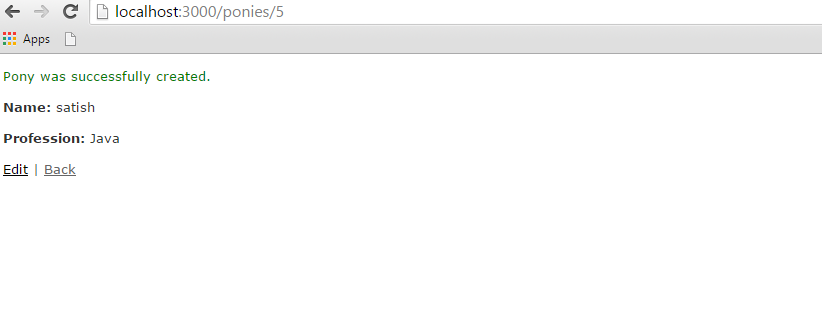
Now click on back button, it will show all pony created information as shown image
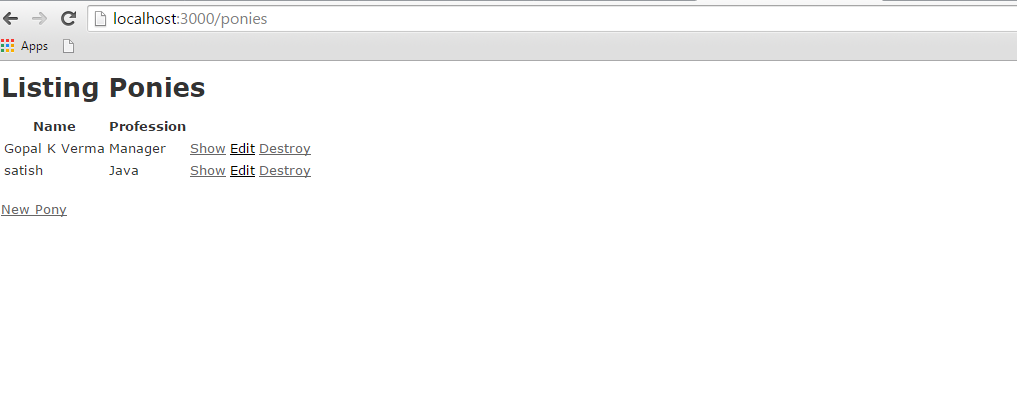
Till now, we are working on scaffold, now click on destroy button, it will call a pop-up as shown below image, the pop-up works based on Ajax.
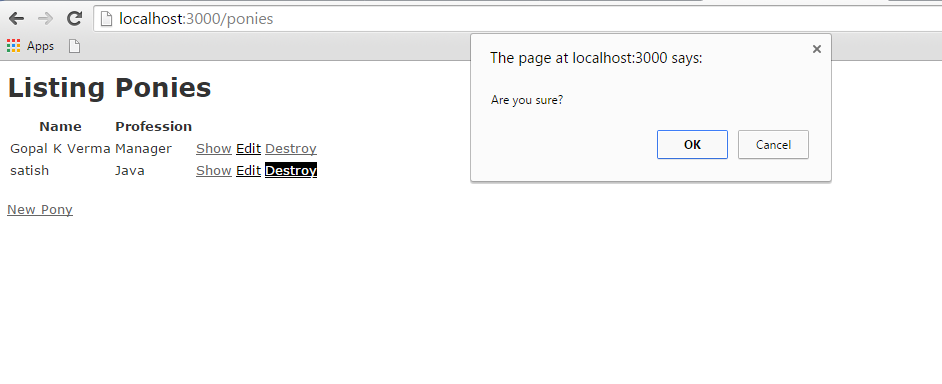
If Click on ok button, it will delete the record from pony. Here I have clicked ok button. Final output will be as follows −
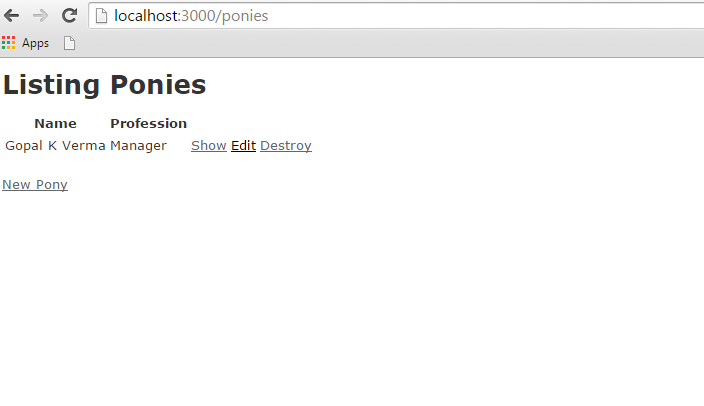
Ruby on Rails - File Uploading
You may have a requirement in which you want your site visitors to upload a file on your server. Rails makes it very easy to handle this requirement. Now we will proceed with a simple and small Rails project.
As usual, let's start off with a new Rails application called testfile. Let's create the basic structure of the application by using simple rails command.
tp> rails new testfile
Before starting application development, we should install gem files as shown below −
gem install carrierwave
gem install bootstrap-sass
Open up your gemfile and add the following two gems at the bottom as shown in the following image −

After adding gems in the gem file, we need to run the following command on the console −
bundle install
Creating the Model
We need to create a model with two strings as name and attachment as shown below −
rails g model Resume name:string attachment:string
We need to create the database migration as shown below −
rake db:migrate
We need to generate the controller as shown below −
rails g controller Resumes index new create destroy
Great! Now we have the basic structure set up. Now we need to create an uploader. An Uploader came from carrierwave gem and it tells to carrierwave how to handle the files. In short, it contained all file processing functionalities. Run the command to create an uploader as shown below
rails g uploader attachment
Now open the resume model and call the uploader as shown below. Resume model has placed at app/models/resume.rb −
class Resume < ActiveRecord::Base
   mount_uploader :attachment, AttachmentUploader # Tells rails to use this uploader for this model.
   validates :name, presence: true # Make sure the owner's name is present.
end
Before working on controller, we need to modify our config/routes.db as shown below −
CarrierWaveExample::Application.routes.draw do
   resources :resumes, only: [:index, :new, :create, :destroy]
   root "resumes#index"
end
Lets us edit the controller as shown below.
class ResumesController < ApplicationController
   def index
      @resumes = Resume.all
   end

   def new
      @resume = Resume.new
   end

   def create
      @resume = Resume.new(resume_params)

      if @resume.save
         redirect_to resumes_path, notice: "The resume #{@resume.name} has been uploaded."
      else
         render "new"
      end

   end

   def destroy
      @resume = Resume.find(params[:id])
      @resume.destroy
      redirect_to resumes_path, notice:  "The resume #{@resume.name} has been deleted."
   end

   private
      def resume_params
      params.require(:resume).permit(:name, :attachment)
   end

end
Let's add bootstrap implementation in css file.css file could be in app/assets/stylesheets/resumes.css.scss
@import "bootstrap";
Now open up app/views/layouts/application.html.erb and add codes as shown below −
<!DOCTYPE html>
<html>

   <head>
      <title>Tutorialspoint</title>
      <%= stylesheet_link_tag "application", media: "all", "data-turbolinks-track" => true %>
      <%= javascript_include_tag "application", "data-turbolinks-track" => true %>
      <%= csrf_meta_tags %>
   </head>

   <body>
      <div class = "container" style = "padding-top:20px;">
         <%= yield %>
      </div>
   </body>

</html>
Now we need to set up index views as shown below −
<% if !flash[:notice].blank? %>
   <div class = "alert alert-info">
      <%= flash[:notice] %>
   </div>
<% end %>

<br />

<%= link_to "New Resume", new_resume_path, class: "btn btn-primary" %>
<br />
<br />

<table class = "table table-bordered table-striped">
   <thead>.
      <tr>
         <th>Name</th>
         <th>Download Link</th>
         <th> </th>
      </tr>
   </thead>

   <tbody>
      <% @resumes.each do |resume| %>

         <tr>
            <td><%= resume.name %></td>
            <td><%= link_to "Download Resume", resume.attachment_url %></td>
            <td><%= button_to "Delete",  resume, method: :delete, class: "btn btn-danger", confirm: "Are you sure that you wish to delete #{resume.name}?" %></td>
         </tr>

      <% end %>
   </tbody>

</table>
Now, lets edit new.html.erb and add our form code.
<% if !@resume.errors.empty? %>
   <div class = "alert alert-error">

      <ul>
         <% @resume.errors.full_messages.each do |msg| %>
            <li><%= msg %></li>
         <% end %>
      </ul>

   </div>
<% end %>

<div class = "well">
   <%= form_for @resume, html: { multipart: true } do |f| %>
      <%= f.label :name %>
      <%= f.text_field :name %>
      <%= f.label :attachment %>
      <%= f.file_field :attachment %>
      <%= f.submit "Save", class: "btn btn-primary" %>
   <% end %>
</div>
Now start the server and visit http://localhost:3000. It will produce a screen similar to as follows −

One last thing we need to do is filter the list of allowed filetypes. For that we need add simple code as shown below at app/uploaders/attachment_uploader.rb
class AttachmentUploader < CarrierWave::Uploader::Base
   storage :file

   def store_dir
      "uploads/#{model.class.to_s.underscore}/#{mounted_as}/#{model.id}"
   end

   def extension_white_list
      %w(pdf doc htm html docx)
   end
end
Now start the server and visit http://localhost:3000. Now input a wrong format; it will generate a wrong message as shown below −

For a complete detail on File object, you need to go through the Ruby Reference Manual.
Ruby on Rails - Send Emails
Action Mailer is the Rails component that enables applications to send and receive emails. In this chapter, we will see how to send an email using Rails. Let’s start creating an emails project using the following command.
tp> rails new mailtest
This will create the required framework to proceed. Now, we will start with configuring the ActionMailer.
Action Mailer - Configuration
Following are the steps you have to follow to complete your configuration before proceeding with the actual work −
Go to the config folder of your emails project and open environment.rb file and add the following line at the bottom of this file.
config.action_mailer.delivery_method = :smtp
It tells ActionMailer that you want to use the SMTP server. You can also set it to be :sendmail if you are using a Unix-based operating system such as Mac OS X or Linux.
Add the following lines of code at the bottom of your environment.rb as well.
config.action_mailer.smtp_settings = {
   address:              'smtp.gmail.com',
   port:                 587,
   domain:               'example.com',
   user_name:            '<username>',
   password:             '<password>',
   authentication:       'plain',
   enable_starttls_auto: true
}
Replace each hash value with proper settings for your Simple Mail Transfer Protocol (SMTP) server. You can take this information from your Internet Service Provider if you already don't know. You don't need to change port number 25 and authentication type if you are using a standard SMTP server.
You may also change the default email message format. If you prefer to send email in HTML instead of plain text format, add the following line to config/environment.rb as well −
ActionMailer::Base.default_content_type = "text/html"
ActionMailer::Base.default_content_type could be set to "text/plain", "text/html", and "text/enriched". The default value is "text/plain".
The next step will be to create a mailer
Generate a Mailer
Use the following command to generate a mailer as follows −
tp> cd emails
emails> rails generate mailer Usermailer
This will create a file user_mailer.rb in the app\mailer directory. Check the content of this file as follows −
class Emailer < ActionMailer::Base
end
Let's create one method as follows −
class UserMailer < ApplicationMailer
   default from: 'notifications@example.com'

   def welcome_email(user)
      @user = user
      @url  = 'http://www.gmail.com'
      mail(to: @user.email, subject: 'Welcome to My Awesome Site')
   end

end
default Hash − This is a hash of default values for any email you send from this mailer. In this case we are setting the :from header to a value for all messages in this class. This can be overridden on a per-email basis
mail − The actual email message, we are passing the :to and :subject headers in.
Create a file called welcome_email.html.erb in app/views/user_mailer/. This will be the template used for the email, formatted in HTML −
<html>

   <head>
      <meta content = 'text/html; charset = UTF-8' http-equiv = 'Content-Type' />
   </head>

   <body>
      <h1>Welcome to example.com, <%= @user.name %></h1>

      <p>
         You have successfully signed up to example.com,your username is:
         <%= @user.login %>.<br>
      </p>

      <p>
         To login to the site, just follow this link:
         <%= @url %>.
      </p>

      <p>Thanks for joining and have a great day!</p>

   </body>
</html>
Next we will create a text part for this application as follow −
Welcome to example.com, <%= @user.name %>
===============================================

You have successfully signed up to example.com,
your username is: <%= @user.login %>.

To login to the site, just follow this link: <%= @url %>.

Thanks for joining and have a great day!
Calling the Mailer
First, let's create a simple User scaffold
$ bin/rails generate scaffold user name email login
$ bin/rake db:migrate
Action Mailer is nicely integrated with Active Job so you can send emails outside of the request-response cycle, so the user doesn't have to wait on it −
class UsersController < ApplicationController
   # POST /users
   # POST /users.json
   def create
   @user = User.new(params[:user])

      respond_to do |format|
         if @user.save
            # Tell the UserMailer to send a welcome email after save
            UserMailer.welcome_email(@user).deliver_later

            format.html { redirect_to(@user, notice: 'User was successfully created.') }
            format.json { render json: @user, status: :created, location: @user }
         else
            format.html { render action: 'new' }
            format.json { render json: @user.errors, status: :unprocessable_entity }
         end

      end

   end
end
Now, test your application by using http://127.0.0.1:3000/users/new. It displays the following screen and by using this screen, you will be able to send your message to anybody.
This will send your message and will display the text message "Message sent successfully" and output as follow −
sent mail to kittuprasad700@gmail.com (2023.Sms)
[ActiveJob] [ActionMailler::DeliveryJob] [2cfde3c-260e-4a33-1a6ada13a9b] Date: Thu, 09 Jul 2015 11:44:05 +0530
From: notification@example.com
To: kittuprasad700@gmail.com
Message-Id: <559e112d63c57_f1031e7f23467@kiranPro.mail>
Subject: Welcome to My Awesome Site
Mime-Version: 1.0
Content-Type: multipart/alternative;
boundary="--mimepart_559e112d601c8_f1031e7f20233f5";
charset=UTF-8
Content-Transfer-Encoding:7bit
For more information on how to send emails using Rails, please go through ActionMailer.