- QTP Tutorial
- QTP - Home
- QTP - Introduction
- QTP - Test Automation
- QTP - Environment Setup
- QTP - Record and Play Back
- QTP - Object Repository
- QTP - Actions
- QTP - DataTables
- QTP - Checkpoints
- QTP - Synchronization
- QTP - Smart Identification
- QTP - Debugging
- QTP - Error Handling
- QTP - Recovery Scenarios
- QTP - Environment Variables
- QTP - Library Files
- QTP - Test Results
- QTP - GUI Objects
- QTP - Virtual Objects
- QTP - Accessing Databases
- QTP - Working with XML
- QTP - Descriptive Programming
- QTP - Automation Object Model
- QTP - Frameworks
- QTP - Designing a Framework
- QTP Useful Resources
- QTP - Questions and Answers
- QTP - Quick Guide
- QTP - Useful Resources
- QTP - Discussion
QTP - Environment SetUp
QTP is a commercial tool and the trial version can be downloaded from HP site directly. Only the current version, which is Unified functional testing (11.5x) is available for download. Following is the URL from where the trial version can be downloaded.
The Download URL − QTP
Installation Procedure
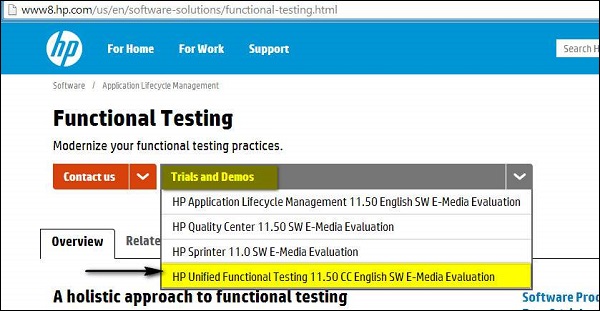
Step 1 − Click the "Trials and Demos" link and select "HP Unified Functional Testing 11.50 CC English SW E-Media Evaluation" as shown below −
Step 2 − After Selecting "HP Unified Functional Testing 11.50", the download wizard opens. Fill in the Personal details and click Next.

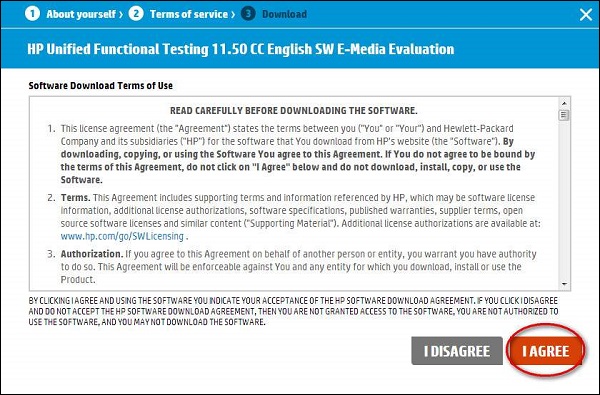
Step 3 − Read the ‘Terms of Use’ and click "NEXT".
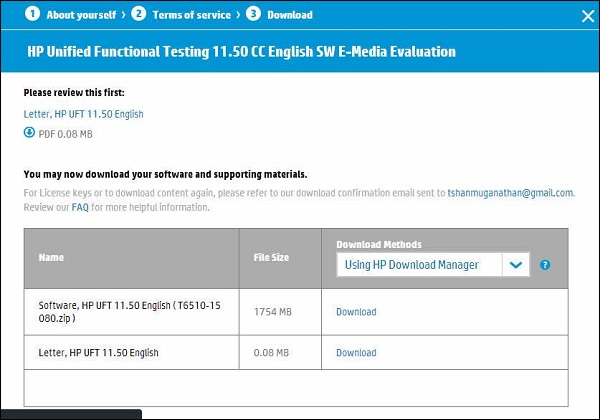
Step 4 − The Download window opens. Now, click the "Download" button.
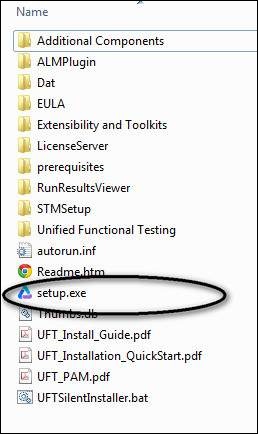
Step 5 − The downloaded file will be of the format .RAR. Now you need to unzip the archive and the folder contents would be as shown below and execute the Setup.exe.
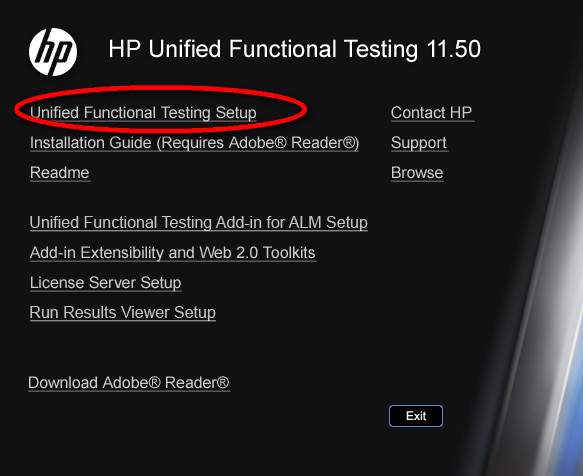
Step 6 − Upon Executing the Setup File, in order to install, select "Unified Functional Testing Set up" from the list as shown below −
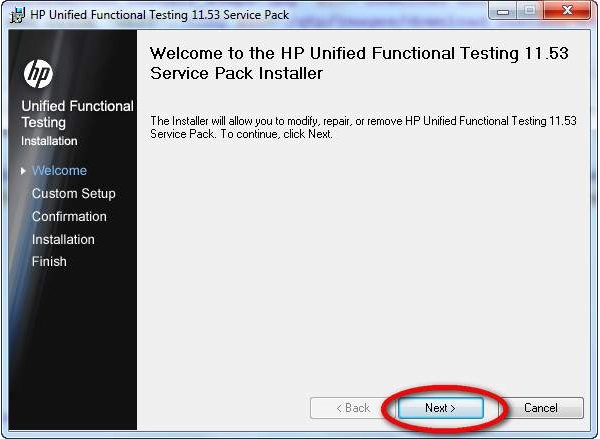
Step 7 − Then click Next to continue.
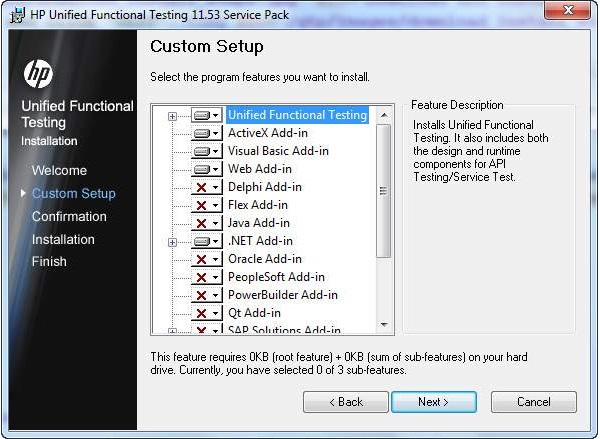
Step 8 − In the Custom Set up Window, select the plugins that are required for your automation i.e. you should select the plugins based on the technology of your application under test. For Example, if your application is based on .NET then you should ensure that you select .NET.
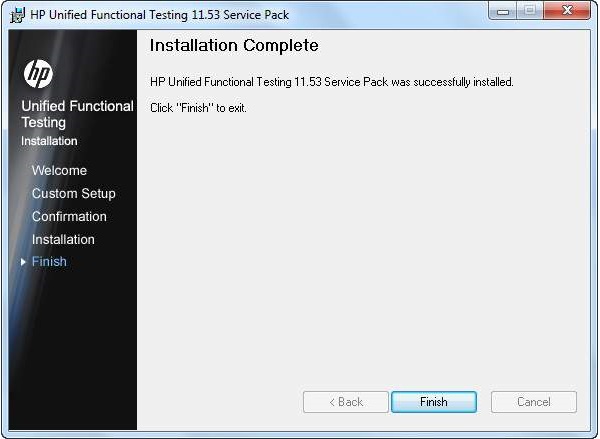
Step 9 − After selecting the required plugins for installation, click Next. After the completion of installation, you will end up with a Finish button Window.
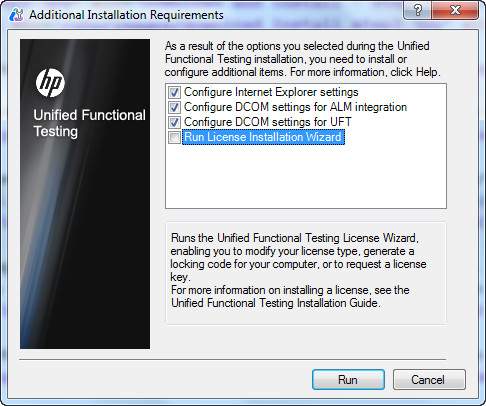
Step 10 − Once you complete your installation, the "Additional Installation Requirements" Dialog box opens. Select everything in the list other than "Run License Installation Wizard" and click "RUN". We Need NOT select "Run License Installation Wizard" because we are installing the trial version, which, by default, gives a license for 30 days.
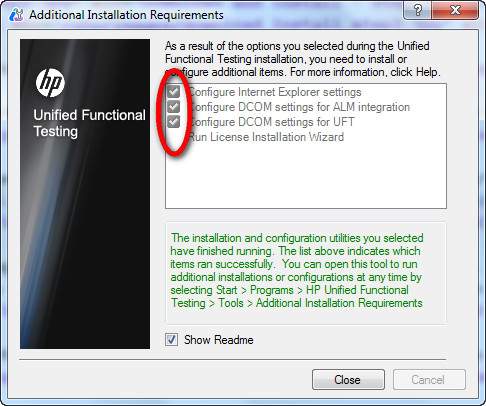
Step 11 − After the completion of Additional Installation Requirements, a tick mark is shown, which in turn states that the components are installed successfully. Now, click Close.
Launching UFT and Add ins Page
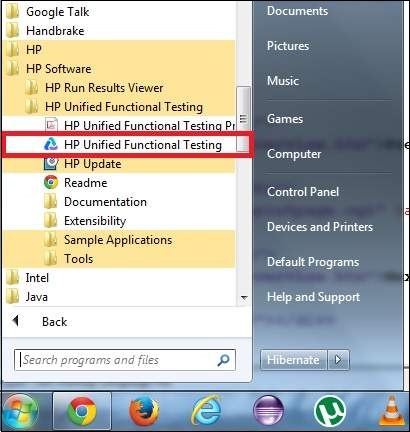
Step 1 − After Installation, application can be launched from the Start Menu as shown in the figure.
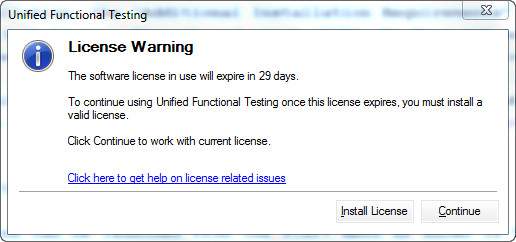
Step 2 − The license page appears. You can click Continue as we have installed the trial license.
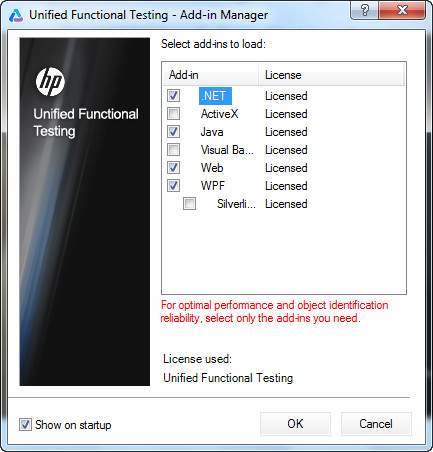
Step 3 − The Add-ins dialog box opens for the user to select the required add-ins.
Note − Do not load all the add-ins but just the required add-ins and click OK.
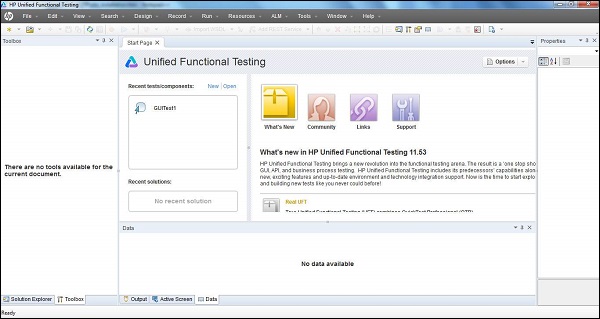
Step 4 − After loading the required add-ins, the UFT 11.5 tool opens for the user and the first glimpse of the UFT looks, as shown below −