- Microsoft Expression Web Tutorial
- MS Expression Web - Home
- MS Expression Web - Overview
- Environment Setup
- MS Expression Web - New Website
- Blank Web Page
- Webpage Layout
- MS Expression Web - HTML Layout
- Horizontal Navigation
- Vertical Navigation
- MS Expression Web - Validate Pages
- Dynamic Web Template
- MS Expression Web - Search Page
- MS Expression Web - Images
- MS Expression Web - Hyperlinks
- MS Expression Web - Video
- SQL Datasource
- MS Expression Web - MS Word
- MS Expression Web - Gridview
- MS Expression Web - Master Pages
- MS Expression Web - Data Table
- MS Expression Web - Publish
- Backup Website
- MS Expression Web - Add-Ins
- MS Expression Web Resources
- MS Expression Web - Quick Guide
- MS Expression Web - Resources
- MS Expression Web - Discussion
Microsoft Expression Web - Webpage Layout
In this chapter, we will be covering the basic layout of your webpages. Before creating our webpage layout, we need to think about our content and then design how we want to present that content, as it is the content that will be visible on our website.
It is up to us how we present our content so that our viewers find our site and then stay to check it out. The layout will probably include the company logo or banner at the top, the navigation menu, a content area that may include multiple columns, and footer at the bottom of the page.
Previously, developers used tables to achieve this look. Tables created group of boxes that were used to create rows and columns. Now, web designers use <div>s to form the boxes and CSS to place those boxes on the page.
<div> tag
Following are some of the features of <div> tag.
The <div> tag defines a division or a section in an HTML document and makes it easy to manage, style, and manipulate those divisions or sections.
It is used to group block elements to format them with CSS.
Browsers usually place a line break before and after the div element.
The <div> tag is a block-level element.
The <div> tag can contain almost any other element.
The <div> tag cannot be inside a <p> tag.
Example
Let’s take a look at a simple example in which we will be using <div> </div> tags to create the various boxes and style rules.
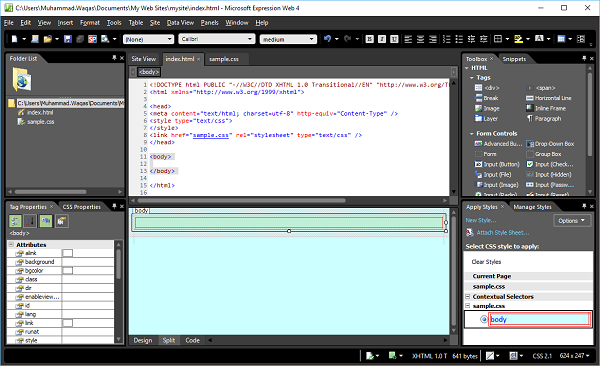
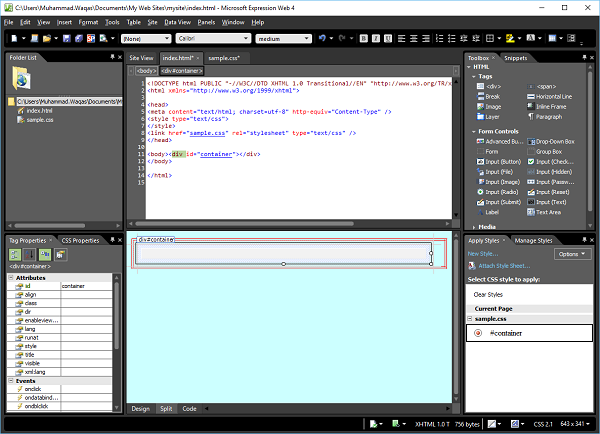
Step 1 − Open Expression Web and then the index.html page that we created in the previous chapter.
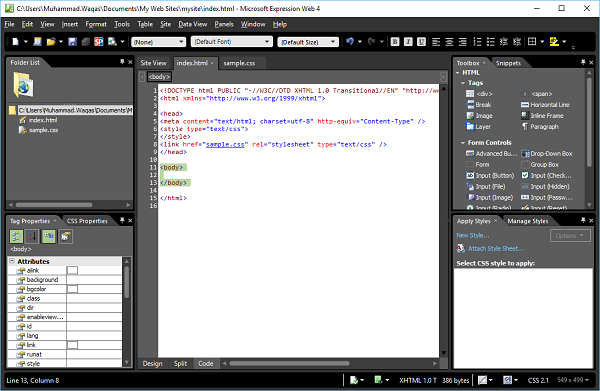
Step 2 − As seen in the above screenshot, the Code View is highlighted by default. You can work in Code View or Design View, but you can also see the Split View which will open both Code View and Design View. So let’s select the Split View option.
Step 3 − The body element defines the document's body. To style the <body> tag, we need to create a new style. First select the body tag in Design View and then click the New Style… in Apply Styles panel, which will open the New Style dialog. Here, you can define the different options for your style.
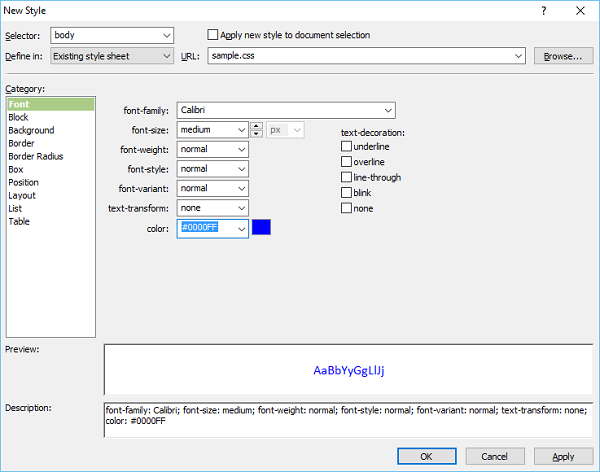
Step 4 − The first step is to select the body from the Selector dropdown list and then select the Existing style sheet from “Define in” the dropdown list. From the URL, select the CSS file we have created in the previous chapter.
On the left side, there is a Category list such as Font, Background, etc. and the current Font is highlighted. Set the Font-related information as per your requirements as shown in the above screenshot.
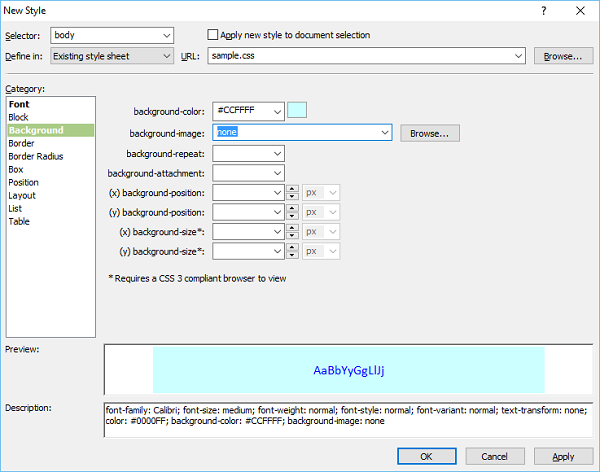
Step 5 − Select the Background color you want. You can also select the image for your background by using the browser button. Once you are done with the Background, define your Borders if you want.
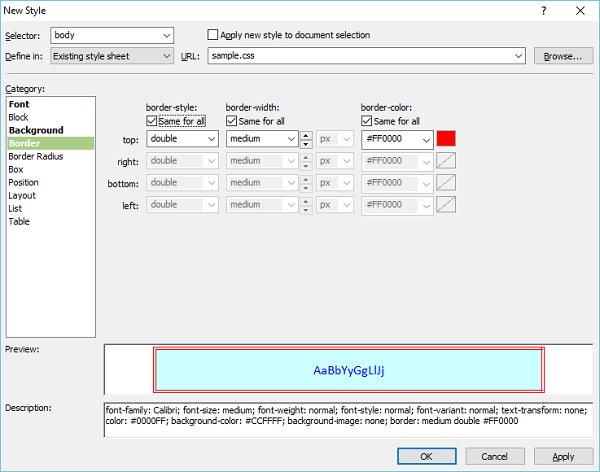
Step 6 − Let’s select the double line option for the border and choose the width and color also from the dropdown lists. Once you are done with the style, then click Ok.
Step 7 − Now you can see in the design view that the background color is changed to what we have selected. If you open the sample.css file, you will see that all the information is automatically stored in the CSS file.

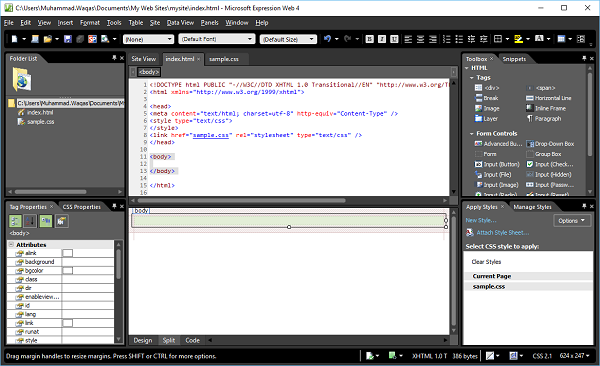
Step 8 − Go to the index.html page again and drag the <div> from the 'Toolbox' panel and drop it on your open page.
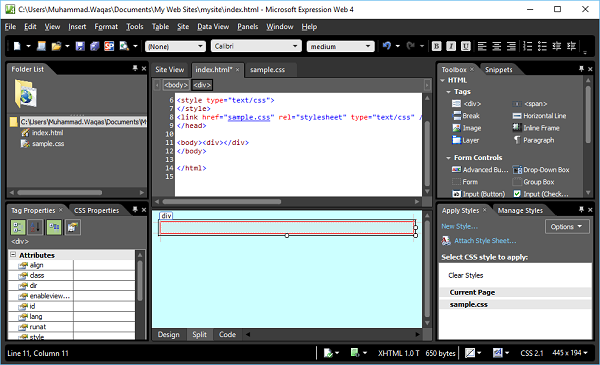
Step 9 − Above the code view, you will see <body> and <div> tags, click the <div> tag and then in Apply Styles panel click on the New Style…. which will open the New Style dialog.
Type “#container” in the Selector field. The hash mark # is an ID selector. From the “Define in” dropdown list, select the Existing style sheet and check the “Apply new style to document selection” option. Go to the Background category.

Step 10 − Select the background color, let’s select white color and then go to the Box category.
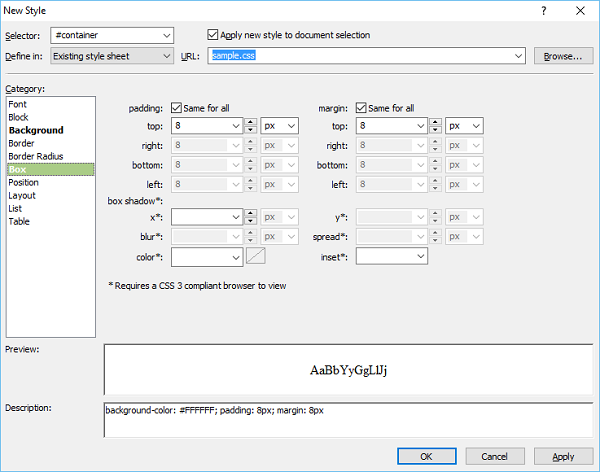
Step 11 − Define padding and margin and then go to the Position category
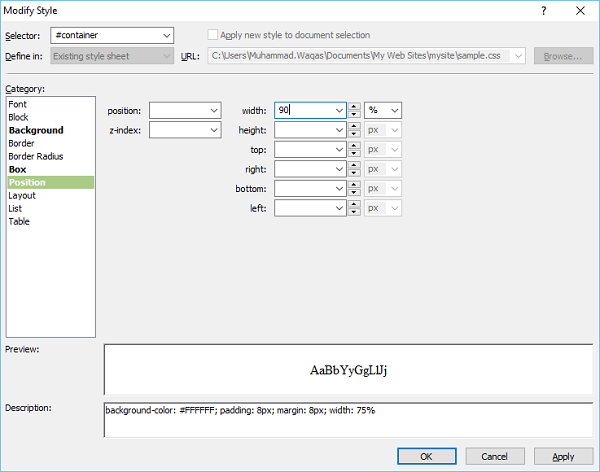
Step 12 − Set the width to 90%. However, don’t specify the height as here we want that the container should expand when we enter the content. Click the OK button.
Similarly, let’s add styles for Header, top navigation, left navigation, main content, and footer.
sample.css
Following is the code in sample.css style-sheet after adding all the above-mentioned styles.
body {
   font-family: Calibri;
   font-size: medium;
   font-weight: normal;
   font-style: normal;
   font-variant: normal;
   text-transform: none;
   color: #0000FF;
   background-color: #CCFFFF;
   background-image: none;
   border: medium double #FF0000;
}

#container {
   background-color: #FFFFFF;
   padding: 8px;
   margin: 8px;
   width: 90%;
}

#header {
   background-color: #54B431;
   background-repeat: no-repeat;
   background-position: right center;
   height: 170px;
}

#top-nav {
   height: 50px;
   border-top: solid medium #006600;
   border-bottom: solid medium #006600;
   background-color: #FFFFFF;
}

#left-nav {
   margin: 20px 0px 10px 0px;
   width: 180px;
   float: left;
   border: thin dashed #006600;
}

#main-content {
   margin: 20px 10px 10px 200px;
   background-color: #CCFFCC;
}

#footer {
   border-top: 2px solid #006600;
   clear: both;
   padding: 10px 0px;
   text-align: center;
}
index.html
Following is the code in index.html file after adding all the <div> tags.
<!DOCTYPE html PUBLIC "-//W3C//DTD XHTML 1.0 Transitional//EN"
"http://www.w3.org/TR/xhtml1/DTD/xhtml1-transitional.dtd">
<html xmlns = "http://www.w3.org/1999/xhtml">
<head>
<meta content = "text/html; charset = utf-8" http-equiv = "Content-Type" />
<style type = "text/css"></style>
<link href = "sample.css" rel = "stylesheet" type = "text/css" />
</head>
<body>
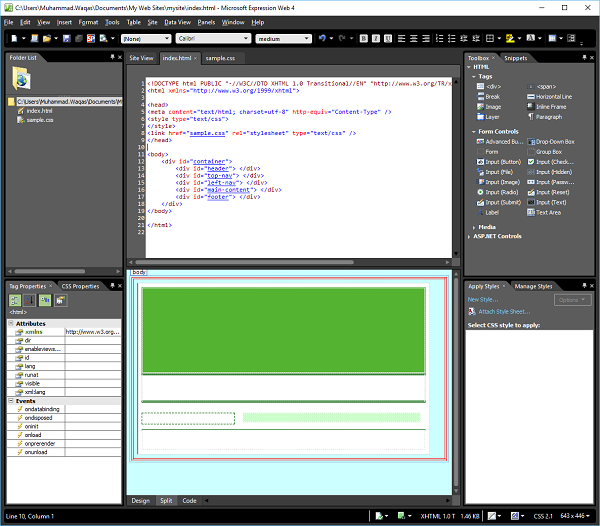
<div id = "container">
<div id = "header"></div>
<div id = "top-nav"></div>
<div id = "left-nav"></div>
<div id = "main-content"></div>
<div id = "footer"></div>
</div>
</body>
</html>
Output
Your page layout in the design view will look as shown in the following screenshot.