- Microsoft Expression Web Tutorial
- MS Expression Web - Home
- MS Expression Web - Overview
- Environment Setup
- MS Expression Web - New Website
- Blank Web Page
- Webpage Layout
- MS Expression Web - HTML Layout
- Horizontal Navigation
- Vertical Navigation
- MS Expression Web - Validate Pages
- Dynamic Web Template
- MS Expression Web - Search Page
- MS Expression Web - Images
- MS Expression Web - Hyperlinks
- MS Expression Web - Video
- SQL Datasource
- MS Expression Web - MS Word
- MS Expression Web - Gridview
- MS Expression Web - Master Pages
- MS Expression Web - Data Table
- MS Expression Web - Publish
- Backup Website
- MS Expression Web - Add-Ins
- MS Expression Web Resources
- MS Expression Web - Quick Guide
- MS Expression Web - Resources
- MS Expression Web - Discussion
Microsoft Expression Web - SQL Datasource
Expression Web has many tools for working with static HTML pages, but it also has tools for creating more dynamic pages. Dynamic pages often retrieve data or content from a source of data. In this chapter, we will learn how to create a SQL DataSource to be used in dynamic pages.
Example
Let’s take a look at a simple example in which we create a dropdown list and fill the list by retrieving data from the database using SQL DataSource.
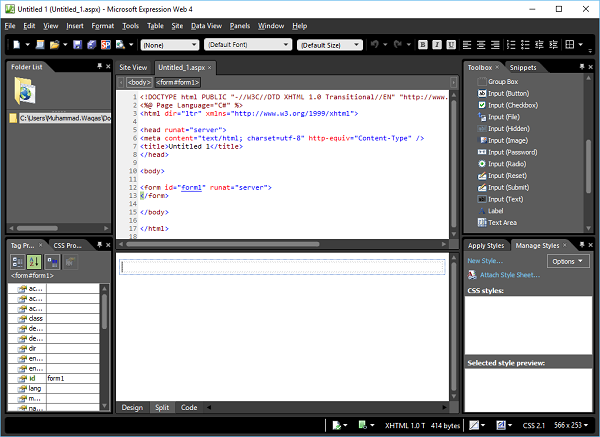
Step 1 − Start by creating a new empty website.
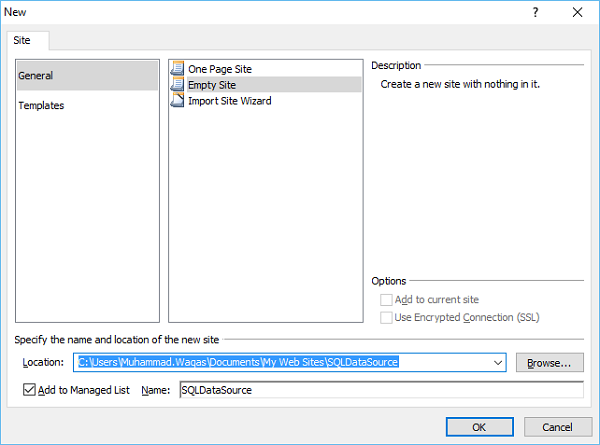
Let’s call it SQLDataSource. Click OK.
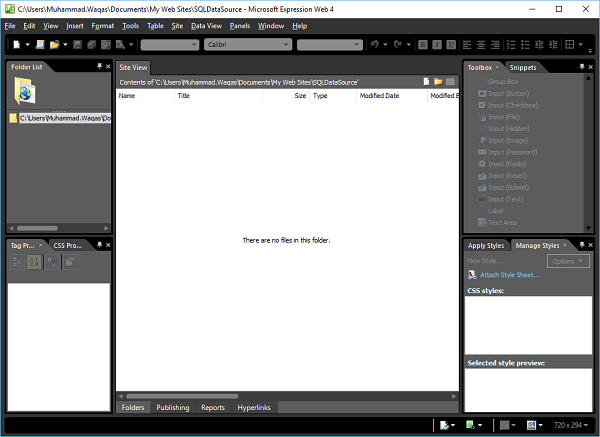
Step 2 − You will see that expression web has created a folder for us. However, since we chose to create an empty project, so we don't have any files yet.
Expression Web doesn't have to be used just to create static HTML sites; we can create dynamic sites using pages and controls with much ease.
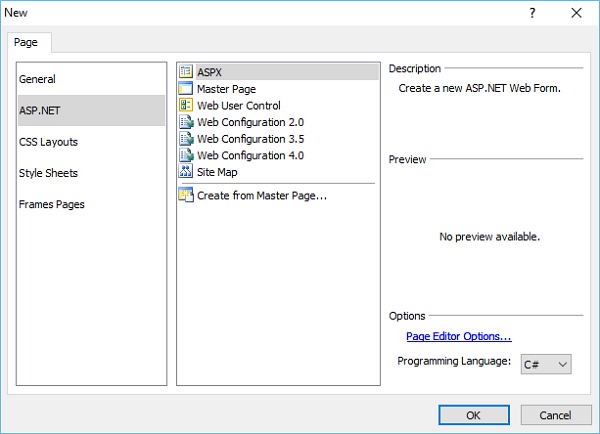
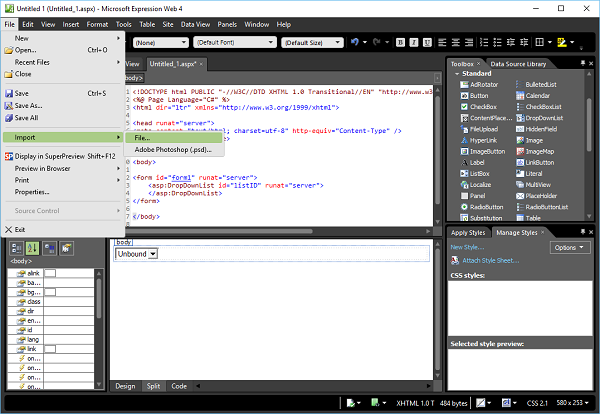
Step 3 − Expression web also allows us to create a lot of dynamic content without necessarily having to be a developer. So let’s add an ASPX file from the File → New Page menu option. Select ASPX in the middle model and click OK.
Step 4 − Here we will be creating a control in our form that needs to access data from a database to create a dynamic website.
In this particular case, we will create a SQL DataSource which will retrieve data from the database.
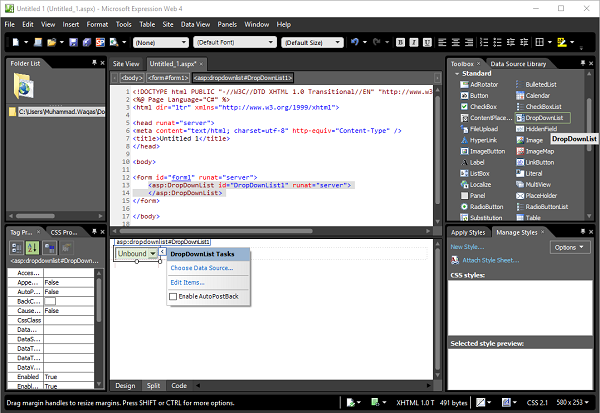
Step 5 − Go to the Toolbox and drag the DropDownList and drop it inside the <form> tag in Code View or you can also drop it in the form section in Design View. You will see that the code is added by Expression Web.
Here, we want to connect some data from our database and store that in our dropdown list. So, the first thing we need is the database.
Step 6 − Create a new Folder in your Project folder by going to the New → Folder menu option.
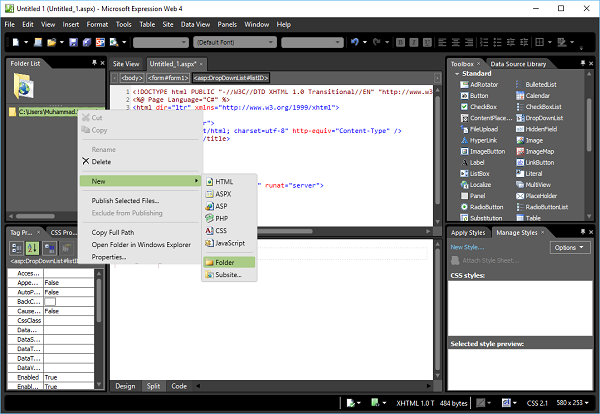
Step 7 − Call this folder App_Data.
Step 8 − We need to import a database in our project by using the File → Import → File… menu option.
Step 9 − It will open the Import dialog, as shown below. Click on the Add File… button which will open the open file dialog box.

Step 10 − Browse to the database (*.mdf file) which you want to include in the website and click Open.
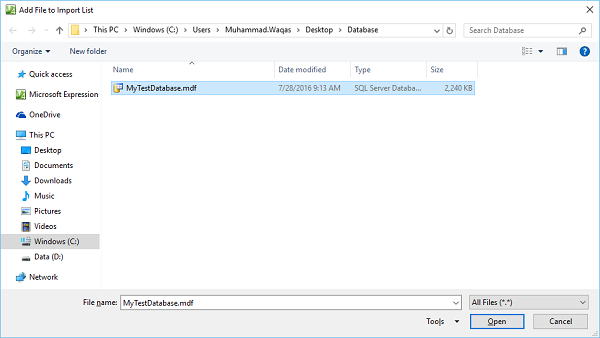
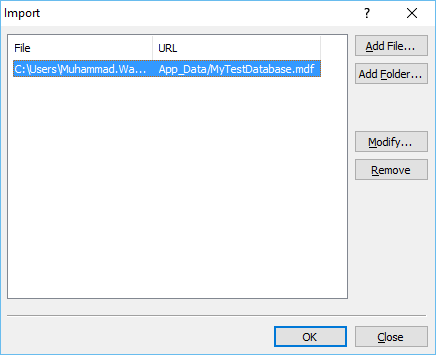
Step 11 − Open the MyTestDatabase.mdf. It will display the following dialog. Click OK.
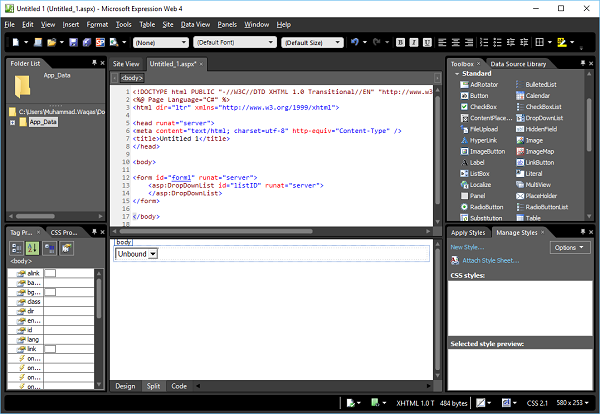
Step 12 − Now you can see that the database file is added in the App_Data folder. When you have a control like a dropdown list and Expression Web allows you to bind the data to it, then you will see a little arrow at the top right corner in the design view.
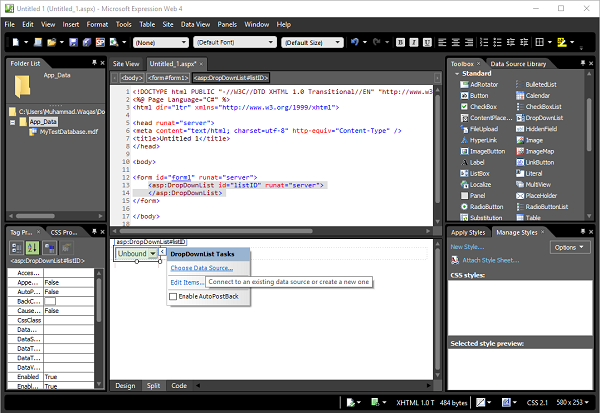
Step 13 − This is the current context menu that can allow us to do a very specific task for that particular control and one of those is to choose a data source. So let’s click on Choose Data Source… and that will open the data source configuration wizard.
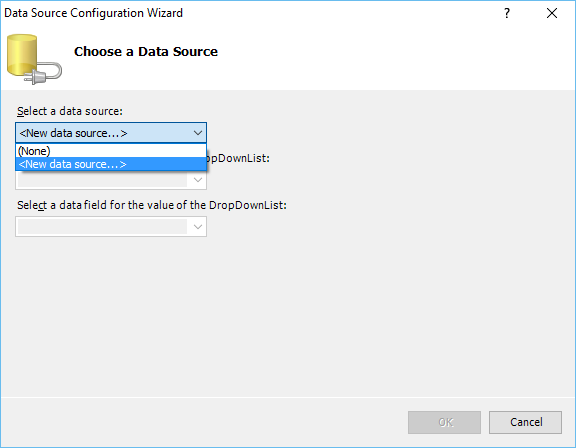
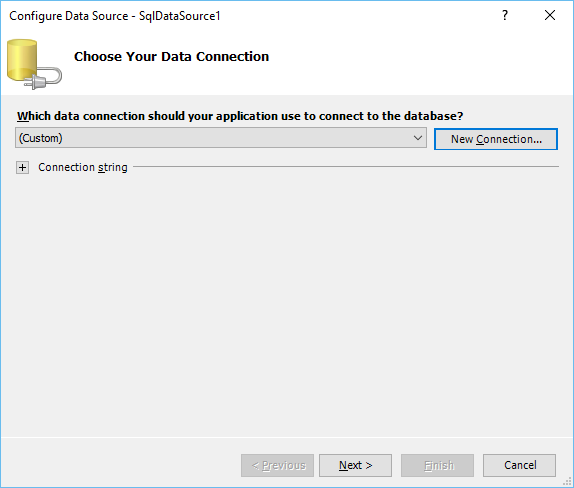
Step 14 − Currently, we don’t have a data source. Let’s select the New data source option from the menu.
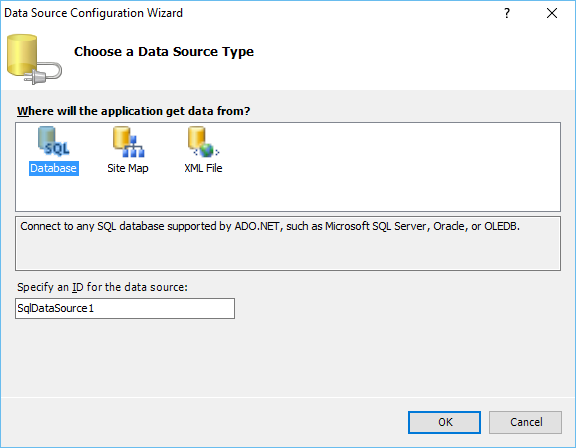
Here, we will import an SQL database. Let’s select the database and click OK.
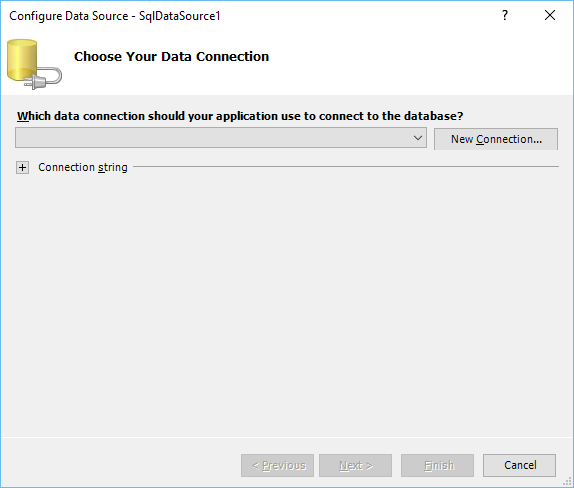
Step 15 − Now, we need to specify the connection string. Let’s click the New Connection button.
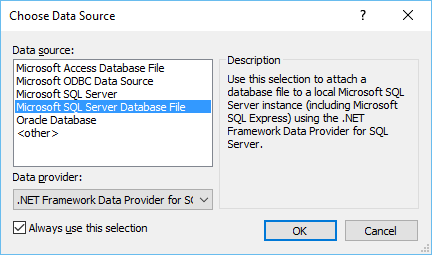
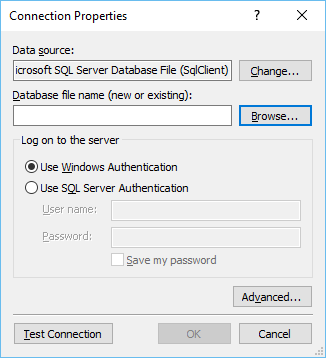
Step 16 − Select the Microsoft SQL Server Database File and click OK.
Step 17 − Click the Browse button to locate the database file.
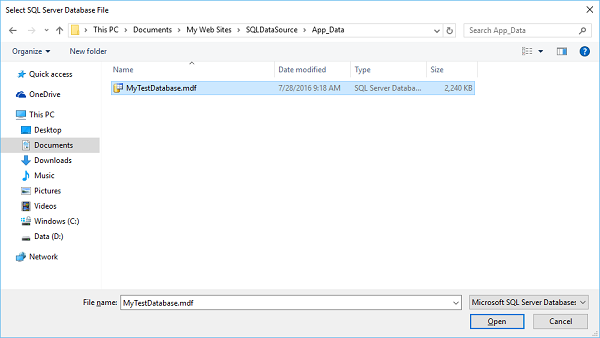
Step 18 − Select the database file and click the Open button or double-click the database file.
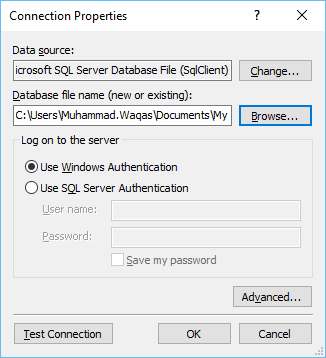
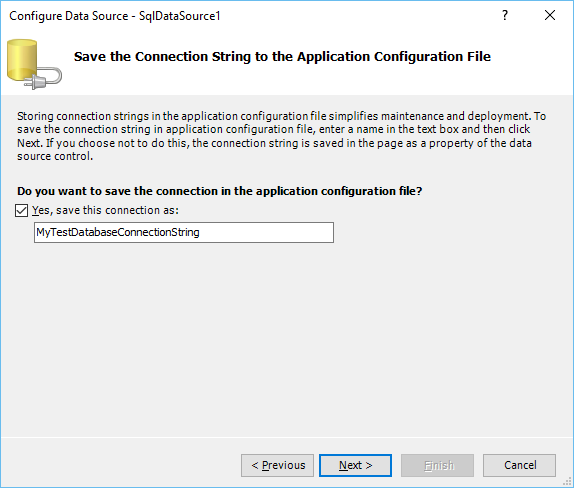
Step 19 − To test the connection, click the Test Connection button.
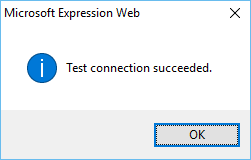
It will display the following screen. Click the OK button.
Step 20 − Now, we will configure the data source. Click Next on the following screen.
Check the checkbox and click Next again.
Step 21 − Here you will see all the tables from your database. Let’s select the Student table.
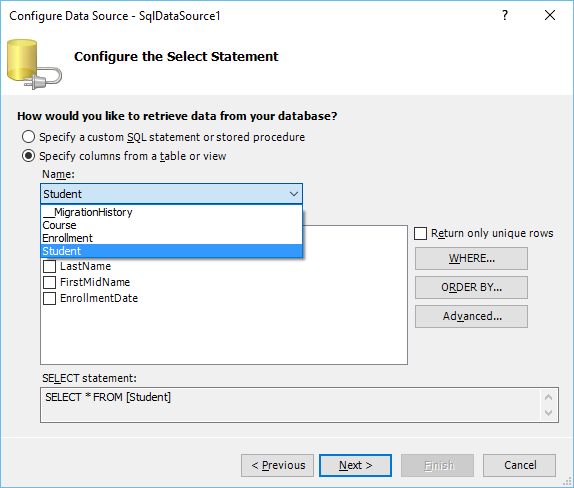
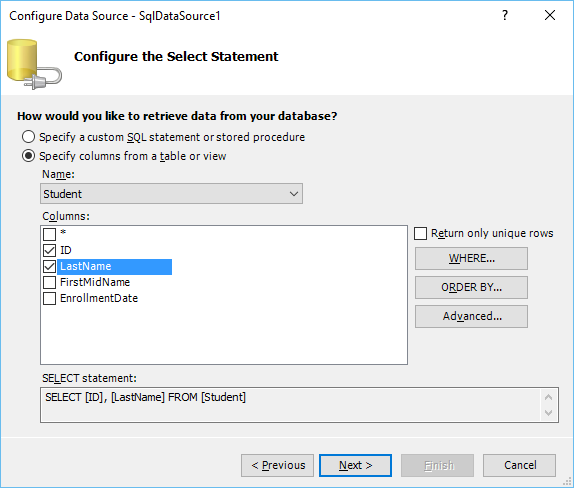
Step 22 − And you will see the all the columns in the list box. Select ID and LastName. At the bottom, you can see that it is actually creating a query. You can also you use the Where or ORDER BY clauses. Once you are done with the query, click Next.
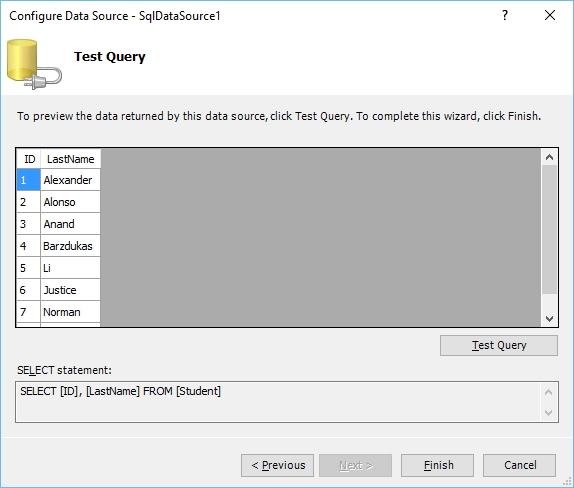
Step 23 − Click the Test Query button. It will display the query result as shown below.
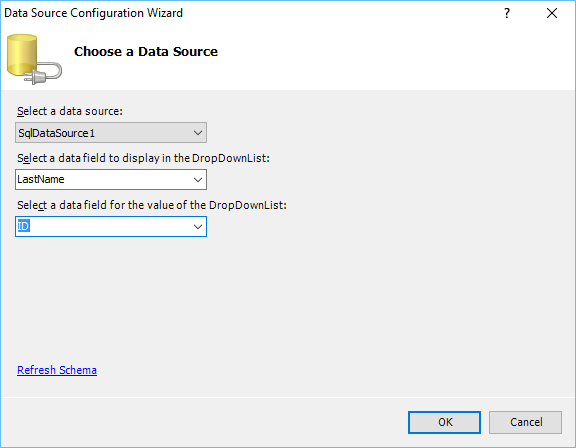
Step 24 − In the following dialog box, the data source is selected by default. The “Select a data field to display in the DropDownList” is the field that is actually going to be displayed. Let’s select LastName and select the ID from the “Select a data field for the value of the DropDownList” and click Ok.
As you can see in the following screenshot, DataSource is added in design view.
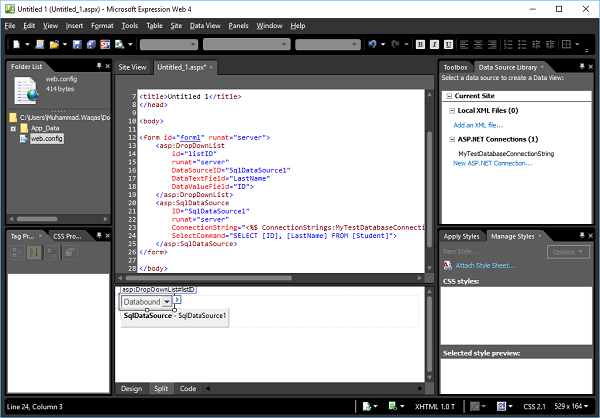
Following is the complete code in ASPX file, which is created by Expression Web.
<!DOCTYPE html PUBLIC "-//W3C//DTD XHTML 1.0 Transitional//EN"
   "http://www.w3.org/TR/xhtml1/DTD/xhtml1-transitional.dtd">
<%@ Page Language = "C#" %>
<html dir = "ltr" xmlns = "http://www.w3.org/1999/xhtml">
   <head runat = "server">
      <meta content = "text/html; charset = utf-8" http-equiv = "Content-Type" />
      <title>Untitled 1</title>
   </head>

   <body>
      <form id = "form1" runat = "server">
         <asp:DropDownList id = "listID" runat = "server" DataSourceID = "SqlDataSource1"
            DataTextField = "LastName" DataValueField = "ID">
         </asp:DropDownList>

         <asp:SqlDataSource ID = "SqlDataSource1" runat = "server"
            ConnectionString = "<%$ ConnectionStrings:MyTestDatabaseConnectionString %>"
               SelectCommand = "SELECT [ID], [LastName] FROM [Student]">
         </asp:SqlDataSource>
      </form>
   </body>
</html>
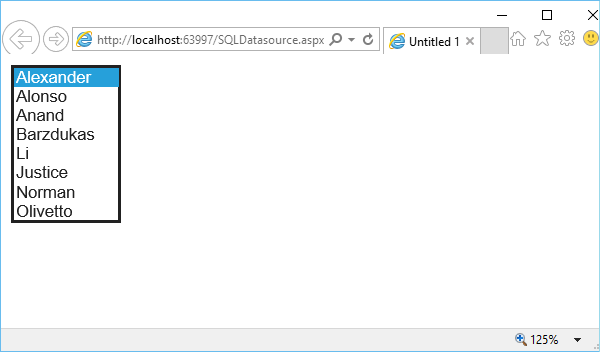
Step 25 − Let’s save the webpage by pressing Ctrl + S.
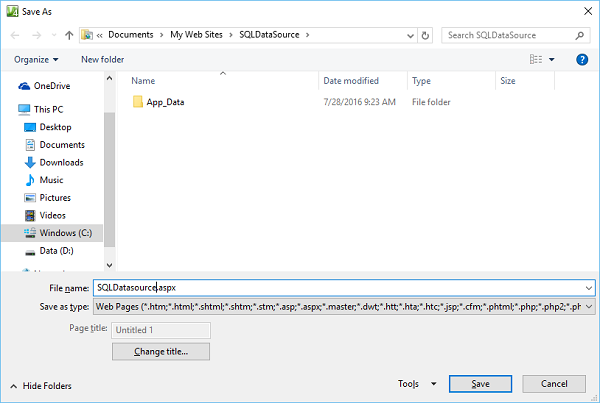
Call this page SQLDatasource.aspx and click Save.
Step 26 − Let’s preview this page in a browser. You will see a dropdown list which contains the last name of the students from the Student table.